1. Important Safety Information
Please read all instructions carefully before using the Potlimepan 1500W Multipurpose Steam Cleaner. Failure to follow these instructions may result in electric shock, fire, or serious injury.
- Always ensure the unit is unplugged from the power outlet before filling or emptying the water tank, or when not in use.
- Do not open the water tank cap while the unit is hot or pressurized. Wait for the unit to cool down completely before refilling.
- Keep the steam cleaner out of reach of children and pets.
- Do not direct steam at people, animals, or electrical appliances. Steam is extremely hot and can cause burns.
- Use only clean tap water in the steam cleaner. Do not add detergents, perfumes, or other chemicals to the water tank.
- Inspect the power cord and hose for any damage before each use. Do not operate the unit if any part is damaged.
- Always use the appropriate accessories for the cleaning task to prevent damage to surfaces or the unit.
2. Product Overview and Features
The Potlimepan 1500W Multipurpose Steam Cleaner is designed for chemical-free cleaning across various surfaces in your home, car, or office. It features a powerful 1500W heating element and a large 1.5L water tank for extended cleaning sessions.
Key Features:
- Powerful Cleaning: 1500W power generates 4 bar high-pressure steam to effectively clean and sanitize.
- Large Capacity: 1.5L (51oz) water tank provides up to 40 minutes of continuous steam.
- Safe & Convenient: Features a safety button and a continuous steam lock for ease of use and safety.
- Versatile Accessories: Includes 14 accessories for cleaning floors, windows, upholstery, and hard-to-reach areas.
- Portable Design: Lightweight with wheels and a 9.8ft power cord for easy maneuverability.
Included Accessories:
Your steam cleaner comes with a comprehensive set of 14 accessories to tackle various cleaning tasks:

Image: The steam cleaner unit displayed with all 14 included accessories, clearly labeled for identification.
For a visual guide on the included accessories and their storage, please refer to the video below:
Video: This video demonstrates the unboxing of the Potlimepan Multipurpose Steam Cleaner and showcases all 14 accessories, including how some can be stored on-board the unit.
3. Setup Instructions
3.1 Filling the Water Tank:
- Ensure the steam cleaner is unplugged and completely cool.
- Unscrew the safety valve/water tank cap located on top of the unit by turning it counter-clockwise.
- Using the provided measuring cup and funnel, carefully pour up to 1.5 liters of clean tap water into the tank. Do not overfill.
- Securely replace the safety valve/water tank cap by turning it clockwise until tight.

Image: A close-up view of the water tank cap, highlighting the safety warning to wait for cooling before opening.
For a visual demonstration of filling the water tank and the safety valve mechanism, please watch the following videos:
Video: This video illustrates the process of easily filling the steam cleaner's water tank and highlights its portability and on-board storage features.
Video: This video demonstrates the safety valve mechanism, emphasizing that it cannot be opened when the steam cleaner is hot or pressurized for user safety.
3.2 Attaching Accessories:
Select the appropriate accessory for your cleaning task. Attach it firmly to the steam gun or extension tubes until it clicks into place. Ensure all connections are secure before operating the unit.
4. Operating Instructions
4.1 Powering On and Heating:
- Plug the power cord into a grounded electrical outlet. The 'Power On' indicator light (red) will illuminate.
- The 'Heating Up' indicator light (orange) will also illuminate, indicating the water is being heated.
- Once the unit reaches operating temperature, the orange 'Heating Up' light may cycle on and off. This is normal and indicates the unit is maintaining pressure. You can continue cleaning even when the light is off.

Image: A detailed view of the steam cleaner's indicator lights for power and heating status.
4.2 Steam Emission and Safety Lock:
- To emit steam, press and hold the trigger on the steam gun.
- The steam gun features a safety lock switch with three modes:
- Lock Off State (Model 1): The switch is pushed forward, preventing the trigger from being pressed.
- Easy On/Off (Model 2): The switch is in the middle position. Steam is emitted only when the trigger is pressed and stops when released.
- Continuous Steam (Model 3): Press the trigger, then push the switch backward to lock it. Steam will emit continuously without needing to hold the trigger. Exercise caution in this mode.
Refer to the video for a demonstration of the safety lock and continuous steam function:
Video: This video demonstrates the three modes of the safety lock switch on the steam gun, including how to engage continuous steam emission.
4.3 Initial Condensation:
When first starting the steam cleaner or after a period of non-use, some water may be discharged before continuous steam appears. This is normal condensation within the hose and nozzle as the unit heats up. Direct the initial water into a cloth or sink until only steam is emitted.
5. Application Guide
The Potlimepan steam cleaner is highly versatile. Here are some common applications:

Image: A visual guide to the wide range of applications for the steam cleaner, including floors, corners, ovens, and windows.
5.1 Floor Cleaning:
Attach the floor brush with the provided extension tubes and a cleaning cloth. Use long, even strokes to clean hard floors or carpets. The extension tubes allow for comfortable upright cleaning.

Image: A user demonstrating floor cleaning with the steam cleaner's floor brush attachment.
5.2 Window and Mirror Cleaning:
Use the window brush attachment to clean glass surfaces. The steam helps to loosen dirt and grime, while the squeegee blade removes excess moisture for a streak-free finish.
5.3 Kitchen and Grime Removal:
For stubborn grease and grime on stovetops, ovens, or countertops, use the small or large round brushes, or the high-pressure nozzle. The concentrated steam effectively breaks down tough residues.

Image: The steam cleaner being used with a round brush to remove grime from a kitchen surface.
5.4 Upholstery and Fabric Refreshing:
The window brush can be detached to reveal an ironing brush, suitable for refreshing upholstery, curtains, and other fabrics. The steam helps to remove wrinkles and odors.
5.5 Hard-to-Reach Areas:
Utilize the extension tubes and various nozzles to reach high cabinets, ceilings, or tight corners without the need for a ladder.
Watch the video below for demonstrations of various cleaning applications:
Video: This video demonstrates the versatile cleaning capabilities of the Potlimepan steam cleaner across various surfaces, including kitchen grime, floors, windows, upholstery, and hard-to-reach areas using different attachments.
6. Maintenance
6.1 Cleaning the Unit:
After each use, ensure the unit is unplugged and cool. Wipe the exterior of the steam cleaner with a damp cloth. Clean accessories as needed with water and mild soap, then allow them to air dry.
6.2 Descaling:
Depending on water hardness and frequency of use, mineral deposits may build up inside the water tank. To descale, use a descaling solution specifically designed for steam cleaners, following the product's instructions. Alternatively, a solution of white vinegar and water can be used (consult manufacturer guidelines for specific ratios and procedures).
6.3 Storage:
Store the steam cleaner and its accessories in a dry, cool place. The unit features on-board storage for smaller accessories, and the extension tubes can be disassembled for compact storage.
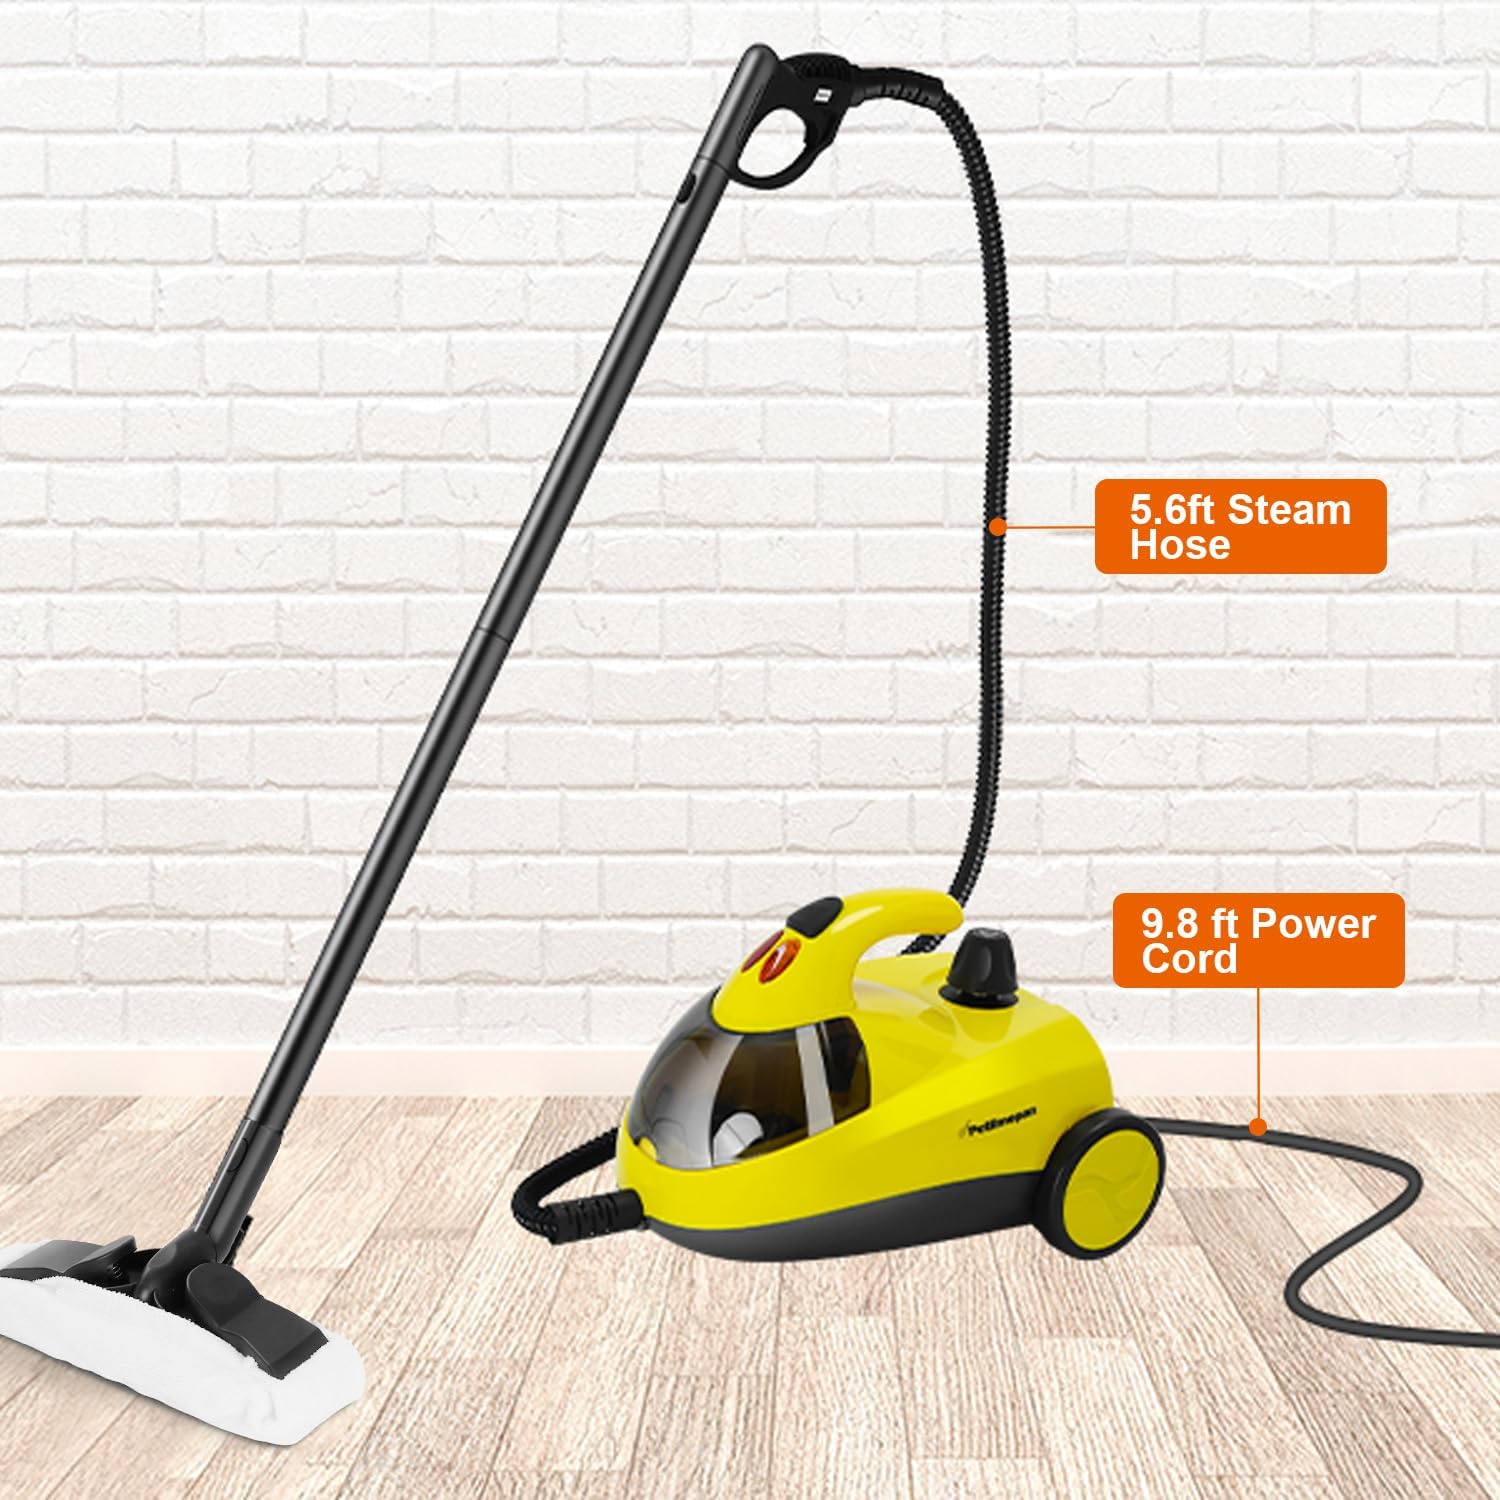
Image: The steam cleaner with its long power cord and steam hose, demonstrating its reach for cleaning.
7. Troubleshooting
| Problem | Possible Cause | Solution |
|---|---|---|
| No steam or weak steam. | Low water level; Unit not heated sufficiently; Nozzle/hose blockage. | Refill water tank; Allow unit to heat up (orange light off); Check for blockages and clean if necessary. |
| Water dripping from nozzle. | Initial condensation (normal); Unit not fully heated. | Allow unit to heat up completely until continuous steam is produced. Direct initial water into a cloth. |
| Safety valve cannot be opened. | Unit is hot and/or pressurized. | Unplug the unit and allow it to cool down completely before attempting to open the safety valve. |
| Unit not turning on. | Not plugged in; Power outlet issue; Unit malfunction. | Ensure unit is properly plugged in; Test outlet with another appliance; Contact customer support if issue persists. |
8. Specifications
- Brand: Potlimepan
- Model Name: NK-0697
- Wattage: 1500 watts
- Tank Volume: 1.5 Liters (51oz)
- Power Source: Corded Electric
- Voltage: 120 Volts (Standard US)
- Item Weight: 12.27 pounds
- Special Features: Carry Handle, Edge Cleaning, Large Capacity Tank, Locking Switch, Onboard Storage
- Surface Recommendation: Floor, Windows, Upholstery, Kitchen Surfaces, Car Interiors
9. Warranty and Support
For warranty information, product support, or to purchase replacement parts, please refer to the documentation included with your product or contact Potlimepan customer service directly. Keep your purchase receipt as proof of purchase for warranty claims.


