
1. Introduction
This manual provides detailed instructions for the JESSINIE WH148 B100K Single Potentiometer. This component is a variable resistor designed for applications requiring adjustable resistance, such as volume control, dimmers, or sensor calibration in electronic circuits. Please read this manual thoroughly before installation and operation to ensure proper use and longevity of the product.
2. Safety Information
- Always disconnect power from the circuit before installing or removing the potentiometer.
- Ensure proper soldering techniques are used to prevent damage to the component or circuit board.
- Avoid applying excessive force to the shaft during rotation, as this may damage the internal mechanism.
- Do not expose the potentiometer to extreme temperatures, moisture, or corrosive environments.
- Handle with care to prevent electrostatic discharge (ESD) damage, especially in sensitive electronic applications.
3. Product Overview
The JESSINIE WH148 B100K is a single-gang, 100K Ohm linear taper rotary potentiometer. It features a 15mm knurled shaft for easy knob attachment and three pins for electrical connection. The B100K designation indicates a 100,000 Ohm resistance with a linear taper, meaning the resistance changes proportionally to the rotation angle.
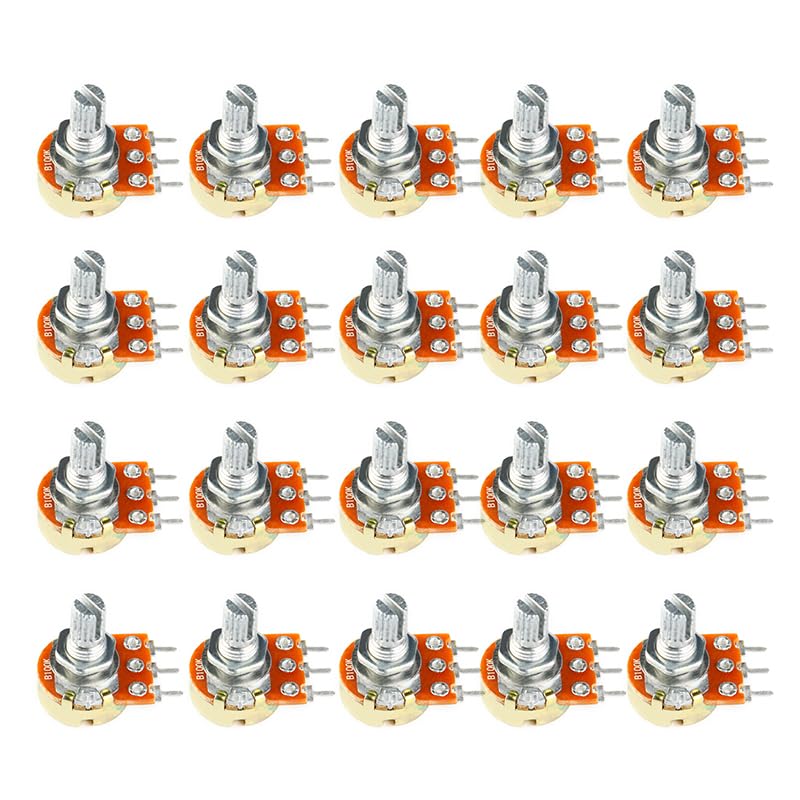
Figure 3.1: Side view of the JESSINIE WH148 B100K Potentiometer, showing the knurled shaft, mounting nut, and three connection pins.

Figure 3.2: Close-up view of the potentiometer, highlighting the B100K resistance marking and the three solder pins for circuit integration.

Figure 3.3: Two potentiometers displayed from different perspectives, illustrating their compact design and standard form factor for electronic projects.
4. Specifications
| Feature | Specification |
|---|---|
| Model | WH148 B100K |
| Resistance Value | 100K Ohm |
| Taper Type | Linear (B-type) |
| Shaft Length | 15mm |
| Shaft Type | Knurled |
| Number of Pins | 3 |
| Rotational Life | 15,000 cycles |
| Insulation Resistance | > 100MΩ at DC 500V |
| Total Rotational Angle | 300° ± 5° |
| Rotational Torque | 2~20 mN.m (20~200gf.cm) |
| Gang Error | -40~0 dB ≤ 3dB (specialty: -60~0 dB ≤ 1.5dB) |
| Compatible Devices | Camera, Personal Computer, Smartphone (Note: Refers to general electronic applications, not direct plug-and-play compatibility.) |
5. Setup & Installation
Follow these steps for proper installation of the WH148 B100K potentiometer into your electronic circuit:
- Prepare the Circuit: Ensure all power is disconnected from the circuit board where the potentiometer will be installed. Identify the appropriate mounting location and connection points for the three pins.
- Mounting: Insert the potentiometer shaft through the designated hole on your enclosure or PCB. Secure it in place using the provided nut and washer on the shaft. Tighten gently to prevent damage.
- Wiring Connections:
- Pin 1 (Leftmost): Typically connected to ground or the low side of the voltage divider.
- Pin 2 (Center/Wiper): This is the output pin, providing a variable voltage or resistance depending on the shaft position.
- Pin 3 (Rightmost): Typically connected to the input voltage or the high side of the voltage divider.
Note: Always refer to your specific circuit diagram for correct pin assignments.
- Soldering: Carefully solder the three pins to the corresponding pads on your PCB. Use a soldering iron with appropriate temperature and avoid prolonged heat application to prevent internal damage. Ensure clean, strong solder joints.
- Knob Attachment (Optional): If using a control knob, align it with the knurled shaft and press it firmly into place.
- Initial Testing: Before applying full power, perform continuity and resistance checks with a multimeter to verify correct connections and functionality.
6. Operating Instructions
The WH148 B100K potentiometer operates by varying resistance as its shaft is rotated. This changes the voltage or current flow in a circuit, allowing for control over various parameters.
- Rotation: Rotate the knurled shaft clockwise or counter-clockwise to adjust the resistance. The total rotational angle is approximately 300 degrees.
- Linear Taper (B-type): For a linear taper potentiometer, the resistance change is directly proportional to the angle of rotation. This is suitable for applications where a consistent rate of change is desired, such as controlling light intensity or motor speed.
- Voltage Divider Configuration: When used as a voltage divider, connecting Pin 1 to ground, Pin 3 to a voltage source, and taking the output from Pin 2 (wiper) will provide a variable voltage output between 0V and the source voltage.
- Variable Resistor Configuration: To use as a variable resistor, connect Pin 1 (or Pin 3) to Pin 2 (wiper). The resistance between the connected pins and the remaining end pin will vary with rotation.
7. Maintenance
The JESSINIE WH148 B100K potentiometer is designed for durability and requires minimal maintenance. However, following these guidelines can help ensure its long-term performance:
- Cleaning: If dust or debris accumulates around the shaft or body, gently clean it with a soft, dry brush or a lint-free cloth. Avoid using liquid cleaners directly on the component.
- Environmental Protection: Keep the potentiometer away from excessive dust, moisture, and corrosive chemicals. If used in harsh environments, consider additional protective enclosures.
- Shaft Integrity: Periodically check the shaft for any signs of bending or looseness. Ensure the mounting nut remains securely tightened.
- Avoid Over-rotation: Do not force the shaft beyond its mechanical stops (approximately 300 degrees of rotation) as this can damage the internal resistive track.
8. Troubleshooting
If you encounter issues with your WH148 B100K potentiometer, consider the following troubleshooting steps:
| Problem | Possible Cause | Solution |
|---|---|---|
| No resistance change / Open circuit | Broken internal track, faulty solder joint, incorrect wiring. | Check solder joints for continuity. Verify wiring against circuit diagram. Replace potentiometer if internal damage is suspected. |
| Intermittent resistance / Scratchy sound | Dust/debris on resistive track, worn wiper, poor contact. | Attempt to clean with compressed air (if accessible). If problem persists, replacement may be necessary. |
| Resistance value is incorrect | Incorrect potentiometer value used, manufacturing defect. | Verify the potentiometer's marked resistance (B100K). Measure with a multimeter. Ensure it matches circuit requirements. |
| Shaft is stiff or loose | Damaged shaft, overtightened/undertightened mounting nut. | Adjust mounting nut tightness. If shaft is bent or damaged, replace the unit. |
9. Warranty & Support
JESSINIE products are manufactured to high-quality standards. While specific warranty details are not provided in this manual, please retain your proof of purchase. For technical support, inquiries, or warranty claims, please contact your retailer or the JESSINIE customer service department through the contact information provided at the point of purchase or on the official JESSINIE website.
When contacting support, please be prepared to provide the product model (WH148 B100K) and a detailed description of the issue.