Introduction
Thank you for choosing the Candy CSO 496TWMB6/1-S washing machine. This appliance is designed to provide efficient and convenient laundry care with its advanced features, including the Smart Pro Inverter motor and Quick&Clean system. This manual contains important information regarding the installation, operation, and maintenance of your washing machine. Please read it carefully before using the appliance and keep it for future reference.

Figure 1: Front view of the Candy CSO 496TWMB6/1-S washing machine, showcasing its sleek design and front-loading door.
Setup and Installation
1. Unpacking
Carefully remove all packaging materials, including the polystyrene base and any protective film. Ensure all transit bolts are removed from the rear of the machine. These bolts secure the drum during transport and must be removed before operation to prevent damage.
2. Placement
Place the washing machine on a firm, level floor. Ensure there is adequate ventilation around the appliance. Avoid placing it in areas where the temperature may drop below freezing. The machine should not be installed behind a lockable door, a sliding door, or a door with a hinge on the opposite side to that of the washing machine, in such a way that a full opening of the washing machine door is restricted.

Figure 2: The Candy washing machine properly installed in a laundry area, demonstrating suitable placement with surrounding space.
3. Leveling
Adjust the four adjustable feet at the bottom of the machine to ensure it is perfectly level and stable. Use a spirit level to verify. Proper leveling reduces vibration and noise during operation.
4. Water Connection
Connect the water inlet hose (supplied) to a cold water tap with a 3/4" thread. Ensure the connection is tight to prevent leaks. The machine is equipped with an Aquastop safety system for water overflow protection.
5. Drain Connection
Securely place the drain hose into a standpipe or over the edge of a sink, ensuring it is at a height between 50 cm and 85 cm from the floor. The hose must not be kinked or submerged in water.
6. Electrical Connection
Plug the power cord into a grounded electrical outlet. Ensure the voltage and frequency match the specifications on the appliance's rating plate. Do not use extension cords or multiple adapters.
7. First Use
Before washing laundry for the first time, run a complete wash cycle without any clothes and with a small amount of detergent. This helps to clean the drum and remove any manufacturing residues.
Operating Instructions
1. Control Panel Overview
The control panel features a central program selector knob, a digital display, and touch-sensitive buttons for various functions.
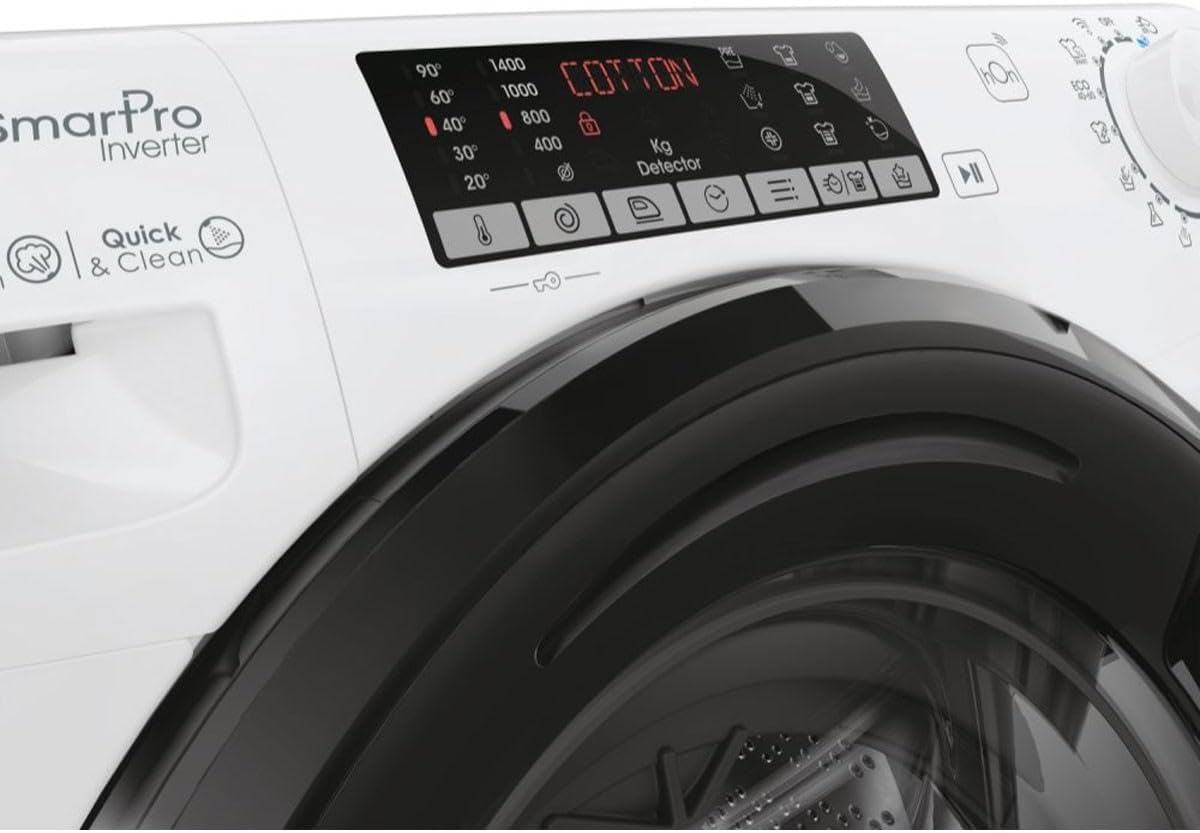
Figure 3: Detailed view of the control panel, showing the digital display, program options, and touch controls.

Figure 4: Close-up of the program selector knob, indicating various wash cycles and settings.
2. Loading Laundry
Open the door and load laundry into the drum. Do not overload the machine; the maximum capacity is 9 kg. For optimal washing results and to prevent excessive vibration, ensure the load is balanced.
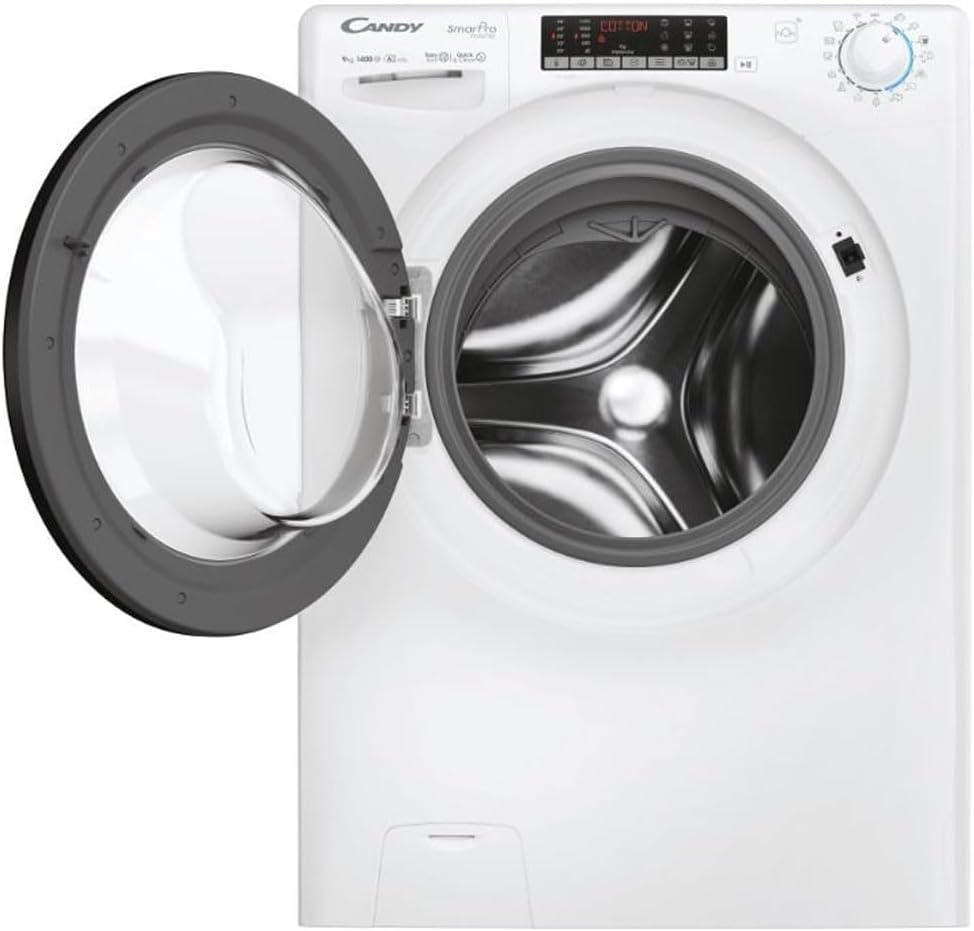
Figure 5: The washing machine with its door open, providing a clear view of the stainless steel drum for loading laundry.
3. Adding Detergent and Additives
Pull out the detergent dispenser drawer. Add the appropriate amount of detergent to the main wash compartment and fabric softener to the designated compartment. Refer to your detergent packaging for dosage recommendations.
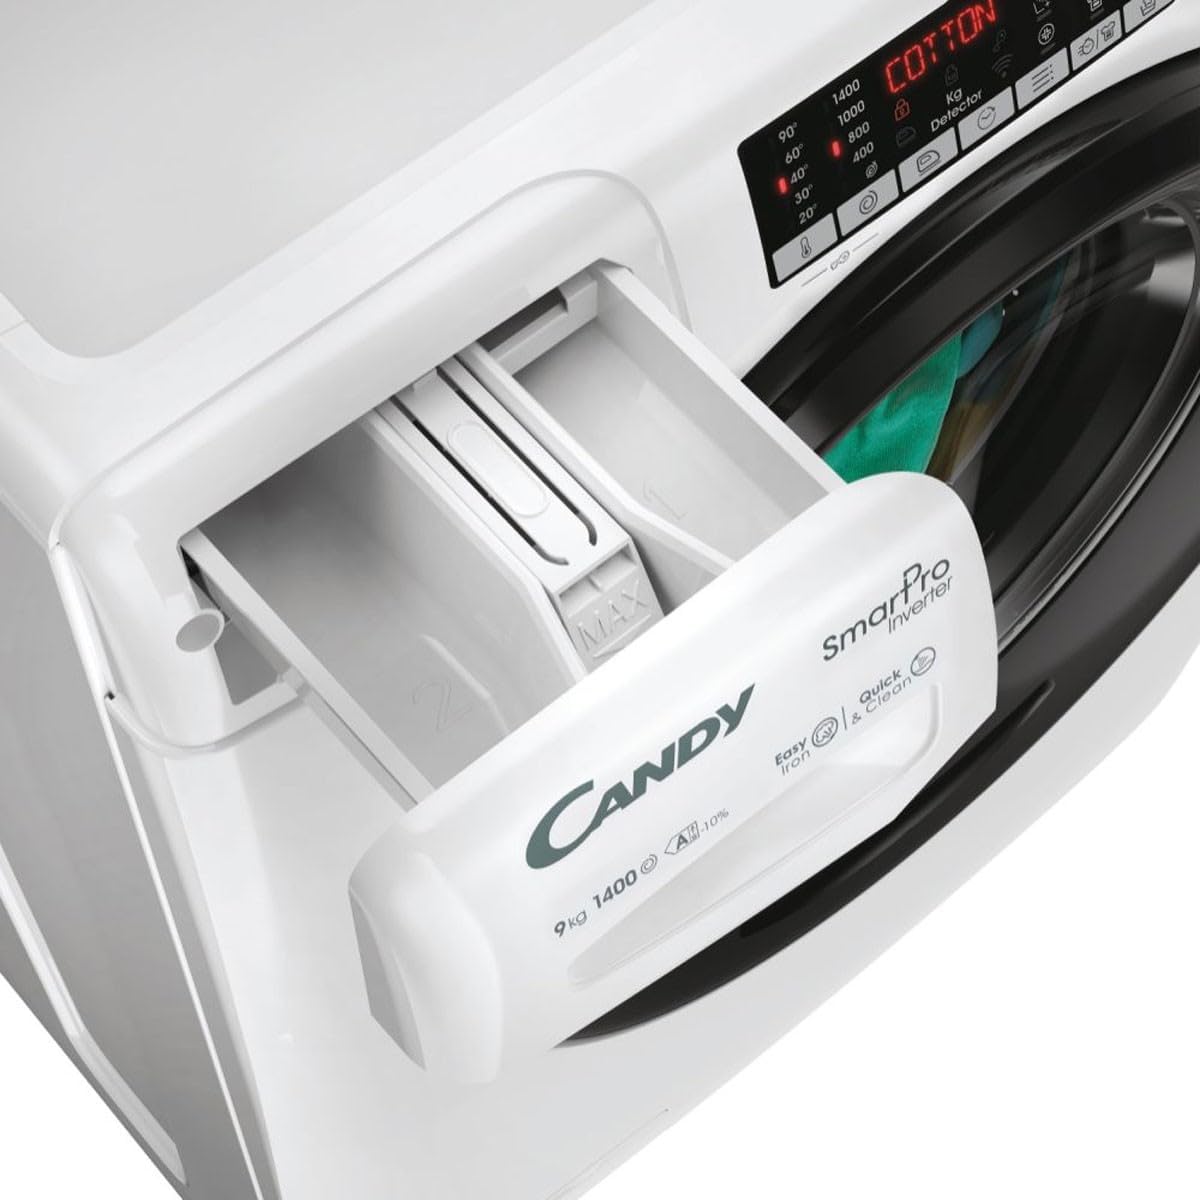
Figure 6: The detergent dispenser drawer, clearly showing compartments for detergent and fabric softener.
4. Program Selection
Turn the program selector knob to choose the desired wash program. The machine offers 16 wash programs, including a dedicated Steam program for enhanced hygiene and wrinkle reduction. The display will show the estimated cycle duration.
5. Special Functions and Options
- Delay Start: Press the delay start button to postpone the start of the cycle by up to 24 hours.
- Spin Speed: Adjust the spin speed from 400 to 1400 rpm using the dedicated button.
- Add Garment (Pause): If the 'Add Garment' indicator is lit, you can pause the cycle and add forgotten items.
- Wi-Fi Connectivity (hOn App): Connect your washing machine to the hOn app via Wi-Fi for remote control, additional programs, and smart features.
6. Starting and Ending a Cycle
Press the 'Start/Pause' button to begin the selected program. The machine will automatically proceed through the wash, rinse, and spin phases. Once the cycle is complete, the door will unlock, and you can remove your laundry.
Maintenance
Regular maintenance ensures the longevity and optimal performance of your washing machine.
1. Cleaning the Exterior
Wipe the exterior surfaces with a soft, damp cloth. Do not use abrasive cleaners or solvents.
2. Cleaning the Detergent Dispenser
Periodically remove the detergent dispenser drawer and rinse it under running water to remove any detergent residue. Clean the housing of the drawer with a brush.
3. Cleaning the Drum
Run a maintenance wash (e.g., a hot cycle with no laundry and a descaling agent) every few months to prevent odor and limescale buildup.
4. Cleaning the Filter
The filter should be cleaned regularly to prevent blockages. Locate the filter at the bottom front of the machine, open the cover, and carefully unscrew the filter. Drain any residual water into a shallow container, then clean the filter under running water. Reinsert and secure the filter.
Troubleshooting
If you encounter issues with your washing machine, refer to the following common problems and solutions:
| Problem | Possible Cause | Solution |
|---|---|---|
| Machine does not start | No power supply; Door not closed properly; Start/Pause button not pressed. | Check power plug and fuse; Ensure door is firmly closed; Press Start/Pause button. |
| Water not filling | Water tap closed; Inlet hose kinked; Water filter blocked. | Open water tap; Straighten hose; Clean inlet hose filter. |
| Water not draining | Drain hose kinked or blocked; Pump filter blocked. | Straighten or clear drain hose; Clean pump filter. |
| Excessive vibration/noise | Machine not level; Transit bolts not removed; Unbalanced load. | Adjust feet to level machine; Remove all transit bolts; Redistribute laundry inside drum. |
| Excessive foam | Too much detergent used. | Reduce detergent quantity for future washes. The machine has a foam control system. |
Specifications
| Specification | Value |
|---|---|
| Model Number | CSO 496TWMB6/1-S |
| Appliance Placement | Freestanding |
| Loading Type | Front-load |
| Color | White |
| Display | Yes |
| Control Type | Knob, Touch |
| Door Hinge | Left |
| Inverter Technology | Yes |
| Drum Material | Stainless Steel |
| Drum Volume | 58 L |
| Capacity | 9 kg |
| Max Spin Speed | 1400 RPM |
| Spin Efficiency Class | B |
| Number of Wash Programs | 16 |
| Noise Emission Class (Spin) | B |
| Noise Level (Spin) | 76 dB |
| Delay Start | Yes (24 h) |
| Steam Program | Yes |
| Water Overflow Protection | Yes |
| Load Balancing System | Yes |
| Aquastop Safety System | Yes |
| Foam Control System | Yes |
| Adjustable Spin Speed | Yes |
| Min Spin Speed | 400 RPM |
| Add Garment Function | Yes |
| Remote Smartphone Support | Yes |
| Wi-Fi Controlled | Yes |
| Dimensions (W x D x H) | 60 x 53 x 85 cm |
| Weight | 60 kg |
| Included Components | Drain hose, Fill hose, Power cable |
Warranty and Support
Your Candy CSO 496TWMB6/1-S washing machine is covered by a manufacturer's warranty. Please refer to the warranty card included with your purchase or visit the official Candy website for specific terms and conditions.
For technical assistance, spare parts, or further support, please contact Candy customer service. You can find contact information on the official Candy website or through your retailer.
For more information, you may visit the Candy Store on Amazon.


