
SEHMUA RBX-S40
Contents
SEHMUA RBX-S40 Wireless Solar Security Camera User Manual
Model: RBX-S40
Introduction
Thank you for choosing the SEHMUA RBX-S40 Wireless Solar Security Camera. This 2K 360° view battery-powered camera offers advanced home security with solar charging, spotlight color night vision, and PIR motion detection. This manual provides detailed instructions for installation, operation, and maintenance to ensure optimal performance and security for your property.
What's in the Box
- SEHMUA RBX-S40 Wireless Solar Security Camera
- Solar Panel
- Mounting Bracket and Screws
- USB Charging Cable
- User Manual (this document)
- 128GB SD Card
Note: Please check all components upon unboxing. If any items are missing or damaged, contact customer support.
Product Features
- Wireless & Solar-Powered: Rechargeable battery with continuous solar charging.
- 2K Full HD Video: Crystal clear 2K resolution for live view and recordings.
- Color Night Vision: Advanced technology captures vibrant colors in low light (requires spotlight activation).
- PIR Motion Detection: Highly sensitive sensor for human-like recognition, minimizing false alarms.
- Two-Way Communication: Built-in speaker and microphone for remote interaction.
- Flexible Angle Adjustment (PTZ): Pan and Tilt functionality for wide area coverage.
- IP65 Weatherproof: Durable design for reliable outdoor performance in various weather conditions.
- 2.4GHz WiFi Connection: Stable and reliable wireless connectivity (not compatible with 5GHz).
- 128GB Memory Card Included: Local storage for event footage.
Setup Guide
1. Initial Charging
Before installation, fully charge the camera using the provided USB cable and a 5V/2A power adapter (not included). A full charge ensures the camera has sufficient power for initial setup and operation, especially if solar charging is limited during cloudy days.
2. App Download and Account Registration
- Download the "UBox" app from the App Store (iOS) or Google Play Store (Android).
- Open the app and register a new account using your email address. Follow the on-screen prompts to complete registration and log in.
3. Adding the Camera to the App
- Ensure your smartphone is connected to a 2.4GHz Wi-Fi network. (5GHz networks are not supported).
- In the UBox app, tap the "+" icon to add a new device.
- Select "Setup Device" or scan the QR code located on the camera body or packaging.
- Follow the in-app instructions to connect the camera to your Wi-Fi network. This typically involves entering your Wi-Fi password and scanning a QR code generated by the app with the camera's lens.
- Once connected, name your camera and complete the setup process.
4. Mounting the Camera
Choose a location with optimal sunlight exposure for the solar panel and a clear view of the area you wish to monitor.
- Mark the drilling spots using the mounting bracket as a template.
- Drill holes and insert wall anchors if mounting on masonry.
- Secure the mounting bracket to the wall or surface with screws.
- Attach the camera to the mounting bracket. Adjust the camera angle to cover the desired area. Ensure the solar panel is positioned to receive maximum direct sunlight throughout the day.
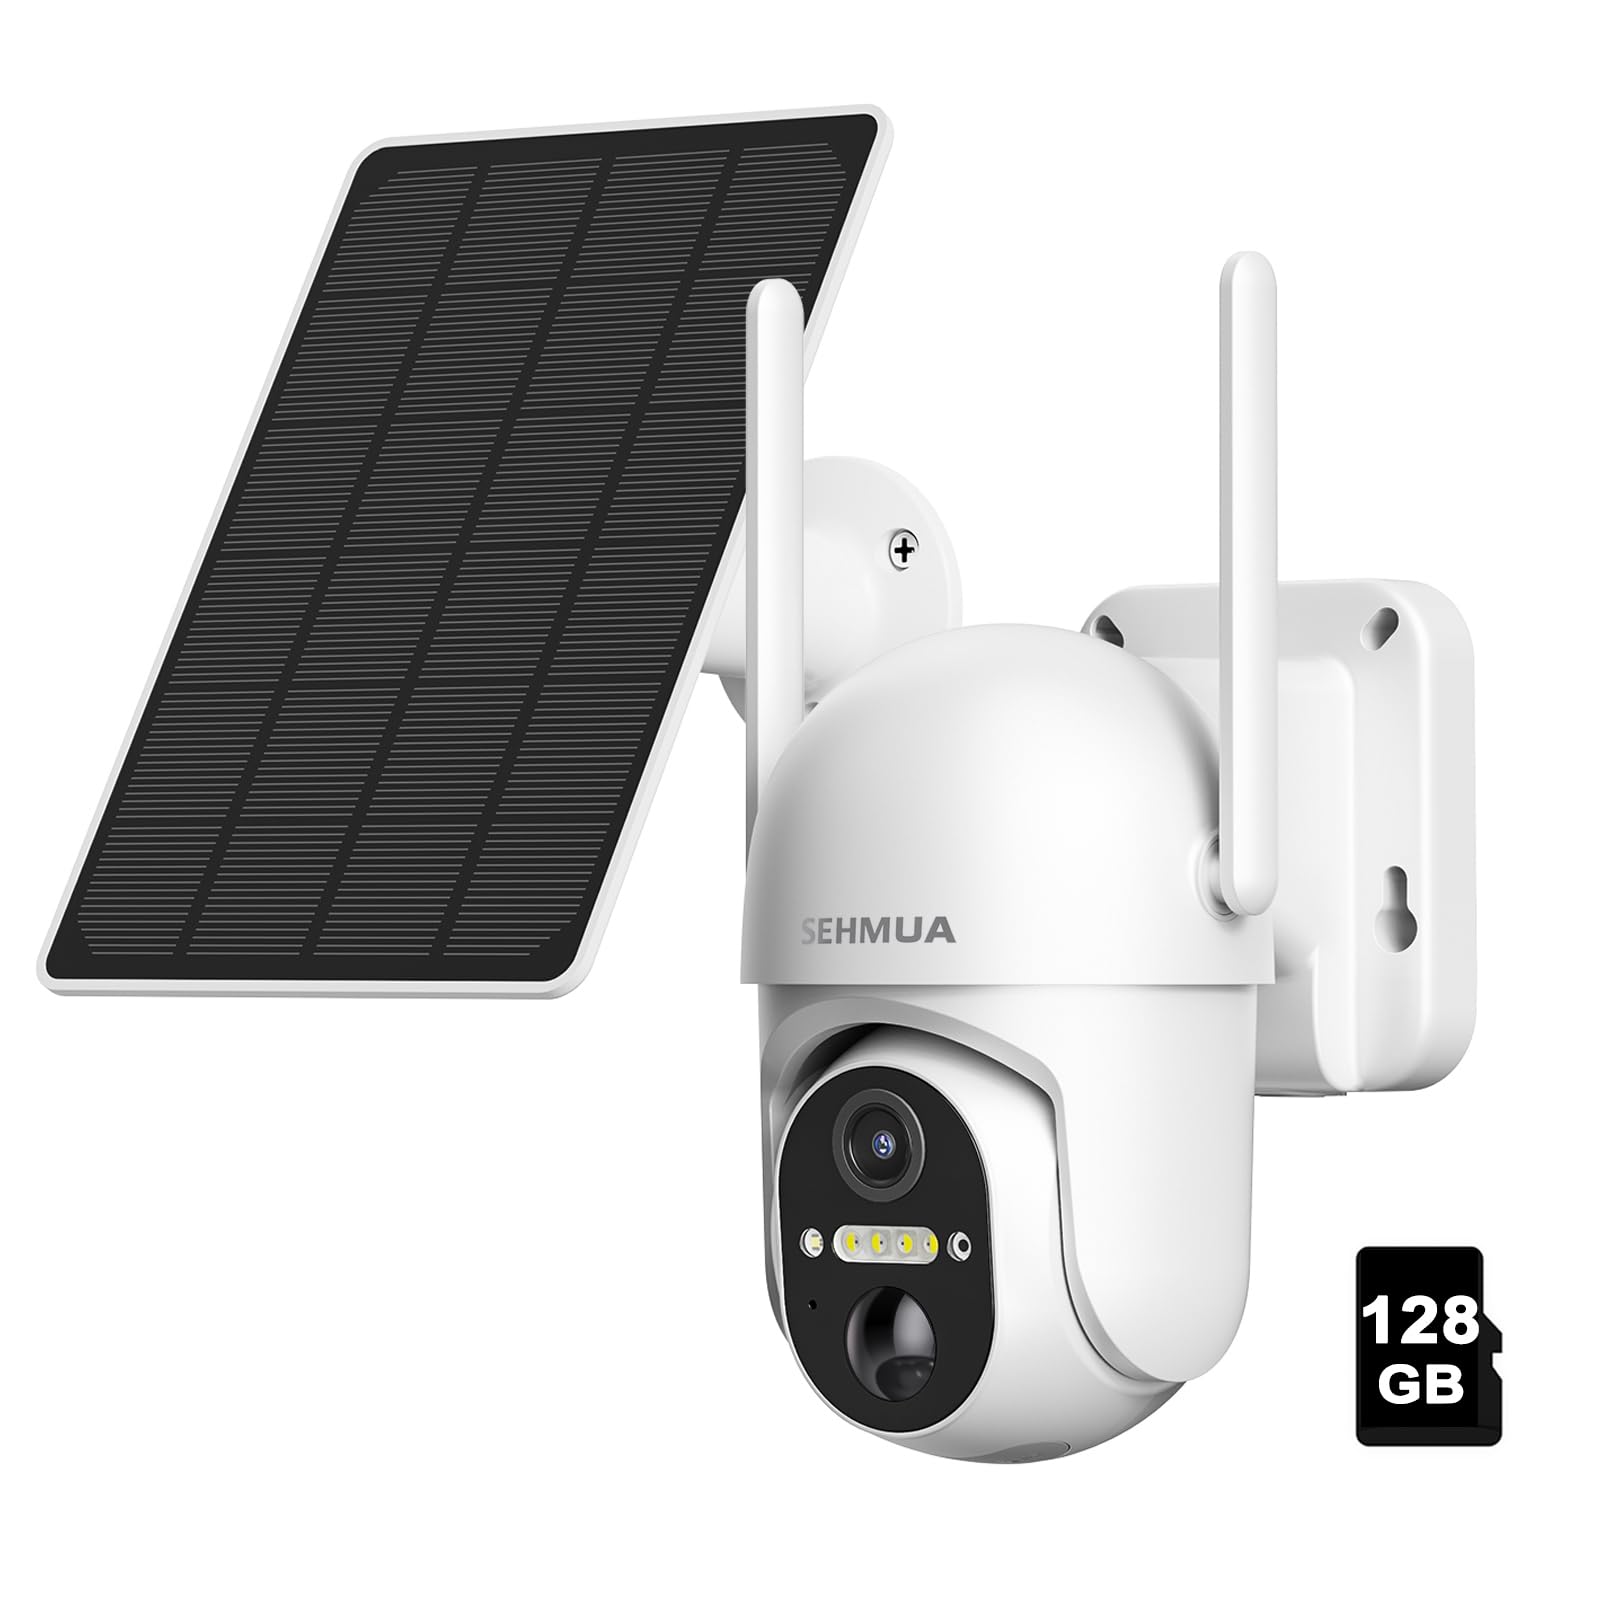
Image: The SEHMUA RBX-S40 camera and its solar panel mounted on an exterior wall, highlighting its wireless and solar-powered design.
Operating Instructions
1. Live View
Open the UBox app and select your camera from the device list. You will see a live feed from the camera.

Image: A smartphone screen showing a clear 2K HD live video feed from the camera, demonstrating its high-resolution and color night vision features.
2. Pan and Tilt Control
On the live view screen, use the directional controls (usually an arrow pad or joystick icon) to remotely adjust the camera's horizontal (pan) and vertical (tilt) angles. This allows you to cover a wider area without physically repositioning the camera.

Image: The camera mounted on a building, illustrating its ability to pan and tilt for comprehensive area monitoring.
3. Motion Detection and Alerts
The camera uses a PIR (Passive Infrared) sensor to detect human-like motion. When motion is detected, the camera will:
- Send an instant push notification to your smartphone via the UBox app.
- Automatically record a video clip of the event to the installed 128GB SD card or cloud storage (if subscribed).
- Activate the spotlight for color night vision (if enabled).
You can adjust the motion detection sensitivity and schedule in the app settings to minimize false alarms.

Image: A smartphone showing a motion detection alert from the UBox app, with the camera's spotlight active, illustrating the PIR sensor's functionality.
4. Two-Way Audio
On the live view screen, tap the microphone icon to speak through the camera's built-in speaker. Tap the speaker icon to listen to audio from the camera's surroundings.
5. Night Vision
The camera automatically switches to infrared night vision in low-light conditions. For full-color night vision, ensure the spotlight feature is enabled in the app settings. The spotlight will activate when motion is detected at night.
6. Playback and Storage
Recorded event videos are stored on the included 128GB SD card. You can access and review these recordings through the UBox app's "Playback" or "History" section. Cloud storage options may also be available through the app for additional backup.
Maintenance
1. Cleaning
- Regularly wipe the camera lens and solar panel with a soft, damp cloth to remove dust, dirt, or debris. This ensures clear image quality and efficient solar charging.
- Do not use harsh chemicals or abrasive cleaners.
2. Battery Care
- Ensure the solar panel receives adequate direct sunlight daily to maintain battery charge.
- If the camera's battery level consistently drops, check for obstructions on the solar panel or consider temporarily charging the camera via USB.
3. Firmware Updates
Periodically check the UBox app for available firmware updates. Keeping your camera's firmware updated ensures optimal performance, security, and access to new features. Follow the in-app instructions for any updates.

Image: The camera and solar panel enduring rainfall, highlighting its IP65 weather-resistant construction.
Troubleshooting
| Problem | Possible Cause | Solution |
|---|---|---|
| Camera won't connect to Wi-Fi. | Incorrect Wi-Fi password; 5GHz network used; camera too far from router. |
|
| Poor video quality or lag. | Weak Wi-Fi signal; network congestion. |
|
| Motion alerts are too frequent or not triggering. | Sensitivity settings incorrect; environmental factors (e.g., trees, shadows). |
|
| Battery not charging via solar panel. | Insufficient sunlight; dirty solar panel; panel obstruction. |
|
| No recordings saved. | SD card full or faulty; recording settings disabled. |
|
Specifications
| Model Name | RBX-S40 |
| Brand | SEHMUA |
| Connectivity Technology | Wireless (2.4GHz Wi-Fi) |
| Power Source | Solar Powered, Battery |
| Video Capture Resolution | 2K |
| Special Features | Adjustable (Pan/Tilt), Color Night Vision, PIR Motion Detection, Two-Way Audio |
| Indoor/Outdoor Usage | Outdoor |
| Waterproof Rating | IP65 |
| Memory Storage Capacity | 128 GB (SD Card Included) |
| Compatible Devices | Smartphone (via UBox app) |
| Item Dimensions | 7 x 6 x 5 inches |
| UPC | 198168240489 |
Warranty and Support
SEHMUA products are designed for reliability and performance. For specific warranty details, please refer to the warranty card included with your product or visit the official SEHMUA website.
If you encounter any issues or have questions regarding your SEHMUA RBX-S40 camera, please contact our customer support team.
- Customer Support: Refer to your product packaging or the SEHMUA official website for contact information.
- Online Resources: Visit the SEHMUA Brand Store on Amazon for FAQs and additional product information.
Ask a question about this manual
Ask about setup, troubleshooting, compatibility, parts, safety, or missing instructions. Manuals+ will review the question and use this page’s manual context to help answer it.