Introduction
This instruction manual provides detailed guidance for the assembly, operation, and maintenance of your Tilta Camera Cage Pro Kit for the Canon R7. This kit is designed to enhance the functionality and protection of your Canon R7 camera, offering multiple mounting points for accessories and improved handling.
Please read this manual thoroughly before using the product to ensure proper setup and safe operation.
What's in the Box
Verify that all components listed below are present in your package:
- 1: Full Camera Cage for Canon R7 – Black (TA-T59-FCC-B) *1
- 2: Tiltaing Compact NATO Top Handle – Black (TA-QRTH7-B) *1
- 3: 1/4″-20 Mounting Screw to NATO Rail Adapter (TA-1420-NTR4) *1
- 4: LWS Baseplate Adapter Type III – Black (TA-LBA3-B) *1
- 5: Tilta Universal 15mm LWS Baseplate – Black (TA-UBP-B) *1
- 6: Aluminum rod 15*200mm – Black (R15-200-B) *2 Pcs
Setup and Installation
Follow these steps to assemble your Tilta Camera Cage Pro Kit:
- Attaching the Full Camera Cage:
Align the Canon R7 camera body with the full camera cage (TA-T59-FCC-B). Secure the camera to the cage using the integrated mounting screws at the bottom and side. Ensure the camera is firmly seated and all screws are tightened to prevent movement. - Installing the NATO Top Handle:
Attach the Tiltaing Compact NATO Top Handle (TA-QRTH7-B) to the NATO rail located on the top of the camera cage. Slide the handle onto the rail and secure it by tightening the locking mechanism. - Attaching the LWS Baseplate and Rods:
Mount the LWS Baseplate Adapter Type III (TA-LBA3-B) to the bottom of the camera cage. Then, attach the Tilta Universal 15mm LWS Baseplate (TA-UBP-B) to the adapter. Insert the two 15mm aluminum rods (R15-200-B) into the baseplate's rod clamps and secure them. This setup supports 15mm rod-based accessories. - Utilizing the Cable Clamp:
The cage includes a cable clamp to secure HDMI and USB-C cables. Attach the cable clamp to the side of the cage and route your cables through it. Tighten the thumb screws on the clamp to hold the cables firmly in place, preventing accidental disconnections during operation. - Accessory Mounting Points:
The cage features multiple 1/4"-20 threads with locating points, cold shoe receivers, and NATO rails for mounting various accessories such as articulating arms, monitors, LED lights, and microphones. Refer to the diagram for specific locations.
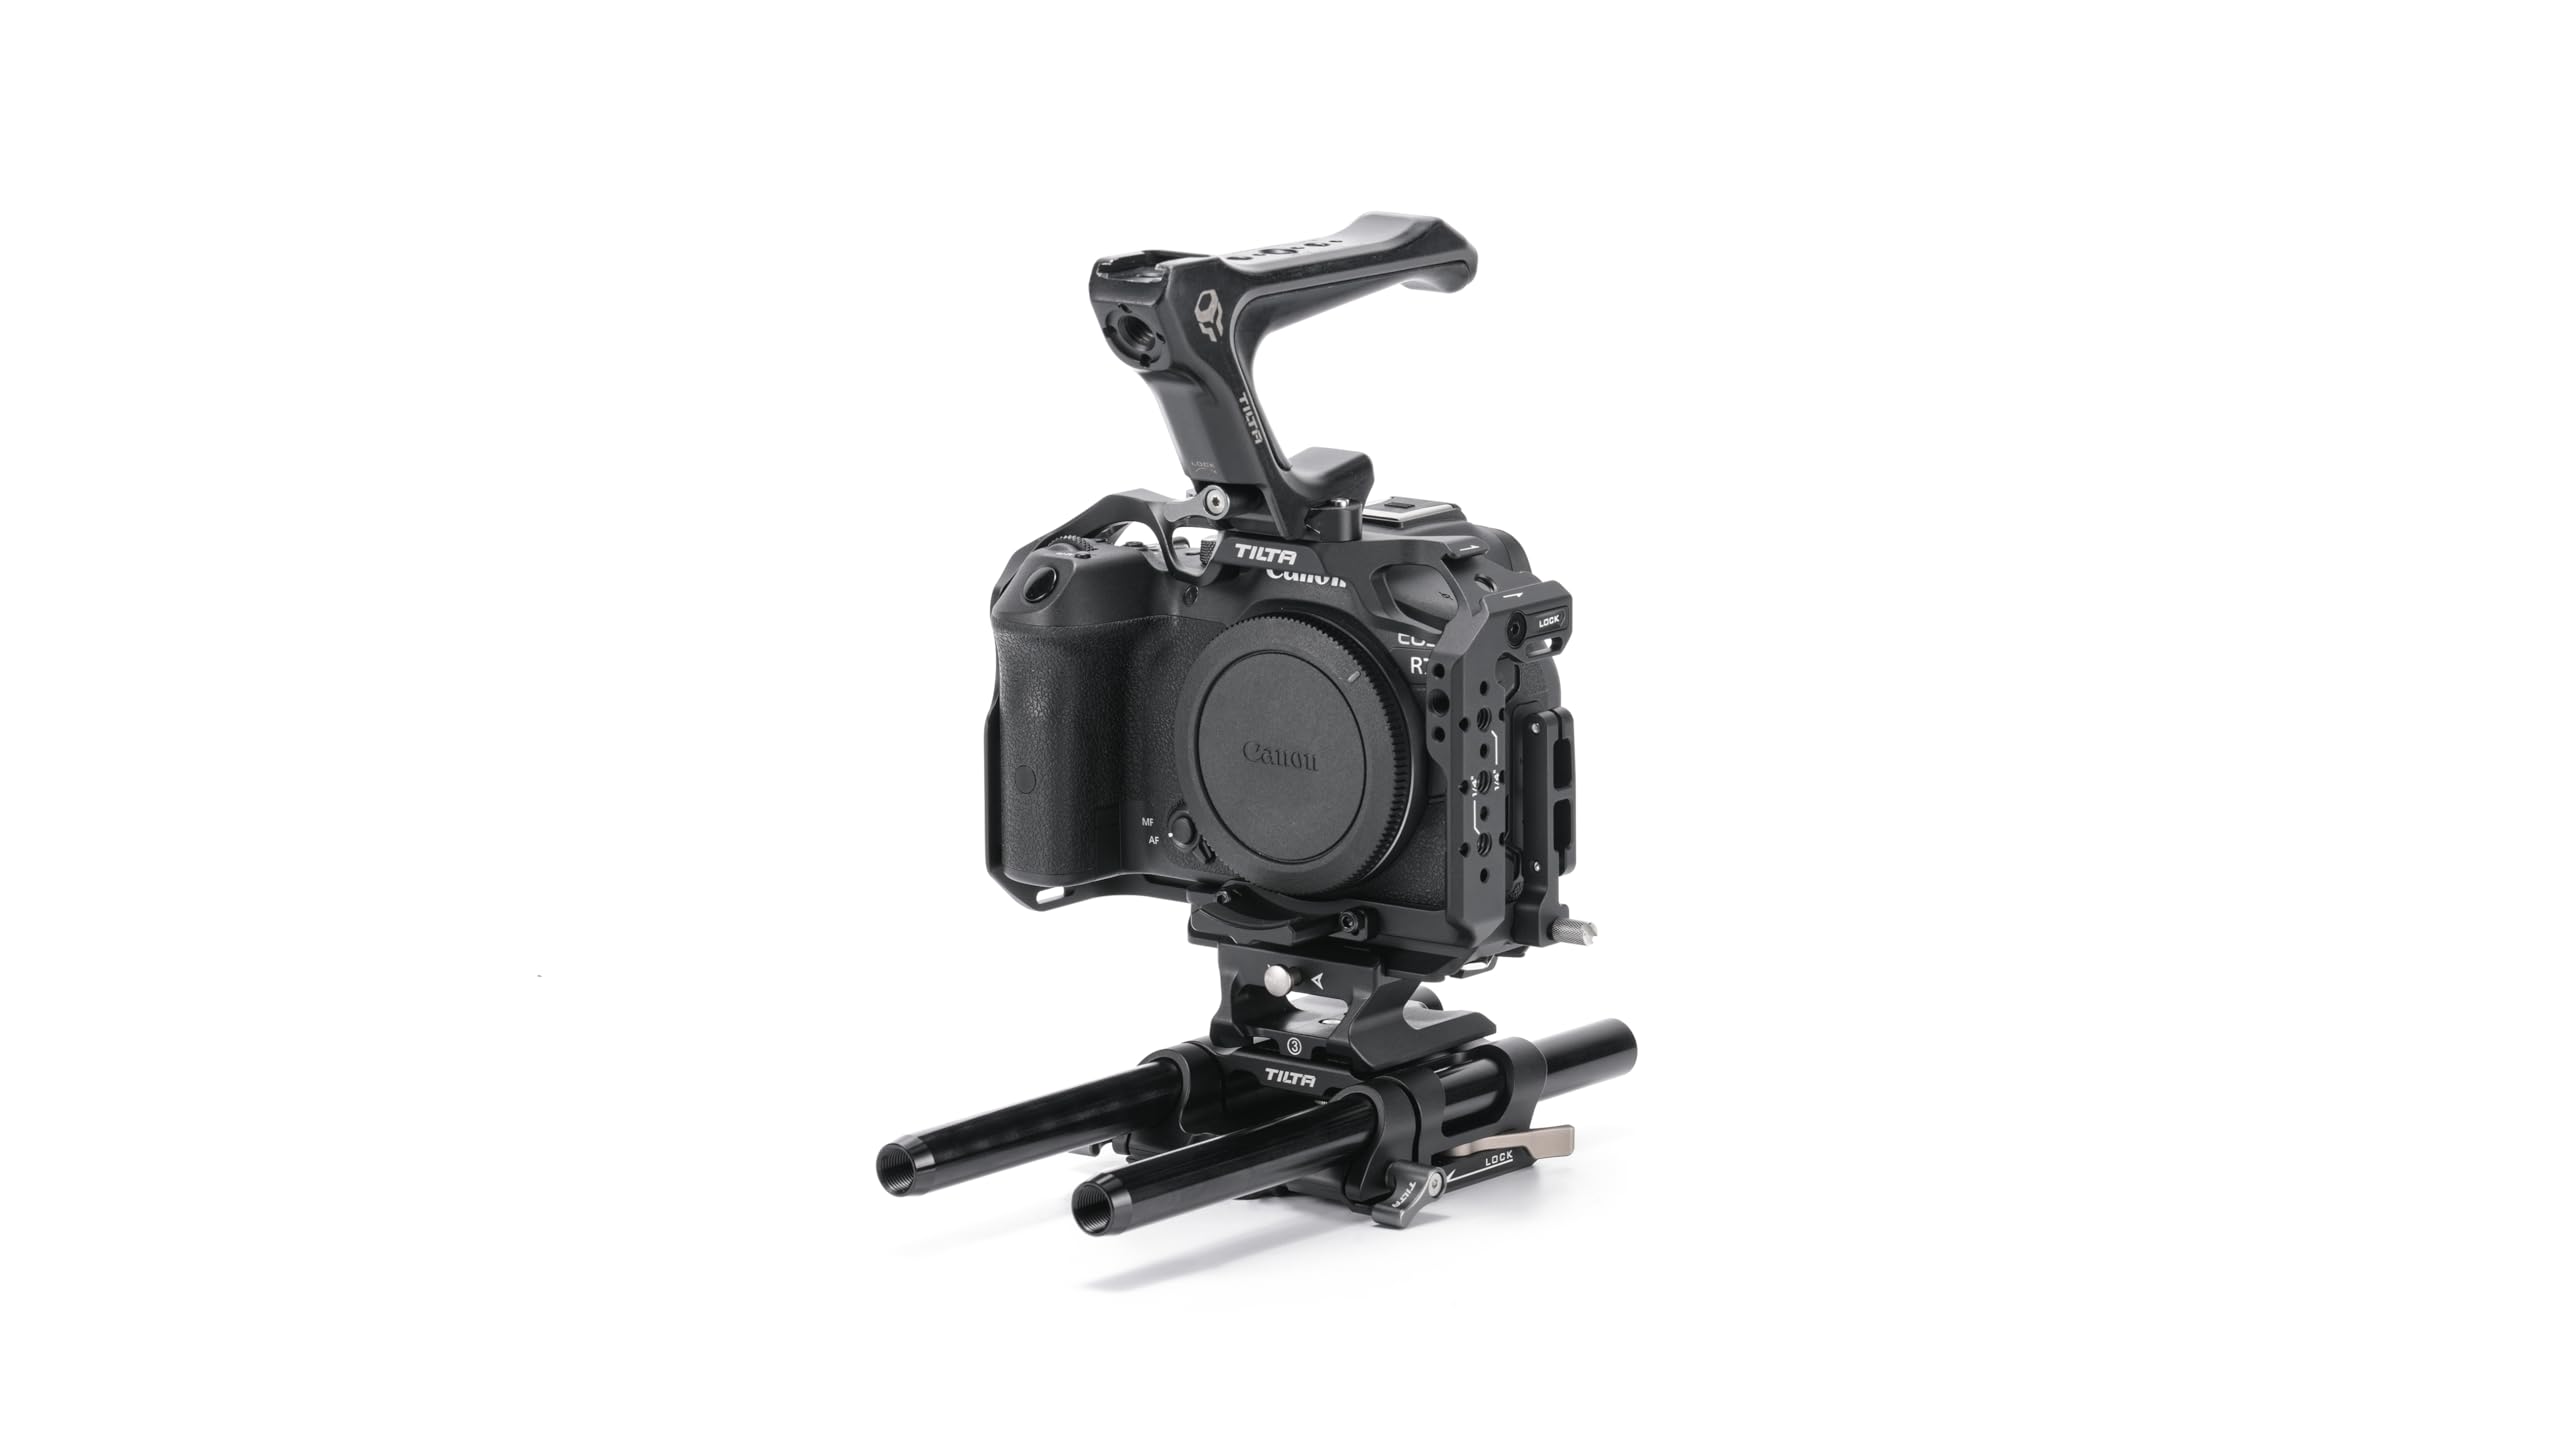
Image: Fully assembled Tilta Camera Cage Pro Kit with Canon R7 camera, top handle, and LWS baseplate.

Image: Side view of the Canon R7 camera mounted in the Tilta cage with the NATO top handle attached.
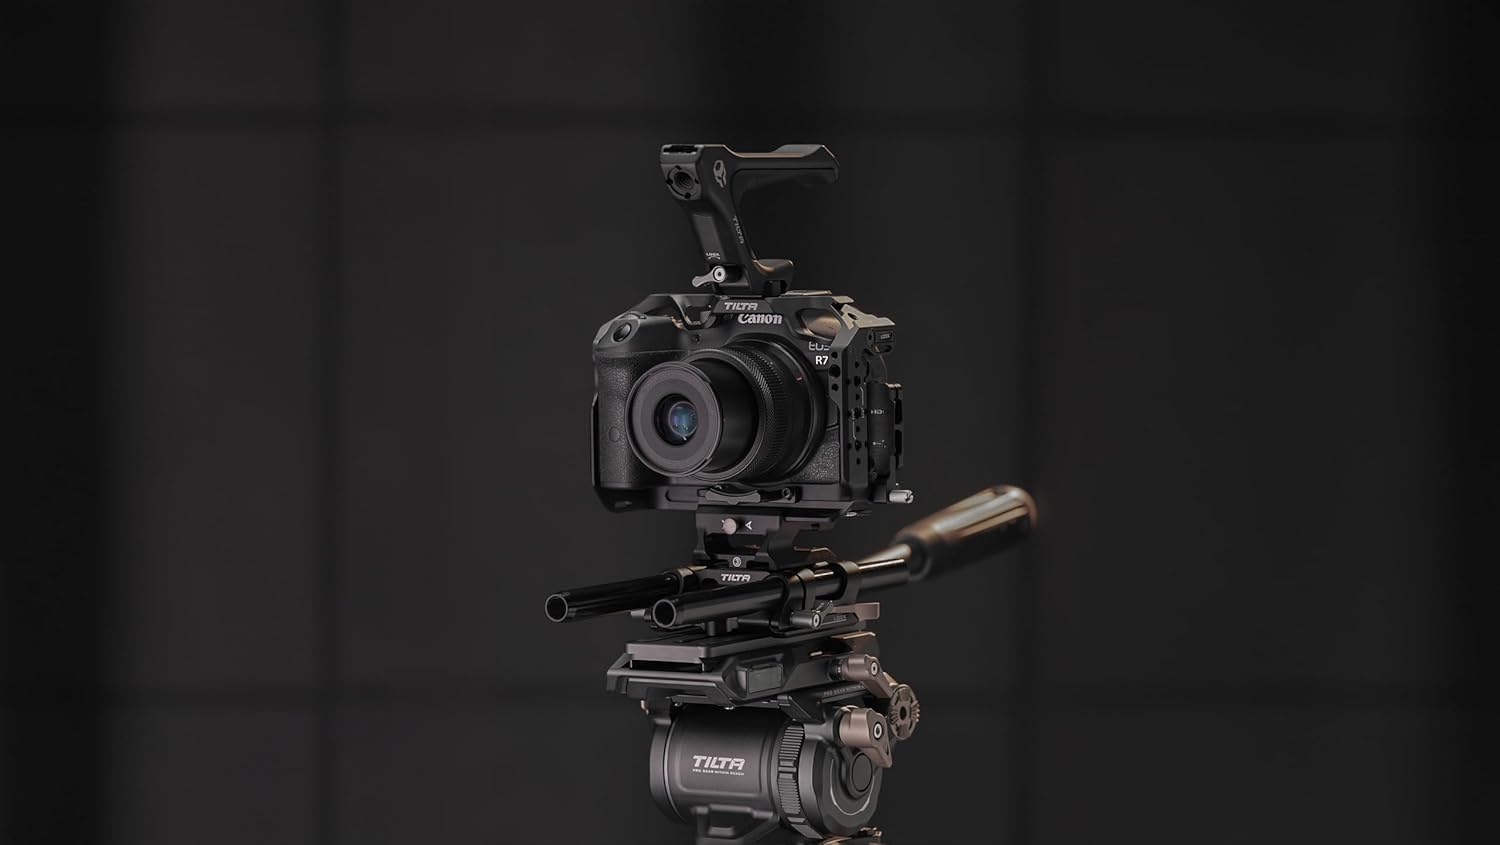
Image: Side view of the Tilta Camera Cage for Canon R7, showing the top handle and the LWS baseplate with 15mm rods.

Image: Close-up view of the cable clamp mechanism on the Tilta camera cage, designed to secure HDMI and USB-C cables.

Image: Diagram highlighting various mounting points on the Tilta camera cage, including 1/4"-20 threads, cold shoe, and NATO rail.
Operating Instructions
Once assembled, the Tilta Camera Cage Pro Kit provides enhanced functionality for your Canon R7:
- Accessory Integration: Utilize the various mounting points (cold shoe, NATO rails, 1/4"-20 threads) to attach external monitors, microphones, lights, and other camera accessories. Ensure all accessories are securely fastened to prevent accidental detachment.
- Improved Handling: The NATO Top Handle offers a comfortable and secure grip for low-angle shots and general camera operation, improving stability and control.
- Baseplate Functionality: The ARCA BASEPLATE allows for quick transitions between different support systems, such as tripods, gimbals, and shoulder rigs. It is compatible with DJI Ronin systems for seamless integration. The 15mm rods support follow focus systems, matte boxes, and other rod-mounted accessories.
- Cable Management: The integrated cable clamp helps maintain stable data transmission by preventing HDMI and USB-C cables from being pulled or disconnected during filming.
Maintenance
Proper maintenance ensures the longevity and optimal performance of your Tilta Camera Cage Pro Kit:
- Cleaning: Use a soft, dry cloth to wipe down the cage and its components. Avoid abrasive cleaners or solvents that could damage the finish.
- Inspection: Regularly check all screws and connections for tightness. Over time, vibrations from use can cause screws to loosen. Re-tighten as necessary.
- Storage: Store the kit in a clean, dry environment when not in use to prevent dust accumulation and potential corrosion.
Troubleshooting
If you encounter issues with your Tilta Camera Cage Pro Kit, consider the following common solutions:
- Camera Movement within Cage: Ensure all camera mounting screws are fully tightened. Check that the camera is correctly aligned within the cage.
- Loose Accessories: Verify that all accessory mounting screws (e.g., for top handle, monitors, lights) are securely fastened.
- Baseplate Instability: Confirm that the LWS Baseplate Adapter and Universal Baseplate are correctly attached to the cage and that the 15mm rods are firmly clamped.
- Cable Disconnections: Ensure the cable clamp is properly installed and tightened around the cables to prevent accidental pulls.
For persistent issues not covered here, please refer to the warranty and support section.
Specifications
| Feature | Detail |
|---|---|
| Model Number | TA-T59-B-B |
| Compatible Devices | Canon R7 |
| Color | Black |
| Item Weight | 2.57 pounds (1.17 kg) |
| Package Dimensions | 11.34 x 9.45 x 4.06 inches (28.8 x 24 x 10.3 cm) |
| Mounting Points | 1/4"-20 threads with locating points, Cold Shoe, NATO Rail |
| Baseplate Type | ARCA BASEPLATE, 15mm LWS Rod Support |
| Cable Management | Integrated HDMI and USB-C Cable Clamp |
Warranty and Support
For information regarding product warranty, please refer to the documentation included with your purchase or visit the official Tilta website. Warranty terms and conditions may vary.
If you require technical assistance or have questions not addressed in this manual, please contact Tilta customer support through their official channels. Keep your purchase receipt and product model number (TA-T59-B-B) readily available when seeking support.


