Introduction
This manual provides detailed instructions for the Ducky One 2 Pro Mini White Edition Mechanical Keyboard. Please read this manual thoroughly before using the product to ensure proper operation and longevity.
The Ducky One 2 Pro Mini is a 60% mechanical keyboard featuring RGB LED backlighting and Cherry MX Brown switches. It is designed for compact form factor and high performance.
Package Contents
- Ducky One 2 Pro Mini Mechanical Keyboard
- USB-C to USB-A Cable
- Additional PBT Double Shot Colorful Keycaps (Random color)
- Keycap Puller
- User Manual (this document)
Setup
1. Connecting the Keyboard
- Locate the USB-C port on the back of the Ducky One 2 Pro Mini keyboard.
- Connect the smaller end of the provided USB-C cable to the keyboard's USB-C port.
- Connect the larger USB-A end of the cable to an available USB port on your computer.
- The keyboard will automatically be detected by your operating system. No additional drivers are typically required for basic functionality.

Image: The Ducky One 2 Pro Mini keyboard connected to its white USB-C cable, illustrating the connection point.
2. Adjusting Keyboard Feet
The keyboard features 3-level adjustable feet to customize the typing angle.
- Gently pull out the small feet for the first level of elevation.
- Pull out the larger feet for the second level of elevation.
- For the highest elevation, extend both sets of feet.

Image: Side profile of the Ducky One 2 Pro Mini keyboard, highlighting the adjustable feet in an extended position.
Operating Instructions
1. Function Layer (Fn Key)
Due to its 60% compact layout, many standard keys are accessed via a function layer using the Fn key. The legends on the front of the keycaps indicate these secondary functions.
To activate a secondary function, hold down the Fn key and press the desired key.
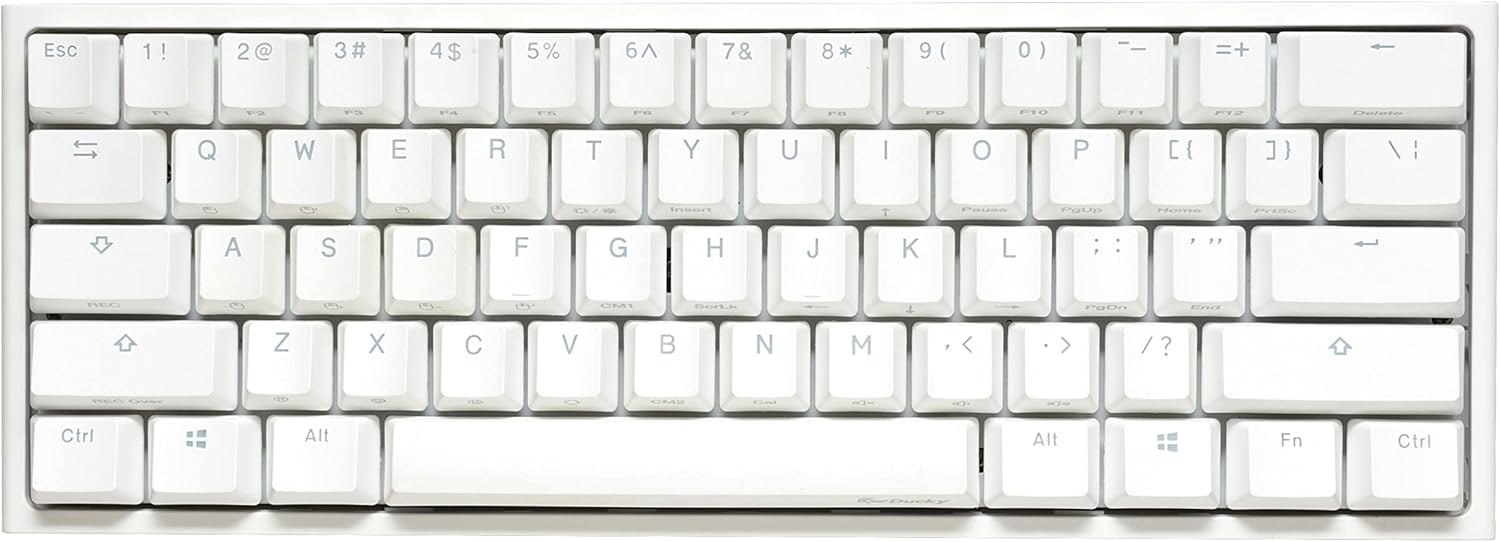
Image: A full top-down view of the Ducky One 2 Pro Mini keyboard, showing the compact 60% layout and secondary function legends on the keycaps.
2. RGB LED Backlighting
The Ducky One 2 Pro Mini features customizable RGB LED backlighting. Various lighting modes and effects can be controlled directly from the keyboard using specific key combinations.
Refer to the official Ducky software or the full Ducky One 2 Pro Mini manual for a comprehensive list of lighting controls and customization options. Common controls include:
- Fn + Alt + T: Cycle through lighting modes.
- Fn + Alt + Z/X/C: Adjust RGB colors (Red/Green/Blue).
- Fn + Alt + Left/Right Arrow: Adjust lighting speed.
- Fn + Alt + Up/Down Arrow: Adjust lighting brightness.

Image: A close-up view of the Ducky One 2 Pro Mini keyboard with its RGB backlighting illuminated in a blue hue, showcasing the keycap legends.
3. Ducky Macro 2.0
The keyboard supports Ducky Macro 2.0, allowing for advanced key remapping and macro creation directly on the hardware. This feature enables users to customize key functions without software.
For detailed instructions on creating and managing macros, please consult the comprehensive Ducky Macro 2.0 guide available on the official Ducky website.
4. DIP Switches
The Ducky One 2 Pro Mini may include DIP switches on the underside for hardware-level configuration changes, such as modifying the position of the Fn key or other special functions. Refer to the specific product documentation for your model for DIP switch settings.
Maintenance
1. Cleaning the Keyboard
- Disconnect the keyboard from your computer before cleaning.
- Use a soft, lint-free cloth slightly dampened with water or a mild cleaning solution to wipe the keycaps and casing.
- For deeper cleaning, use the provided keycap puller to remove keycaps and clean underneath with compressed air or a small brush.
- Avoid spraying liquids directly onto the keyboard.

Image: The Ducky One 2 Pro Mini keyboard with one keycap removed, showing the mechanical switch underneath and a keycap puller nearby, illustrating the process of keycap removal for cleaning or customization.
2. Keycap Replacement
The Ducky One 2 Pro Mini comes with additional colorful PBT double shot keycaps. To replace keycaps:
- Use the keycap puller to gently remove the desired keycap by hooking it onto the keycap and pulling straight up.
- Align the new keycap with the switch stem and press down firmly until it clicks into place.
Troubleshooting
Keyboard Not Responding
- Ensure the USB-C cable is securely connected to both the keyboard and the computer.
- Try connecting the keyboard to a different USB port on your computer.
- Test the keyboard on another computer to rule out system-specific issues.
- If possible, try a different USB-C cable.
RGB Lighting Not Working or Incorrect
- Check the lighting control key combinations (e.g., Fn + Alt + T) to ensure a lighting mode is active.
- Adjust brightness settings (Fn + Alt + Up/Down Arrow).
- Perform a factory reset if issues persist (refer to the full manual for specific reset procedures).
Keys Not Registering
- Ensure the keyboard is clean and free of debris that might obstruct key switches.
- If a specific key is not working, carefully remove the keycap and inspect the switch for any visible damage or obstruction.
Specifications
| Feature | Detail |
|---|---|
| Model Name | Ducky One 2 Pro Mini White Edition |
| Model Number | DKON2061ST-BUSPDWWT2 |
| Switch Type | Cherry MX Brown Mechanical Switches |
| Layout | 60% Compact |
| Keycaps | PBT Double Shot Seamless |
| Backlighting | RGB LED |
| Connectivity | USB-C (Detachable) |
| Polling Rate | 1000 Hz |
| Dimensions | 11.89 x 4.25 x 1.57 inches |
| Weight | 2.05 pounds |
| Features | Quack Mechanics EVA sound dampener, Q-Bounce synthetic padding, Ducky Macro 2.0, 3-level adjustable feet |
Warranty and Support
Ducky products are covered by a limited manufacturer's warranty. For specific warranty terms and conditions, please refer to the warranty card included with your product or visit the official Ducky website.
For technical support, driver downloads, or further assistance, please visit the official Ducky support page or contact your regional distributor.
Official Ducky Website: www.duckychannel.com.tw


