Introduction
This manual provides detailed instructions for the installation, operation, and maintenance of your VTOPEK HD 1080P 4-Pin Universal Rear View Camera. Please read this manual thoroughly before using the product to ensure proper function and safety. This camera is designed to enhance parking and driving safety by providing a clear, wide-angle view behind your vehicle, compatible with a wide range of dashcams and mirror dashcams.
Package Contents
Verify that all items listed below are included in your package:
- 1 × HD 1080P Rear View Camera
- 1 × 26 ft (8m) Extension Cable
- 1 × Mounting Bracket
- 2 × Screws
- 1 × 3M Adhesive Sticker
- 1 × User Manual

Specifications
| Brand | VTOPEK |
| Model | P062 |
| Product Dimensions | 15.5 x 9.5 x 5.5 cm |
| Weight | 200 grams |
| Compatible Devices | Dashcams and reversing dashcams with 4-pin interface supporting AHD 1080P/720P/CVBS-NTSC/PAL/CVI/TVI formats. |
| Mounting Type | Surface Mount |
| Optical Sensor Technology | CMOS |
| Lens Type | Wide Angle Lens |
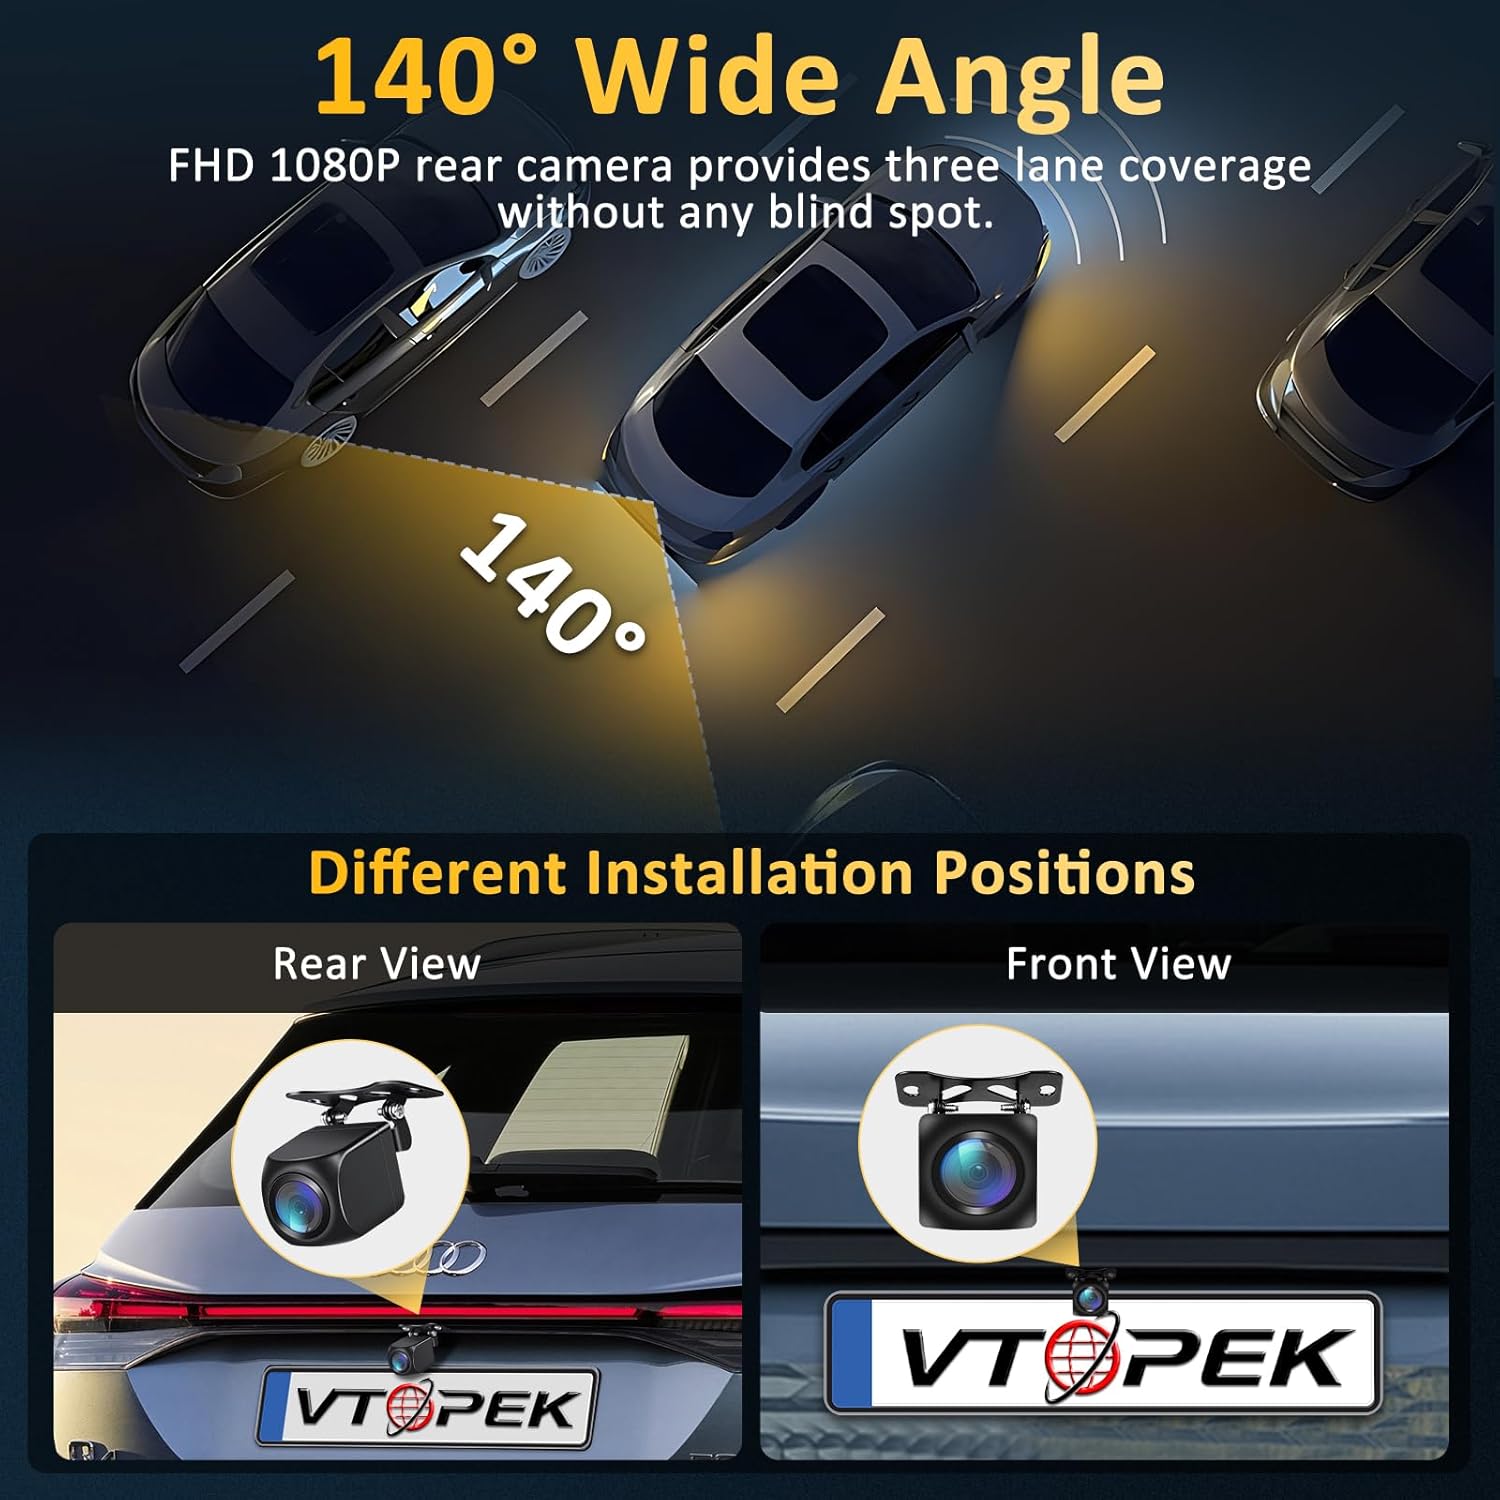
| Real Viewing Angle | 140 degrees |
| Connector Type | 4-pin |
| Optical Sensor Size | 1/2.7 inch |
| Operating Voltage | 12-24 Volts |
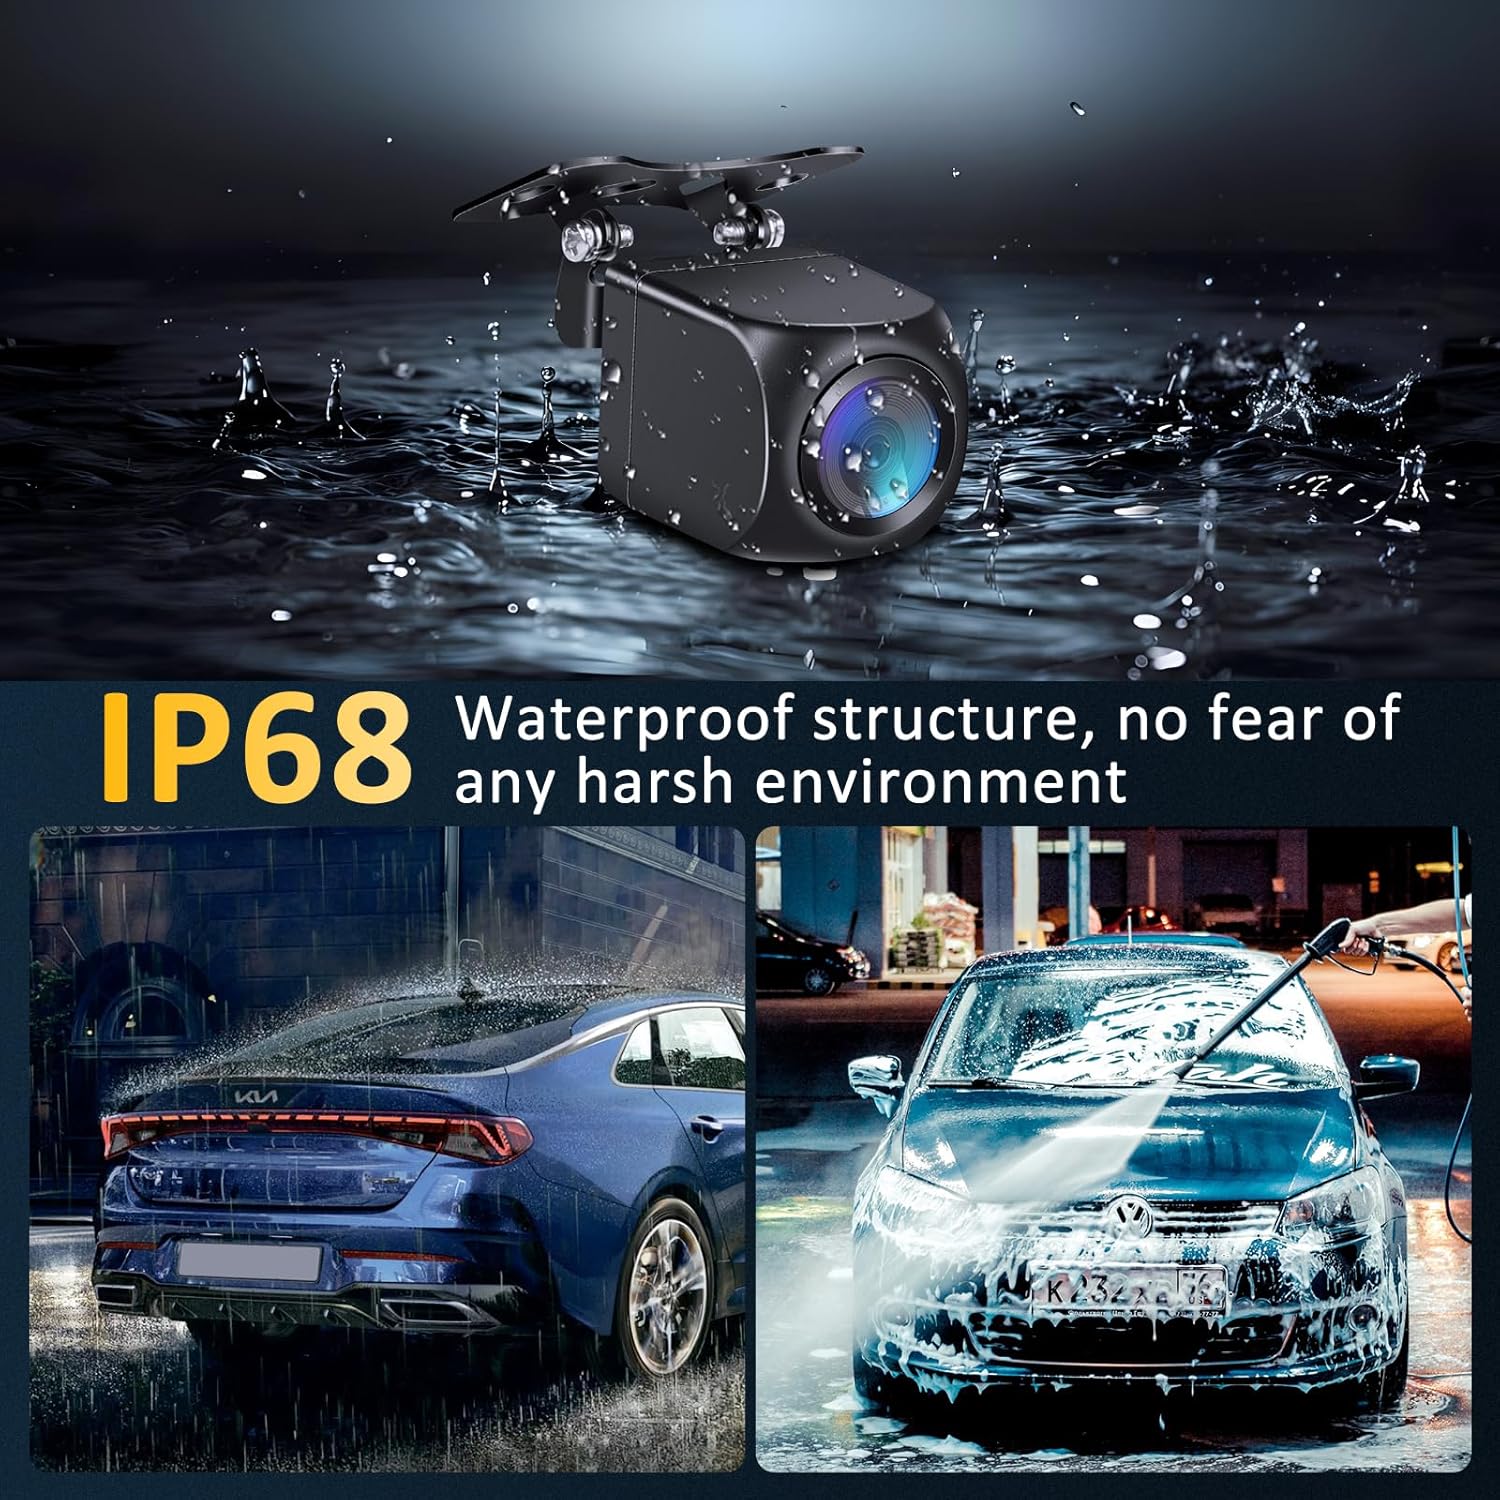
| Waterproof Rating | IP68 |
Setup and Installation
Follow these steps to properly install your VTOPEK rear view camera:
- Choose an Installation Location: The camera can be installed as a rear view camera (typically above the license plate) or as a front/side camera. Ensure the chosen location provides a clear, unobstructed view.
- Mount the Camera: Use the provided mounting bracket and screws or the 3M adhesive sticker to securely attach the camera to your vehicle. For license plate installation without drilling, a special license plate bracket may be available (contact support for details).
- Connect Power: Connect the camera's trigger wire to the power source of your vehicle's backup lights. This ensures the camera activates when reversing. The camera operates on 12-24 volts.
- Connect to Dashcam/Monitor: Connect the 26 ft (8m) extension cable from the rear view camera to the 4-pin interface on your dashcam or compatible monitor. Ensure a secure connection.
- Cable Routing: Carefully route the extension cable to avoid kinks, pinches, or interference with moving parts. Secure the cable using clips or ties to prevent it from dangling.

Operating Instructions
The VTOPEK rear view camera is designed for simple, automatic operation:
- Automatic Activation: When properly connected to your vehicle's backup lights, the camera will automatically activate and display its feed on your compatible dashcam or monitor when you shift your vehicle into reverse.
- Video Signal Compatibility: The camera supports multiple video formats including AHD 1080P, AHD 720P, NTSC, PAL, CVI, and TVI. It can switch between 12 types of video output signals to ensure compatibility with 95% of dashcams on the market.
- Image Switching: The camera features a small button (often on the cable or camera body) that allows you to switch between normal and mirror image modes. Press this button multiple times to cycle through the available image modes until the desired orientation is achieved. This also allows for use as a front or side camera.
- Parking Lines: The camera may have an option to enable or disable parking guide lines. This feature is typically controlled by cutting a specific wire loop on the camera cable (refer to the specific wire instructions if applicable) or through settings on your connected dashcam/monitor.


Maintenance
To ensure the longevity and optimal performance of your VTOPEK rear view camera, follow these maintenance guidelines:
- Regular Cleaning: Periodically clean the camera lens with a soft, damp cloth to remove dirt, dust, or water spots that may obstruct the view. Avoid abrasive cleaners.
- Check Connections: Ensure all cable connections remain secure and free from corrosion. Loose connections can lead to intermittent signal loss.
- Inspect for Damage: Regularly inspect the camera housing and cable for any signs of physical damage. Although the camera is IP68 waterproof, severe damage can compromise its integrity.
- Waterproof Design: The camera features an IP68 waterproof and dustproof rating, designed with a fully sealed glue filling process. This allows it to withstand various weather conditions, including rain, snow, and extreme temperatures, without fear of water or dust ingress.
Troubleshooting
If you encounter issues with your VTOPEK rear view camera, refer to the following common problems and solutions:
| Problem | Possible Cause | Solution |
|---|---|---|
| No image on screen | Loose cable connection, incorrect power connection, incompatible dashcam/monitor. | Check all 4-pin connections. Ensure the trigger wire is correctly connected to the backup light power. Verify your dashcam supports the camera's video signals (AHD 1080P/720P, NTSC, PAL, CVI, TVI). |
| Image is black and white or distorted | Incorrect video signal format, low light conditions (though camera has good night vision). | Use the small button on the camera/cable to cycle through video output signals until a clear, colored image appears. Ensure sufficient lighting for optimal performance. The camera uses WDR technology for clearer images in low light, but extreme darkness may still affect color. |
| Image is reversed (mirror image) | Incorrect image orientation setting. | Press the small button on the camera/cable to switch between normal and mirror image modes. |
| Parking lines are not visible or incorrect | Parking line feature disabled or wire cut incorrectly. | Check if there is a specific wire loop on the camera cable that controls parking lines. Cutting or connecting this wire typically toggles the lines. Refer to your dashcam's manual for its parking line settings. |
| Poor image quality at night | Lens obstruction, extreme glare from headlights. | Clean the camera lens. While the camera has Super Night Vision with a starlight sensor and WDR technology for true color reproduction, extreme glare from bright headlights directly behind the vehicle can still affect visibility. |
Warranty Information
VTOPEK offers a 1-year replacement warranty for this product. If you encounter any issues or problems with your VTOPEK reversing camera within one year of purchase, please contact our customer support for assistance. We are committed to providing satisfactory service and will arrange for a replacement if necessary.
Customer Support
For technical assistance, troubleshooting, or warranty claims, please contact VTOPEK customer support through the retailer where you purchased the product or visit the official VTOPEK website for contact information. Please have your product model (P062) and purchase details ready when contacting support.