
Introduction
This manual provides comprehensive instructions for the installation, operation, and maintenance of your Aramox GD01 Electric Bike LCD Display. Please read this manual thoroughly before use to ensure proper function and longevity of the product.
The GD01 LCD display is designed to provide essential riding data, including speed, battery power, mileage, and pedal-assist levels, enhancing your electric biking experience.
Setup and Installation
1. Unpacking
Carefully remove all components from the packaging. Ensure all parts are present and undamaged.
2. Handlebar Installation
The GD01 display is suitable for handlebars with a 22.2mm (0.9in) diameter. Securely attach the display to your handlebar using the provided mounting bracket and screws. Ensure the display is positioned for optimal visibility and accessibility during riding.

Image: The Aramox GD01 LCD Display shown mounted on a bicycle handlebar, viewed from the side, with the mounting screw visible.
3. Electrical Connection
Connect the 5-pin waterproof interface cable from the display to the corresponding port on your electric bike's controller or motor kit. Ensure the connection is firm and secure to prevent water ingress.
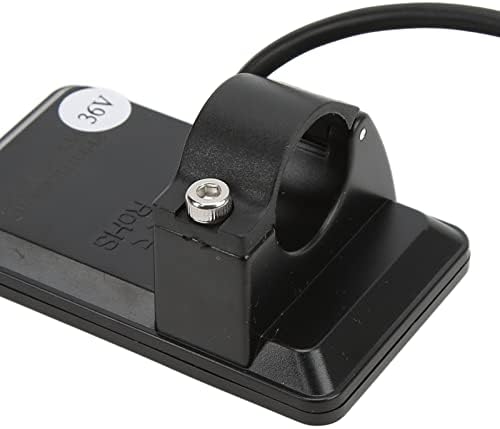
Image: A diagram illustrating the standard 5-pin connector type, showing the controller connector, display output connector, and coupling input connector. A table details the wire color and corresponding functions (e.g., Red for Display Power Cable, Blue for Controller Power On/Off Cable).
The display is compatible with 36V and 48V voltage systems. The voltage setting on the instrument can be adjusted by the user.
Video: A demonstration of installing an electric bike display onto a handlebar and connecting the cables. The video shows the process of securing the display and plugging in the waterproof connectors.
Operating Instructions
1. Power On/Off
To power on the display, press and hold the 'M' button. To power off, press and hold the 'M' button again.

Image: The Aramox GD01 LCD Display powered on, showing various data fields such as speed, energy bar, PAS level, and trip mileage.
2. Display Functions
The LCD screen provides the following data:
- Speed Display: Shows real-time riding speed.
- PAS Grades: Indicates the current pedal-assist level (1-5 levels).
- Battery Power: Displays the remaining battery charge.
- Mileage Display: Shows trip mileage and total odometer readings.
- Headlight Control: Allows control of the bike's headlights.
- Backlight Brightness: Three adjustable levels for screen brightness.
- Fault Code Display: Indicates system errors.
- 6km/h Assist: Feature for low-speed assistance.

Image: A graphic illustrating the various functions displayed on the GD01 LCD screen, including speed, PAS grades, battery power, and multi-function display. Buttons for 'Shift up', 'ON/OFF', and 'Shift down' are also labeled.
3. Button Functions
- '+' Button: Shift up, increase values.
- '-' Button: Shift down, decrease values.
- 'M' Button: Power ON/OFF, mode selection, parameter settings entry.
Video: A demonstration of the GD01 Ebike Display's functions, showing how to navigate through different screens and adjust settings using the '+' and '-' buttons, and the 'M' button for mode selection.
Video: A detailed overview of the BAFANG Ebike Display DZ47 (similar to GD01) functions, demonstrating how to power on, change display modes, and adjust pedal-assist levels while riding.
Maintenance
To ensure optimal performance and longevity of your Aramox GD01 display, follow these maintenance guidelines:
- Cleaning: Wipe the display screen and body with a soft, damp cloth. Avoid using abrasive cleaners or solvents that could damage the plastic or screen.
- Water Protection: Although the interface is waterproof, avoid submerging the display in water. Ensure all connections are dry before connecting or disconnecting.
- Storage: When not in use for extended periods, store the display in a dry, cool place away from direct sunlight.
- Connection Check: Periodically check the 5-pin connection for any signs of wear or corrosion. Ensure it remains securely fastened.
Troubleshooting
If you encounter issues with your GD01 display, refer to the following common problems and solutions:
- Display Not Powering On:
- Check if the 5-pin power cable is securely connected to both the display and the bike's controller.
- Ensure the bike's battery is charged and properly connected.
- Verify the 'M' button is pressed and held for a few seconds to initiate power-on.
- Incorrect Speed/Mileage Readings:
- Confirm that the wheel circumference setting in the display's parameters is correct for your bike.
- Check the speed sensor and its magnet for proper alignment and function.
- Battery Indicator Issues:
- Ensure the display's voltage setting matches your bike's battery voltage (36V or 48V).
- If the issue persists, the battery itself may require inspection.
- Fault Codes Displayed:
- The display can show fault codes. Consult your electric bike's main controller manual for specific fault code interpretations and solutions.
- Often, a simple power cycle (turning off and on) can resolve temporary errors.
For further assistance, please contact Aramox customer support.
Specifications
| Feature | Detail |
|---|---|
| Brand | Aramox |
| Model Name | GD01 |
| Interface | 5 Pin Waterproof Interface |
| Applicable Handlebar Diameter | 22.2mm (0.9in) |
| Voltage Compatibility | 36V, 48V (User adjustable) |
| Material | Plastic |
| Dimensions (Meter) | 82x48mm (3.2x1.9in) |
| Connector Cable Length | 20.5cm (8.1in) |
| Application | For JN Controller and Electric Motor Kit |
Warranty and Support
Aramox products are built to meet standard specifications and undergo strict factory quality control. For warranty information or technical support, please refer to your purchase documentation or contact Aramox customer service directly.
Please note that Agreement 2 applies to this product.