
Introduction
Thank you for purchasing the HOMCOM Set of 2 Floating Bedside Tables. These wall-mounted tables are designed to provide convenient storage and a modern aesthetic to your bedroom or living space. This manual provides essential information for safe assembly, proper use, and maintenance of your new furniture. Please read these instructions carefully before assembly and retain them for future reference.

Image: HOMCOM Floating Bedside Tables in a bedroom setting.
Important Safety Information
- Always assemble according to the instructions provided. Incorrect assembly can lead to instability and potential injury.
- Do not exceed the maximum weight limit of 8 kg (17.6 lbs) per table. Overloading can cause the table to detach from the wall or break.
- Ensure the tables are securely mounted to a sturdy wall structure (e.g., wall studs) to prevent tipping or collapse. Use appropriate wall anchors for your wall type.
- Keep small parts and packaging materials away from children during assembly to prevent choking hazards.
- Regularly check all fasteners to ensure they remain tight. Re-tighten as necessary.
- Avoid placing hot items directly on the surface without protection.
Package Contents
Before beginning assembly, please verify that all components listed below are present and undamaged. If any parts are missing or damaged, please contact customer support.
- 2 x Floating Bedside Tables (unassembled components)
- 2 x Drawers (unassembled components for each table)
- 1 x Hardware Pack (screws, wall anchors, etc.)
- 1 x Instruction Manual
Product Specifications
| Feature | Detail |
|---|---|
| Brand | HOMCOM |
| Model Number | 831-338V00AK |
| Total Dimensions (each unit) | 35 cm (L) x 32 cm (W) x 22.5 cm (H) / 13.78" (L) x 12.6" (W) x 8.86" (H) |
| Drawer Internal Dimensions | 26.5 cm (L) x 23.5 cm (W) x 6 cm (H) |
| Shelf Dimensions | 35 cm (L) x 30.5 cm (W) x 9 cm (H) |
| Maximum Supported Weight (each) | 8 kg (17.6 lbs) |
| Material | Wood Melamine |
| Color | Oak and White |
| Number of Drawers | 1 per table (total 2) |

Image: Detailed dimensions of one floating bedside table unit.
Setup and Assembly Instructions
Assembly is required for these floating bedside tables. Please follow these steps carefully. It is recommended to have two people for wall mounting.
Tools Required (Not Included):
- Phillips Head Screwdriver
- Drill
- Drill Bits (appropriate for wall anchors)
- Level
- Measuring Tape
- Pencil
- Stud Finder (recommended for secure mounting)
Assembly Steps:
- Unpack and Identify Parts: Carefully unpack all components and hardware. Refer to the included parts list to ensure everything is present.
- Assemble the Drawer: Follow the specific instructions provided in the hardware pack to assemble the drawer unit for each table. Ensure all cam locks and screws are tightened securely.
- Assemble the Table Frame: Connect the main panels of the bedside table using the provided screws and dowels. Pay attention to the orientation of the panels to ensure the open shelf and drawer slot are correctly positioned.
- Insert the Drawer: Once the table frame is assembled, slide the assembled drawer into its designated slot. Test the drawer's smooth operation.
- Choose Mounting Location: Select a suitable wall location. Use a stud finder to locate wall studs for the most secure mounting. If mounting into drywall without studs, use appropriate heavy-duty drywall anchors (not always included, may need to be purchased separately).
- Mark Drilling Points: Hold the assembled bedside table against the wall at the desired height. Use a level to ensure it is straight. Mark the drilling points for the mounting brackets/screws with a pencil.
- Drill Pilot Holes: Drill pilot holes at the marked points. The size of the drill bit should match the wall anchors or screws being used.
- Install Wall Anchors (if needed): If not drilling into studs, insert the appropriate wall anchors into the pilot holes.
- Mount the Table: Align the mounting holes on the back of the bedside table with the drilled holes/anchors. Securely fasten the table to the wall using the provided screws. Ensure it is firmly attached and does not wobble. Repeat for the second table.

Image: Example of a floating bedside table installed, highlighting its space-saving design.
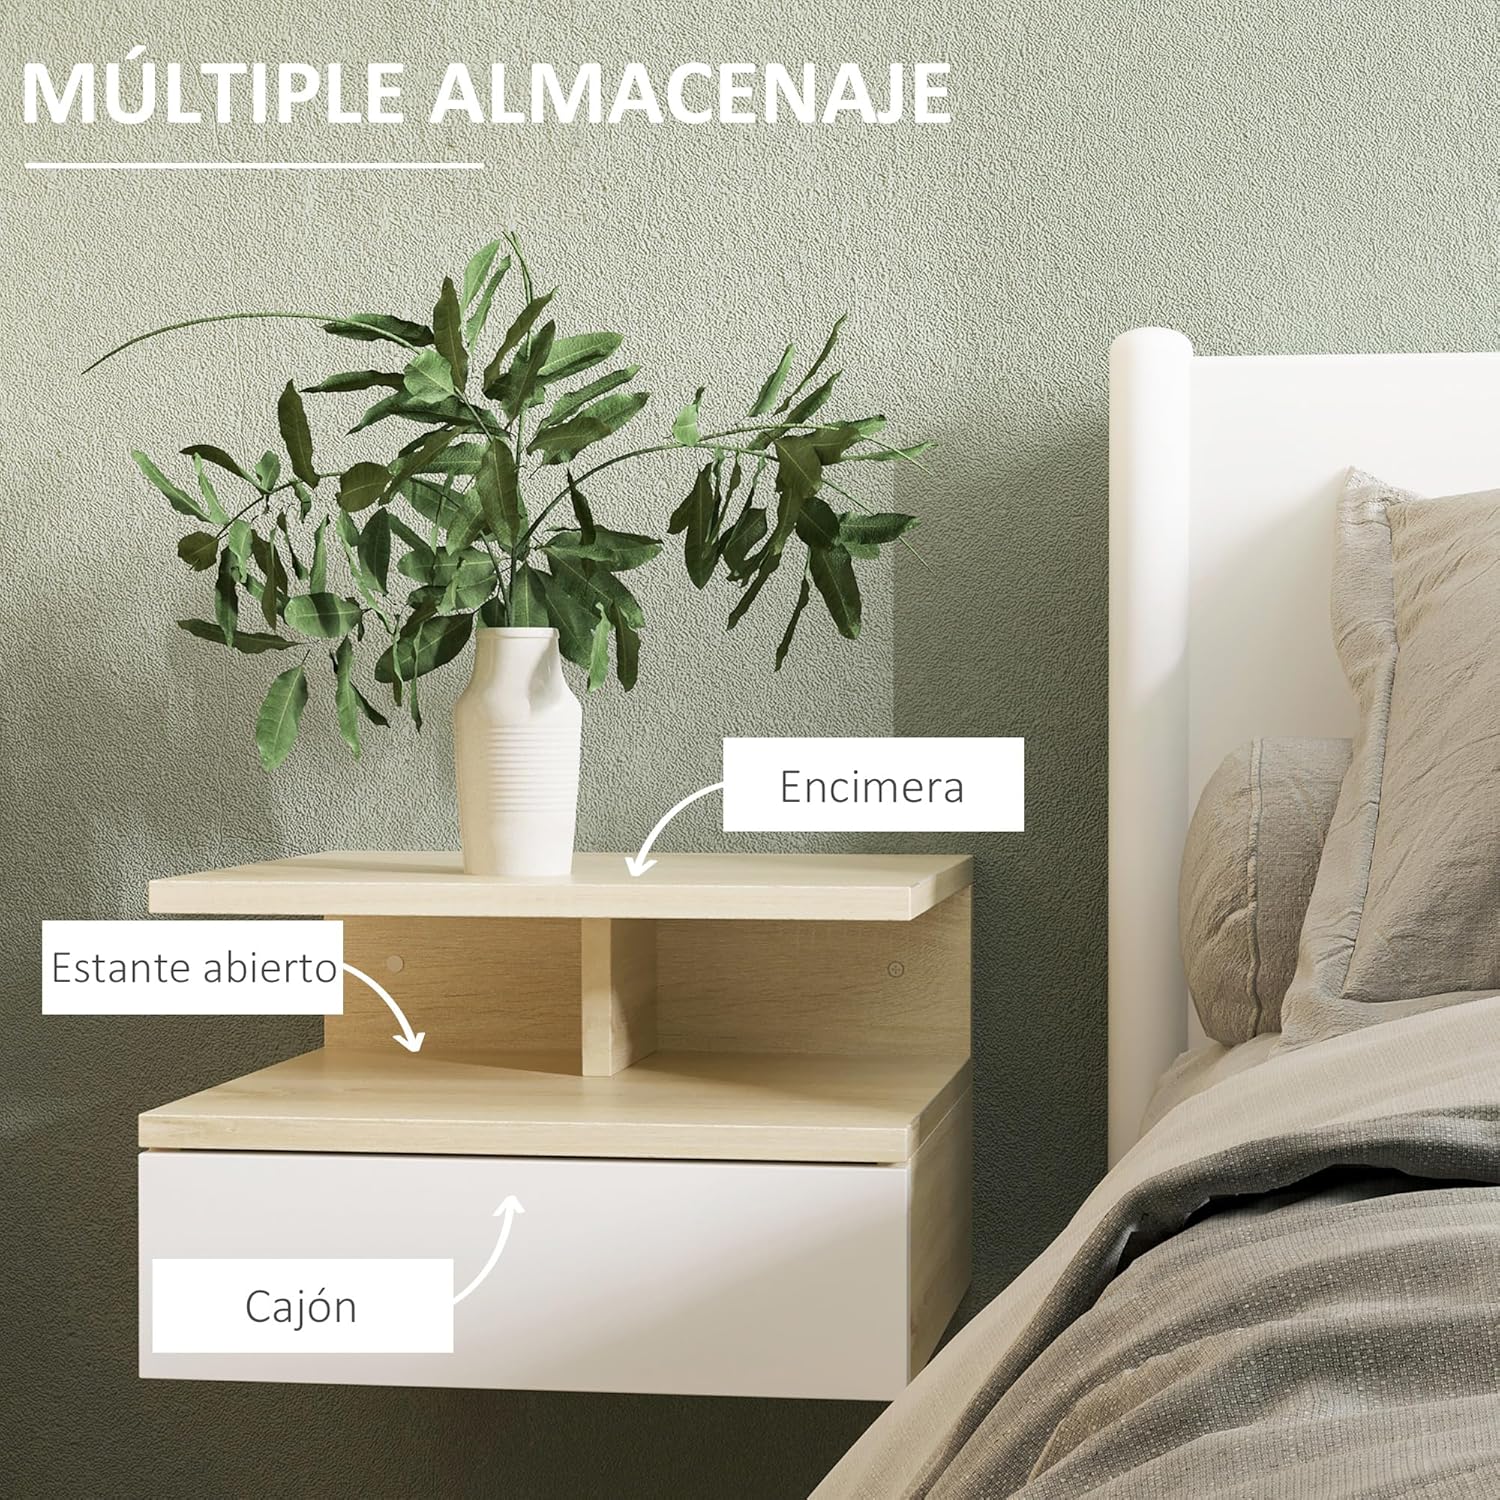
Image: Detailed view of the table's storage compartments: countertop, open shelf, and drawer.
Operating and Usage
Your HOMCOM floating bedside tables are designed for convenient storage and display in various indoor settings.
- Storage: Utilize the top surface for items like lamps, alarm clocks, or decorative pieces. The open shelf is suitable for books, magazines, or small electronic devices. The drawer provides concealed storage for personal belongings.
- Placement: These tables are ideal for bedrooms as nightstands, but can also be used in living rooms as small side tables or even in hallways for keys and mail. Their floating design allows for easy floor cleaning underneath.
- Weight Limit: Always adhere to the maximum weight capacity of 8 kg (17.6 lbs) per table to ensure stability and longevity.

Image: The floating design allows for easy cleaning underneath, as shown with a robot vacuum.
Care and Maintenance
- Cleaning: Wipe with a damp cloth. Avoid using harsh chemicals or abrasive cleaners, which can damage the laminated finish.
- Spills: Clean up spills immediately to prevent staining or damage to the wood melamine.
- Fasteners: Periodically check all screws and wall mounts to ensure they are tight. Re-tighten as needed to maintain stability.
- Environment: Avoid prolonged exposure to direct sunlight or extreme humidity, which can cause warping or discoloration.
Troubleshooting
| Problem | Possible Cause | Solution |
|---|---|---|
| Table feels wobbly or unstable after mounting. | Loose mounting screws or inadequate wall anchors. | Ensure all mounting screws are fully tightened. Verify that appropriate wall anchors were used for your wall type and are securely installed. If necessary, re-mount using stronger anchors or by drilling into wall studs. |
| Drawer does not slide smoothly. | Drawer runners are misaligned or obstructed. | Remove the drawer and check the runners for any obstructions or damage. Ensure the drawer was assembled correctly and the runners are aligned properly within the table frame. |
| Visible gaps between panels. | Panels not fully joined during assembly. | Check all cam locks and screws. Disassemble and reassemble the affected section, ensuring all connections are tight and panels are flush. |
Warranty and Customer Support
For warranty information, please refer to the documentation provided at the time of purchase or contact your retailer. If you have any questions, require assistance with assembly, or need to report missing/damaged parts, please contact HOMCOM customer support:
- Website: www.aosom.com (HOMCOM is a brand of Aosom)
- Contact Information: Please refer to the contact section on the Aosom website for the most up-to-date phone numbers or email addresses for your region.