Introduction
This manual provides detailed instructions for the installation, operation, and maintenance of your XTRONS IXP12GFVL car stereo system. Please read this manual thoroughly before using the product to ensure proper functionality and to prevent damage.
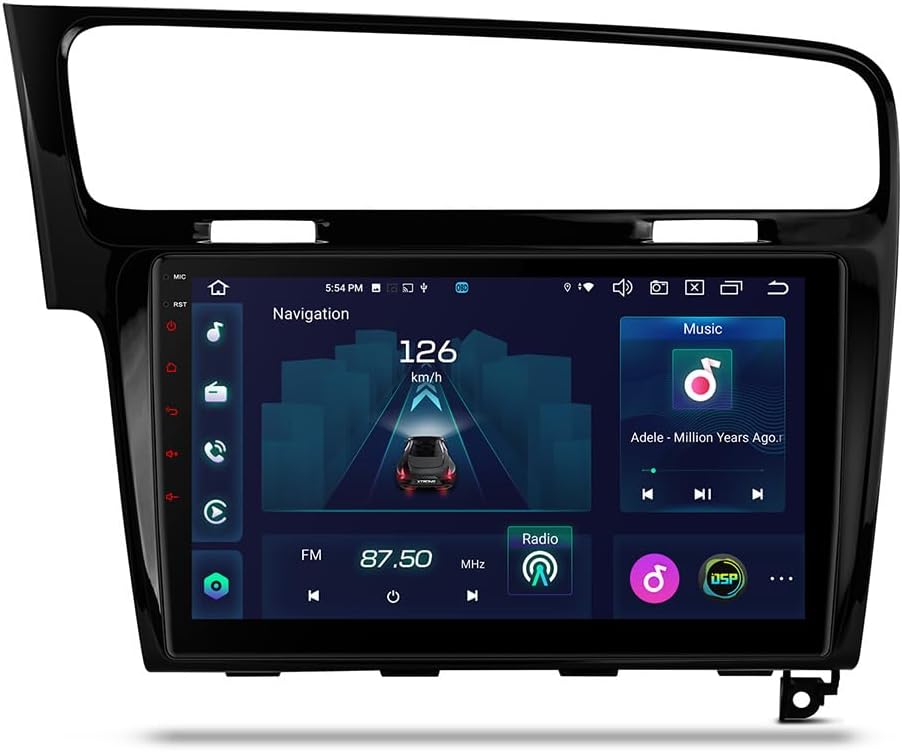
Figure 1: XTRONS IXP12GFVL car stereo unit with a 10.1-inch display, showing navigation and music playback, integrated into a Volkswagen Golf 7 dashboard.
Setup and Installation
The XTRONS IXP12GFVL is designed for specific integration into Volkswagen Golf 7 vehicles. Professional installation is recommended due to the complexity of vehicle electronics and wiring.
Package Contents:
- XTRONS IXP12GFVL Head Unit
- Power Harness (specific for VW Golf 7)
- GPS Antenna
- USB Cables
- External Microphone
- User Manual (this document)
- Other necessary accessories (e.g., mounting brackets, trim tools)
Pre-Installation Checklist:
- Ensure the vehicle's ignition is off and the battery is disconnected.
- Verify all package contents against the packing list.
- Confirm compatibility with your specific Volkswagen Golf 7 model and year.
Installation Steps (Overview):
- Remove Factory Head Unit: Carefully remove the existing car stereo and trim panels from your Volkswagen Golf 7 dashboard. Refer to your vehicle's service manual for specific instructions.
- Connect Wiring Harness: Connect the provided power harness to the vehicle's wiring. Ensure all connections are secure. The unit supports Dual Canbus for vehicle information integration.
- Connect Antennas: Attach the GPS antenna and Wi-Fi/4G antennas (if applicable) to the corresponding ports on the XTRONS unit. Position the GPS antenna in a location with a clear view of the sky.
- Connect USB and Other Cables: Connect any external USB devices, cameras, or other accessories as required.
- Mount the Unit: Securely mount the XTRONS IXP12GFVL head unit into the dashboard opening. Ensure proper fitment and alignment.
- Test Functionality: Reconnect the vehicle battery. Turn on the ignition and test basic functions such as power, audio, touch screen, and steering wheel controls.
- Reassemble Dashboard: Once all functions are verified, reassemble the dashboard trim panels.
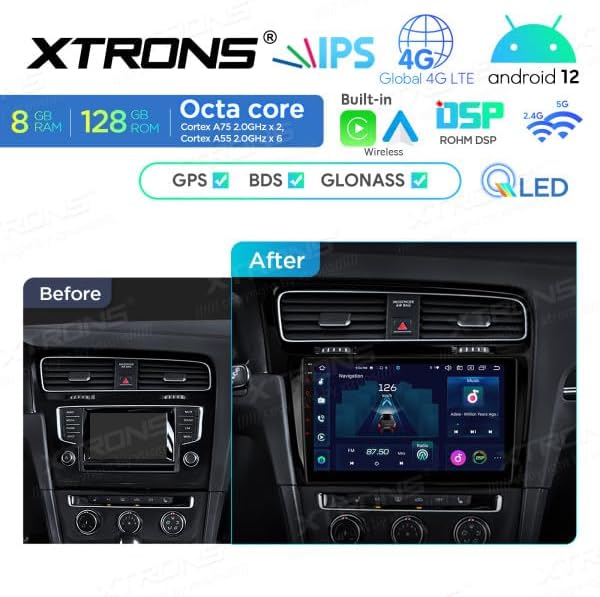
Figure 2: Visual comparison of the dashboard before and after installation of the XTRONS IXP12GFVL unit in a Volkswagen Golf 7.

Figure 3: Dimensional diagram of the XTRONS IXP12GFVL unit, indicating measurements for installation.
Operating Instructions
The XTRONS IXP12GFVL operates on Android 12, providing a familiar and intuitive user interface. The 10.1-inch QLED touchscreen allows for easy navigation through menus and applications.
Basic Operations:
- Power On/Off: Press and hold the power button (if available) or turn the vehicle ignition on/off.
- Volume Control: Adjust volume using the on-screen controls or vehicle's steering wheel controls.
- Home Screen: Tap the home icon to return to the main application launcher.
- Navigation: Access the pre-installed GPS navigation application or download your preferred navigation app from the Google Play Store.
- Radio: Select the Radio application to tune into FM/AM stations.

Figure 4: Main application launcher screen of the XTRONS IXP12GFVL, showing various available functions and apps.
Connectivity:
- Bluetooth 5.0: Pair your smartphone for hands-free calling and audio streaming.
- Go to Settings > Bluetooth.
- Enable Bluetooth on your phone and the head unit.
- Select your phone from the list of available devices to pair.
- Wi-Fi: Connect to a Wi-Fi hotspot for internet access, app downloads, and online services. The unit supports Dual Band Wi-Fi.
- Go to Settings > Network & Internet > Wi-Fi.
- Select your desired network and enter the password.
- 4G Connectivity: Insert a 4G SIM card into the designated slot for direct internet access.
- USB: Connect USB drives for media playback or data transfer.
Smart Integration (Apple CarPlay / Android Auto):
The unit features integrated Apple CarPlay and Android Auto for seamless smartphone integration.
- Apple CarPlay: Connect your iPhone via USB or wirelessly (if supported by your phone and unit) to access navigation, music, messages, and more directly on the car stereo screen.
- Android Auto: Connect your Android phone via USB or wirelessly (if supported by your phone and unit) to use Google Maps, play music, send messages, and make calls.

Figure 5: Apple CarPlay interface shown on the XTRONS IXP12GFVL display.

Figure 6: Android Auto interface shown on the XTRONS IXP12GFVL display.
GPS Navigation:
The unit includes a GPS navigator with support for GPS, BDS, and GLONASS satellite systems for accurate positioning. Pre-installed navigation software is available, and users can download additional navigation applications.
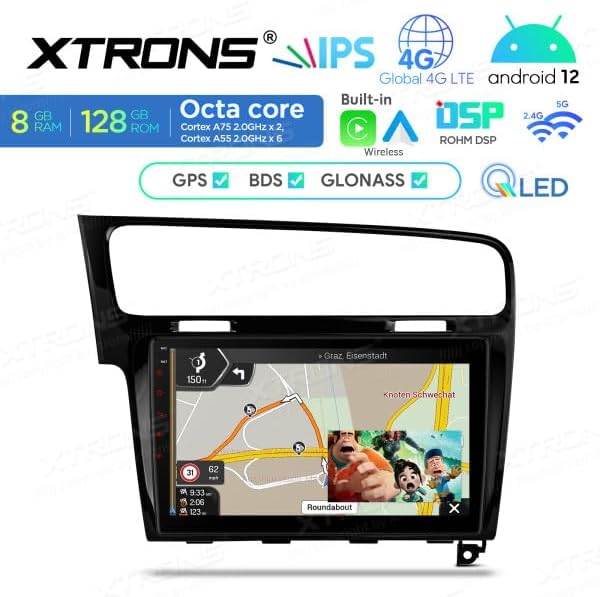
Figure 7: GPS navigation display on the XTRONS IXP12GFVL unit, showing a map and route information.
Audio Settings (DSP Equalizer):
Utilize the integrated DSP (Digital Signal Processor) equalizer to customize audio output. Access the DSP settings through the audio or sound settings menu to adjust frequency bands, balance, fader, and other sound characteristics for an optimized listening experience.
Maintenance
Regular maintenance ensures the longevity and optimal performance of your XTRONS IXP12GFVL car stereo.
- Screen Cleaning: Use a soft, lint-free cloth slightly dampened with water or a screen cleaner specifically designed for electronic displays. Avoid abrasive materials or harsh chemicals.
- Software Updates: Periodically check for software updates via the unit's settings menu or the official XTRONS website. Keeping the software updated can improve performance and add new features.
- General Cleaning: Keep the unit free from dust and debris. Use a soft brush or compressed air to clean vents and ports.
- Avoid Extreme Temperatures: Do not expose the unit to extreme heat or cold for extended periods, as this can affect performance and lifespan.
Troubleshooting
This section addresses common issues you might encounter with your XTRONS IXP12GFVL unit.
| Problem | Possible Cause | Solution |
|---|---|---|
| Unit does not power on. |
|
|
| No sound output. |
|
|
| GPS signal is weak or unavailable. |
|
|
| Touchscreen unresponsive. |
|
|
| Apple CarPlay/Android Auto not connecting. |
|
|
If the problem persists after attempting these solutions, please contact XTRONS customer support.
Specifications
| Feature | Detail |
|---|---|
| Model Name | IXP12GFVL |
| Operating System | Android 12 |
| CPU | 8-Core Processor (Cortex A75 x 2, Cortex A55 x 6) |
| RAM | 8 GB DDR4 |
| ROM | 128 GB SSD |
| Screen Size | 10.1 Inches |
| Screen Type | HD QLED |
| Resolution | 1280 x 720 |
| Connectivity | Bluetooth 5.0, USB, Dual Band Wi-Fi, 4G (with SIM card support) |
| Navigation | GPS, BDS, GLONASS support |
| Smartphone Integration | Integrated Apple CarPlay, Integrated Android Auto |
| Audio Features | DSP Equalizer, Digital Audio Output Mode |
| Vehicle Integration | Dual Canbus (for board info, steering wheel controls) |
| Mounting Type | Dashboard Mount (specific for VW Golf 7) |
Warranty Information
Specific warranty details for the XTRONS IXP12GFVL are typically provided at the point of purchase or included with the product packaging. Please refer to your purchase receipt or the warranty card for information regarding warranty duration, coverage, and claims process. Keep your proof of purchase in a safe place.
For warranty service, you may be required to provide the product model number (IXP12GFVL) and proof of purchase.
Customer Support
For technical assistance, troubleshooting beyond this manual, or inquiries regarding your XTRONS IXP12GFVL car stereo, please contact XTRONS customer support.
You can typically find contact information (website, email, phone number) on the official XTRONS website or in the product packaging.
When contacting support, please have the following information ready:
- Product Model: IXP12GFVL
- Description of the issue
- Steps already taken to resolve the issue
- Date and place of purchase


