
Real Instruments ZSD-009

Real Instruments ZSD-009 Digital Stop Watch User Manual
Model: ZSD-009 | Brand: Real Instruments
Introduction
The Real Instruments ZSD-009 Digital Stop Watch is a versatile and reliable chronograph designed for precise timing in various sports, fitness, and professional applications. It features a clear LCD display, waterproof construction, and functions including stopwatch, date, time, and alarm. This manual provides detailed instructions for setting up, operating, maintaining, and troubleshooting your ZSD-009 stopwatch.
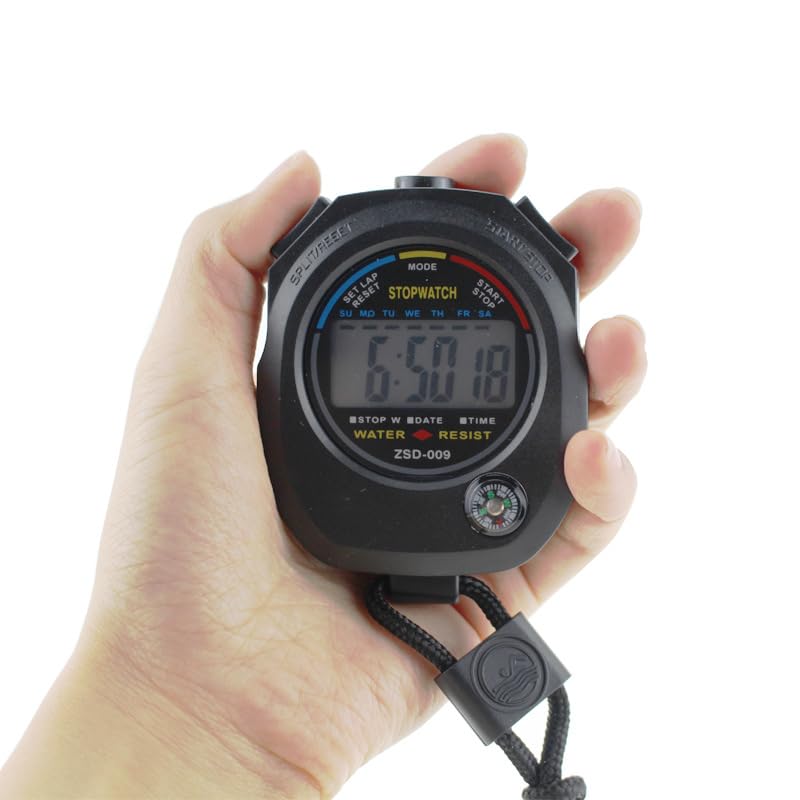
Figure 1: Real Instruments ZSD-009 Digital Stop Watch
This image shows the ZSD-009 Digital Stop Watch held in a hand, displaying its LCD screen with time, mode indicators, and button labels. The attached lanyard and a small compass are also visible.
Setup
1. Battery Installation
The ZSD-009 stopwatch typically comes with a pre-installed battery. If the display is dim or not functioning, battery replacement may be necessary. Refer to the Maintenance section for battery replacement instructions.
2. Initial Power On
The device powers on automatically when the battery is inserted. If the screen is blank, press any button to activate the display.
3. Setting Time and Date
- Press the MODE button repeatedly until the time display mode is shown.
- While in time display mode, press and hold the RESET button until the seconds digit begins to flash.
- Press the START/STOP button to adjust the flashing digit (seconds, minutes, hours, day, month, week).
- Press the RESET button to move to the next setting.
- Once all settings are adjusted, press the MODE button to exit the setting mode.

Figure 2: Button Functions
This image highlights the three main buttons on the stopwatch: "Split / Reset", "Mode", and "Start / Stop", along with their primary functions in different operational modes.
Operating Instructions
1. Switching Modes
Press the MODE button to cycle through the available functions: Stopwatch, Time/Date, and Alarm.

Figure 3: Mode Switching
This diagram illustrates how to switch between the timer function and the clock function by pressing the 'Mode' button.
2. Stopwatch Function
- Ensure the stopwatch is in the stopwatch mode (indicated by "STOPWATCH" on the display).
- Press START/STOP to begin timing.
- Press START/STOP again to pause the timing.
- Press RESET to clear the stopwatch to zero.
- For split timing: While the stopwatch is running, press RESET to display the split time. The stopwatch continues to run in the background. Press RESET again to return to the running time.
3. Alarm Function
- Press the MODE button until the alarm setting mode is displayed.
- Press and hold the RESET button until the hour digit flashes.
- Press START/STOP to adjust the hour.
- Press RESET to move to the minute setting.
- Press START/STOP to adjust the minutes.
- Press MODE to exit the alarm setting mode.
- To activate/deactivate the alarm, press START/STOP while in the alarm display mode. An alarm icon will appear/disappear.
4. Daily Use and Applications
The ZSD-009 is suitable for a wide range of activities, including:
- Sports Training: Track lap times, interval training, and overall performance.
- Coaching/Refereeing: Manage game times, timeouts, and individual event timings.
- Fitness: Monitor workout durations and rest periods.
- General Timing: Use for cooking, experiments, or any activity requiring precise time measurement.
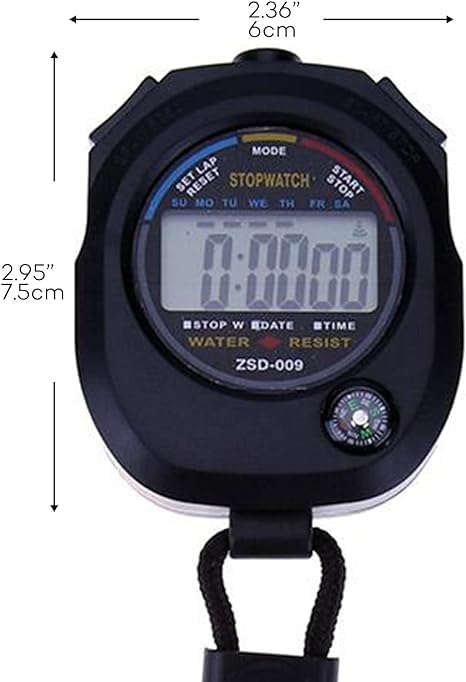
Figure 4: Versatile Applications
This image illustrates common uses for the stopwatch, including for referees/coaches, swimming, cycling, and running, highlighting its adaptability for various sports and fitness activities.
Maintenance
1. Cleaning
Wipe the stopwatch with a soft, damp cloth. Do not use abrasive cleaners or solvents, as they may damage the display or casing.
2. Water Resistance
The ZSD-009 is designed to be waterproof. However, avoid submerging it in water for extended periods or pressing buttons while submerged, as this may compromise the seal. Dry the stopwatch thoroughly if it gets wet.

Figure 5: Durable Design
This image emphasizes the stopwatch's construction from ABS hard plastic, its waterproof and shockproof design, and reinforced internal supports for durability.
3. Battery Replacement
When the display becomes dim or unresponsive, it's time to replace the battery. The ZSD-009 uses a standard button cell battery (e.g., CR2032). To replace:
- Locate the battery compartment on the back of the stopwatch.
- Carefully open the compartment using a small screwdriver or coin.
- Remove the old battery and insert a new one, ensuring correct polarity (+ side up).
- Securely close the battery compartment.
4. Storage
Store the stopwatch in a cool, dry place away from direct sunlight and extreme temperatures. If storing for an extended period, consider removing the battery to prevent leakage.
Troubleshooting
| Problem | Possible Cause | Solution |
|---|---|---|
| Display is blank or dim. | Low or dead battery. | Replace the battery (refer to Maintenance section). |
| Buttons are unresponsive. | Temporary software glitch; moisture ingress. | Remove and reinsert the battery to reset. Ensure the device is dry. |
| Incorrect time/date displayed. | Time/date not set correctly. | Follow the "Setting Time and Date" instructions in the Setup section. |
| Alarm does not sound. | Alarm not activated or set incorrectly. | Ensure the alarm icon is visible on the display. Verify alarm time setting. |
Specifications
| Feature | Detail |
|---|---|
| Model | ZSD-009 |
| Brand | Real Instruments |
| Material | Plastic (ABS hard plastic) |
| Color | Black |
| Product Dimensions | 6.4D x 8W x 2H Centimeters |
| Item Weight | 100 Grams |
| Screen Size | 1.5 Inches |
| Functions | Stopwatch (1/100 second), Date, Time (12/24 hour), Alarm, Split Timing |
| Water Resistance | Waterproof design (avoid prolonged submersion) |

Figure 6: Product Dimensions
This image provides a visual representation of the stopwatch's dimensions, indicating a height of 2.95 inches (7.5 cm) and a width of 2.36 inches (6 cm).
Warranty and Support
For warranty information and customer support, please refer to the documentation included with your purchase or contact Real Instruments directly through their official website or customer service channels. Keep your purchase receipt as proof of purchase for any warranty claims.
Manufacturer: Real Instruments
Country of Origin: India
Ask a question about this manual
Ask about setup, troubleshooting, compatibility, parts, safety, or missing instructions. Manuals+ will review the question and use this page’s manual context to help answer it.