
SAMA 3509W
SAMA 3509 ATX Mid Tower Computer Case User Manual
Model: 3509W
1. Introduction
This manual provides comprehensive instructions for the installation, operation, and maintenance of your SAMA 3509 ATX Mid Tower Computer Case. Please read this manual thoroughly before beginning assembly to ensure proper setup and to maximize the performance and longevity of your system.

Figure 1.1: SAMA 3509 ATX Mid Tower Computer Case (White)
2. Safety Information
- Always disconnect power from all components before installing or removing hardware.
- Handle tempered glass panels with care to prevent breakage.
- Avoid placing the case in direct sunlight or near heat sources.
- Ensure proper grounding to prevent electrostatic discharge (ESD) damage to components.
- Keep small parts and screws away from children.
3. Package Contents
Verify that all items listed below are present in your package:
- SAMA 3509 ATX Mid Tower Computer Case
- Pre-installed 4 ARGB Fans (3 front, 1 rear)
- Accessory Kit (screws, standoffs, cable ties)
- User Manual (this document)
4. Product Features
The SAMA 3509 case is designed for optimal performance and user convenience.
- Tool-Free Hinged Tempered Glass Panel: Features a magnetic, hinged tempered glass side panel for easy access to internal components.
- Extensive Motherboard Compatibility: Supports ATX, Micro-ATX (M-ATX), Mini-ITX (ITX), and Extended-ATX (E-ATX) motherboards.
- Vertical GPU Support: Accommodates graphics cards up to 345mm in length with vertical mounting options.
- Superior Cooling Capacity: Supports up to 8x120mm or 5x140mm fans and 360mm radiators for liquid cooling.
- Efficient Cable Management: Ample space and features for neat cable routing.
- Convenient Top I/O Panel: Includes dual high-speed USB 3.0 ports, headset, and HD audio jacks.
- Portable Storage Device Rack: Dedicated rack for HDD/SSD storage.
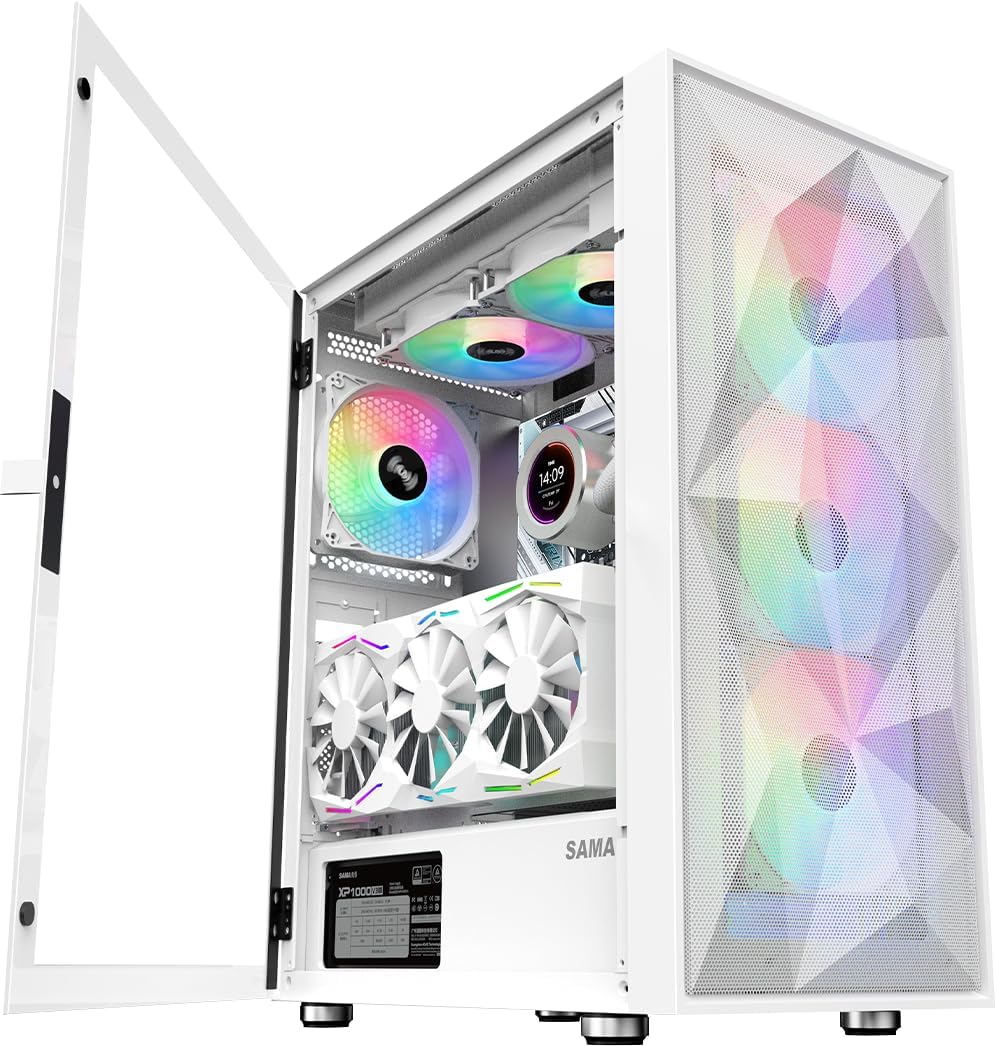
Figure 4.1: Hinged Tempered Glass Panel for easy access.

Figure 4.2: Top-mounted I/O Panel with USB 3.0 ports.
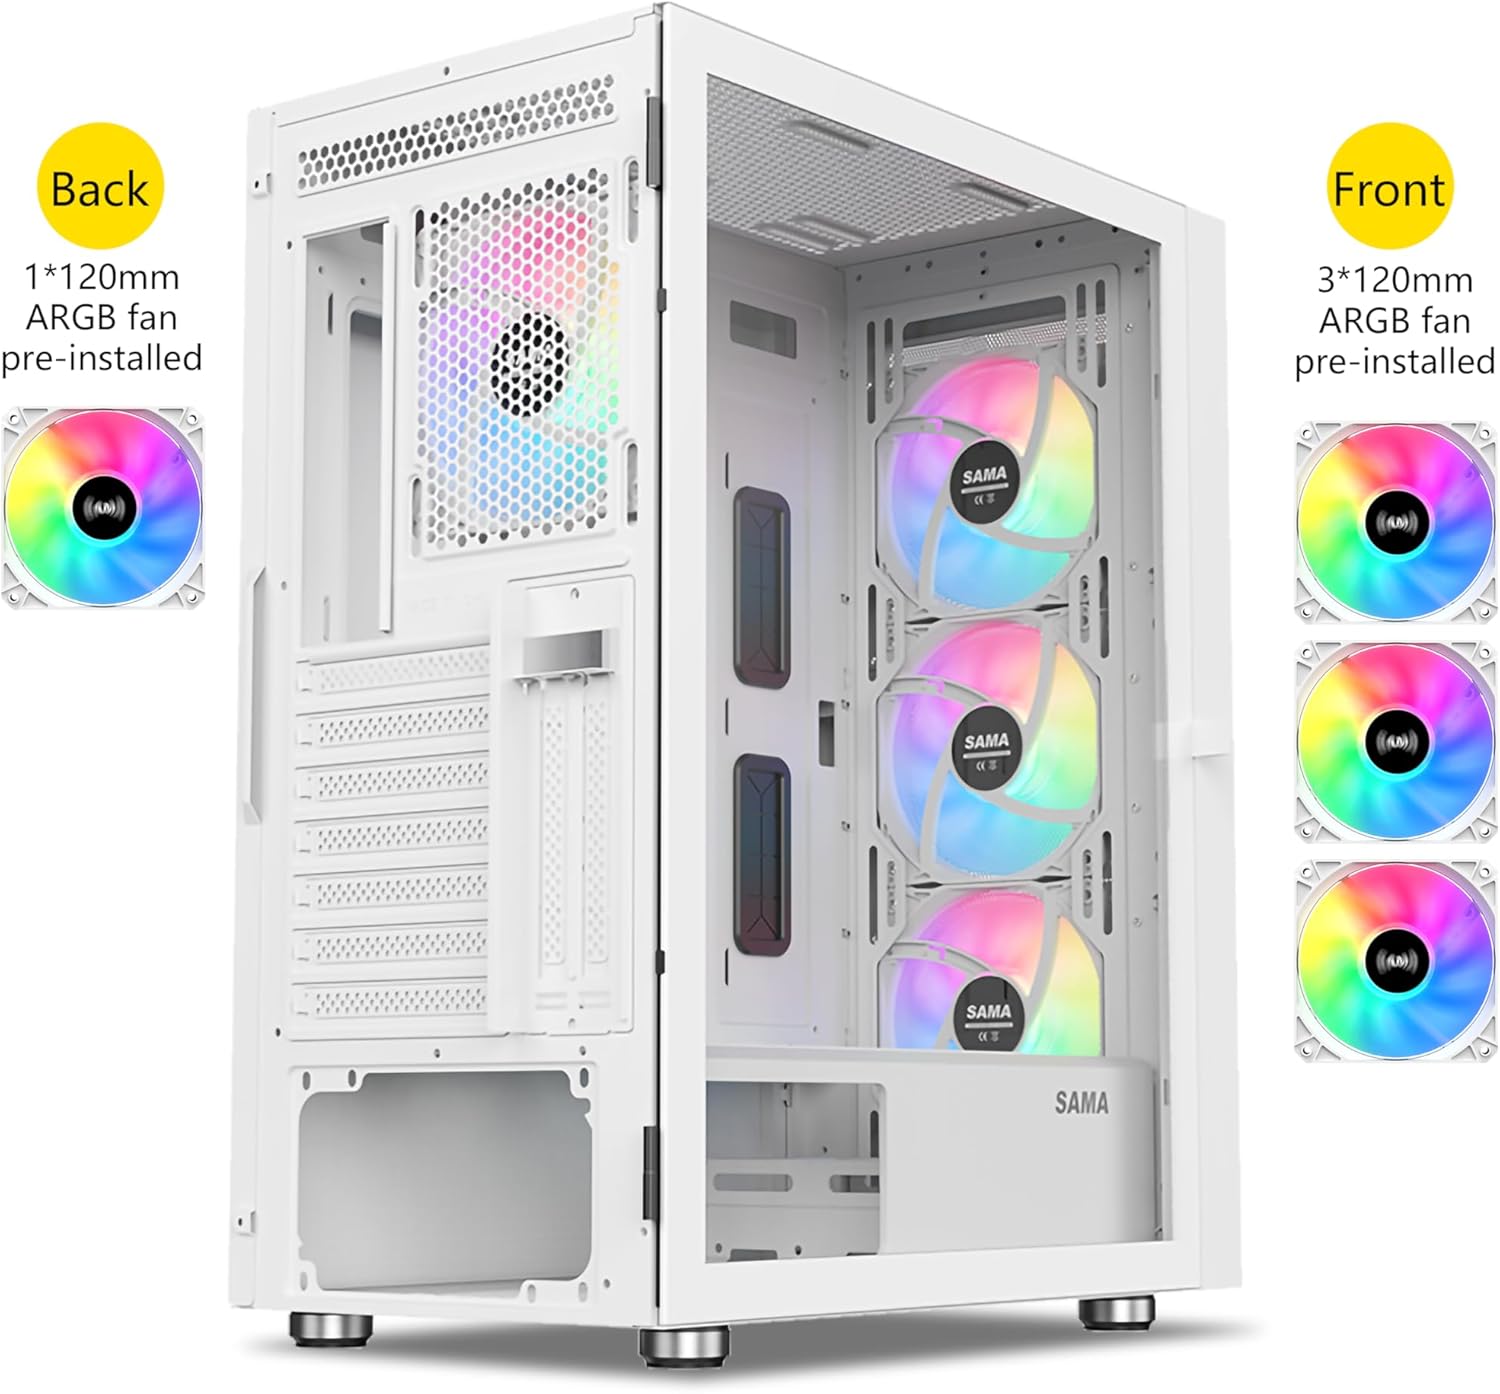
Figure 4.3: Pre-installed ARGB fans for optimal airflow.
Video 4.1: Overview of the SAMA 3509 computer case features and internal layout.
5. Setup and Installation
5.1 Preparing the Case
- Carefully unbox the SAMA 3509 case.
- Place the case on a stable, flat surface.
- Open the hinged tempered glass side panel by gently pulling it open.
- Remove the rear side panel to access the cable management area.
5.2 Motherboard Installation
The SAMA 3509 supports various motherboard form factors.
- Identify the correct standoff positions for your motherboard (ATX, M-ATX, ITX, E-ATX).
- Install any necessary additional standoffs from the accessory kit.
- Carefully place your motherboard onto the standoffs, aligning the screw holes.
- Secure the motherboard with the provided screws.

Figure 5.1: Motherboard compatibility layout.
5.3 Power Supply Unit (PSU) Installation
- Slide the PSU into its designated compartment at the bottom rear of the case.
- Secure the PSU with screws from the rear of the case.
- Route necessary power cables through the cable management cutouts.
5.4 Storage Drive Installation (HDD/SSD)
Utilize the portable storage device rack for 3.5" HDDs or 2.5" SSDs.
- Locate the drive bays/racks in the case.
- Mount your 3.5" HDDs or 2.5" SSDs into the appropriate trays or directly onto mounting points.
- Secure drives with screws.

Figure 5.2: Cable management area and drive mounting points.
5.5 Graphics Card (GPU) Installation
The case supports both horizontal and vertical GPU mounting.
- Horizontal Installation: Remove the necessary PCIe slot covers and insert your GPU directly into the motherboard's PCIe slot. Secure with screws.
- Vertical Installation: (Requires a separate PCIe riser cable, not included). Mount the GPU to the vertical bracket and connect it to the motherboard via the riser cable. Secure the bracket.

Figure 5.3: Hardware installation with vertical GPU support.
5.6 Cooling System Installation (Fans/Radiators)
The case comes with 4 pre-installed ARGB fans. Additional fans or liquid cooling radiators can be installed.
- Fan Support: Up to 8x120mm or 5x140mm fans.
- Radiator Support: Up to 360mm radiator at the front, and 240mm at the top.
- Mount additional fans or radiators to the designated mounting points (front, top, rear).
- Connect fan and ARGB cables to the pre-installed ARGB hub or directly to your motherboard.
6. Operating Instructions
6.1 Powering On Your System
- Ensure all internal components are securely connected and all cables are properly routed.
- Connect your monitor, keyboard, mouse, and other peripherals to your system.
- Plug the power cable into the PSU and then into a wall outlet.
- Flip the power switch on the PSU to the 'ON' position.
- Press the power button on the top I/O panel of the case.
6.2 ARGB Lighting Control
The pre-installed ARGB fans can be controlled via the dedicated LED button on the top I/O panel or through motherboard synchronization.
- LED Button: Press the LED button on the top panel to cycle through various lighting modes and colors.
- Motherboard Sync: If your motherboard supports ARGB synchronization (e.g., ASUS Aura Sync, MSI Mystic Light, Gigabyte RGB Fusion), connect the ARGB hub to your motherboard's 3-pin 5V ARGB header. Control lighting effects using your motherboard's software.
7. Maintenance
Regular maintenance helps ensure optimal performance and extends the lifespan of your computer components.
- Dust Filters: The SAMA 3509 features magnetic dust filters on the top and a PVC dust filter at the bottom. Regularly remove and clean these filters with compressed air or water (ensure they are completely dry before re-installation).
- Internal Cleaning: Periodically open the side panel and use compressed air to remove dust buildup from fans, heatsinks, and other components.
- Tempered Glass Panel: Clean the tempered glass with a soft, lint-free cloth and a non-abrasive glass cleaner. Avoid harsh chemicals.

Figure 7.1: Location of dust filters for easy cleaning.
8. Troubleshooting
| Problem | Possible Cause | Solution |
|---|---|---|
| System does not power on. | PSU switch off, power cables loose, front panel connectors incorrect. | Ensure PSU switch is ON. Check all power connections (24-pin, CPU, GPU). Verify front panel power switch cable is correctly connected to motherboard. |
| Fans are not spinning or RGB not working. | Fan cables loose, ARGB hub not powered, motherboard sync issue. | Check fan power cables. Ensure ARGB hub is connected to PSU. Try cycling modes with the LED button. If using motherboard sync, check software settings. |
| USB ports on top panel not working. | USB 3.0 header cable not connected to motherboard. | Verify the USB 3.0 cable from the top I/O panel is securely connected to the USB 3.0 header on your motherboard. |
| Poor airflow or high temperatures. | Dust buildup, incorrect fan orientation, insufficient fans. | Clean dust filters and internal components. Ensure fans are oriented for optimal intake/exhaust. Consider adding more fans if temperatures remain high. |
9. Specifications
| Feature | Detail |
|---|---|
| Model | 3509W |
| Case Type | Mid Tower |
| Dimensions (L x W x H) | 380mm x 205mm x 425mm (14.96" x 8.07" x 16.73") |
| Material | Steel, Plastic, Tempered Glass |
| Motherboard Support | E-ATX, ATX, Micro-ATX, Mini-ITX |
| Pre-installed Fans | 4 x 120mm ARGB Fans (3 Front, 1 Rear) |
| Fan Support | Front: 3x120mm / 3x140mm; Top: 2x120mm / 2x140mm; Rear: 1x120mm |
| Radiator Support | Front: 360mm; Top: 240mm; Rear: 120mm |
| GPU Clearance | Up to 345mm (horizontal/vertical) |
| CPU Cooler Height | Up to 163mm |
| PSU Length | Up to 190mm |
| Drive Bays | 2 x 3.5" HDD, 2 x 2.5" SSD (convertible) |
| I/O Ports | 2 x USB 3.0, HD Audio (Headset/Mic), LED Control Button, Power Button |
10. Warranty and Support
SAMA products are manufactured to the highest quality standards. For warranty information and technical support, please refer to the official SAMA website or contact your local distributor.
For further assistance, you may visit the SAMA Official Store on Amazon.
Please retain your proof of purchase for warranty claims.
Ask a question about this manual
Ask about setup, troubleshooting, compatibility, parts, safety, or missing instructions. Manuals+ will review the question and use this page’s manual context to help answer it.