
1. Introduction
This manual provides essential instructions for the safe and efficient operation, installation, and maintenance of your Velivi 24-inch 154-bottle single zone wine cooler refrigerator, model KMHJ408. Please read this manual thoroughly before using the appliance and retain it for future reference.

Image 1.1: Front view of the Velivi 24-inch 154-bottle single zone wine cooler.
2. Safety Information
To reduce the risk of fire, electric shock, or injury when using your appliance, follow these basic precautions:
- Read all instructions before using the wine cooler.
- Do not allow children to climb, stand, or hang on the shelves of the wine cooler.
- Do not clean appliance parts with flammable fluids. The fumes can create a fire hazard or explosion.
- Do not store or use gasoline or other flammable vapors and liquids in the vicinity of this or any other appliance.
- Unplug the wine cooler before cleaning or performing any maintenance.
- Ensure the appliance is properly grounded.
- Keep ventilation openings, in the appliance enclosure or in the built-in structure, clear of obstruction.
- Do not damage the refrigerant circuit.
- This appliance is intended for household use only.

Image 2.1: The integrated safety lock mechanism, designed to prevent unauthorized access to your wine collection.
3. Product Overview and Features
The Velivi KMHJ408 wine cooler is designed to store your wine collection at optimal conditions. Key features include:
- Large Capacity: Stores up to 154 standard 750ml wine bottles.
- Precise Temperature Control: Maintains a stable temperature range of 41°F-65°F (5°C-18°C).
- Ultra-Silent Operation: Equipped with an energy-efficient compressor for quiet performance and minimal vibration, ensuring wine sediment remains undisturbed.
- Adjustable Wood Shelves: High-quality, removable wooden shelves protect bottles and allow for flexible storage configurations.
- Blue LED Lighting: Interior blue LED light enhances visibility and creates an elegant display without harming wine tannins.
- Double Tempered Glass Door: Low-E glass provides effective thermal insulation and UV protection.
- Forced Circulation Refrigeration System: A fan system ensures even cooling throughout the cabinet.
- Safety Lock: Integrated lock secures your wine collection.
- Stainless Steel Handle: Durable and ergonomic handle for easy door access.
3.1 Components
- Wine Cooler Unit
- Adjustable Wooden Shelves
- Door Handle
- Keys for Safety Lock
- User Manual

Image 3.1: Interior view highlighting the large capacity and adjustable wooden shelves.

Image 3.2: Illustration of the forced circulation refrigeration system ensuring even cooling.

Image 3.3: The wine cooler can be installed as a freestanding unit or built into cabinetry.

Image 3.4: Depiction of the wine cooler's low noise operation, suitable for quiet environments.
4. Setup and Installation
4.1 Unpacking
- Remove all packaging materials, including the foam base and adhesive tape.
- Inspect the wine cooler for any damage. Report any damage to your retailer immediately.
- Keep packaging materials out of reach of children.
4.2 Location Requirements
- Place the wine cooler on a flat, solid surface strong enough to support it when fully loaded.
- Ensure adequate ventilation. For freestanding installation, allow at least 2 inches (5 cm) of space at the back and sides, and 4 inches (10 cm) at the top. For built-in installation, ensure proper front ventilation as designed.
- Avoid direct sunlight or heat sources (e.g., oven, radiator).
- Maintain an ambient room temperature between 60°F (16°C) and 90°F (32°C).
4.3 Leveling the Appliance
It is crucial for the wine cooler to be level for proper operation. Adjust the leveling legs at the bottom of the unit by turning them clockwise to raise or counter-clockwise to lower.
4.4 Electrical Connection
- Ensure the power outlet is a standard 115V AC, 60Hz, 3-prong grounded outlet.
- Do not use an extension cord or adapter plug.
- Plug the wine cooler into its own dedicated electrical outlet to prevent power fluctuations.
4.5 Initial Startup
After installation, allow the wine cooler to stand upright for at least 2-4 hours before plugging it in. This allows the refrigerant to settle. Once plugged in, let the unit run empty for 24 hours to stabilize the internal temperature before loading bottles.
5. Operating Instructions
5.1 Control Panel

Image 5.1: The smart touch control panel for managing settings.
The control panel is located at the top of the interior. It features touch-sensitive buttons for various functions:
- Light Control (
 ): Toggles the interior blue LED light on/off.
 - Celsius/Fahrenheit (
 ): Switches the temperature display between Celsius and Fahrenheit.
 - Temperature Setting (
 ): Activates temperature adjustment mode.
 - Temperature Up (
 ) / Temperature Down (
 ): Adjusts the desired temperature.
 - Power Switch (
 ): Turns the appliance on or off.
5.2 Setting the Temperature
- Press the Temperature Setting button. The display will flash.
- Use the Temperature Up or Temperature Down buttons to select your desired temperature.
- Once the desired temperature is set, the display will stop flashing and show the current internal temperature. The unit will then work to reach the set temperature.
5.3 Loading Bottles
- Ensure bottles are clean and dry before placing them on the shelves.
- Arrange bottles to allow for proper air circulation. Do not overcrowd shelves.
- Adjust shelf height as needed to accommodate different bottle sizes.
6. Maintenance
6.1 Cleaning the Interior
- Unplug the wine cooler before cleaning.
- Wash the interior with a mild detergent and warm water solution.
- Wipe dry with a soft cloth.
- Removable shelves can be cleaned with a mild soap solution and dried thoroughly.
6.2 Cleaning the Exterior
- Clean the exterior with a soft cloth and mild detergent.
- For stainless steel surfaces, use a stainless steel cleaner and polish in the direction of the grain.
- Clean the door gasket regularly to ensure a proper seal.
6.3 Defrosting
The wine cooler features an automatic defrost system. Frost will melt and drain into a drip tray at the back of the unit. Ensure the drain hole is not blocked.
6.4 Power Failure
Most power failures are corrected within a few hours and should not affect the temperature of your appliance if you minimize the number of times the door is opened. For longer power failures, consider placing dry ice in the upper part of your wine cooler.
7. Troubleshooting
Review this section before calling for service. It may save you time and expense.
| Problem | Possible Cause | Solution |
|---|---|---|
| Wine cooler does not operate. | Not plugged in; circuit breaker tripped; temperature control set to OFF. | Ensure plug is secure; reset circuit breaker; set temperature control to desired setting. |
| Temperature is not cold enough. | Door opened too frequently; door not closed completely; door gasket weak; warm bottles added; poor ventilation. | Minimize door openings; ensure door is fully closed; check door gasket for leaks; allow new bottles to cool gradually; ensure proper clearance around the unit. |
| Excessive vibration. | Appliance is not level. | Adjust the leveling legs. |
| Noise from the unit. | Normal operating sounds (compressor, fan); loose parts. | These sounds are normal. If unusual, check for loose items inside or outside the unit. |
| Door will not close properly. | Appliance not level; gasket dirty or damaged; shelves out of position. | Level the appliance; clean or replace gasket; ensure shelves are correctly inserted. |
8. Specifications
| Feature | Specification |
|---|---|
| Brand | Velivi |
| Model Number | KMHJ408 |
| Capacity | 154 Bottles (standard 750ml) / 14.8 Cubic Feet |
| Temperature Range | 41°F - 65°F (5°C - 18°C) |
| Installation Type | Freestanding / Built-In / Undercounter |
| Product Dimensions (D x W x H) | 27.2 x 23.5 x 62.9 inches |
| Item Weight | 100 Pounds |
| Voltage | 115 Volts |
| Defrost System | Automatic |
| Door Material | Stainless Steel |
| Shelf Type | Wooden |
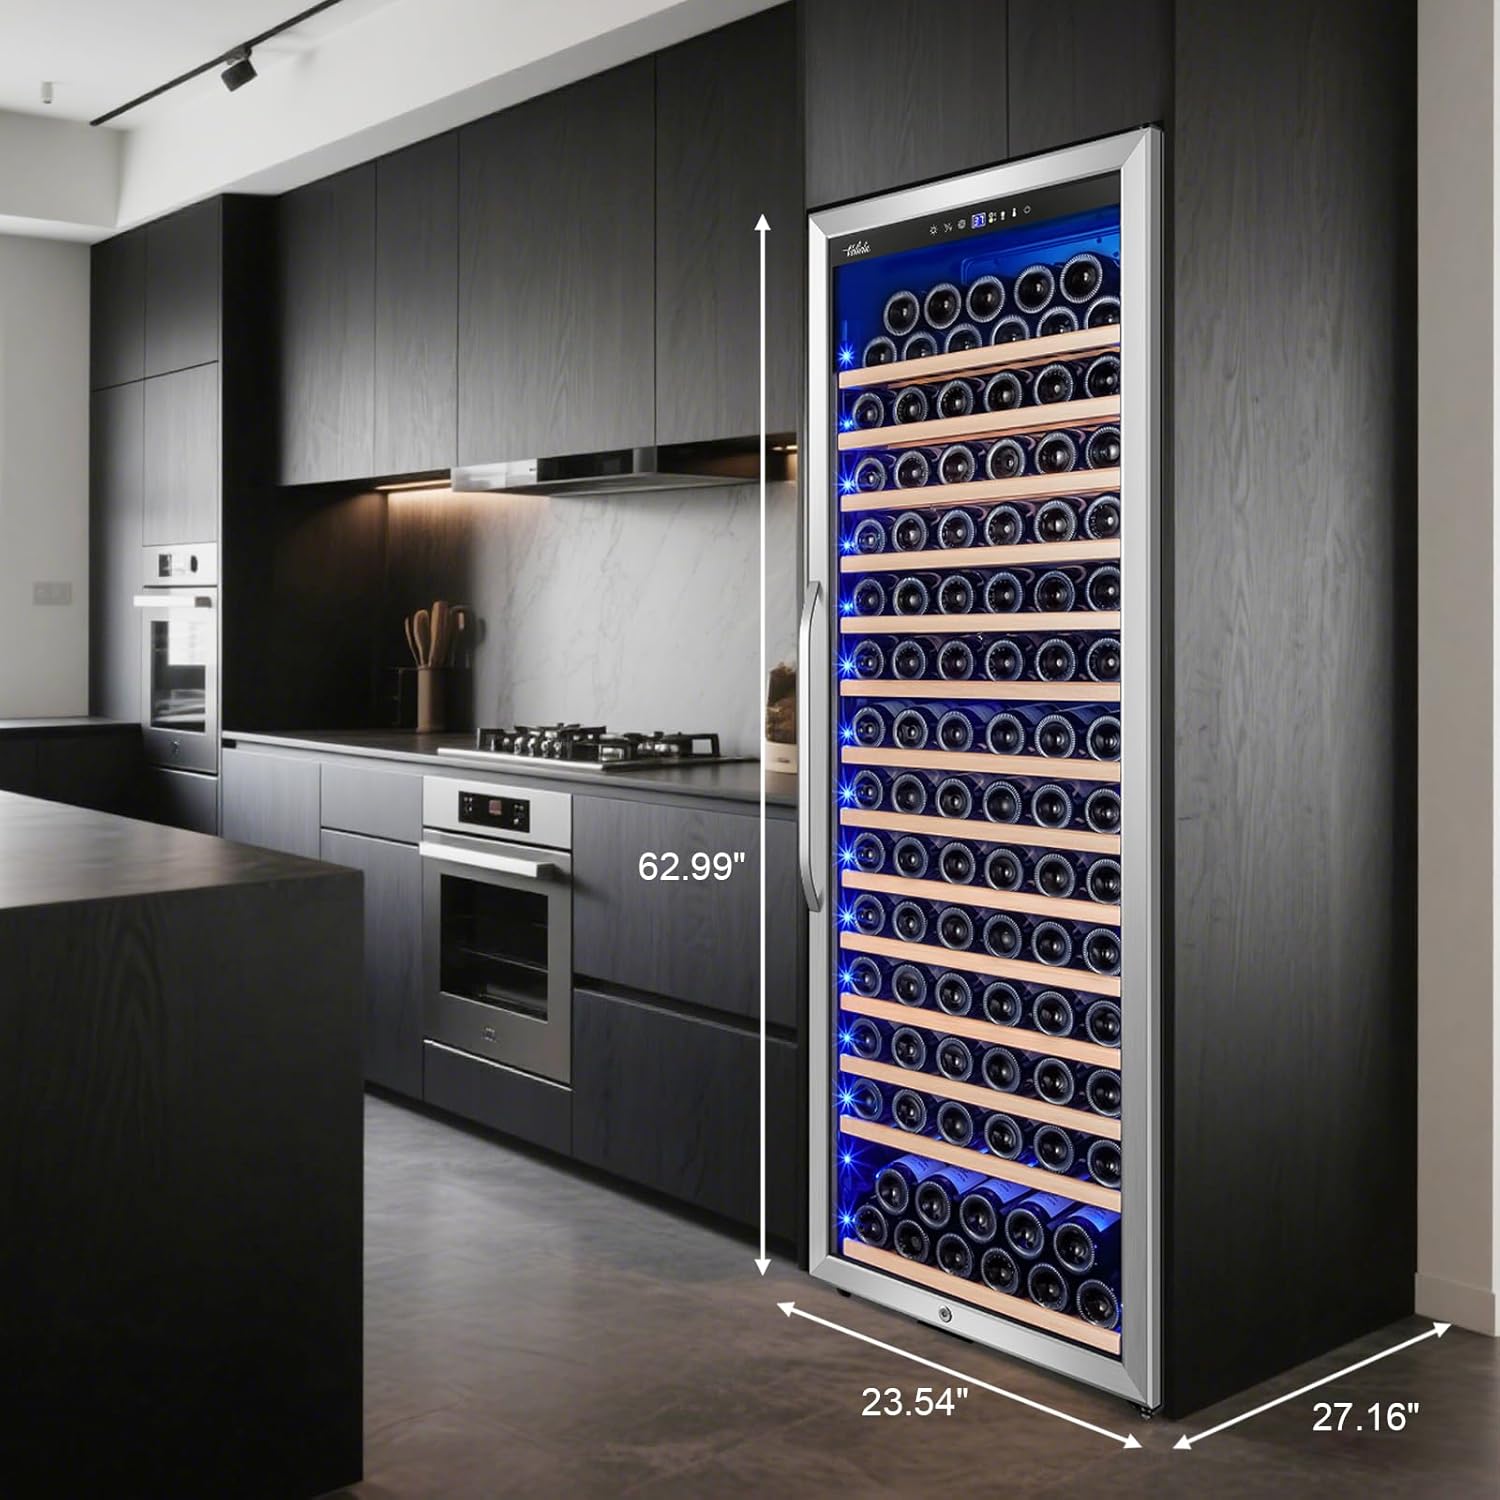
Image 8.1: Detailed dimensions of the Velivi KMHJ408 wine cooler.
9. Warranty and Customer Support
For warranty information or technical assistance, please contact the Velivi Store directly. Details regarding specific warranty periods and terms are typically provided with your purchase documentation.
You can visit the official Velivi Store on Amazon for further support and product information: Velivi Store
Please have your model number (KMHJ408) and purchase date available when contacting support.