Introduction
This manual provides comprehensive instructions for the safe and effective use of your Dragonhawk Wireless Rotary Tattoo Pen Machine, model YZBTD. Please read this manual thoroughly before operating the device to ensure optimal performance and longevity.
Safety Information
For external use only.
- Always ensure the machine is clean and sterilized before and after each use.
- Use only compatible and sterile needle cartridges.
- Do not operate the machine if it appears damaged or malfunctioning.
- Keep out of reach of children.
- Consult a professional for proper tattooing techniques and safety protocols.
Product Overview
The Dragonhawk Wireless Rotary Tattoo Pen Machine is designed for precision and versatility, suitable for both beginners and experienced artists. It features a powerful coreless motor, adjustable stroke length, and a long-lasting battery for uninterrupted work.

Image: The Dragonhawk Wireless Rotary Tattoo Pen Machine, showcasing its sleek black and silver design.
Key Features:
- Enhanced Performance: Equipped with a 1500mAh battery, providing extended working time and a quick 1.5-hour charging time.
- 7 Adjustable Strokes: Easily change stroke length from 2.4mm to 4.2mm by turning the adjustment knob, offering versatility for various tattooing styles.
- Coreless Motor: Features a powerful bagged Mcore motor for exceptional power, durability, and smooth operation, even on thick skin.
- Stable Drive System: Ensures smooth, precise, soft, and quiet operation, facilitating gentle and even ink transfer.
- Professional-Grade Tool: Ideal for precise lining, layering colors, shading, and blending.
- Two Operating Modes: "L" for lining mode and "S" for shading mode, with automatic voltage memory.
- Comfortable Control: Ergonomic design allows for one-hand adjustment of stroke length.
- Type-C Charging Port: Convenient and modern charging interface.
Setup
- Charge the Machine: Ensure the tattoo machine is fully charged before initial use. Connect the provided Type-C charging cable to the machine and a suitable power source. The OLED display will indicate charging status.

Image: Close-up of the machine's battery display, highlighting the 1500mAh capacity and 1.5-hour charging time.
- Attach Needle Cartridge: Securely attach the desired sterile needle cartridge to the machine. Ensure it clicks into place firmly.
- Adjust Needle Depth: Rotate the grip of the machine to adjust the needle depth according to your preference and the specific tattooing requirement.
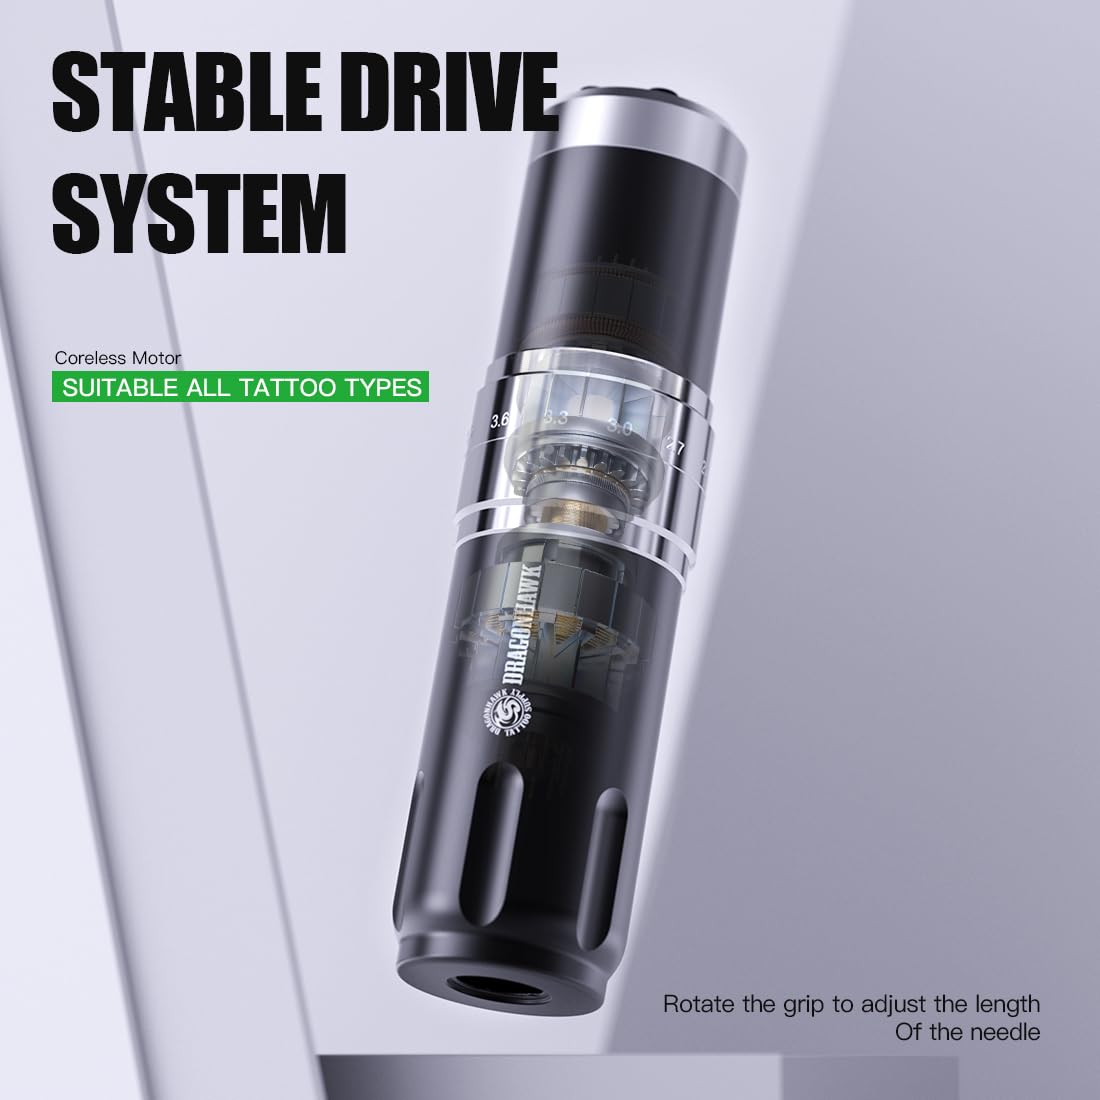
Image: The tattoo machine showing the internal coreless motor and the visible stroke adjustment mechanism.
Operating Instructions
- Power On/Off: Long press the power button (marked with a circle) to turn the machine on or off. The OLED screen will display the remembered voltage from the previous session and enter standby mode.

Image: Detailed view of the control panel, indicating power, mode, timing, voltage adjustment, and battery display.
- Adjust Voltage: Use the '+' and '-' buttons to increase or decrease the operating voltage. The current voltage is displayed on the OLED screen.
- Select Mode (Lining/Shading): Click the 'M' button to switch between "L" (lining mode) and "S" (shading mode). The machine automatically memorizes the voltage setting for each mode.
- Adjust Stroke Length: Rotate the adjustment knob on the machine body to select your desired stroke length from 2.4mm to 4.2mm. This can be done with one hand during operation.
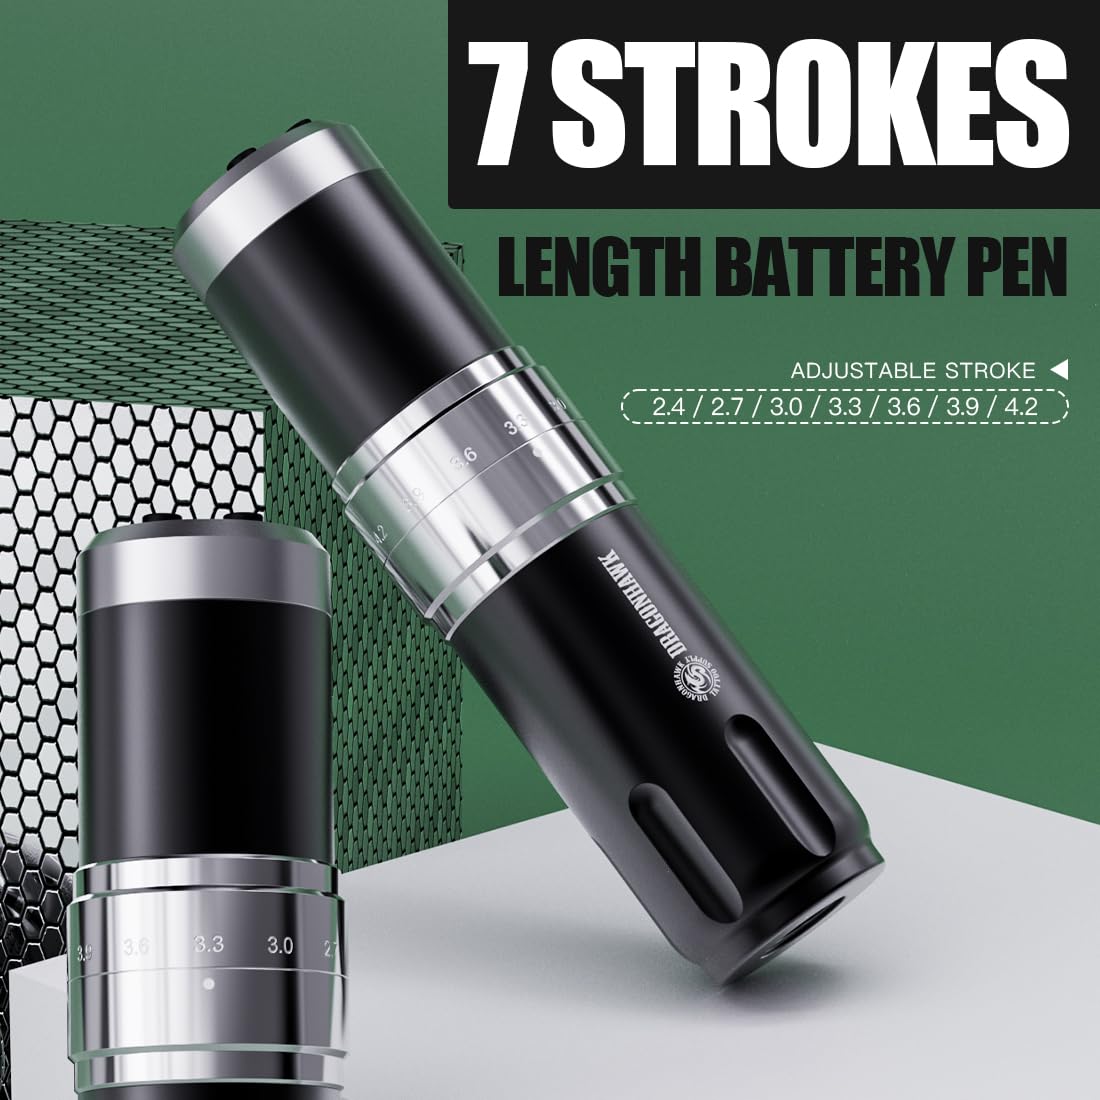
Image: The tattoo machine highlighting the adjustable stroke length mechanism with markings for 2.4, 2.7, 3.0, 3.3, 3.6, 3.9, and 4.2mm.
- Begin Tattooing: Once settings are configured, apply the ink needle and begin tattooing by gently pressing the needle against the skin.
Maintenance
- Cleaning: After each use, thoroughly clean the machine. Disassemble any removable parts that come into contact with ink or bodily fluids and sterilize them according to industry standards. Wipe the main body with a disinfectant wipe.
- Storage: Store the machine in a clean, dry place away from direct sunlight and extreme temperatures.
- Battery Care: To prolong battery life, avoid fully discharging the battery frequently. Charge the machine regularly, even if not in use for extended periods.
- Inspection: Regularly inspect the machine for any signs of wear, damage, or loose components. Do not operate if any issues are detected.
Troubleshooting
| Problem | Possible Cause | Solution |
|---|---|---|
| Machine does not turn on. | Low battery or power button not pressed correctly. | Charge the machine fully. Ensure the power button is long-pressed. |
| Inconsistent needle movement. | Loose needle cartridge or incorrect stroke setting. | Re-attach the needle cartridge securely. Verify stroke setting. |
| Machine vibrates excessively or makes unusual noise. | Internal component issue or motor obstruction. | Discontinue use immediately. Contact customer support for assistance. |
| Battery drains quickly. | Battery degradation or high voltage usage. | Ensure full charge before use. Consider lower voltage settings if possible. If issue persists, contact support. |
Specifications
| Feature | Detail |
|---|---|
| Model Number | YZBTD |
| Motor | Coreless Motor (Bagged Mcore) |
| Speed | 8V 6500RPM |
| Dimensions (Diameter & Length) | 32.5mm x 130mm |
| Weight | 213g (approx. 0.47 lbs) |
| Battery Capacity | 1500mAh |
| Adjustable Stroke Lengths | 2.4mm, 2.7mm, 3.0mm, 3.3mm, 3.6mm, 3.9mm, 4.2mm |
| Charging Cable Type | Type-C |
| Working Time | Up to 5 hours (depending on usage) |
| Charging Time | Approximately 1.5 hours |

Image: Visual representation of the machine's key specifications and parameters.
Warranty and Support
Dragonhawk provides coverage for your product to ensure peace of mind. For any inquiries, issues, or support needs, please reach out through Amazon's messaging system.
For additional guidance, video tutorials, setup guides, and professional tips, visit the official Dragonhawk YouTube channel: Youtube.com/@Dragonhawkofficial.


