
MSI Cubi 5 12M-093BUS
MSI Cubi 5 12M-093BUS Barebones Mini PC User Manual
Model: Cubi 5 12M-093BUS
Brand: MSI
1. Introduction
The MSI Cubi 5 12M-093BUS is a compact and energy-efficient barebones mini PC designed for a variety of applications, from home office to commercial use. This manual provides essential information for setting up, operating, and maintaining your device. As a barebones system, it requires the installation of RAM and storage to function.
2. What's in the Box
Please verify that all items are present in your package:
- MSI Cubi 5 Mini PC Unit
- Power Adapter
- VESA Mount Kit (for monitor mounting)
- Screws for 2.5-inch storage device
Note: RAM (DDR4 SODIMM) and storage devices (2.5-inch SATA SSD/HDD or M.2 NVMe SSD) are not included and must be purchased separately.

Image: Contents of the package, showing the MSI Cubi 5 Mini PC, a 2.5-inch storage drive, and a mounting bracket.
3. Setup Guide
3.1. Installing RAM and Storage
- Carefully open the chassis of the MSI Cubi 5. Refer to the quick start guide for specific instructions on accessing the internal components.
- Install one or two DDR4 SODIMM memory modules into the available slots. Ensure they are seated firmly until the clips snap into place.
- Install your chosen storage device:
- For a 2.5-inch SATA SSD/HDD: Secure the drive into the provided bracket using the included screws, then connect the SATA data and power cables.
- For an M.2 NVMe SSD: Insert the M.2 module into the designated slot and secure it with the screw.
- Close the chassis securely.
3.2. Connecting Peripherals
Connect your essential peripherals to the mini PC:
- Display: Connect your monitor(s) using an HDMI or DisplayPort cable. The Cubi 5 supports dual displays.
- Keyboard and Mouse: Connect your USB keyboard and mouse to the available USB ports (USB 3.0 or USB 2.0).
- Network: For wired internet, connect an Ethernet cable to one of the two LAN ports. For wireless, ensure your WiFi antenna is connected (if external) or that the internal antenna is unobstructed.
- Power: Connect the power adapter to the DC-in port on the rear of the mini PC, then plug it into a power outlet.

Image: Front view of the MSI Cubi 5 Mini PC, highlighting the front panel ports including USB-A, USB-C (Thunderbolt), and audio jacks.

Image: Rear view of the MSI Cubi 5 Mini PC, displaying the HDMI, DisplayPort, dual Ethernet ports, USB-A ports, and DC power input.
3.3. First Boot and Operating System Installation
- Press the power button located on the front panel.
- The system will power on. Since this is a barebones unit, you will need to install an operating system (e.g., Windows, Linux) from a bootable USB drive or other media. Follow the on-screen instructions for your chosen OS installation.
- After OS installation, install the necessary drivers, which can typically be found on the MSI support website for your specific model.
4. Operating Instructions
4.1. Power On/Off
- Power On: Press the power button on the front panel.
- Power Off: Use the operating system's shutdown function. Alternatively, press and hold the power button for 5 seconds for a forced shutdown (use only when necessary).
4.2. Display Configuration
The MSI Cubi 5 supports connecting up to two displays simultaneously via its HDMI and DisplayPort outputs. You can configure display settings (resolution, orientation, extended/duplicate desktop) within your operating system's display settings.
4.3. Network Connectivity
- Wired Network: Connect an Ethernet cable to one of the two 2.5G or 1G LAN ports for a stable wired internet connection.
- Wireless Network (Wi-Fi 6E): Access your operating system's network settings to connect to available Wi-Fi networks. The Wi-Fi 6E standard provides faster speeds and lower latency.
- Bluetooth 5.2: Use Bluetooth to connect wireless peripherals such as keyboards, mice, or headphones. Enable Bluetooth in your OS settings and pair devices.
4.4. USB and Thunderbolt Ports
The Cubi 5 features multiple USB ports, including USB 3.0 (SuperSpeed) for high-speed data transfer and a Thunderbolt Type-C port for versatile connectivity, supporting data, display, and power delivery (with compatible devices).
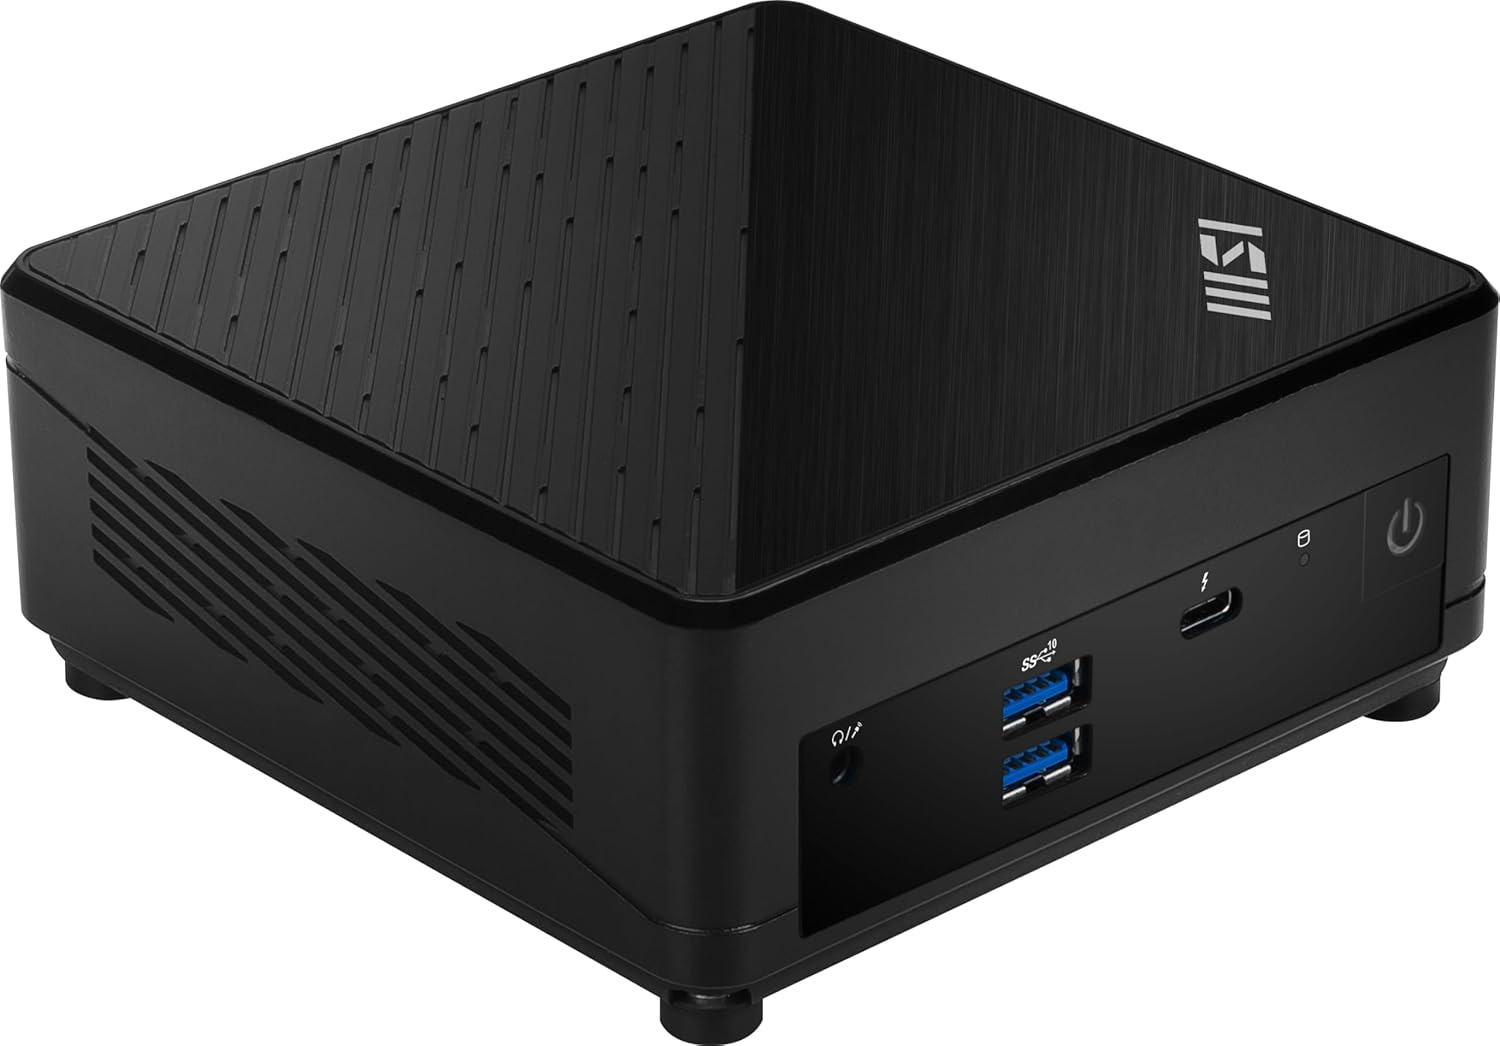
Image: Angled front view of the MSI Cubi 5 Mini PC, showcasing its compact design and front panel ports.
5. Maintenance
5.1. Cleaning
- Regularly clean the exterior of the mini PC with a soft, dry cloth.
- Use compressed air to gently clear dust from the ventilation grilles to ensure proper airflow and prevent overheating. Do this with the device powered off and unplugged.
- Avoid using liquid cleaners directly on the device.
5.2. Software Updates
Keep your operating system and device drivers updated to ensure optimal performance, security, and compatibility. Visit the official MSI website for the latest driver downloads for your Cubi 5 model.
5.3. Storage Management
Periodically check your storage usage and free up space by deleting unnecessary files or uninstalling unused applications. This helps maintain system responsiveness.

Image: Side view of the MSI Cubi 5 Mini PC, illustrating the ventilation slots crucial for heat dissipation.
6. Troubleshooting
If you encounter issues with your MSI Cubi 5, refer to the following common solutions:
- No Power:
- Ensure the power adapter is securely connected to both the mini PC and a working power outlet.
- Verify the power outlet is functional by testing it with another device.
- No Display Output:
- Check that the display cable (HDMI or DisplayPort) is firmly connected to both the mini PC and the monitor.
- Ensure your monitor is set to the correct input source.
- Try a different display cable or monitor if possible.
- System Not Booting / OS Not Found:
- Verify that RAM modules and storage devices are correctly installed and seated firmly.
- Ensure an operating system has been successfully installed on the storage device.
- Check BIOS/UEFI settings to confirm the boot order is correct.
- Network Connectivity Issues:
- For wired connections, check the Ethernet cable and router/modem status.
- For wireless connections, ensure Wi-Fi is enabled in the OS and you are connected to the correct network with the correct password.
- Update network drivers from the MSI website.
- Excessive Fan Noise:
- Ensure the mini PC is placed in a well-ventilated area and that air vents are not obstructed.
- Clean dust from the vents as described in the Maintenance section.
- High CPU usage can cause fans to spin faster; monitor system resource usage.
7. Specifications
| Feature | Detail |
|---|---|
| Model Name | Cubi 5 12M-093BUS |
| Processor | Intel Core i5-1235U (3.3 GHz) |
| Graphics Coprocessor | Intel UHD Graphics 750 (Integrated) |
| Max Screen Resolution | 7680x4320 |
| RAM Type | DDR4 SDRAM (Barebones, requires user installation) |
| Hard Drive Interface | Solid State (Barebones, requires user installation) |
| Wireless Type | 802.11ax (WiFi 6E), Bluetooth 5.2 |
| USB 3.0 Ports | 4 |
| Thunderbolt Port | 1 (Type-C) |
| Video Output | HDMI, DisplayPort |
| Ethernet | 2.5G LAN, 1G LAN |
| Item Weight | 1 pounds |
| Product Dimensions (LxWxH) | 4.88 x 4.88 x 2.11 inches |
| Color | Black |
| Operating System | Windows (Not included, user installable) |
8. Warranty and Support
MSI products are covered by a manufacturer's warranty. For detailed warranty information, including terms, conditions, and duration, please refer to the warranty card included with your product or visit the official MSI website.
For technical support, driver downloads, FAQs, and service requests, please visit the MSI support portal:
When contacting support, please have your product model (Cubi 5 12M-093BUS) and serial number ready.
Related documentsCubi 5 12M-093BUS


Ask a question about this manual
Ask about setup, troubleshooting, compatibility, parts, safety, or missing instructions. Manuals+ will review the question and use this page’s manual context to help answer it.