
1. Introduction
This manual provides detailed instructions for the Accutime Spider-Man LCD Watch SPD40166. This digital watch features a Spider-Man design with flashing LEDs and includes additional accessories: a rubber strap, a mini torch, and an LED light. Please read this manual thoroughly to ensure proper use and care of your product.
2. Package Contents
The Accutime Spider-Man LCD Watch SPD40166 gift set includes the following items:
- 1 x LCD Digital Watch (Spider-Man design)
- 1 x Additional Rubber Strap
- 1 x Mini Torch with Carabiner
- 1 x LED Light with Carabiner
- Batteries (pre-installed or included for watch and accessories)
- Instruction Manual

Figure 2.1: Front view of the Accutime Spider-Man LCD Watch Gift Set packaging, displaying the watch, mini torch, and LED light.

Figure 2.2: Back view of the gift set packaging, detailing the included components.
3. Setup
3.1. Watch Battery Activation
The watch comes with pre-installed LR41 button cell batteries. If the display is not active, check for a small plastic tab in the crown or button area. Remove this tab to activate the battery. If no tab is present, the watch should be ready for use.
3.2. Setting the Time and Date
The watch features buttons on the right side of the case for setting the time and date. Refer to the specific button functions below:
- Mode Button: Press this button to cycle through display modes (Time, Date, Seconds).
- Set Button: While in a setting mode (e.g., flashing hours), press this button to adjust the value.
- Light Button: Activates the flashing LED feature.
To set the time (hours, minutes) and date (month, day):
- Press the Mode Button repeatedly until the desired setting (e.g., hours) begins to flash.
- Use the Set Button to adjust the flashing value.
- Continue pressing the Mode Button to move to the next setting (minutes, month, day) and adjust each using the Set Button.
- Once all settings are complete, press the Mode Button until the display returns to normal time mode.

Figure 3.1: Close-up of the watch face, showing the digital display and Spider-Man graphic.
3.3. Attaching the Rubber Strap
The watch comes with an adjustable rubber strap. To attach or adjust the strap:
- Thread the strap through the watch lugs if it is not already attached.
- Adjust the length to fit comfortably on the wrist. The strap is designed to be easily threaded and closed at the ends using the tang buckle mechanism.

Figure 3.2: The included rubber watch strap.
4. Operating Instructions
4.1. Displaying Time and Date
The watch displays hours, minutes, seconds, month, and day. Press the Mode Button (typically the top right button) to cycle through these display modes.
4.2. Flashing LED Feature
To activate the flashing LED lights on the watch face, press the Light Button (typically the bottom right button). The lights will flash for a few seconds and then automatically turn off to conserve battery life.
4.3. Using the Mini Torch and LED Light
The mini torch and LED light accessories are equipped with carabiner hooks for easy attachment to bags, keys, or clothing. Both accessories operate independently and are powered by LR41 batteries.
- Mini Torch: Twist the head of the torch to turn it on or off.
- LED Light: Press the button on the body of the LED light to activate or deactivate the light.
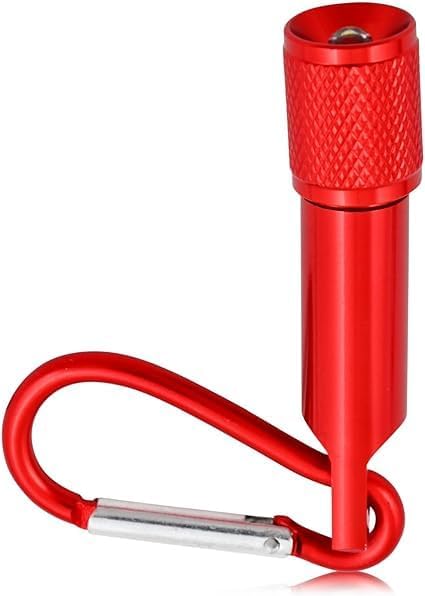
Figure 4.1: The mini torch with carabiner.

Figure 4.2: The LED light with carabiner.
5. Maintenance
5.1. Battery Replacement
The watch and accessories use LR41 button cell batteries. When the display dims or the lights stop working, it is time to replace the batteries.
- Watch: Requires 2 x LR41 batteries. Carefully open the back casing of the watch using a small screwdriver. Replace the old batteries with new ones, ensuring correct polarity. Securely close the casing.
- Mini Torch: Requires 4 x LR41 batteries. Unscrew the head of the torch to access the battery compartment. Replace batteries and reassemble.
- LED Light: Requires LR41 batteries (quantity may vary, typically 1-2). Open the battery compartment, replace batteries, and close securely.
Warning: Keep button cell batteries out of reach of small children. If swallowed, seek immediate medical attention.
5.2. Cleaning
To clean the watch and accessories, wipe them gently with a soft, dry cloth. Avoid using harsh chemicals or abrasive materials, as these can damage the finish or electronic components. The watch is not waterproof; avoid submerging it in water.
5.3. Storage
Store the watch and accessories in a cool, dry place away from direct sunlight and extreme temperatures. If storing for an extended period, consider removing the batteries to prevent leakage.
6. Troubleshooting
- Watch display is blank or dim:
Check if the battery activation tab has been removed. Replace the LR41 batteries (2 required) if they are depleted. - LED flashing feature not working:
Ensure the batteries are not depleted. Replace the LR41 batteries in the watch if necessary. - Time or date is incorrect:
Follow the instructions in Section 3.2 to reset the time and date. - Mini torch or LED light not working:
Check the batteries in the respective accessory. Replace the LR41 batteries (4 for torch, 1-2 for LED light) if needed. Ensure the torch head is twisted fully for activation or the LED light button is pressed correctly.
7. Specifications
- Model Number:
- SPD40166
- Display Type:
- Digital LCD
- Watch Movement Type:
- Automatic
- Power Source:
- Battery Powered
- Watch Battery Type:
- 2 x LR41 Button Cells
- Torch Battery Type:
- 4 x LR41 Button Cells
- Strap Type:
- Adjustable Rubber Strap
- Clasp Type:
- Tang Buckle
- Case Material Type:
- Plastic
- Band Material Type:
- Plastic
- Case Diameter:
- 4 Centimetres
- Case Thickness:
- 1 Centimetre
- Band Length:
- 22 Centimetres
- Item Weight:
- 80 Grams (total package)
- UPC:
- 0030506611028
8. Warranty and Support
This Accutime product comes with a Limited Warranty. For specific details regarding warranty coverage and duration, please refer to the warranty information provided with your purchase or contact Accutime customer support.
For technical assistance, troubleshooting not covered in this manual, or to inquire about replacement parts, please contact Accutime customer service through their official website or the retailer where the product was purchased.


