1. Introduction
The Cleyver Talk 54 is a robust, license-free PMR446 walkie-talkie designed for reliable communication in various environments. This manual provides essential information for the safe and effective use of your device, covering setup, operation, maintenance, and troubleshooting.
2. Product Overview
2.1 Package Contents
Ensure all items are present in your package:
- 2 x Cleyver Talk 54 Walkie Talkies
- 2 x Belt Clips (Motorola-compatible)
- 2 x Micro-USB Charging Cables (charging cable only, no desktop charger)
- 2 x Rechargeable Li-ion Battery Packs
- User Documentation
2.2 Key Features
- PMR446 License-Free Communication: Operates on 16 channels for free calls.
- IP54 Protection: Dust and splash water resistant for use in challenging conditions.
- Long Battery Life: 1800mAh Li-ion battery provides up to 12 hours of average use.
- SOS Emergency Button: For urgent situations.
- Integrated Flashlight: Provides illumination when needed.
- CTCSS/DCS: Continuous Tone-Coded Squelch System / Digital Coded Squelch for interference reduction.
- Scan Function: Automatically scans for active channels.
- VOX Function: Voice Operated Exchange for hands-free communication.
- Low Battery Alert: Notifies you when the battery is low.
- Connectivity: Micro-USB for charging and 2.5mm jack for audio accessories.
- Accessory Compatibility: Compatible with Motorola T82 accessories.

Figure 1: Front view of two Cleyver Talk 54 walkie-talkies, showing the display and main control buttons.
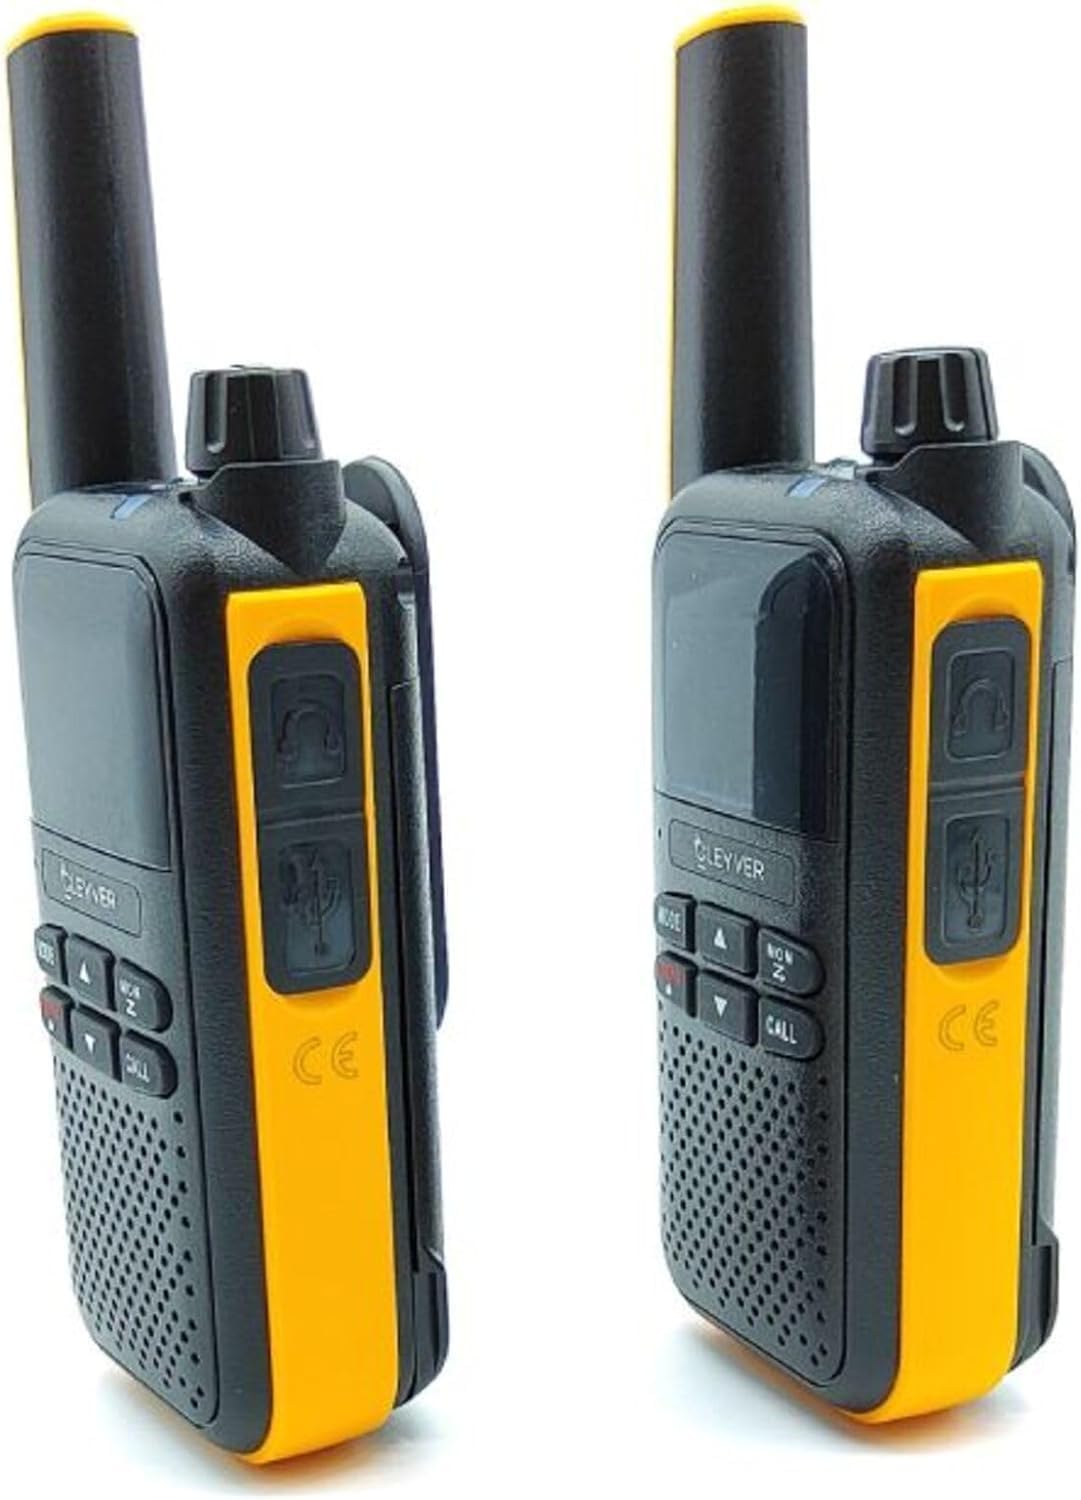
Figure 2: Side view of two Cleyver Talk 54 walkie-talkies, highlighting the headset and USB charging ports.

Figure 3: Other side view of two Cleyver Talk 54 walkie-talkies, showing the Push-to-Talk (PTT) and SOS buttons.
3. Setup
3.1 Battery Installation
- Ensure the walkie-talkie is powered off.
- Locate the battery compartment cover on the back of the device.
- Slide the cover down or unclip it to open the compartment.
- Insert the Li-ion battery pack, ensuring the contacts align correctly.
- Replace the battery compartment cover and secure it.
3.2 Charging the Battery
- Connect the Micro-USB charging cable to the charging port on the side of the walkie-talkie.
- Connect the other end of the cable to a compatible USB power adapter (not included) or a computer USB port.
- The charging indicator light will illuminate, typically red, during charging.
- Once fully charged, the indicator light may change color (e.g., green) or turn off. A full charge takes approximately 3-4 hours.
3.3 Attaching the Belt Clip
- Align the belt clip with the designated slots on the back of the walkie-talkie.
- Slide the clip upwards until it locks securely into place.
- To remove, press the release tab (if present) and slide the clip downwards.

Figure 4: Cleyver Talk 54 walkie-talkies shown with the included belt clips, Micro-USB charging cables, and battery packs.
4. Operation
4.1 Power On/Off
- To Power On: Rotate the On/Off/Volume knob clockwise until you hear a click and the display illuminates.
- To Power Off: Rotate the On/Off/Volume knob counter-clockwise until you hear a click and the display turns off.
4.2 Volume Adjustment
Rotate the On/Off/Volume knob clockwise to increase volume and counter-clockwise to decrease volume.
4.3 Channel Selection
- Press the MODE/MENU button to enter channel selection mode. The channel number on the display will flash.
- Use the UP (▲) and DOWN (▼) arrow buttons to select one of the 16 available PMR446 channels.
- Press the MODE/MENU button again or wait a few seconds for the selection to be confirmed.
4.4 Transmitting and Receiving
- To Transmit: Press and hold the PTT (Push-to-Talk) button located on the side of the walkie-talkie. Speak clearly into the microphone. Release the PTT button when finished speaking.
- To Receive: Ensure the PTT button is not pressed. The walkie-talkie will automatically receive transmissions on the selected channel.
4.5 Flashlight Function
Press the dedicated Flashlight button (often marked with a lightbulb icon) to turn the flashlight on or off.
4.6 SOS Emergency Button
Press and hold the SOS button (usually located on the side, near the PTT button) to activate the emergency alert. This will transmit an audible alarm signal to other walkie-talkies on the same channel.
4.7 VOX (Voice Operated Exchange)
VOX allows for hands-free transmission. When activated, the walkie-talkie will transmit automatically when it detects your voice.
- Press the MODE/MENU button repeatedly until the VOX setting appears on the display.
- Use the UP (▲) and DOWN (▼) arrow buttons to select the VOX sensitivity level (e.g., 1-3, with 3 being most sensitive) or to turn VOX off.
- Press MODE/MENU to confirm.
4.8 Scan Function
The scan function allows the walkie-talkie to automatically search for active channels.
- Press the MON/SCAN button to activate the scan function. The walkie-talkie will cycle through channels.
- When an active signal is detected, the scan will pause on that channel.
- Press the MON/SCAN button again to stop scanning.
4.9 CTCSS/DCS Tones
CTCSS (Continuous Tone-Coded Squelch System) and DCS (Digital Coded Squelch) tones help filter out unwanted conversations on a busy channel. Only transmissions with the same tone setting will be heard.
- Press the MODE/MENU button repeatedly until the CTCSS or DCS setting appears.
- Use the UP (▲) and DOWN (▼) arrow buttons to select a tone code. Ensure all walkie-talkies in your group use the same channel and tone code.
- Press MODE/MENU to confirm.

Figure 5: Close-up view of the Cleyver Talk 54 display, showing channel number and icons, along with the MODE, UP, DOWN, MON/SCAN, and CALL buttons.
5. Maintenance
5.1 Cleaning
- Wipe the device with a soft, damp cloth. Do not use harsh chemicals or abrasive cleaners.
- Ensure the charging port and accessory jacks are free from dust and debris.
5.2 Battery Care
- To prolong battery life, avoid fully discharging the battery frequently.
- Charge the battery regularly, even if the device is not in use for extended periods.
- Do not expose batteries to extreme temperatures.
5.3 Storage
- Store the walkie-talkie in a cool, dry place away from direct sunlight and extreme temperatures.
- If storing for an extended period, remove the battery pack.
6. Troubleshooting
| Problem | Possible Cause | Solution |
|---|---|---|
| No power | Battery is low or not installed correctly. | Charge the battery. Ensure the battery is correctly inserted. |
| Cannot transmit or receive | Incorrect channel or tone code. Out of range. Battery low. | Verify both walkie-talkies are on the same channel and tone code. Move closer to the other unit. Charge the battery. |
| Poor audio quality | Weak signal. Obstructions. Volume too low. | Move to an open area. Adjust volume. Check for interference. |
| Flashlight not working | Battery low. Faulty button. | Charge the battery. If problem persists, contact support. |
| VOX not activating | VOX sensitivity too low. Background noise. | Increase VOX sensitivity. Reduce background noise. |
7. Specifications
| Feature | Specification |
|---|---|
| Brand | Cleyver |
| Model | ODTALK54 |
| Tuner Technology | PMR446 |
| Channels | 16 |
| IP Rating | IP54 (Dust and Splash Water Resistant) |
| Battery Type | Lithium-ion (1800mAh) |
| Average Battery Life | 12 Hours |
| Product Dimensions | 4 x 6 x 13 cm |
| Product Weight | 500 g (approximate, for the pair) |
| Charging Port | Micro-USB |
| Audio Jack | 2.5mm |
8. Warranty and Support
The Cleyver Talk 54 walkie-talkies come with a 2-year warranty. For technical support, warranty claims, or further assistance, please refer to the contact information provided in your purchase documentation or visit the official Cleyver website.
