1. Introduction
Thank you for choosing the LEOTEC AM/FM Bluetooth Radio. This device combines classic aesthetics with modern functionality, offering AM/FM radio reception, Bluetooth connectivity, and auxiliary input. This manual provides detailed instructions to help you get the most out of your radio.

Image 1.1: Front view of the LEOTEC Retro Wood Table Radio.
2. Product Features
- AM/FM Radio Tuner: Enjoy a wide range of radio stations with clear reception.
- Bluetooth Connectivity: Wirelessly stream audio from your Bluetooth-enabled devices.
- Auxiliary Input (AUX IN): Connect external audio sources via a 3.5mm cable.
- Headphone Jack: Private listening experience.
- Bass Control: Adjust the bass level to your preference.
- Volume Control: Easily manage audio output level.
- Retractable Telescopic Antenna: Enhances FM reception.
- Classic Wood Design: Aesthetically pleasing and durable construction.

Image 2.1: Overview of the radio's key features including AM/FM, Bluetooth, AUX, and Headphone Jack.
3. Package Contents
Please check the package for the following items:
- LEOTEC AM/FM Bluetooth Radio
- Power Cord (integrated)
- User Manual (this document)
4. Controls and Indicators
Familiarize yourself with the controls and indicators on your LEOTEC radio:
- Tuning Knob: Used to select AM or FM radio frequencies.
- Volume Knob: Adjusts the overall sound output level.
- Bass Knob: Controls the low-frequency audio output.
- Pilot Lamp: Indicates power status.
- AUX IN Jack: 3.5mm input for external audio devices.
- Phone Jack: 3.5mm output for headphones.
- Mode Switch (BT/FM/AM): Selects between Bluetooth, FM, and AM modes.
- Retractable Antenna: Located at the back, for FM reception.

Image 4.1: Front panel showing tuning dial, knobs for bass and volume, and input jacks.
5. Setup
- Placement: Place the radio on a stable, flat surface away from direct sunlight, heat sources, and excessive moisture.
- Power Connection: Plug the integrated power cord into a standard wall outlet (AC 120V, 60Hz). The radio is designed for corded electric power only.
- Antenna Adjustment: For optimal FM reception, fully extend the retractable telescopic antenna. For AM reception, the internal antenna is generally sufficient, but you may need to adjust the radio's position for best signal.
6. Operating Instructions
6.1. Power On/Off and Volume
- Rotate the Volume Knob clockwise to turn the radio on. The Pilot Lamp will illuminate.
- Continue rotating the Volume Knob to increase or decrease the sound level.
- Rotate the Volume Knob counter-clockwise until it clicks to turn the radio off.
6.2. AM/FM Radio Operation
- Set the Mode Switch to 'FM' for FM radio or 'AM' for AM radio.
- Extend the telescopic antenna for FM reception.
- Rotate the Tuning Knob to scan for radio stations. The illuminated dial will show the selected frequency.
- Adjust the Bass Knob to fine-tune the audio's low frequencies.
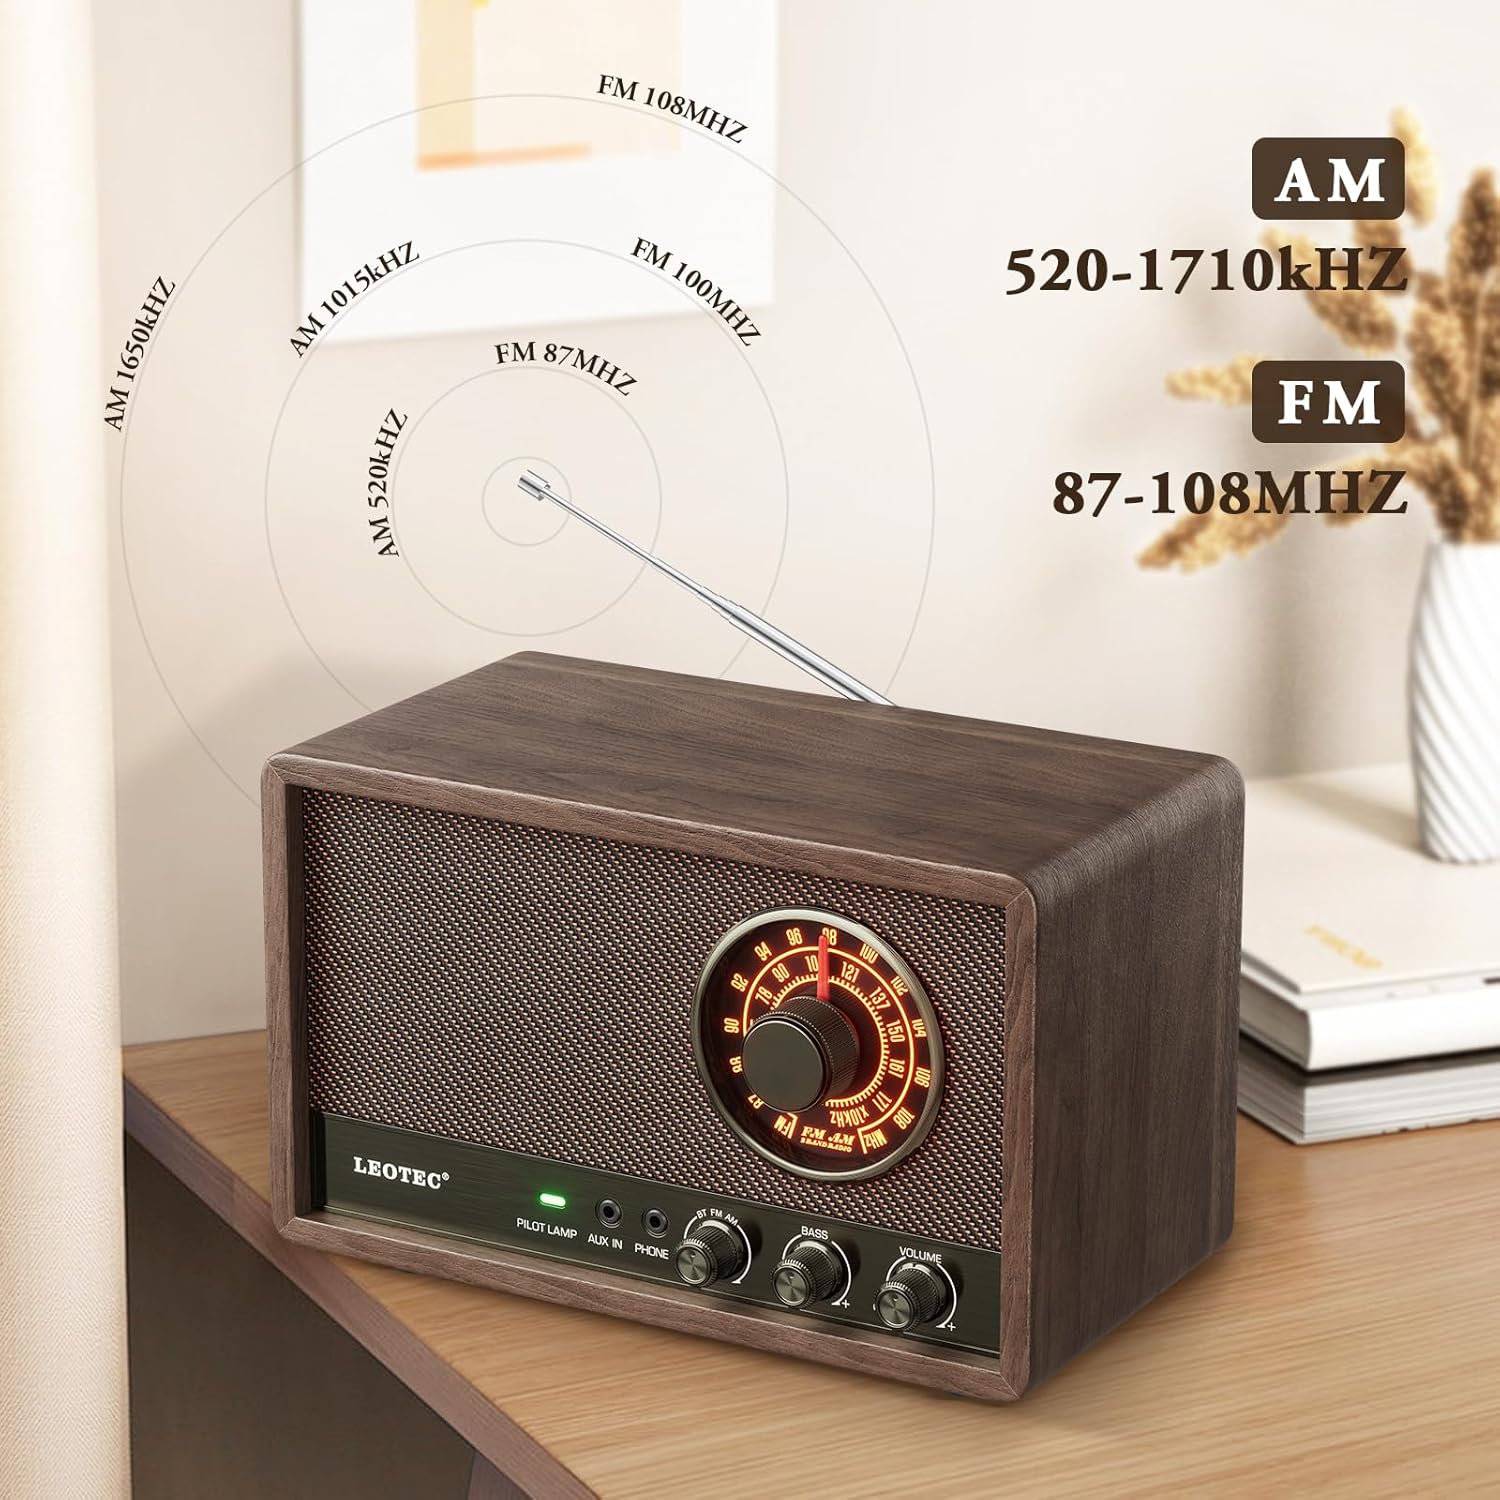
Image 6.2.1: Display showing AM and FM frequency ranges.
6.3. Bluetooth Operation
- Set the Mode Switch to 'BT' (Bluetooth). The radio will enter pairing mode, indicated by a flashing light or audio prompt.
- On your Bluetooth-enabled device (e.g., smartphone, tablet), enable Bluetooth and search for available devices.
- Select 'LEOTEC Radio' (or similar name) from the list of devices to pair.
- Once paired, you can play audio from your device through the radio.
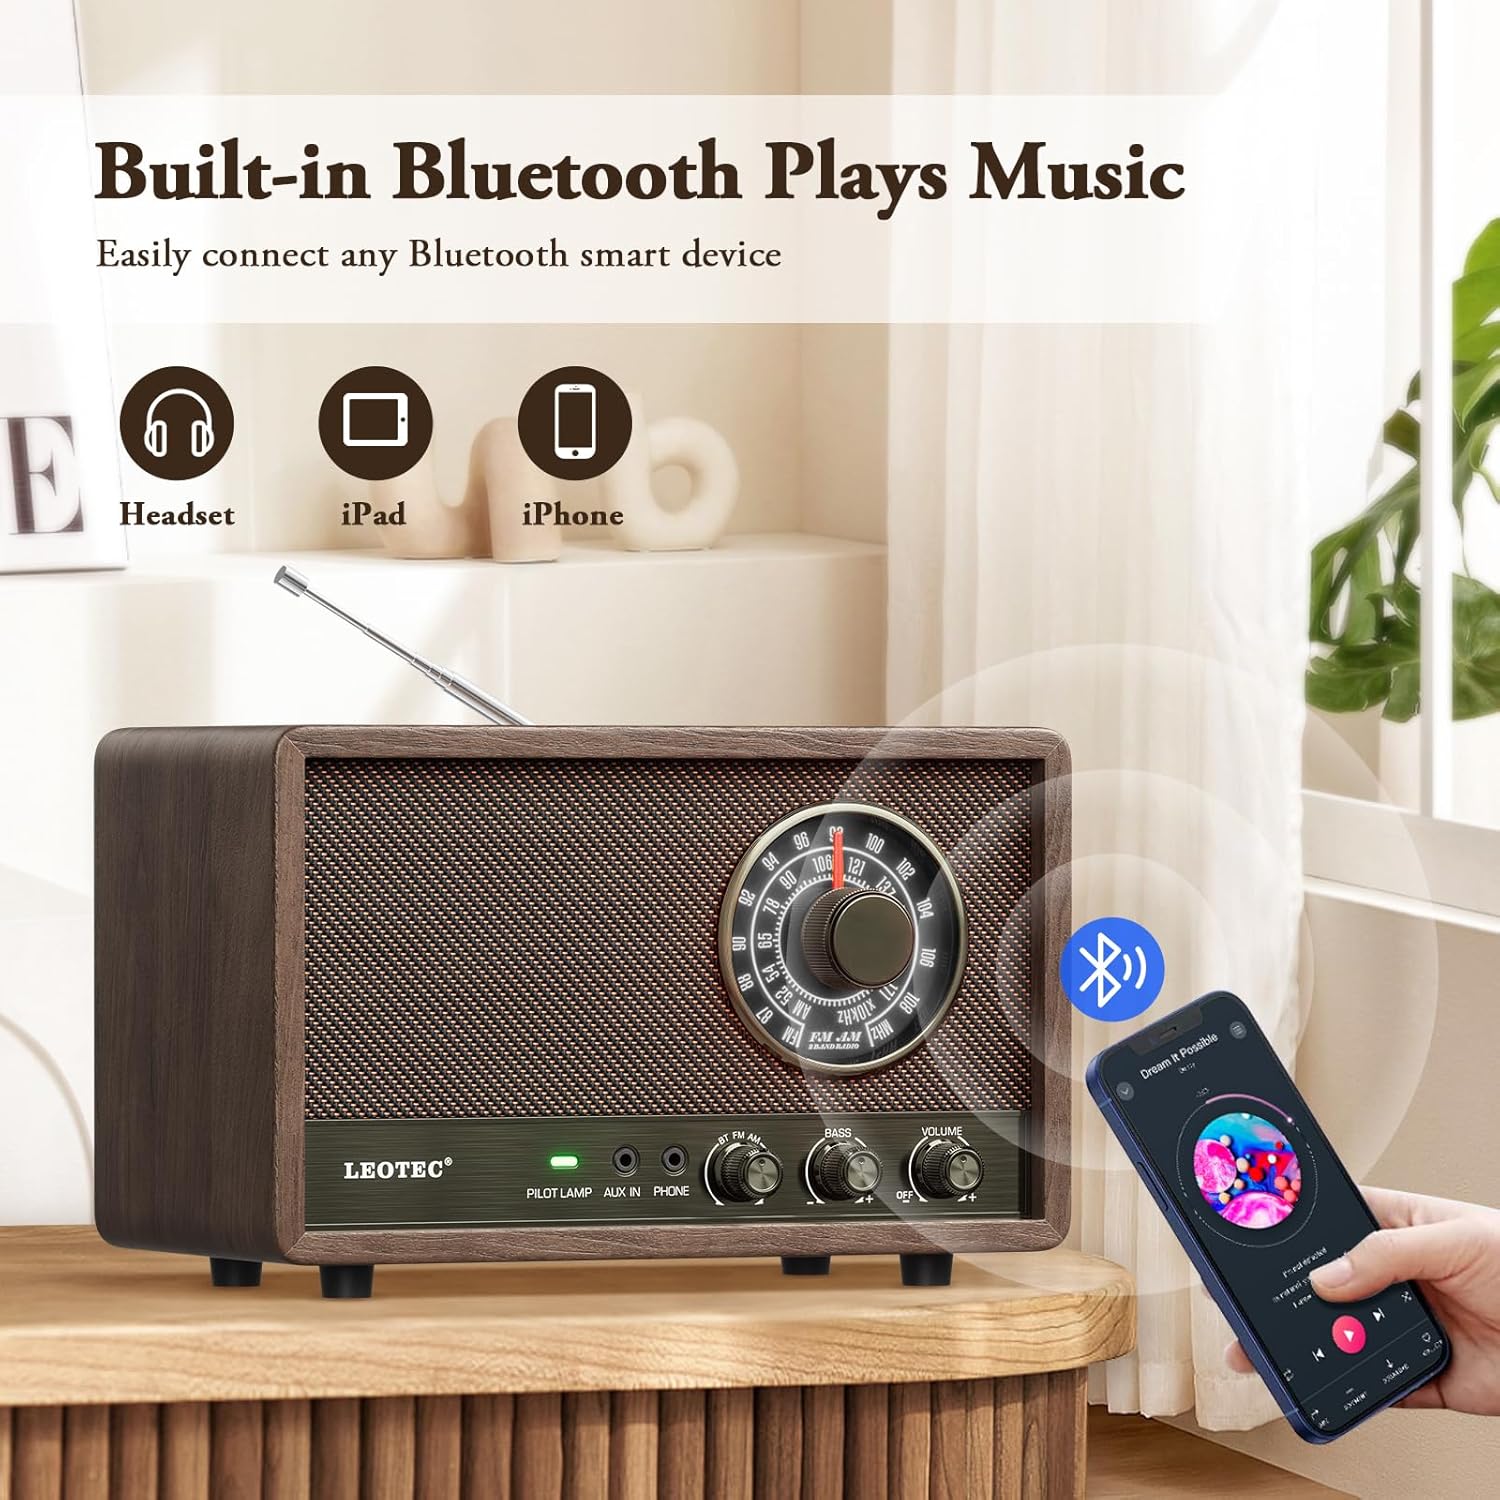
Image 6.3.1: Illustration of connecting a Bluetooth device to the radio.
6.4. AUX Input Operation
- Connect one end of a 3.5mm audio cable (not included) to the AUX IN Jack on the radio.
- Connect the other end of the cable to the headphone jack or audio output of your external audio device (e.g., MP3 player, CD player).
- Set the Mode Switch to 'AUX'.
- Play audio from your external device. Adjust volume on both the radio and the external device as needed.
6.5. Headphone Usage
- Plug your headphones (not included) into the Phone Jack on the radio.
- The main speaker will mute, and audio will be routed to your headphones.
- Adjust the Volume Knob for comfortable listening.
7. Maintenance
- Cleaning: Wipe the radio with a soft, dry cloth. Do not use abrasive cleaners, waxes, or solvents.
- Storage: When not in use for extended periods, unplug the radio and store it in a cool, dry place.
- Antenna Care: Handle the telescopic antenna gently to prevent bending or breakage.
8. Troubleshooting
| Problem | Possible Cause | Solution |
|---|---|---|
| No power | Power cord not securely plugged in; outlet not active. | Ensure power cord is fully inserted. Test the outlet with another device. |
| Poor radio reception | Antenna not extended (FM); radio position (AM); interference. | Fully extend the telescopic antenna for FM. Adjust radio position for AM. Move away from electronic devices causing interference. |
| Bluetooth not connecting | Radio not in BT mode; device Bluetooth off; already paired to another device. | Ensure radio is in BT mode. Turn Bluetooth on your device. Disconnect from other Bluetooth devices. |
| No sound from speaker/headphones | Volume too low; headphones plugged in (speaker); incorrect mode. | Increase volume. If headphones are plugged in, unplug them for speaker sound. Ensure correct mode (AM/FM/BT/AUX) is selected. |
9. Specifications
- Brand: LEOTEC
- Model Number: 10282b06-df39-4249-847a-582b2973a2d8
- Product Dimensions: 8.26"L x 3.74"W x 4.6"H (20.98 cm x 9.5 cm x 11.68 cm)
- Item Weight: 1.98 pounds (0.9 kg)
- Power Source: Corded Electric
- Radio Bands Supported: AM, FM
- FM Frequency Range: 87-108 MHz
- AM Frequency Range: 520-1710 KHz
- Connectivity Technology: Bluetooth
- Special Feature: Portable (requires power outlet)

Image 9.1: Diagram illustrating the product dimensions.
10. Warranty and Support
LEOTEC is committed to providing quality products and customer satisfaction. For any technical assistance or inquiries, please contact our customer support team. We offer professional technical support and 24/7 after-sales service.
For further information or to contact support, please visit the official LEOTEC store or refer to the contact details provided with your purchase.
Note: Extended protection plans may be available for purchase separately. These plans are not included with the standard product warranty.


