1. Introduction
This instruction manual provides guidance for the installation and use of the BrickBling LED Lighting Kit, designed specifically for the Lego 10325 Alpine Lodge Winter Village Set. This kit enhances your Lego model with integrated lighting, bringing it to life. Please note that this product includes only the lighting components; the Lego 10325 Alpine Lodge Winter Village Set is sold separately and is required for installation.
2. What's in the Box
Carefully unpack the contents and verify that all components are present. The package should contain the following items:
- LED Light Kits (various light strips, connecting cables, expansion boards)
- Power Supply (USB cable and battery box)
- Instruction Guide (physical copy, if included)

Image 2.1: Overview of the BrickBling LED Lighting Kit components.

Image 2.2: Detailed view of light components and their application on the Lego 10325 model.
3. Setup and Installation
Before beginning installation, ensure you have the completed Lego 10325 Alpine Lodge Winter Village Set. The lighting kit is designed to be integrated into the existing Lego structure. Follow the steps below and refer to the detailed video instructions for a smooth installation process.
3.1 Preparation
- Ensure your Lego 10325 model is fully assembled.
- Gather all lighting kit components and organize them according to the instruction guide.
- Prepare a clean, well-lit workspace.
3.2 Installation Steps
The installation process involves carefully disassembling small sections of your Lego model, routing the thin light wires, and reassembling the sections. The wires are designed to be concealed within the Lego bricks.
- Identify Placement: Refer to the instruction guide and video to identify where each light component should be placed within the Lego model.
- Disassemble Sections: Carefully remove the necessary Lego bricks to access the interior where lights will be installed.
- Route Wires: Thread the thin light wires through the gaps between Lego studs or under bricks as indicated in the instructions. Ensure wires are not pinched or excessively bent.
- Connect Lights: Attach the LED lights to their designated positions. Connect the light wires to the expansion boards, ensuring correct polarity if applicable.
- Connect Expansion Boards: Link the expansion boards together and to the main power supply cable.
- Reassemble Model: Carefully reassemble the Lego sections, ensuring all wires are neatly tucked away and not visible or obstructing brick connections.
- Test Connections: Before fully securing all parts, connect the power supply and briefly test the lights to ensure all connections are working.
Video 3.1: Step-by-step installation guide for the BrickBling LED Lighting Kit on the Lego 10325 Alpine Lodge. This video demonstrates the process of integrating the lights into the model.
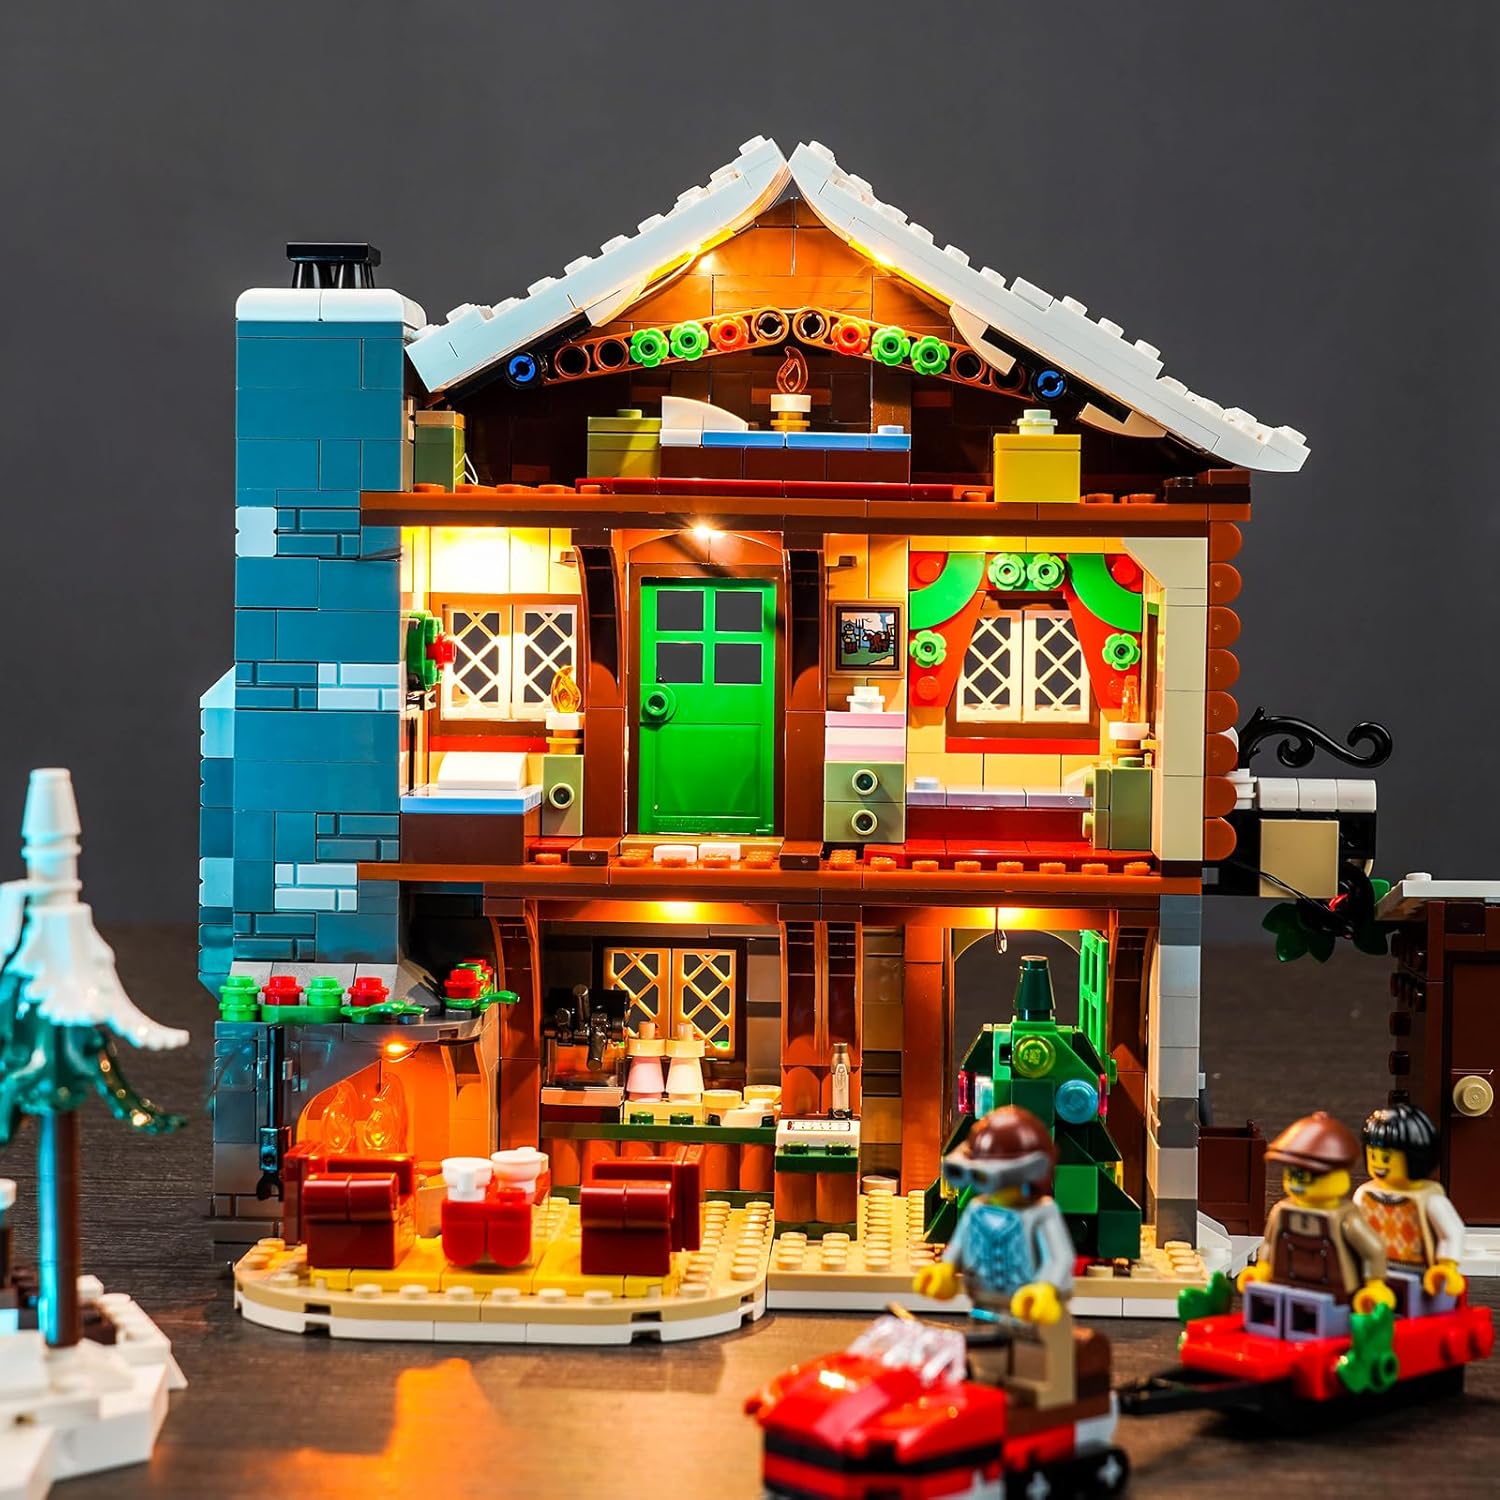
Image 3.1: The completed Lego Alpine Lodge with the lighting kit installed and illuminated.
4. Operating Instructions
Once the lighting kit is fully installed, operating it is straightforward.
4.1 Powering the Lights
The BrickBling LED Lighting Kit can be powered using various methods:
- USB Power: Connect the provided USB power cable to a power bank, computer USB port, wall adapter, or any other USB power source.
- Battery Box: Insert AAA batteries (not included) into the provided battery box and connect it to the lighting kit.
The recommended voltage for operation is 3-5V. Ensure your power source provides power within this range.
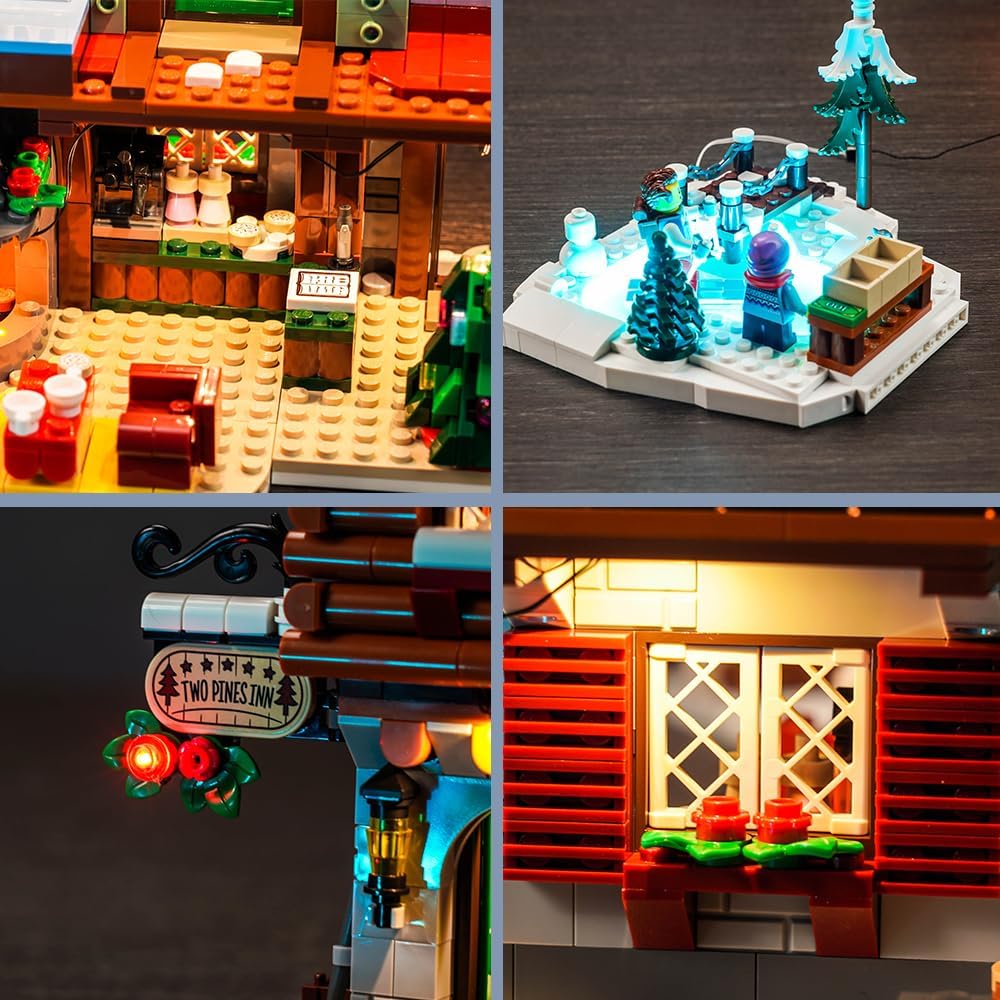
Image 4.1: Various illuminated sections of the Lego Alpine Lodge, demonstrating the lighting effect.
5. Maintenance
To ensure the longevity and optimal performance of your BrickBling LED Lighting Kit, follow these maintenance guidelines:
- Cleaning: Gently dust the LED lights and wires with a soft, dry cloth. Avoid using liquid cleaners directly on the electrical components.
- Handling: Handle the wires and LED components with care. Avoid sharp bends or excessive pulling, which can damage the delicate wiring.
- Storage: If disassembling for storage, carefully disconnect components and store them in a dry, cool place, protected from dust and physical damage.
6. Troubleshooting
If you encounter issues with your lighting kit, refer to the following troubleshooting steps:
- Lights Not Turning On:
- Check the power source: Ensure the USB cable is securely connected to a working power source or that the batteries in the battery box are fresh and correctly inserted.
- Verify connections: Ensure all light wires are securely plugged into the expansion boards and that the expansion boards are correctly connected to each other and the power supply.
- Inspect for damage: Look for any visible damage to wires or LEDs, such as cuts or pinches.
- Some Lights Not Working:
- Isolate the issue: Disconnect and reconnect the specific light or expansion board that is not working.
- Check individual connections: Ensure the small connectors for the non-working lights are fully seated.
- Flickering Lights:
- Ensure a stable power supply.
- Check for loose connections at the expansion boards or individual light connections.
- Wires Not Sticking (if applicable):
- Some light strips may have adhesive backing. Ensure the surface is clean and dry before application. If adhesive fails, a small amount of non-corrosive, non-damaging adhesive suitable for plastics may be used with caution, ensuring it does not interfere with electrical components or Lego bricks.
7. Specifications
| Feature | Detail |
|---|---|
| Model Number | 10325 (Compatible with Lego Set) |
| Product Dimensions | 6.1 x 4.15 x 1.18 inches (Packaging) |
| Item Weight | 3.84 ounces |
| Recommended Voltage | 3-5V |
| Manufacturer Recommended Age | 18 years and up |
| Materials | High-grade ABS materials and copper |
8. Safety Information
Please observe the following safety precautions:
- Choking Hazard: This product contains small parts and is not suitable for children under 3 years of age.
- Electrical Safety: Do not expose electrical components to water or excessive moisture. Use only recommended voltage for power supply.
- Handling: Avoid excessive force when handling wires and connectors to prevent damage.
9. Warranty Information
Specific warranty details for the BrickBling LED Lighting Kit are not provided in this manual. For information regarding warranty coverage, terms, and conditions, please refer to the product packaging or contact the seller directly through your purchase platform.
10. Customer Support
If you require further assistance, have questions about installation, or need to report a defective component, please contact the BrickBling customer support team or the seller from whom you purchased the product. Refer to your purchase documentation for contact details.