1. Introduction
This manual provides essential instructions for the safe and effective use of your ALLC replacement battery, designed for Motorola MTP700 and MTP750 two-way radios. Please read this manual thoroughly before using the battery to ensure proper operation and longevity.
2. Safety Information
Your ALLC replacement battery is manufactured with quality control standards and includes built-in protection features. However, it is crucial to follow these safety guidelines to prevent damage, injury, or fire.
- Do Not Disassemble: Never attempt to disassemble, open, or service the battery pack. This can lead to short circuits, fire, or exposure to hazardous materials.
- Avoid Physical Damage: Do not crush, puncture, or drop the battery. Physical damage can compromise internal components and lead to safety hazards.
- Protect from Heat and Water: Do not expose the battery to temperatures above 60°C (140°F) or dispose of it in fire. Keep the battery away from water or other liquids.
- Prevent Short Circuits: Avoid shorting the external contacts of the battery. Keep metal objects away from the battery terminals.
- Proper Disposal: Dispose of used batteries according to local regulations. Do not dispose of batteries with household waste.
- Children: Keep batteries out of reach of children.

Image: The battery label displaying important safety warnings regarding disassembly, heat, water, and short circuits.
3. Setup and Installation
Follow these general steps to install the replacement battery into your Motorola MTP700 or MTP750 radio. Refer to your radio's original user manual for specific instructions if needed.
- Power Off Radio: Ensure your two-way radio is completely powered off before attempting to remove or install the battery.
- Remove Old Battery: Locate the battery release latch or button on your radio. Press or slide it to unlock the old battery, then carefully slide it out.
- Align New Battery: Take the ALLC replacement battery and align its contacts with the corresponding terminals on the radio.
- Insert Battery: Gently slide the new battery into the battery compartment until it clicks securely into place. Ensure the latch engages properly.
- Verify Connection: Lightly tug on the battery to confirm it is firmly seated and will not accidentally detach.
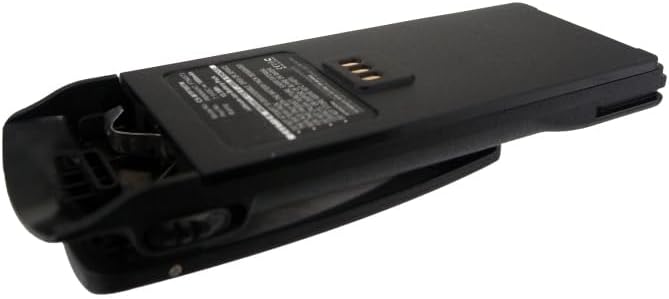
Image: Side view of the ALLC replacement battery, showing the integrated belt clip and overall form factor for installation.
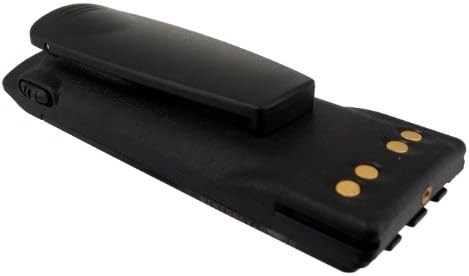
Image: Top view of the ALLC replacement battery, highlighting the gold-plated electrical contacts that connect to the radio.
4. Operating Instructions
This section covers charging and general usage of your ALLC replacement battery.
4.1. Initial Charging
For optimal performance, it is recommended to fully charge the battery before its first use. This helps to calibrate the battery's charge indicator.
- Insert the battery into your compatible Motorola MTP700/MTP750 radio.
- Place the radio with the installed battery into its designated charger.
- Allow the battery to charge continuously until the charger's indicator light signals a full charge (refer to your radio charger's manual for specific indicator meanings).
4.2. Regular Charging
The ALLC replacement battery features a Lithium-Ion composition with no memory effect. This means you can charge the battery at any time without needing to fully discharge it first. Regular charging practices include:
- Charge the battery when the radio's low battery indicator appears.
- Avoid leaving the battery on a charger for extended periods after it is fully charged, although the built-in over-charge protection minimizes risk.
- Use only chargers compatible with Motorola MTP700/MTP750 radios.
5. Maintenance
Proper maintenance ensures the longevity and reliable performance of your battery.
- Cleaning: Periodically clean the battery contacts and the radio's charging terminals with a clean, dry cloth to ensure good electrical connection. Do not use abrasive cleaners or solvents.
- Storage: If storing the battery for an extended period, charge it to approximately 50% capacity and store it in a cool, dry place away from direct sunlight and extreme temperatures. Recharge every 3-6 months to prevent deep discharge.
- Temperature: Operate and store the battery within recommended temperature ranges (typically 0°C to 45°C or 32°F to 113°F) to maximize its lifespan.
6. Troubleshooting
If you encounter issues with your ALLC replacement battery, consider the following:
- Battery Not Charging:
- Ensure the battery is correctly seated in the radio and the radio is properly placed in the charger.
- Check the charger for power and proper function.
- Clean the battery and charger contacts.
- Short Operating Time:
- Ensure the battery is fully charged before use.
- Battery capacity naturally degrades over time with repeated charge cycles. If the battery is old, it may need replacement.
- Extreme temperatures can affect battery performance.
- Radio Not Powering On:
- Verify the battery is fully charged and correctly installed.
- Test with a known working battery if available to rule out a radio issue.
7. Specifications
| Brand | ALLC |
| Compatible Models | Motorola MTP700, MTP750 |
| Compatible Part Numbers | FTN6573, FTN6574, PMN4047BR, PMNN4047, PMR4047 |
| Battery Cell Composition | Lithium Ion |
| Capacity | 1800mAh |
| Voltage | 7.5V |
| Manufacturer | cameronsino |
| Certifications | ISO9001, RoHS, CE |
8. Warranty and Support
The ALLC replacement battery is manufactured under strict quality control standards and has passed ISO9001, RoHS, and CE certifications. We are committed to providing reliable products and customer satisfaction.
For any questions or support needs, please contact our customer service. We guarantee 24-hour email support to assist you with any inquiries regarding your battery.
Please ensure to check the compatible voltage, cell size, and connector type for the best fit before purchase.


