
De'Longhi EXAM44055BG
Contents
De'Longhi Rivelia EXAM440.55.BG Fully Automatic Coffee Machine User Manual
Model: EXAM44055BG | Brand: De'Longhi
Introduction
This manual provides essential information for the safe and efficient operation, maintenance, and troubleshooting of your De'Longhi Rivelia EXAM440.55.BG Fully Automatic Coffee Machine. Please read this manual thoroughly before using the appliance and keep it for future reference.

Figure 1: De'Longhi Rivelia EXAM440.55.BG Fully Automatic Coffee Machine.
Safety Instructions
Always follow basic safety precautions when using electrical appliances to reduce the risk of fire, electric shock, and/or injury to persons.
- Do not immerse the appliance, power cord, or plug in water or other liquids.
- Ensure the voltage indicated on the appliance corresponds to your mains voltage.
- Do not operate the appliance with a damaged cord or plug.
- Keep the appliance out of reach of children.
- Unplug the appliance from the outlet when not in use and before cleaning.
Product Overview and Components
The De'Longhi Rivelia EXAM440.55.BG is a fully automatic bean-to-cup coffee machine designed for ease of use and versatility. Key components include:
- 8.9 cm (3.5 inch) LCD display: For intuitive control and navigation.
- Bean Hoppers: Two interchangeable 250g funnels for different coffee beans.
- 13-stage steel cone grinder: Ensures optimal grinding for various coffee types.
- Removable brewing unit: For easy cleaning and maintenance.
- LatteCrema Hot System: Automatic milk frother for perfect milk-based beverages.
- Water Tank: 1.4 Liters capacity.
- Drip Tray: Collects excess liquid.
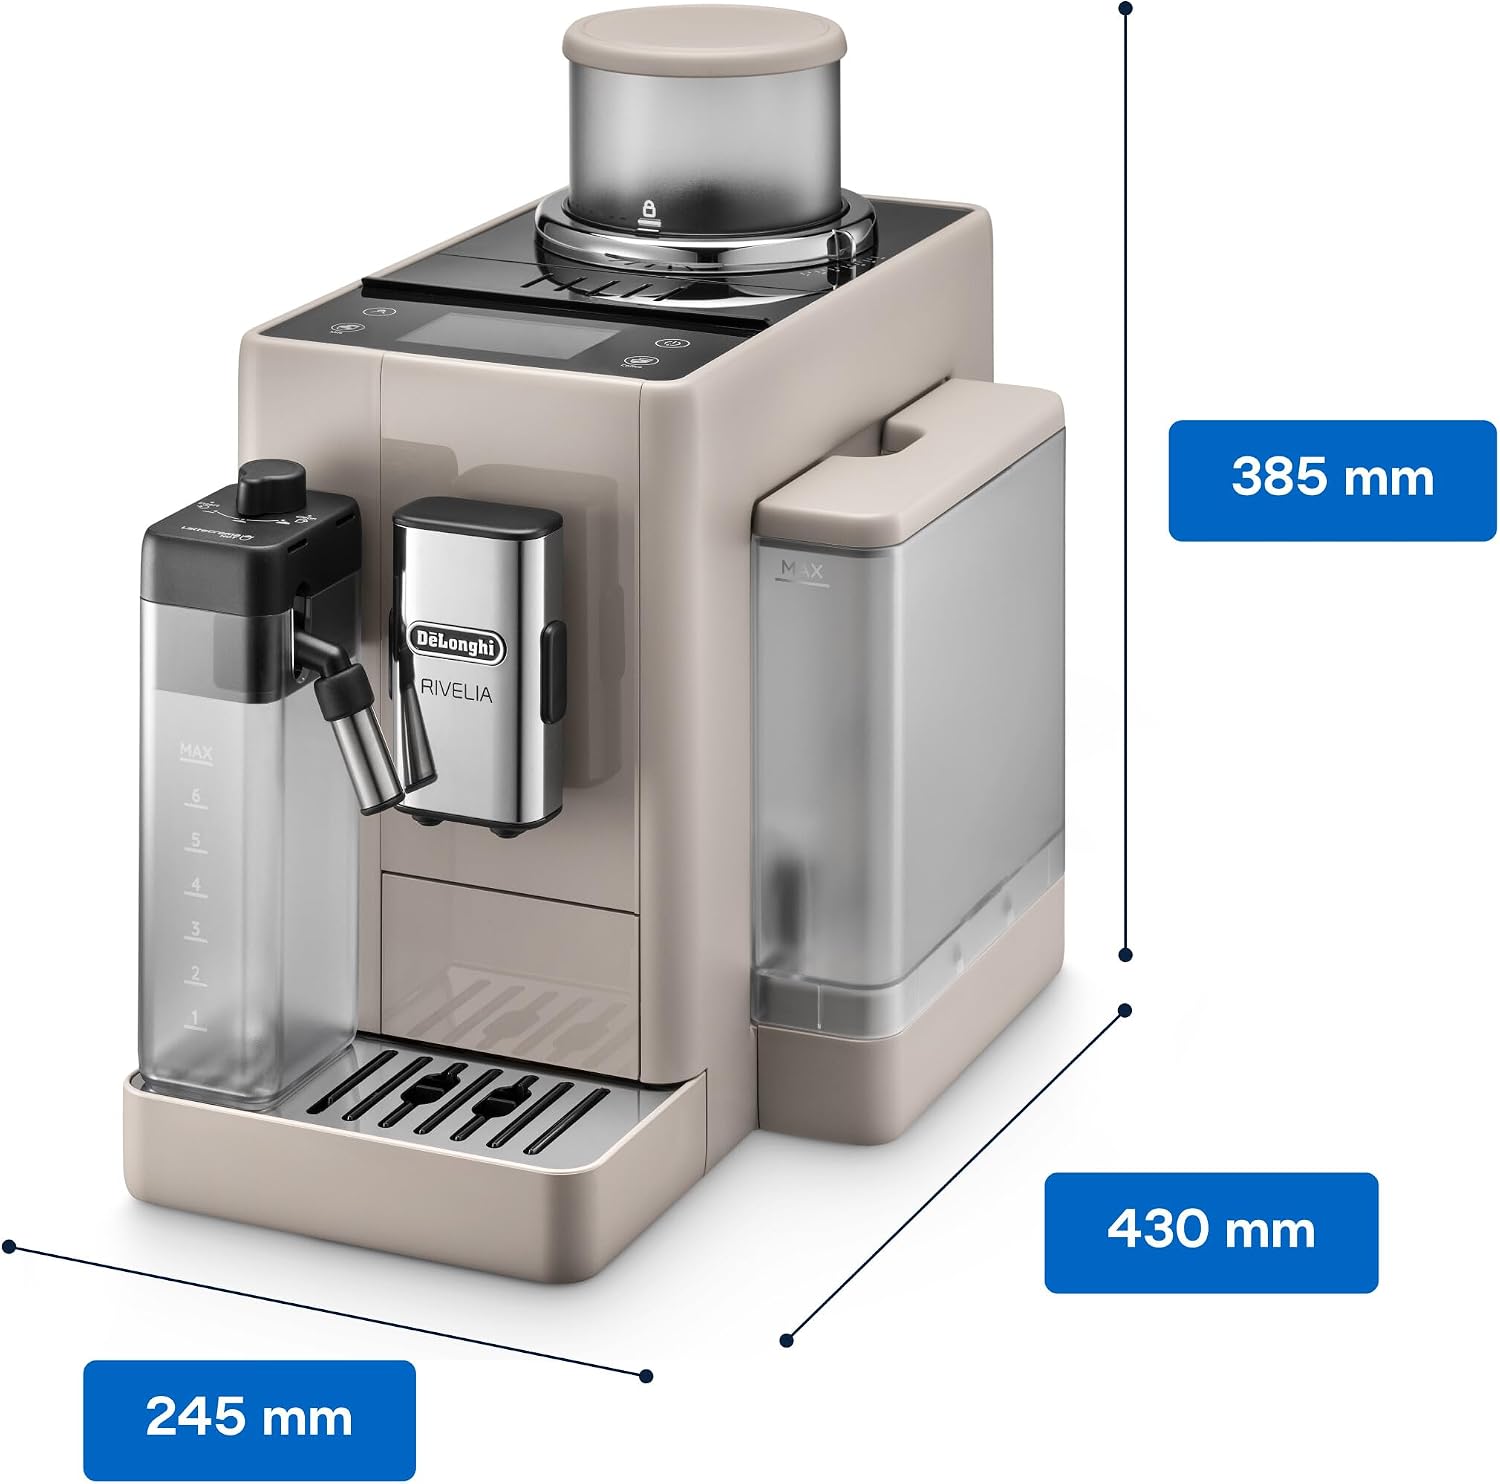
Figure 2: Product Dimensions.
Setup
1. Unpacking and Placement
- Remove all packaging materials.
- Place the machine on a stable, level surface, away from heat sources and water.
- Ensure adequate space around the machine for ventilation and access to components.
2. Initial Rinse Cycle
- Fill the water tank with fresh cold water up to the MAX level.
- Insert one of the 250g bean hoppers into the top of the machine.
- Plug the machine into a grounded power outlet.
- Follow the on-screen instructions for the initial rinse cycle. This prepares the internal circuits for use.

Figure 3: Filling the Bean Hopper.
Operating the Machine
1. Basic Coffee Preparation
- Ensure the water tank is filled and the bean hopper contains coffee beans.
- Place a cup under the coffee spouts.
- Select your desired coffee recipe from the 8.9 cm LCD display. The machine offers 16 pre-programmed recipes.
- Adjust strength, volume, and temperature as desired using the on-screen options.
- Press the start button to begin brewing.

Figure 4: Navigating the Touch Display.
2. Milk-Based Beverages (LatteCrema Hot System)
- Fill the milk carafe with fresh cold milk.
- Attach the milk carafe to the machine's milk spout.
- Place a suitable cup under the coffee and milk spouts.
- Select a milk-based beverage (e.g., Cappuccino, Latte Macchiato) from the display.
- The machine will automatically froth and dispense milk, followed by coffee.
- After use, detach the milk carafe and store it in the refrigerator or clean it immediately.

Figure 5: Automatic Milk Frothing.
3. Using Pre-Ground Coffee
The machine also supports pre-ground coffee for single servings. Refer to the on-screen instructions for the specific procedure, typically involving adding one scoop of pre-ground coffee to the dedicated funnel before selecting your drink.
Maintenance
Regular cleaning and maintenance ensure optimal performance and longevity of your coffee machine. The machine features automatic rinsing and cleaning programs.
1. Daily Cleaning
- Drip Tray and Grounds Container: Empty and rinse daily. The machine will prompt you when full.
- Milk Carafe: After each use, perform the automatic cleaning cycle for the milk carafe. Disassemble and wash components with warm water and mild detergent regularly.
- Coffee Spouts: Wipe with a damp cloth.
2. Weekly/Bi-Weekly Cleaning
- Brewing Unit: Remove the brewing unit (refer to the manual for specific instructions) and rinse thoroughly under running water. Allow to air dry before reinserting.
- Water Tank: Rinse the water tank and check for any residue.
3. Descaling
The machine will indicate when descaling is required. Use only De'Longhi descaling solution and follow the on-screen instructions precisely. Descaling removes mineral buildup and is crucial for machine performance and lifespan.
Troubleshooting
This section addresses common issues you might encounter. For more complex problems, contact customer support.
| Problem | Possible Cause | Solution |
|---|---|---|
| Coffee is not hot enough. | Cups are cold; temperature setting is too low. | Pre-heat cups with hot water; increase coffee temperature setting in the menu. |
| No coffee is dispensed. | Water tank empty; brewing unit blocked. | Fill water tank; clean brewing unit. |
| Milk does not froth properly. | Milk carafe dirty; milk type/temperature. | Clean milk carafe thoroughly; use cold, fresh milk (dairy or plant-based suitable for frothing). |
| Machine displays "Descaling required". | Mineral buildup in the system. | Perform the descaling cycle as prompted by the machine. |
Specifications
Detailed technical specifications for the De'Longhi Rivelia EXAM440.55.BG.
- Brand: De'Longhi
- Model Number: EXAM44055BG
- Color: Sand Beige
- Product Dimensions: 43 x 24.5 x 38.5 cm (Depth x Width x Height)
- Item Weight: 9.7 kg
- Water Tank Capacity: 1.4 Liters
- Power / Wattage: 1450 watts
- Voltage: 240 Volts
- Material: Metal
- Special Features: Milk Frother, 16 Coffee Recipes, 13-stage steel cone grinder, Two interchangeable 250g funnels, Automatic rinsing & cleaning programs, 8.9 cm (3.5 inch) LCD display.

Figure 6: Variety of Beverages.
Warranty and Support
For detailed warranty information, please refer to the warranty card included with your product or visit the official De'Longhi website. For technical support, spare parts, or service, please contact De'Longhi customer service in your region. Contact details are typically available on the manufacturer's website or in the product packaging.
Ask a question about this manual
Ask about setup, troubleshooting, compatibility, parts, safety, or missing instructions. Manuals+ will review the question and use this page’s manual context to help answer it.