1. Introduction
The Hifonics ZXT10.0 Hybrid 10 Farad Capacitor is designed to stabilize the 12-volt vehicle electrical system, particularly in high-power car audio installations. When powerful amplifiers draw significant current during bass attacks, the vehicle's electrical system can experience voltage drops, leading to issues like flickering lights. This capacitor addresses this by providing rapid current impulses that the vehicle's battery, due to its internal resistance, cannot supply quickly enough. Utilizing modern hybrid technology with an electrolytic liquid and polymer, the ZXT10.0 stores up to 10 Farads of capacitance in a compact housing, ensuring very low internal series resistance (ESR) for immediate power delivery. It buffers voltage surges, absorbing excess energy and releasing it as needed, which can also extend the lifespan of the vehicle battery.
2. Safety Instructions
- Read all instructions: Before installation and operation, carefully read and understand all instructions in this manual.
- Professional installation recommended: Installation should ideally be performed by a qualified professional to prevent damage to the capacitor, vehicle, or personal injury.
- Disconnect battery: Always disconnect the vehicle's negative battery terminal before beginning any installation work to prevent electrical shorts and injury.
- Proper wiring: Use appropriate gauge wiring for all connections as specified in the installation section. Incorrect wiring can lead to overheating, fire, or system failure.
- Polarity: Observe correct polarity (+ to + and - to -) when connecting the capacitor. Reversing polarity can cause severe damage to the capacitor and other components.
- Mounting: Securely mount the capacitor in a dry, well-ventilated area, away from heat sources and moving parts. Ensure it is not exposed to moisture or extreme temperatures.
- Charging/Discharging: Capacitors store significant electrical energy. Always follow proper charging and discharging procedures to avoid electrical shock or damage.
- Avoid short circuits: Do not allow tools or metal objects to come into contact with the capacitor terminals, as this can cause a short circuit and severe damage.
3. Setup and Installation
Proper installation is crucial for the performance and safety of your Hifonics ZXT10.0 capacitor. Follow these steps carefully:
3.1 Unpacking and Inspection
Carefully remove the capacitor from its packaging. Inspect it for any signs of physical damage. If damage is found, do not proceed with installation and contact your dealer.
3.2 Mounting Location
Choose a mounting location that is:
- Close to the amplifier(s) it will be supporting, ideally within 18 inches (45 cm).
- Secure and stable, preventing movement during vehicle operation.
- Dry and free from excessive heat or direct sunlight.
- Accessible for wiring and future maintenance.
Use the provided mounting hardware to securely fasten the capacitor.
3.3 Wiring Connections
Before making any connections, ensure the vehicle's negative battery terminal is disconnected.
- Ground Connection: Connect a short, heavy gauge cable (up to 50 mm²) from the capacitor's negative (-) terminal to a clean, solid chassis ground point. Ensure the ground point is free of paint, rust, or debris for optimal conductivity.
- Power Connection: Connect a heavy gauge cable (up to 50 mm²) from the capacitor's positive (+) terminal to the positive (+) terminal of your amplifier(s). This cable should be as short as possible.
- Remote Turn-On Connection: Connect a small gauge wire from the capacitor's remote turn-on terminal to the remote output of your head unit or amplifier. This allows the capacitor to power on and off with your audio system.
- Charging the Capacitor: Before connecting the main power cable from the vehicle battery to the capacitor, the capacitor must be charged. Use a resistor (typically supplied with capacitors, or a 1000 Ohm, 1/2 Watt resistor) to slowly charge the capacitor.
- Connect one end of the resistor to the positive (+) terminal of the capacitor.
- Connect the other end of the resistor to the positive (+) terminal of the vehicle battery.
- Wait approximately 1-2 minutes for the capacitor to charge. The digital voltage display on the capacitor will show the voltage rising.
- Once the voltage display matches the vehicle's battery voltage (around 12-14V), remove the resistor.
- Immediately connect the main power cable from the vehicle battery to the capacitor's positive (+) terminal.
Warning: Do not connect the main power cable directly to an uncharged capacitor without a resistor, as this can cause a large spark and potentially damage the capacitor or battery.
- Reconnect Battery: Once all connections are secure and the capacitor is charged, reconnect the vehicle's negative battery terminal.
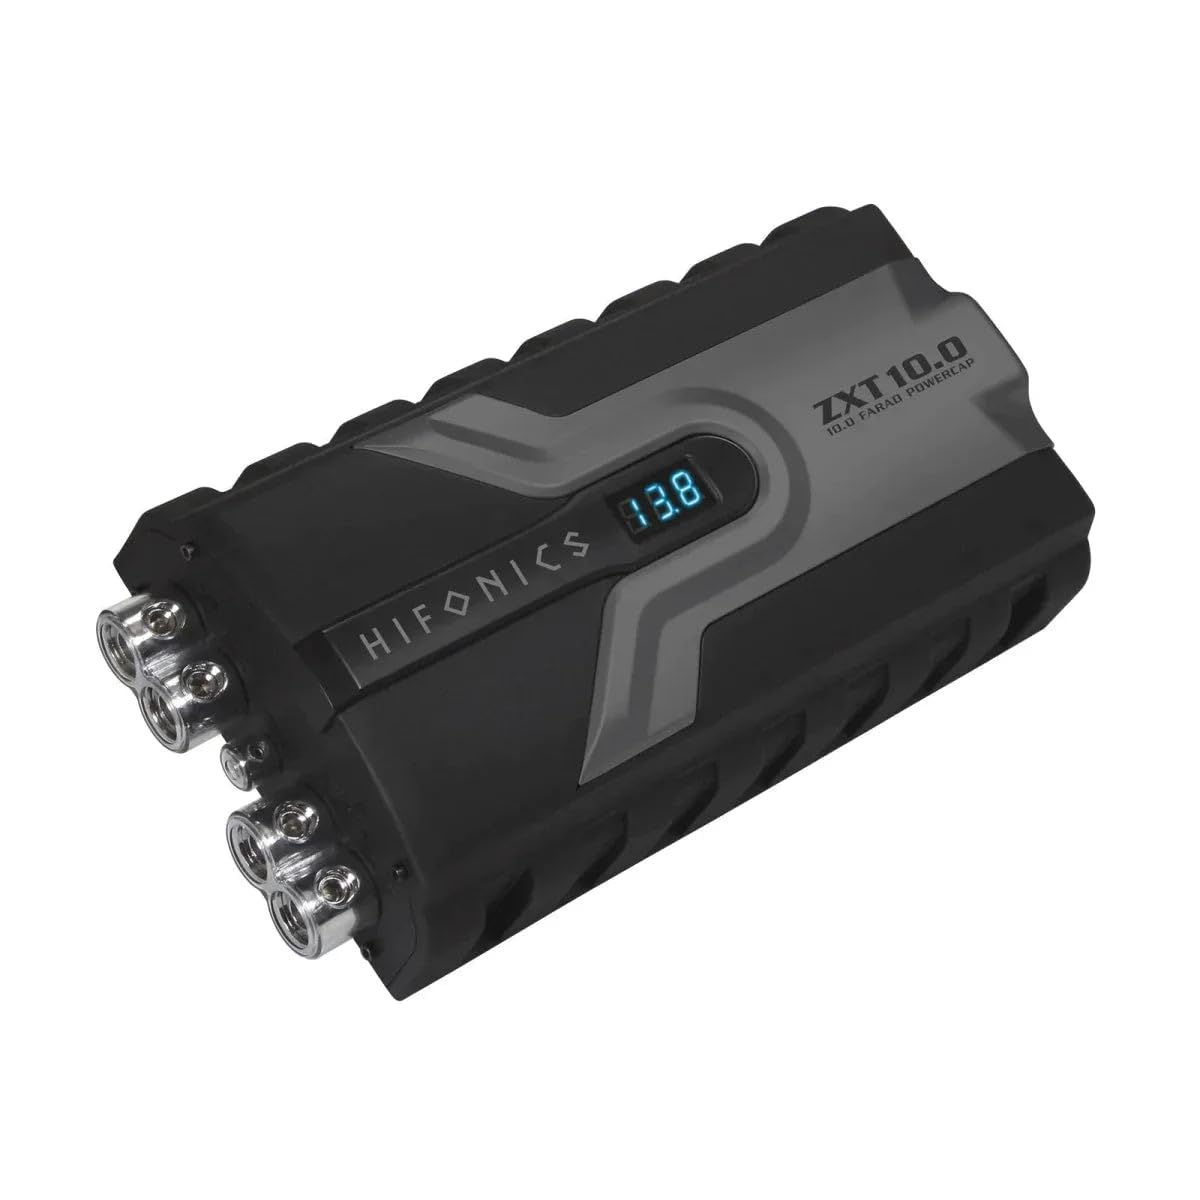
Figure 1: Angled view of the Hifonics ZXT10.0 capacitor, highlighting the connection terminals and the digital voltage display.
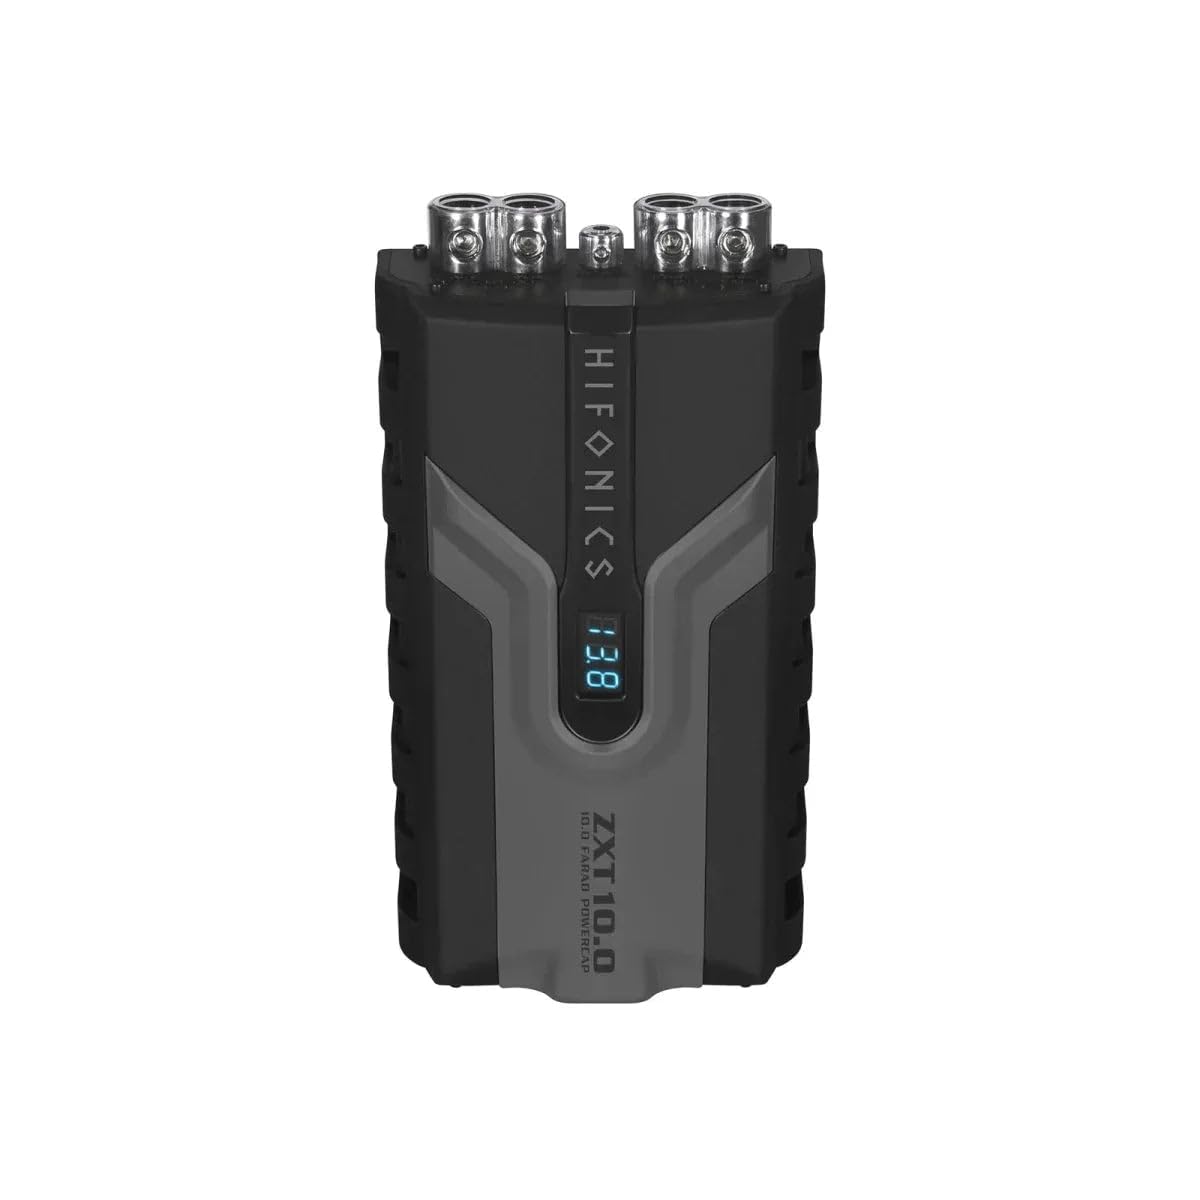
Figure 2: Top view of the Hifonics ZXT10.0 capacitor, illustrating the layout of the power and ground connection points.
4. Operating Instructions
Once properly installed and charged, the Hifonics ZXT10.0 capacitor operates automatically with your car audio system.
- Automatic Operation: The capacitor will automatically charge and discharge as needed to stabilize the voltage supplied to your amplifiers.
- Digital Voltage Display: The integrated 3-digit digital voltage display shows the current voltage of the capacitor. This display provides real-time feedback on your vehicle's electrical system stability. A stable voltage reading (typically between 12V and 14.5V when the engine is running) indicates proper operation. Fluctuations during heavy bass notes are normal, but significant drops below 11V may indicate an issue with the vehicle's charging system or insufficient power delivery.
- Remote Turn-On: The capacitor will power on when your head unit or amplifier sends a remote turn-on signal, and power off when the signal is removed, conserving battery power.
5. Maintenance
The Hifonics ZXT10.0 capacitor requires minimal maintenance to ensure long-term performance.
- Regular Inspection: Periodically check all wiring connections to ensure they are tight and free from corrosion. Loose connections can lead to poor performance or overheating.
- Cleaning: Keep the capacitor clean and free of dust and debris. Use a soft, dry cloth for cleaning. Do not use harsh chemicals or abrasive cleaners.
- Environmental Conditions: Ensure the capacitor remains in a dry, well-ventilated environment. Avoid exposure to extreme temperatures or moisture.
- Discharging for Service: If you need to remove the capacitor for vehicle service or replacement, it must be safely discharged. Use a resistor (similar to the charging process) to discharge the capacitor slowly. Connect the resistor across the positive and negative terminals until the voltage display reads 0V.
6. Troubleshooting
If you experience issues with your Hifonics ZXT10.0 capacitor, refer to the following common problems and solutions:
| Problem | Possible Cause | Solution |
|---|---|---|
| Capacitor not turning on / Display off |
|
|
| Voltage display shows low or fluctuating voltage |
|
|
| Spark when connecting power cable |
|
|
| System performance not improved |
|
|
7. Specifications
| Feature | Specification |
|---|---|
| Capacitance | 10.0 Farad |
| Type | Hybrid Buffer Capacitor |
| Digital Display | 3-digit Voltage Display |
| Continuous Operating Voltage | 11 ~ 14.5 V DC |
| Maximum Operating Voltage | < 16 V DC |
| Equivalent Series Resistance (ESR) | 0.004 Ohm @ 120 Hz / 25°C |
| Cable Connection Sections | Up to 50 mm² |
| Remote Connection | Yes |
| Material | Aluminum |
| Product Dimensions (L x W x H) | 28.5 x 14.5 x 7 cm |
| Weight | 2.3 kg |
8. Warranty and Support
For specific warranty information, please refer to the warranty card included with your product or visit the official Hifonics website. Keep your proof of purchase for any warranty claims.
For technical support or assistance with installation and troubleshooting beyond this manual, please contact Hifonics customer service or your authorized dealer. Contact information can typically be found on the Hifonics website or product packaging.
Online Resources:
- Hifonics Official Website (Please replace with actual URL if available)
- Hifonics Support Page (Please replace with actual URL if available)


