1. Introduction
Thank you for choosing the Camry CR 7739 LCD Convector Heater. This manual provides essential information for the safe and efficient operation, maintenance, and troubleshooting of your new heater. Please read these instructions carefully before use and keep them for future reference.
Important Safety Instructions
- Always ensure the heater is placed on a stable, level surface.
- Do not cover the heater. Covering the heater can lead to overheating and fire.
- Keep flammable materials at least 1 meter (3 feet) away from the heater.
- Do not use the heater in bathrooms, laundry areas, or similar indoor locations where water may be present.
- Unplug the heater when not in use or before cleaning.
- This appliance is equipped with a tilt protection safety switch that automatically turns off the heater if it tips over.
- Do not insert or allow foreign objects to enter any ventilation or exhaust opening as this may cause an electric shock or fire, or damage the heater.
2. Product Overview
The Camry CR 7739 is an efficient convector heater designed to provide supplemental heat to your living spaces. It features an LCD display, thermostatic control, and a remote control for convenient operation.
Components and Controls
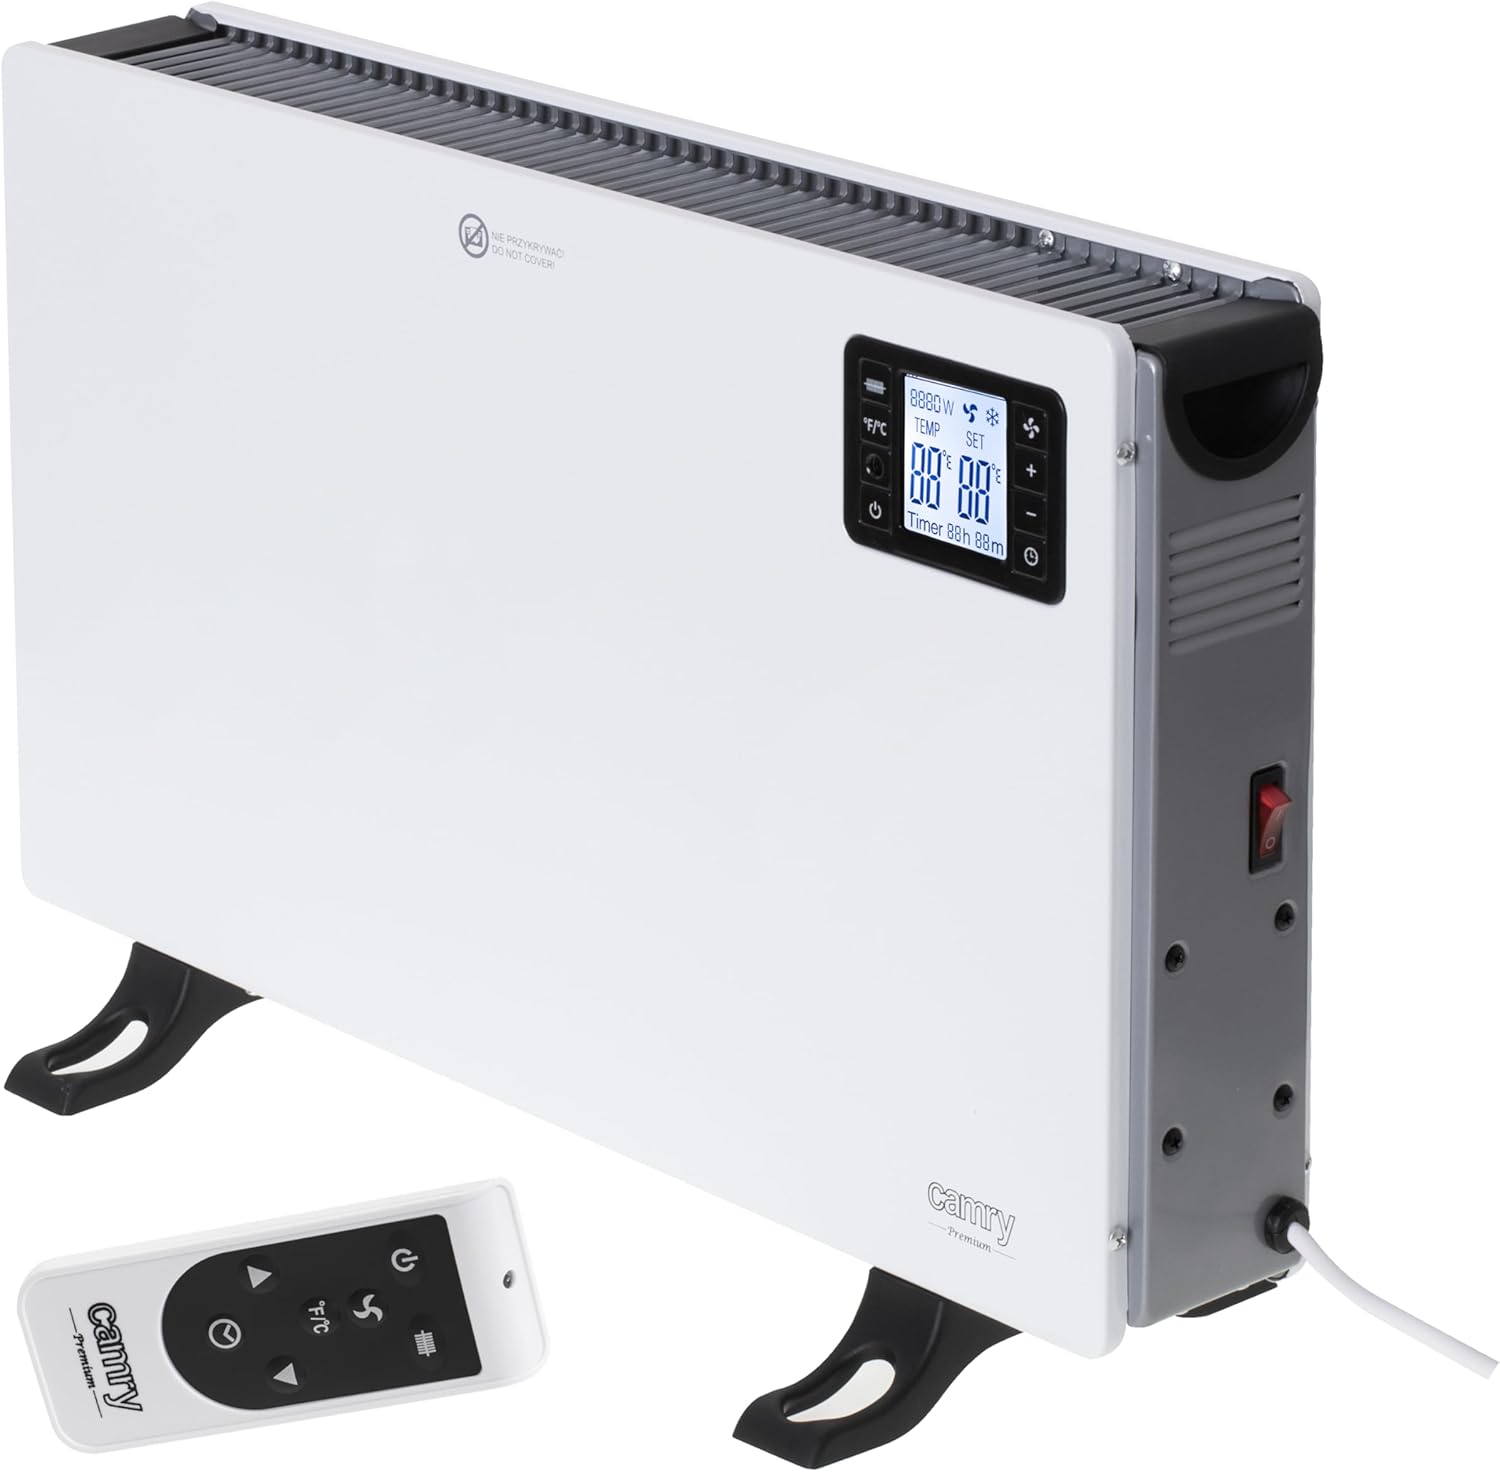
Figure 2.1: Front view of the Camry CR 7739 LCD Convector Heater, showing the main body, feet, and the integrated LCD control panel on the right side.
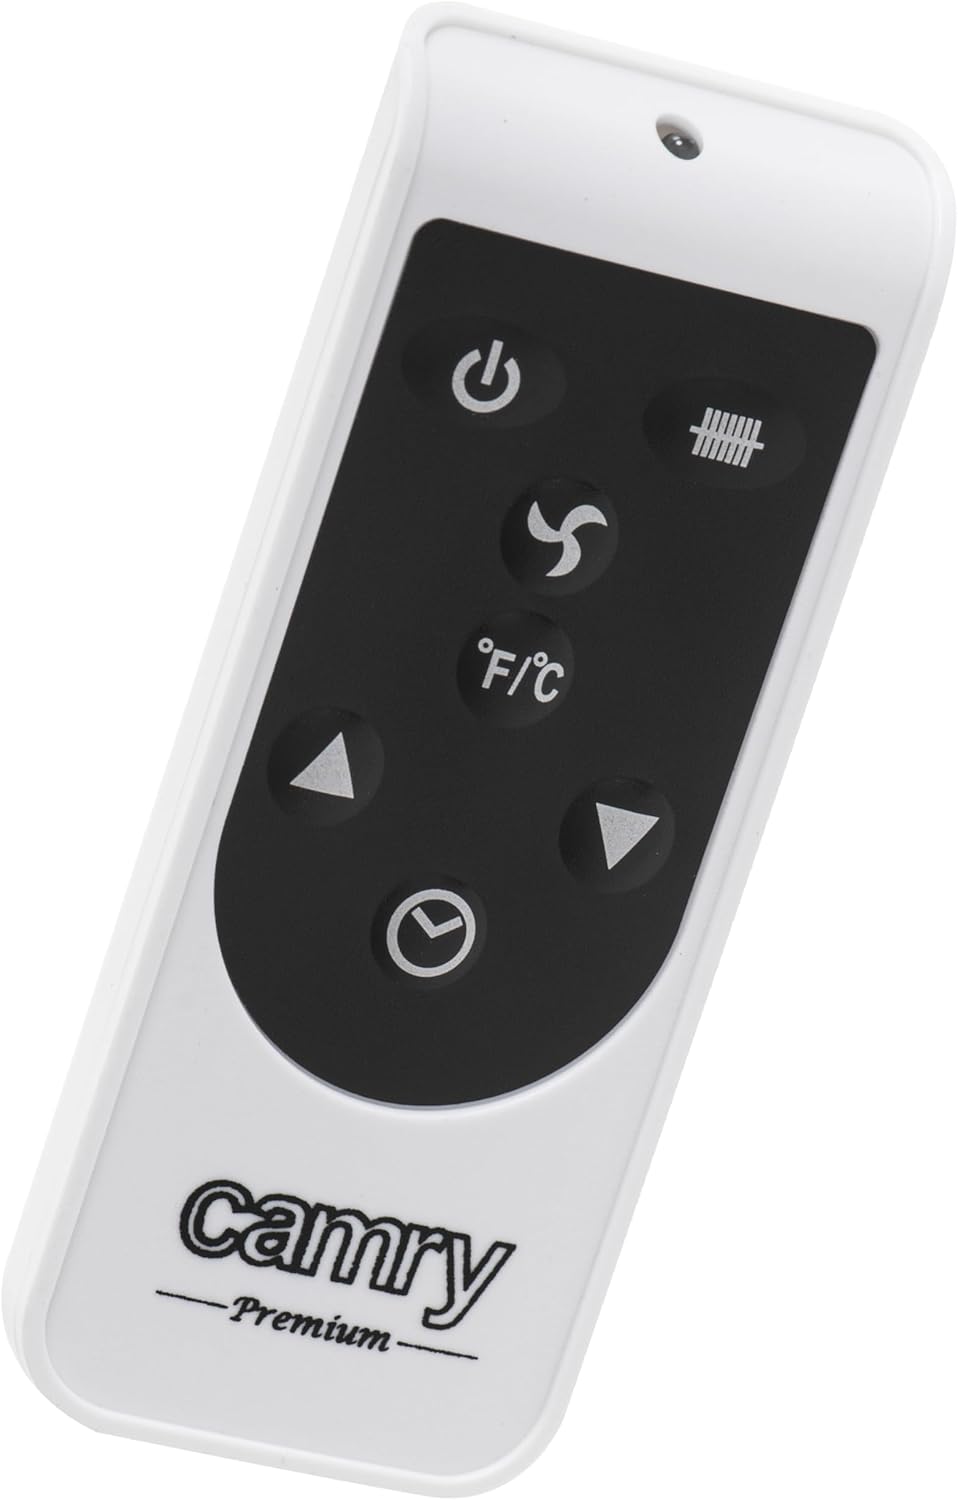
Figure 2.2: The remote control for the heater, featuring power, mode, temperature adjustment, and timer buttons.

Figure 2.3: Detailed view of the LCD control panel, displaying current temperature, set temperature, power level, and various function icons.

Figure 2.4: Top view of the heater, illustrating the air outlet vents for heat distribution.
Parts List
- Convector Heater Unit
- Remote Control
- Feet for Floor Mounting (may require assembly)
- User Manual (this document)
3. Setup
Assembly (if required)
If the feet are not pre-attached, follow these steps:
- Carefully unpack the heater and all components.
- Place the heater upside down on a soft, non-abrasive surface to prevent scratches.
- Align the mounting holes on the feet with the corresponding holes on the base of the heater.
- Secure the feet using the provided screws. Ensure they are tightened firmly but do not overtighten.
- Return the heater to an upright position.
Placement
- Place the heater on a firm, level surface.
- Ensure there is at least 1 meter (3 feet) of clear space around the heater from walls, furniture, curtains, and other flammable materials.
- Do not place the heater directly below a power outlet.
- Ensure the power cord is not obstructed or placed under carpets.
4. Operating Instructions
Powering On/Off
- Plug the heater into a suitable electrical outlet.
- Press the power button on the control panel or remote control to turn the heater ON. The LCD display will illuminate.
- Press the power button again to turn the heater OFF.
Setting the Temperature
- Once powered on, use the '+' and '-' buttons on the control panel or remote to adjust the desired room temperature.
- The LCD display will show both the current room temperature and the set temperature.
- The heater will automatically cycle on and off to maintain the set temperature.
Fan Mode (Ventilation)
- Press the fan icon button on the control panel or remote control to activate the ventilation mode.
- This function circulates air without heating, useful for general air movement.
- Press the button again to deactivate fan mode.
Timer Function
- Press the timer button (clock icon) on the control panel or remote control.
- Use the '+' and '-' buttons to set the desired operating time (e.g., 1-24 hours).
- The heater will automatically turn off after the set time has elapsed.
Remote Control Operation
The remote control duplicates most functions available on the main control panel, offering convenience from a distance. Ensure the remote control has working batteries (not included) and is pointed towards the heater's receiver.
5. Maintenance
Cleaning
- Always unplug the heater and allow it to cool completely before cleaning.
- Wipe the exterior surfaces with a soft, damp cloth. Do not use abrasive cleaners or solvents.
- Use a vacuum cleaner with a brush attachment to remove dust from the air inlet and outlet grilles.
- Never immerse the heater in water or any other liquid.
Storage
- If storing the heater for an extended period, clean it thoroughly as described above.
- Store the heater in its original packaging or a suitable container in a cool, dry place.
- Do not place heavy objects on top of the heater during storage.
6. Troubleshooting
| Problem | Possible Cause | Solution |
|---|---|---|
| Heater does not turn on. | No power supply. Power button not pressed. Safety switch activated (e.g., tipped over). | Check if the heater is properly plugged in. Ensure the power outlet is working. Press the power button. Place the heater upright on a stable surface. |
| Heater produces no heat. | Temperature setting too low. Fan mode is active. Overheat protection activated. | Increase the set temperature. Deactivate fan mode. Unplug the heater, let it cool for 30 minutes, then plug it back in. Ensure vents are clear. |
| Heater makes unusual noise. | Dust or debris inside. Loose component. | Unplug and clean the heater (see Maintenance). If noise persists, discontinue use and contact support. |
| Remote control not working. | Dead batteries. Obstruction between remote and heater. | Replace batteries in the remote control. Ensure a clear line of sight to the heater's receiver. |
7. Specifications
| Feature | Detail |
|---|---|
| Model Number | CR 7739 |
| Manufacturer | Camry |
| Heating Element | Ceramic |
| Maximum Power | 1500W (Note: Product description mentions 1500W, feature bullets mention 1500W, but packaging image shows 2000W. Using 1500W as per text description.) |
| Control Type | LCD Display, Remote Control |
| Thermostat | Yes |
| Fan Mode | Yes |
| Timer Function | Yes (1-24 hours) |
| Safety Features | Tilt Protection, Overheat Protection |
| Dimensions (L x W x H) | 65.5 x 13.5 x 37 cm (approx.) |
| Weight | 4.36 kg (approx.) |
| Color | White |
| Mounting Type | Floor Mounting |
8. Warranty and Support
For warranty information and customer support, please refer to the warranty card included with your product or contact the retailer where the product was purchased. Keep your proof of purchase for any warranty claims.


