1. Introduction
This manual provides detailed instructions for the installation, operation, and maintenance of your ApeStellar AS-KL01-1 Keyless Entry Door Lock. Please read this manual thoroughly before installation and use to ensure proper function and longevity of the product.

Figure 1: ApeStellar AS-KL01-1 Keyless Entry Door Lock (Front and Back)
Description: This image displays the exterior keypad and the interior assembly of the ApeStellar AS-KL01-1 Keyless Entry Door Lock, showcasing its matte black finish and overall design.
The ApeStellar AS-KL01-1 is an electronic keypad deadbolt designed for enhanced security and convenience. It features keyless entry, auto-locking capabilities, and anti-peeping password protection, suitable for various door types.
2. Safety Information
Please observe the following safety precautions to prevent injury or damage to the product:
- Do not attempt to disassemble or repair the lock yourself. Contact qualified personnel for service.
- Use only the specified battery type (4 AA batteries, not included). Do not mix old and new batteries or different types of batteries.
- Keep the lock away from water and direct sunlight to prevent damage to electronic components. The lock has IP54 weather resistance, but extreme conditions should be avoided.
- Ensure all screws are tightened securely during installation to prevent the lock from becoming loose.
- Regularly check the lock for any signs of wear or damage.
3. Package Contents
Verify that all components are present before beginning installation:
- ApeStellar Keyless Entry Door Lock (Exterior Keypad and Interior Assembly)
- 2 Backup Keys
- Latch
- Screws (various sizes for mounting)
- Strike Plate
- Mounting Plate
- Installation Instructions (this manual)
- Programming Instructions (included within this manual)
4. Installation Guide
The ApeStellar AS-KL01-1 lock is designed for easy installation, typically requiring only a screwdriver. Follow these steps for proper setup:
4.1 Door Preparation
- Ensure your door has a 2-1/8" (54mm) diameter hole. This lock is not compatible with 38mm door holes.
- Verify the backset measurement (distance from door edge to center of the bore hole) is either 2-3/8" (60mm) or 2-3/4" (70mm). The latch is adjustable to fit these dimensions.
- The door thickness should be between 1-3/8" to 1-3/4" (35mm-45mm).

Figure 2: Door Compatibility and Dimensions
Description: This image illustrates the required door hole diameter (2-1/8" or 54mm), adjustable backset (2-3/8" or 2-3/4"), and door thickness (1-3/8" to 1-3/4"). It also shows how the lock components fit together on both right-handed and left-handed doors.
4.2 Installing the Latch and Strike Plate
- Insert the latch into the door edge, ensuring the bolt faces the correct direction (slanted side towards the door frame).
- Secure the latch with the provided screws.
- Install the strike plate on the door frame, aligning it with the latch bolt.
4.3 Installing the Exterior Keypad and Interior Assembly
- Feed the cable from the exterior keypad through the door hole.
- Position the exterior keypad flush against the door.
- Attach the mounting plate to the interior side of the door, securing it with screws through the door hole and into the exterior keypad.
- Connect the cable from the exterior keypad to the interior assembly.
- Mount the interior assembly onto the mounting plate, ensuring the thumb turn spindle engages with the latch mechanism.
- Secure the interior assembly with the remaining screws.
- Install batteries (4 AA batteries, not included) into the interior assembly.

Figure 3: Simplified Installation Process
Description: This image shows a person using a screwdriver to install the interior assembly of the ApeStellar keyless entry door lock, highlighting the ease of the 15-minute installation process.
5. Operating Instructions
Your ApeStellar AS-KL01-1 lock offers several convenient ways to secure and access your door.
5.1 Keyless Entry with User Codes
The lock supports up to 50 unique user codes for regular access.
- To unlock: Enter your 4-8 digit user code on the keypad, then press the 'Lock' button (bottom right).
- The lock will retract the deadbolt, and you can open the door.

Figure 4: User Code Capacity
Description: This image visually represents the lock's ability to store up to 50 user codes, suitable for family members, couriers, repairmen, housekeepers, and friends, along with the option for one-time codes.
5.2 One-Time User Codes
Generate temporary codes for single-use access, ideal for visitors or service personnel.
- Refer to the programming section for instructions on creating one-time codes.
- Once used, these codes expire automatically.

Figure 5: One-Time User Code Usage
Description: This image depicts a scenario where a person receives a one-time entry code via phone, demonstrating the convenience of temporary access for guests or service providers.
5.3 Auto-Lock Function
The lock can be programmed to automatically re-lock after a set period (5-900 seconds) once unlocked.
- To enable/disable or adjust the auto-lock time, refer to the programming section.
5.4 One-Touch Locking
For quick locking from the exterior, simply press the 'Lock' button (bottom right) on the keypad.

Figure 6: Auto-Lock and One-Touch Locking
Description: This image illustrates two key operational features: the automatic locking mechanism that engages after a set time, and the one-touch locking function activated by pressing a dedicated button on the keypad.
5.5 Anti-Peeping Password
Enhance security by entering random digits before or after your actual code. This prevents others from guessing your code by observing your hand movements.
- Example: If your code is 3598, you can enter 14072359853248. The lock will still recognize the correct sequence.
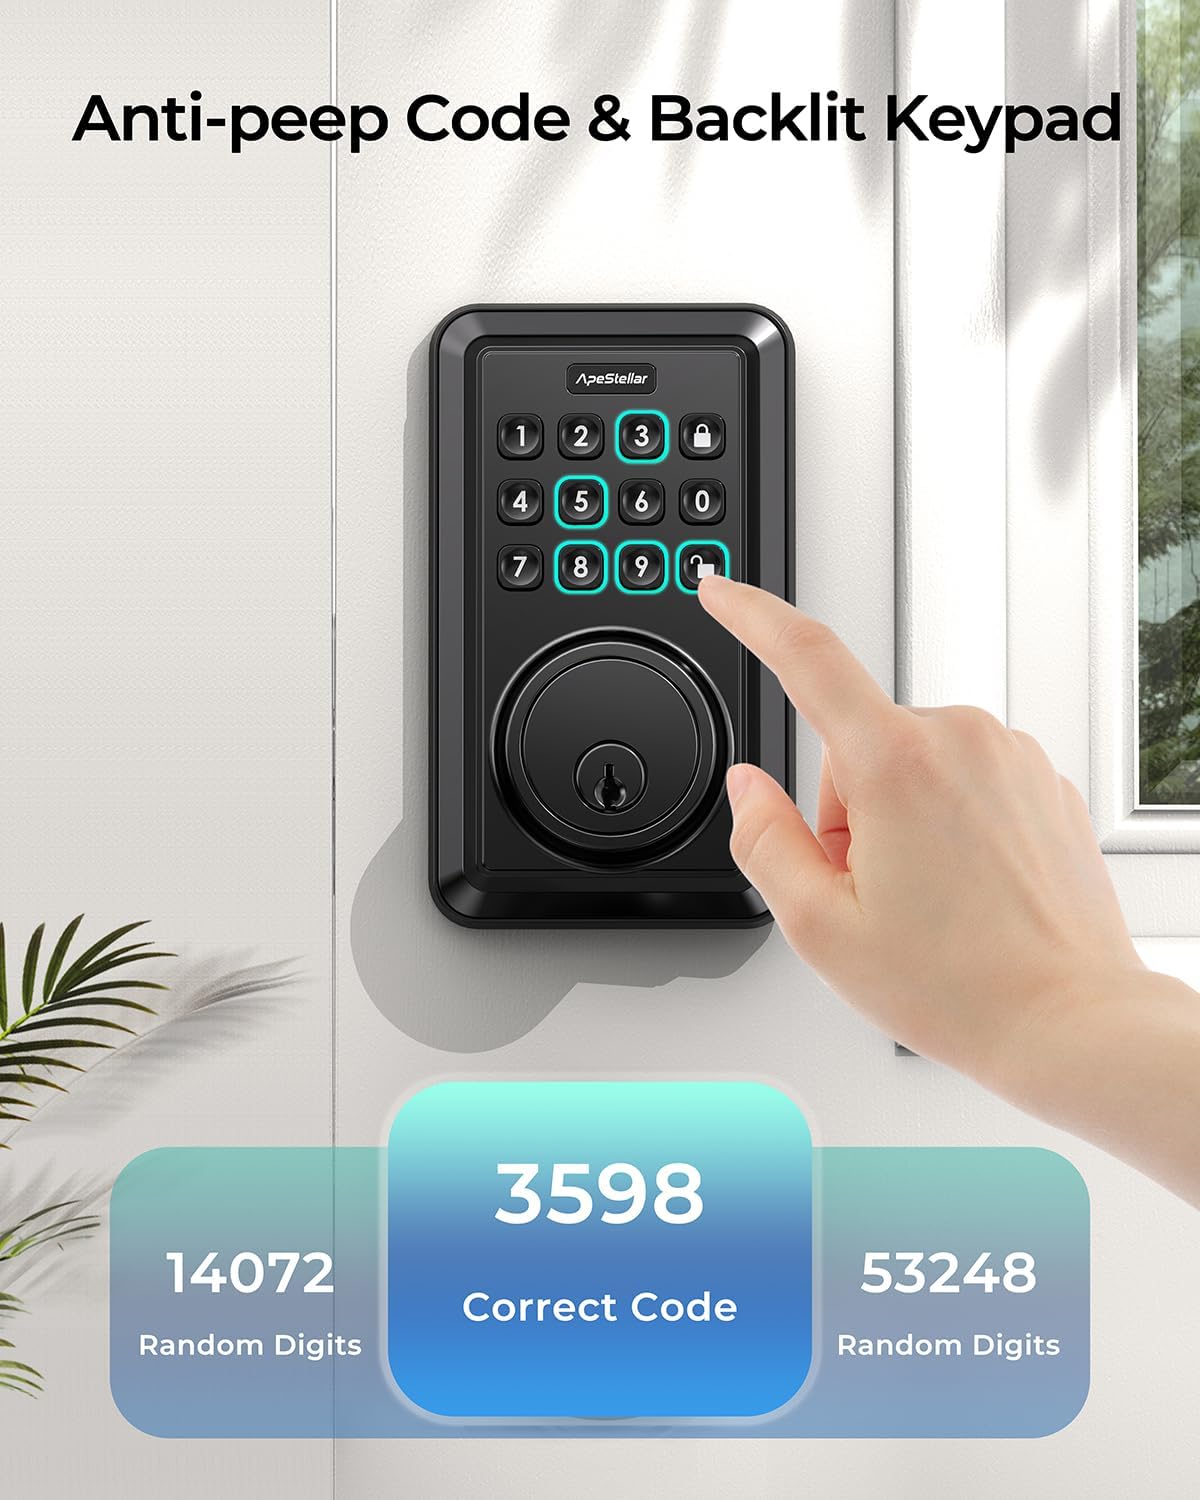
Figure 7: Anti-Peeping Code Functionality
Description: This image demonstrates the anti-peeping code feature, where random digits can be entered before or after the actual correct code (e.g., 3598) to obscure it from onlookers, enhancing security.
5.6 Backlit Keypad
The keypad illuminates for easy visibility in low-light conditions.
6. Programming the Lock
Detailed programming instructions are typically found on a sticker on the interior assembly or in a separate quick start guide. General steps include:
6.1 Master Code Setup
- The first step after installation is to set a Master Code. This code is used to program other settings and user codes.
- Consult the specific programming instructions included with your lock for the exact sequence to set the Master Code.
6.2 Adding User Codes
- Using the Master Code, follow the prompts to add new 4-8 digit user codes.
- Each user code can be assigned to a specific individual.
6.3 Creating One-Time Codes
- Access the programming menu with the Master Code to generate temporary one-time codes.
- These codes are valid for a single use and then automatically deactivate.
6.4 Adjusting Auto-Lock Time
- Through the programming menu, you can set the duration (5-900 seconds) after which the lock will automatically re-engage the deadbolt.
6.5 Vacation Mode
- This mode disables all user codes for extended periods, requiring a physical key or Master Code for entry. Useful when away from home.
6.6 Mute Mode
- Silence keypad beeps for quiet operation.
7. Maintenance
To ensure optimal performance and longevity of your ApeStellar AS-KL01-1 lock, follow these maintenance guidelines:
- Cleaning: Wipe the keypad and lock body with a soft, dry cloth. Avoid abrasive cleaners or solvents that could damage the finish or electronic components.
- Battery Replacement: Replace all four AA batteries when the low battery warning indicator appears. Do not mix old and new batteries.
- Lubrication: Periodically apply a small amount of graphite lubricant to the deadbolt mechanism if it feels stiff. Do not use oil-based lubricants.
- Keypad Protection: While the lock has IP54 weather resistance, prolonged exposure to extreme weather conditions should be minimized.
8. Troubleshooting
If you encounter issues with your ApeStellar AS-KL01-1 lock, refer to the following common problems and solutions:
- Lock does not respond to keypad input:
- Check if the batteries are correctly installed and have sufficient charge. Replace if necessary.
- Ensure the keypad is clean and free of debris.
- If the lock has been exposed to extreme temperatures, allow it to return to normal operating temperature.
- Code not working / Difficulty programming:
- Verify you are entering the correct Master Code or User Code.
- Ensure you are following the programming steps precisely as outlined in the programming instructions.
- If multiple incorrect attempts are made, the lock may temporarily disable the keypad (wrong code attempt limit). Wait a few minutes before trying again.
- Perform a factory reset if programming issues persist (consult specific instructions for your model).
- Deadbolt does not extend or retract fully:
- Check for any obstructions in the door frame or strike plate.
- Ensure the latch and deadbolt are properly aligned with the strike plate.
- Verify that the interior assembly is securely mounted and the thumb turn spindle is correctly engaged.
- Low Battery Warning:
- The lock will typically emit a series of beeps or flash an indicator light when batteries are low. Replace all four AA batteries immediately.
9. Product Specifications
| Model Number | AS-KL01-1 |
| Brand | ApeStellar |
| Material | Zinc Alloy |
| Color | Matte Black |
| Lock Type | Combination Lock, Deadbolt, Keypad, Pin Tumbler |
| Power Source | 4 x AA Batteries (not included) |
| Door Hole Compatibility | 2-1/8" (54mm) diameter |
| Backset Compatibility | Adjustable 2-3/8" (60mm) or 2-3/4" (70mm) |
| Door Thickness | 1-3/8" to 1-3/4" (35mm-45mm) |
| Item Weight | 1.04 Kilograms |
| Product Dimensions (L x W x H) | 12.45 x 9.65 x 22.61 cm |
| Special Features | Keyless Entry, Anti-Peeping Code, Auto-Lock, One-Touch Locking, Backlit Keypad, Vacation Mode, Mute Mode, Low Battery Warning |
| ANSI Grade | Grade 3 Certified |
10. Warranty and Support
ApeStellar provides a warranty for this product. For specific warranty details and to register your product, please refer to the warranty card included in your package or visit the official ApeStellar website. For technical support or assistance with installation and programming, please contact ApeStellar customer service.