1. Important Safety Information
Always wear protective equipment, be cautious around rotating parts, ensure proper ventilation for gasoline models, and handle the snow blower with care, referring to the user manual for maintenance instructions.
- Read the entire manual before operating the snow blower.
- Keep hands, feet, and clothing away from moving parts.
- Never operate the machine indoors or in poorly ventilated areas due to carbon monoxide risk.
- Always wear appropriate eye and ear protection.
- Keep bystanders, children, and pets at a safe distance.
- Inspect the area to be cleared for objects that could be thrown by the auger.
- Do not attempt to clear snow from a steep slope.
- Turn off the engine and remove the spark plug wire before performing any maintenance or clearing clogs.
2. Product Overview
The PowerSmart PS21-LED is a single-stage gas snow blower designed for efficient snow removal. It features a 212cc 4-stroke engine, electric start capability, and an integrated LED light for visibility in low-light conditions.
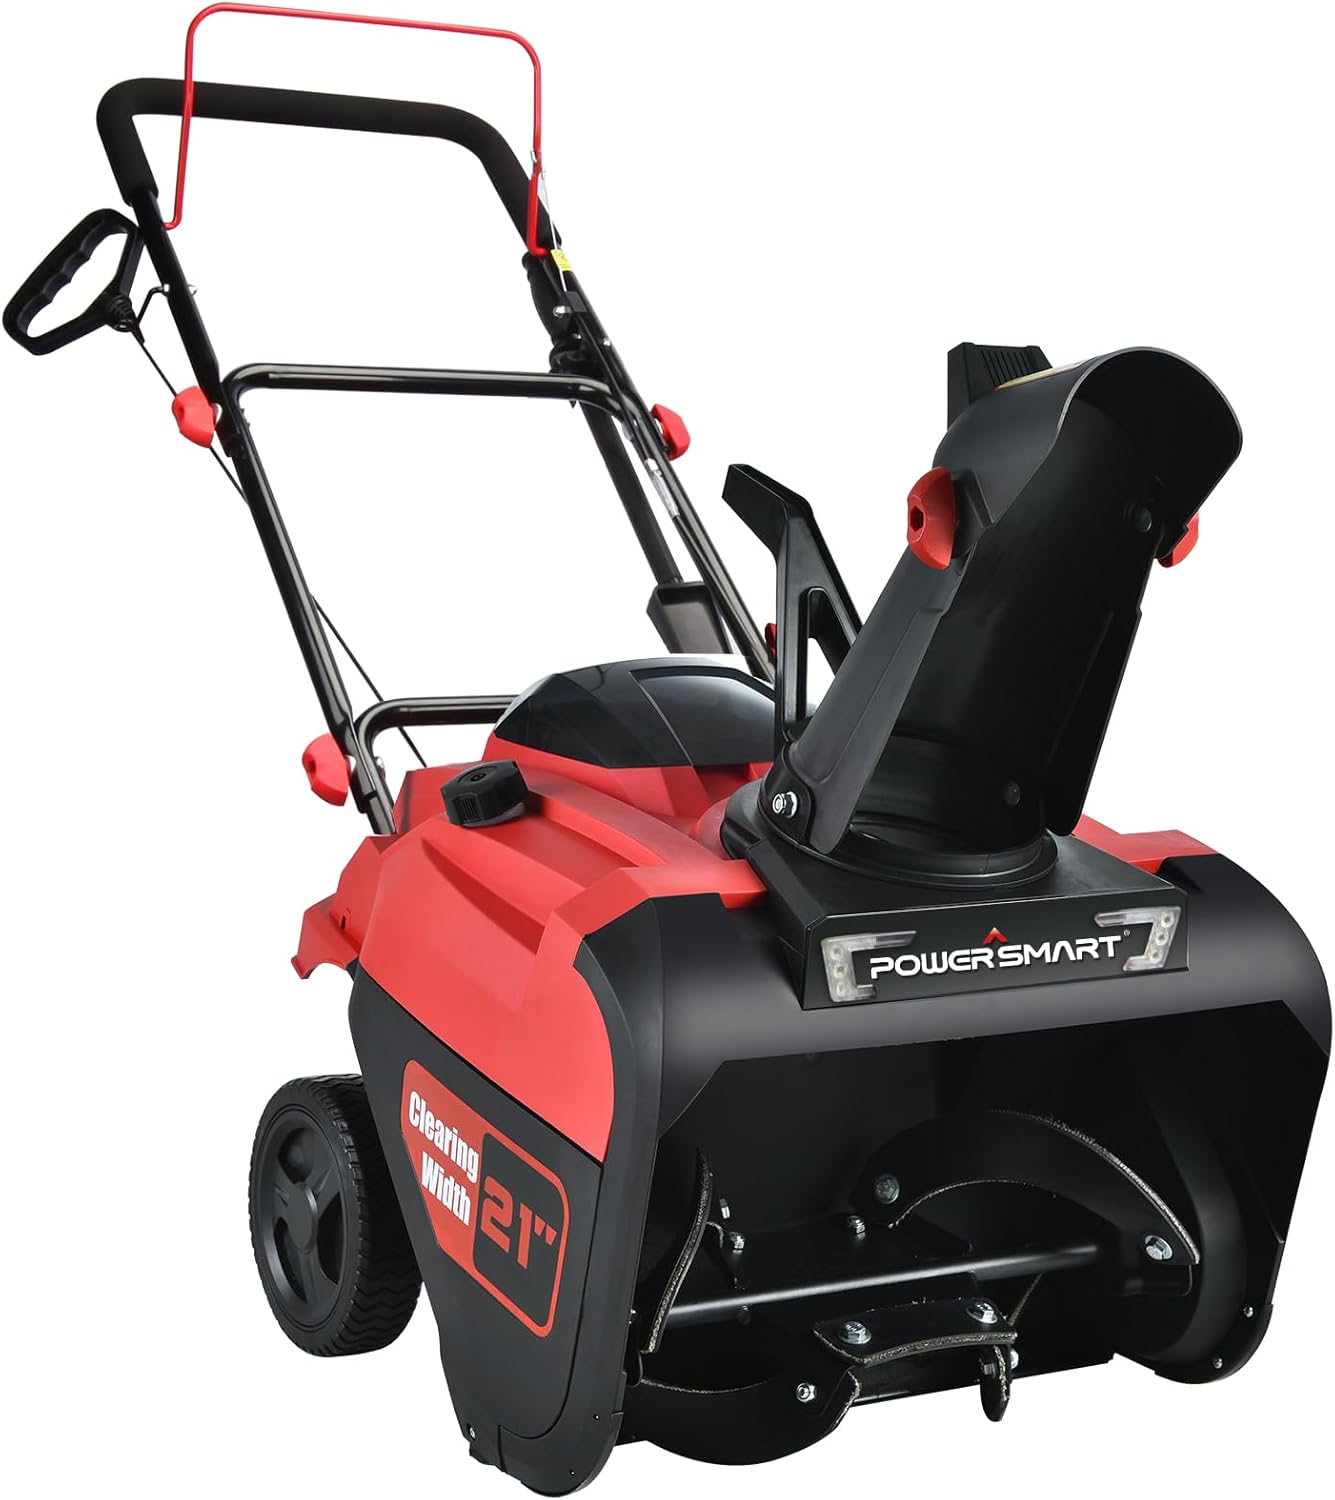
Figure 2.1: Overview of the PowerSmart PS21-LED Snow Blower.
Key features include:
- Engine: 212cc 4-cycle OHV engine.
- Clearing Width: 21 inches.
- Intake Height: 12.5 inches.
- Throwing Distance: Up to 35 feet.
- Snow Plowing Capacity: Up to 1600 lbs/min.
- Start System: Electric start for easy ignition.
- Visibility: Integrated LED light.
- Chute: 180-degree adjustable discharge chute.
- Auger: 4-blade rubber auger.
- Design: Compact and foldable for storage.

Figure 2.2: Key operational specifications of the snow blower.

Figure 2.3: Engine detail of the PowerSmart snow blower.
3. Setup and Assembly
The snow blower is designed for straightforward assembly. Follow these steps to prepare your unit for operation.
- Unpacking: Carefully remove all components from the packaging. Ensure all parts listed in the packing list are present.
- Handlebar Assembly: Attach the upper handle to the lower handle using the provided hardware. Ensure all bolts are tightened securely.
- Chute Assembly: Secure the discharge chute to the main unit. Verify that the chute rotation mechanism operates smoothly.
- Oil Fill: Locate the oil fill cap. Add the recommended 5W-30 engine oil (not included) to the engine crankcase. Do not overfill.
- Fuel Fill: Fill the fuel tank with fresh, unleaded gasoline. Refer to the engine manual for specific fuel requirements.
- Electric Start Connection: For electric start models, connect the power cord to the designated receptacle on the snow blower and then to a standard 120V AC outlet.
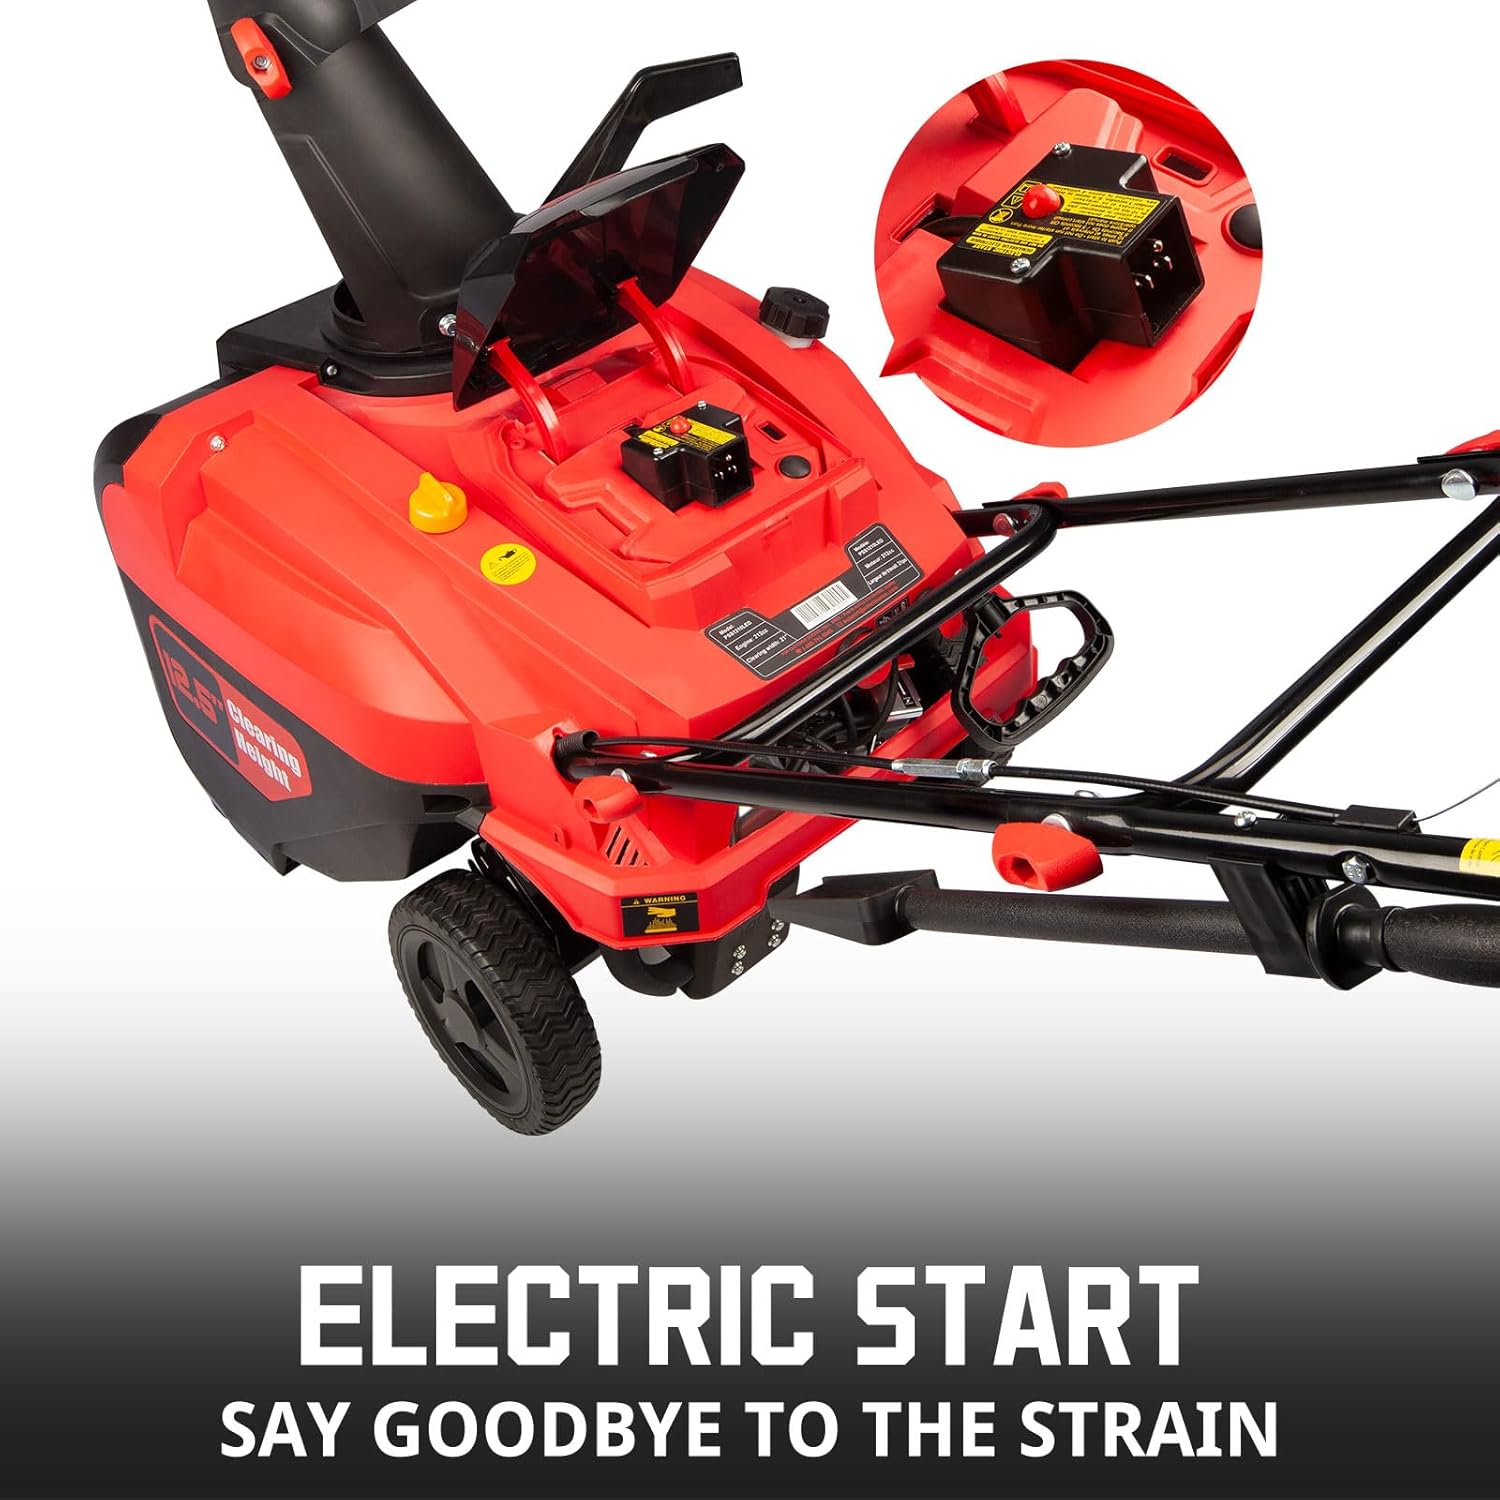
Figure 3.1: Electric start connection point.
The compact and foldable design allows for easier storage. After use, the handles can be folded down to save space.
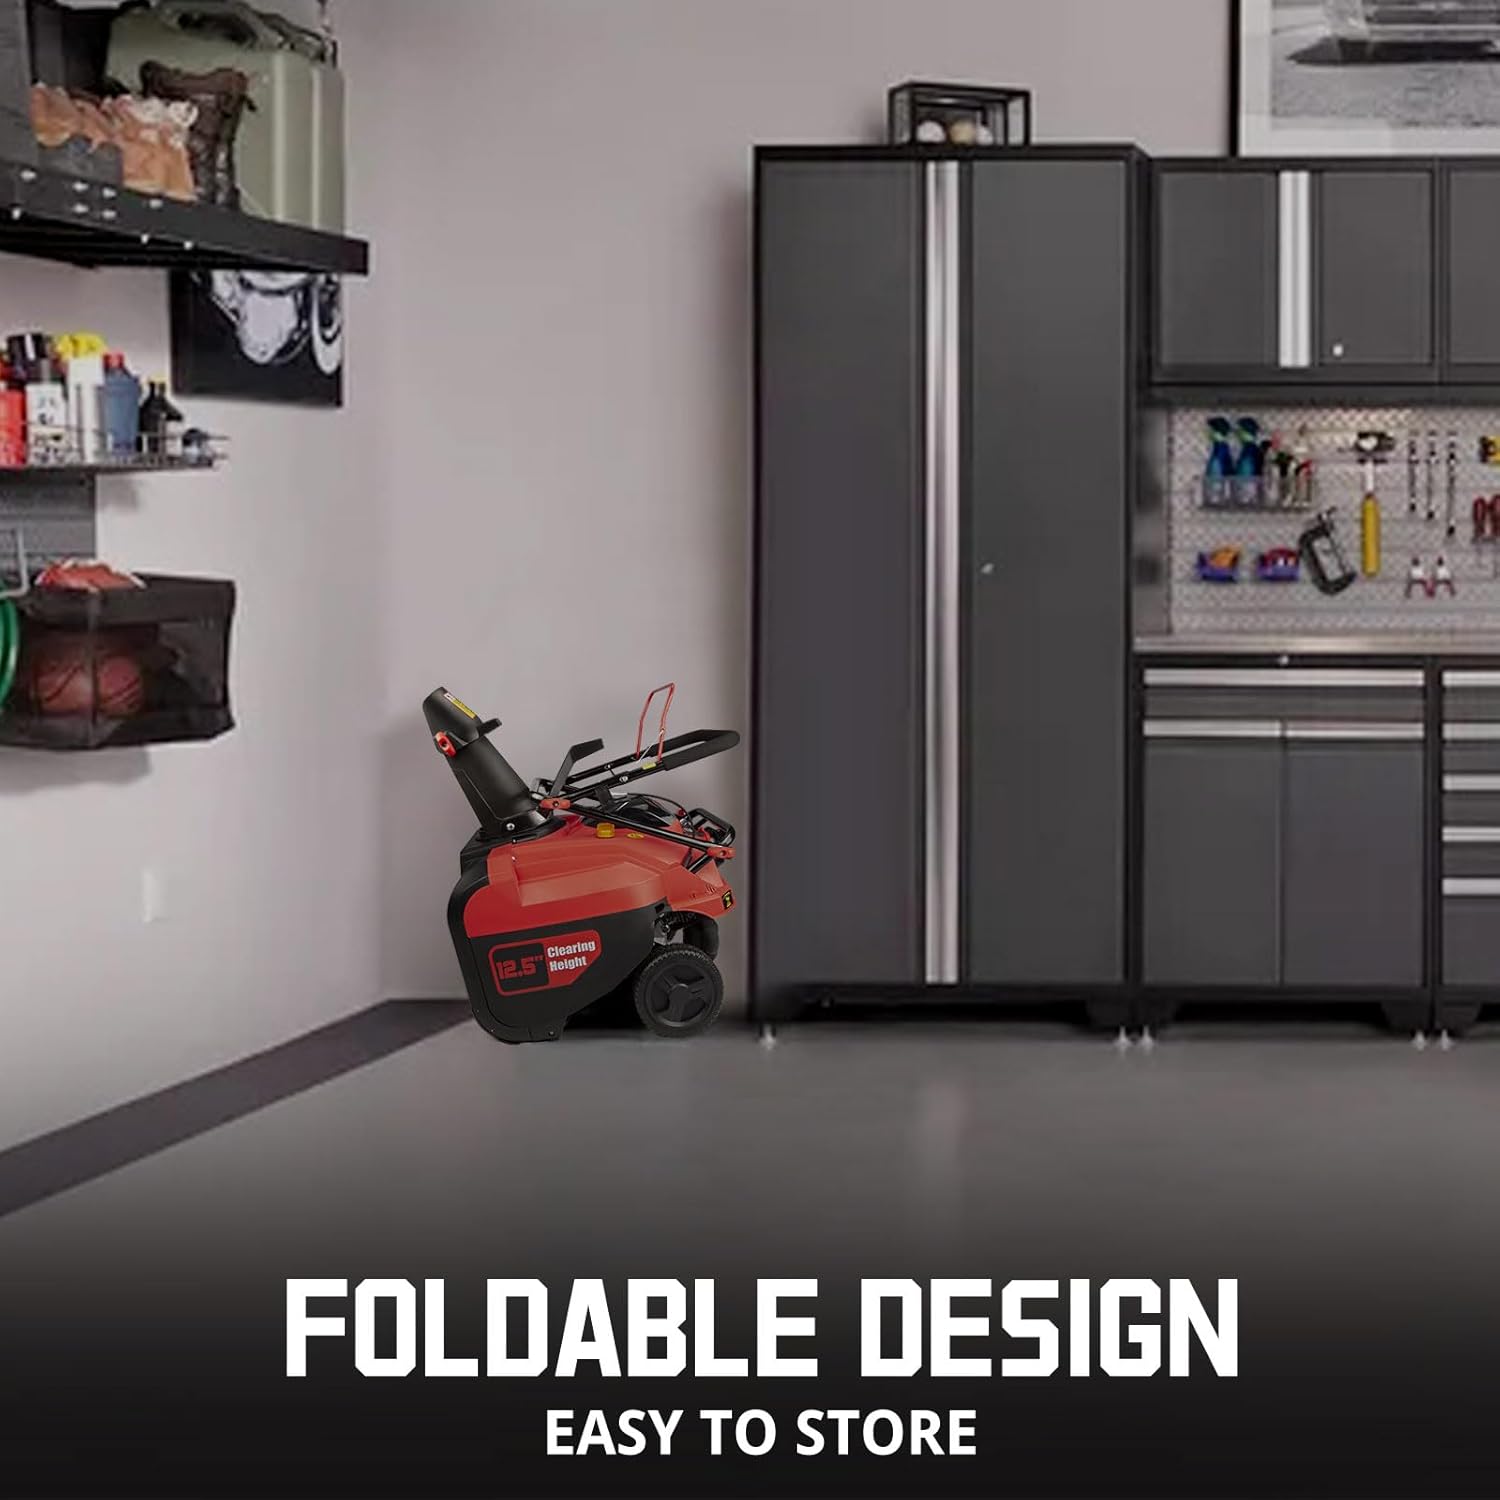
Figure 3.2: Foldable design for compact storage.
4. Operating Instructions
Follow these steps for safe and effective operation of your snow blower.
- Pre-Operation Check:
- Check engine oil level.
- Ensure fuel tank is adequately filled.
- Inspect the auger for any obstructions.
- Verify all controls are functioning correctly.
- Starting the Engine:
- Electric Start: Connect the extension cord to the snow blower and a grounded 120V AC outlet. Press the electric start button. Once the engine starts, disconnect the extension cord.
- Manual Start (if applicable): Prime the engine as per instructions (usually 1-3 pushes of the primer bulb). Set the choke to "FULL CHOKE". Pull the recoil starter handle firmly until the engine starts. Gradually move the choke to "RUN" position as the engine warms up.
- Adjusting the Chute: Use the chute control lever to adjust the direction of snow discharge up to 180 degrees. Aim snow away from windows, vehicles, and bystanders.
- Clearing Snow:
- Push the snow blower forward into the snow. The 4-blade rubber auger will shred and throw snow.
- For deep or heavy snow, clear in narrower passes.
- The LED light provides illumination for operation in low-light conditions.
- Stopping the Engine: Release the auger control lever and turn the engine switch to the "OFF" position.

Figure 4.1: Snow blower in operation, demonstrating snow throwing capability.

Figure 4.2: Auger in action during snow clearing.

Figure 4.3: Integrated LED light for enhanced visibility.

Figure 4.4: 180-degree adjustable chute for precise snow direction.
5. Maintenance
Regular maintenance ensures optimal performance and extends the life of your snow blower. Always ensure the engine is off and cool, and the spark plug wire is disconnected before performing any maintenance.
- Engine Oil: Check oil level before each use. Change oil after the first 5 hours of operation, then every 25 hours or annually.
- Spark Plug: Inspect and clean the spark plug annually or every 50 hours. Replace if necessary.
- Auger Blades: Inspect rubber auger blades for wear. Replace worn blades to maintain clearing efficiency.
- Drive Belt: Check the auger drive belt for wear or damage. Replace if cracked or stretched.
- Chute Clearing Tool: Use the provided chute clearing tool to remove snow clogs from the discharge chute. Never use hands.
- Storage: For seasonal storage, drain the fuel tank or use a fuel stabilizer. Clean the unit thoroughly and store in a dry, protected area.

Figure 5.1: Essential maintenance parts and accessories.
6. Troubleshooting
This section provides solutions to common operational issues.
| Problem | Possible Cause | Solution |
|---|---|---|
| Engine does not start. | No fuel, stale fuel, spark plug issue, choke setting incorrect, electric start not connected. | Check fuel level, use fresh fuel, inspect/replace spark plug, adjust choke, ensure electric start cord is connected. |
| Snow is not clearing effectively. | Worn auger blades, clogged chute, engine not at full RPM. | Inspect/replace auger blades, clear chute with tool, ensure engine is running smoothly. |
| Engine runs rough or stalls. | Stale fuel, dirty air filter, spark plug issue. | Drain and refill with fresh fuel, clean/replace air filter, inspect/replace spark plug. |
| LED light not working. | Loose connection, bulb failure (if replaceable), switch malfunction. | Check connections, consult service center for bulb replacement or switch repair. |
7. Specifications
Detailed technical specifications for the PowerSmart PS21-LED snow blower.
| Specification | Value |
|---|---|
| Brand | PowerSmart |
| Model | PS21-LED |
| Power Source | Gasoline-Powered |
| Engine Type | 4 Cycle OHV |
| Engine Displacement | 212 Cubic Centimeters |
| Clearing Width | 21 Inches |
| Ideal Snow Depth | Up to 8 Inches |
| Item Weight | 85 pounds |
| Package Dimensions | 27 x 23 x 19 inches |
| Manufacturer | Amerisun Inc. |

Figure 7.1: Product dimensions.
8. Warranty and Support
PowerSmart products are supported by Amerisun Inc. For warranty claims, replacement parts, or technical assistance, please contact customer support.
- Manufacturer: Amerisun Inc. (headquartered in Itasca, Illinois).
- Repair Centers: PowerSmart has over 500 certified repair centers in the U.S.
- Replacement Parts: Full replacement parts are available through the IL headquarters.
- Contact: For any issues, contact PowerSmart customer service.
Protection plans are also available for extended coverage:
- 2-Year Protection Plan
- 3-Year Protection Plan
- Complete Protect (monthly plan covering multiple eligible purchases)


