1. Introduction
This manual provides detailed instructions for the installation, operation, and maintenance of your Fookoo HD Single Wireless Backup Camera. This camera is designed to be an add-on or replacement for existing Fookoo Wireless Backup Camera Systems, specifically models DW7Y5, DW7Y503, DW7Y504, and DW5. Please read this manual thoroughly before use to ensure proper functionality and safety.
2. Safety Information
- Ensure all connections are secure before operating your vehicle.
- Do not attempt to disassemble or modify the camera. This may void the warranty and cause damage.
- Always follow local traffic laws and regulations. The backup camera is an aid and should not replace careful driving.
- Keep the camera lens clean for optimal image clarity.
3. Product Overview
The Fookoo HD Single Wireless Backup Camera provides a clear, wide-angle view to assist with vehicle maneuvering. It features a robust, waterproof design and infrared night vision for reliable performance in various conditions.
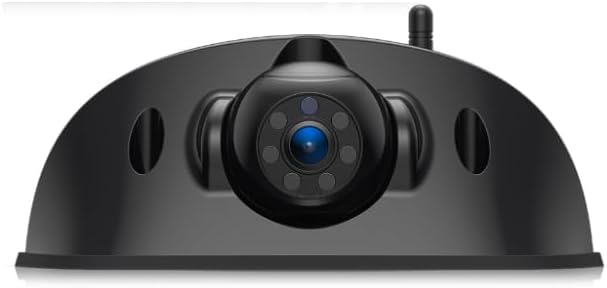
Figure 3.1: Fookoo HD Single Wireless Backup Camera. This image shows the front view of the camera with its central lens and antenna.
Key Features:
- Compatibility: Designed for Fookoo Wireless Backup Camera Systems DW7Y5, DW7Y503, DW7Y504, DW5.
- HD Rearview Camera: Provides high-definition video feed.
- IP69 Waterproof Rating: Ensures durability and performance in harsh weather conditions.
- 120-Degree Viewing Angle: Offers a wide field of view for enhanced safety.
- Infrared Night Vision: Equipped with 6 infrared lights and a light sensor for automatic activation in low light, providing clear images up to 20 feet.
- Adjustable Lens: Allows for 90-degree up and down adjustment to optimize the viewing angle.
- 2.4GHz Wireless Signal: Ensures real-time image transfer to the monitor with minimal delay.
- Furrion Pre-wired Adapted: Designed for easy installation on Furrion pre-wired mounts.

Figure 3.2: Diagram illustrating key features: Adjustable Lens, Waterproof Camera, Furrion Pre-wired Adapted, and IR Night Vision.
4. Setup and Installation
This camera is designed for straightforward installation, particularly on vehicles equipped with a Furrion pre-wired mount. Ensure your existing Fookoo system is compatible (models DW7Y5, DW7Y503, DW7Y504, DW5).
4.1 Mounting the Camera
- Locate the Furrion pre-wired mount on your vehicle (typically at the rear).
- Align the Fookoo camera with the pre-wired mount.
- Secure the camera using the provided screws or mounting hardware. Ensure it is firmly attached to withstand vehicle movement and vibrations.

Figure 4.1: The Fookoo camera mounted on the rear of a vehicle, demonstrating its intended installation location.
4.2 Power Connection
- Connect the camera's power cord directly to the Furrion pre-wired connection point.
- Alternatively, if not using a pre-wired setup, connect the power cord to a suitable 12V DC power supply on your vehicle, ensuring proper polarity.
- Once powered, the camera will automatically attempt to pair with your compatible Fookoo monitor.

Figure 4.2: An RV illustrating the typical location of a Furrion pre-wired mount for easy camera installation.
5. Operating Instructions
5.1 Initial Power-Up and Pairing
- After installation and power connection, turn on your Fookoo monitor.
- The camera should automatically connect to the monitor. If no image appears, refer to the troubleshooting section or the manual for your specific Fookoo monitor system for pairing instructions.
5.2 Adjusting the Camera Lens
The camera lens can be manually adjusted 90 degrees up or down to achieve the optimal viewing angle for your vehicle and preferences.
- With the camera powered on and displaying on your monitor, gently rotate the camera lens housing up or down.
- Observe the monitor to find the best angle that provides a clear view of the area behind your vehicle.
- Avoid forcing the lens beyond its natural range of motion.

Figure 5.1: Illustration of the adjustable camera lens, showing how the viewing angle can be changed from top to middle to bottom for optimal visibility.
5.3 Night Vision Functionality
The camera is equipped with 6 infrared (IR) lights and a light sensor. In low-light conditions, the sensor will automatically activate the IR lights, providing enhanced visibility for night operation.
6. Maintenance
- Cleaning the Lens: Regularly clean the camera lens with a soft, damp cloth to remove dirt, dust, or water spots. Avoid abrasive cleaners that could scratch the lens.
- Checking Connections: Periodically inspect all cable connections to ensure they are secure and free from corrosion or damage.
- Housing Inspection: Check the camera housing for any signs of damage or cracks that could compromise its waterproof integrity.
7. Troubleshooting
| Problem | Possible Cause | Solution |
|---|---|---|
| No image on monitor | No power to camera; Camera not paired; Loose connection. | Check power supply and connections. Refer to your monitor's manual for pairing instructions. |
| Blurry or distorted image | Dirty lens; Incorrect lens adjustment; Interference. | Clean the camera lens. Adjust the lens angle. Ensure no strong wireless interference sources are nearby. |
| Night vision not working | Light sensor obstructed; IR lights malfunction. | Ensure the light sensor is clear. Contact support if IR lights do not activate in darkness. |
| Intermittent signal | Weak signal due to distance or obstruction; Antenna issue. | Ensure the camera and monitor antennas are unobstructed. Check antenna connection on the camera. |
| Camera not compatible | Incorrect system model. | Verify your Fookoo Wireless Backup Camera System model is DW7Y5, DW7Y503, DW7Y504, or DW5. |
8. Specifications
- Brand: Fookoo
- Model: DW7Y5 (Compatible with DW7Y5, DW7Y503, DW7Y504, DW5 systems)
- Product Dimensions: 6.7"L x 2.7"W x 2.8"H
- Item Weight: 13.4 ounces
- Waterproof Rating: IP69
- Viewing Angle: 120 degrees
- Night Vision: 6 Infrared Lights, automatic activation
- Wireless Frequency: 2.4GHz
- Installation Type: Surface Mount (Furrion Pre-wired Adapted)
- Compatible Devices: Fookoo Monitors (DW7Y5, DW7Y503, DW7Y504, DW5 systems)

Figure 8.1: Detailed diagram of the Fookoo camera highlighting dimensions, antenna location, light sensor, adjustable lens, and power cord connection.
9. Warranty and Support
Fookoo products are designed for reliability and performance. For warranty information, technical support, or assistance with your product, please refer to the warranty card included with your original Fookoo Wireless Backup Camera System or visit the official Fookoo website. You may also contact the seller directly for support.
