1. Introduction
This manual provides detailed instructions for the setup, operation, and maintenance of your ROADOM 10.1 Inch Touch Screen Monitor, Model Z3-3. This monitor features an IPS FHD 1024x600 display, responsive 5-point capacitive touch, dual built-in speakers, and broad compatibility with devices like Raspberry Pi 5/4/3/Zero, game consoles, and computers.

Figure 1: ROADOM 10.1 Inch Touch Screen Monitor
2. Safety Information
- Do not expose the monitor to extreme temperatures or humidity.
- Avoid dropping or subjecting the monitor to strong impacts.
- Use only the provided power adapter or a compatible 5V/3A power source.
- Keep the monitor away from water and other liquids.
- Do not attempt to disassemble or repair the monitor yourself. Contact customer support for assistance.
3. Package Contents
Verify that all items are present in the package:
- ROADOM 10.1 Inch Touchscreen with Case × 1
- HDMI-HDMI Cable × 2
- Micro HDMI - HDMI Cable × 1
- Type-C - USB-A Cable × 2
- 3-Pin GPIO Cable × 1
- 4-Wire Touch Cable × 1
- Raspberry Pi Installation Kit × 1
- Power Adapter (5V/3A) × 1
- Stand × 1
- User Manual × 1

Figure 2: Included Accessories
4. Product Overview
4.1 Ports and Buttons
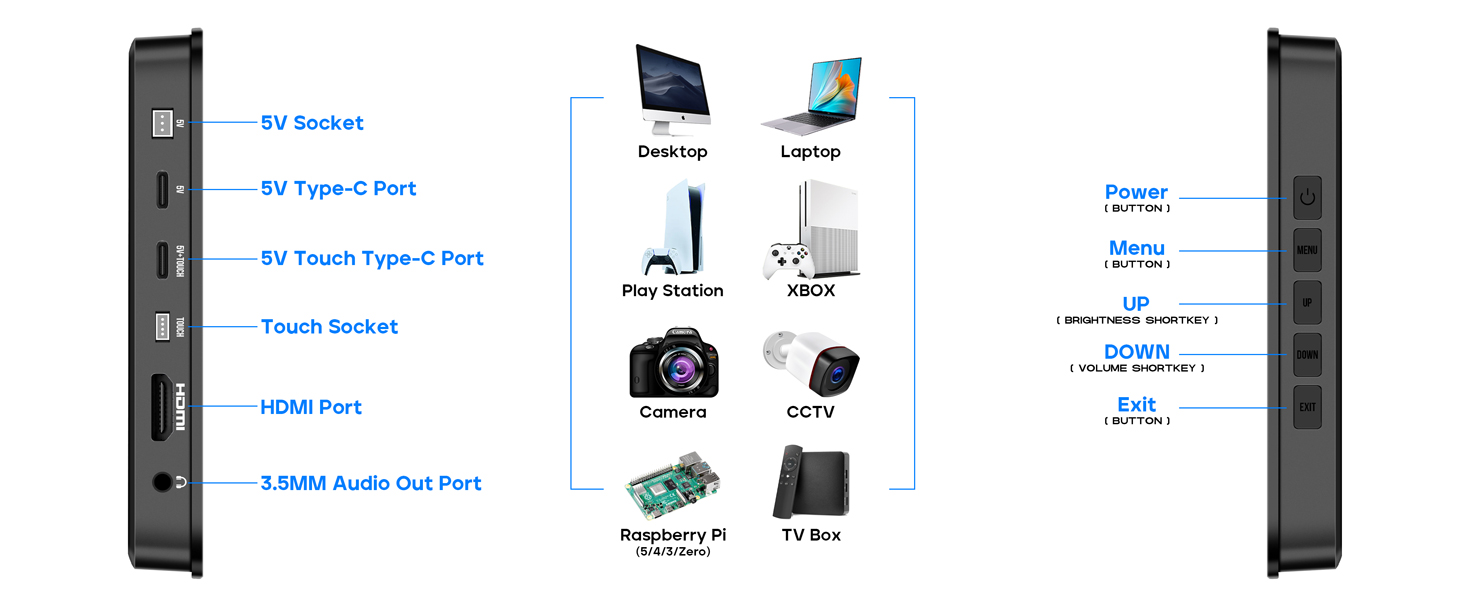
Figure 3: Monitor Ports and Control Buttons
- 5V Socket: For power input.
- 5V Type-C Port: Alternative power input.
- 5V Touch Type-C Port: For power and touch signal transmission.
- Touch Socket: For touch signal via 4-wire cable.
- HDMI Port: For video input.
- 3.5MM Audio Out Port: For external audio devices.
- Power Button: Turns the monitor on/off.
- Menu Button: Accesses the On-Screen Display (OSD) menu.
- Up Button: Navigates up in menus, also a shortcut for Brightness.
- Down Button: Navigates down in menus, also a shortcut for Volume.
- Exit Button: Exits menus.
4.2 Dimensions and Weight

Figure 4: Monitor Dimensions and Weight
- Product Dimensions: 5 x 5.6 x 0.5 inches
- Item Weight: 1.23 pounds
5. Setup Instructions
5.1 Stand Assembly
The included versatile stand allows for adjustable height and tilt angles. Attach the monitor to the stand using the provided screws and screwdriver from the Raspberry Pi Installation Kit. Ensure the connection is secure.
5.2 Connecting to Raspberry Pi
The monitor is designed for seamless integration with Raspberry Pi boards. You can mount your Raspberry Pi directly on the back of the monitor for a clean setup.
- Mounting the Raspberry Pi: Use the provided screws and standoffs from the Raspberry Pi Installation Kit to secure your Raspberry Pi board to the designated mounting points on the back of the monitor.
- Video Connection:
- For Raspberry Pi 3: Connect the Raspberry Pi's HDMI port to the monitor's HDMI port using an HDMI-HDMI cable.
- For Raspberry Pi 4/5/Zero: Connect the Raspberry Pi's Micro HDMI port to the monitor's HDMI port using a Micro HDMI - HDMI cable.
- Touch and Power Connection:
- Connect the Raspberry Pi to the monitor's 5V Touch Type-C Port using a Type-C to USB-A cable. This single connection provides both power to the monitor (from the Pi) and enables touch functionality.
- Alternatively, for touch functionality only, connect the Raspberry Pi's USB port to the monitor's Touch Socket using the 4-wire touch cable. In this setup, the monitor will require separate power via its 5V Socket or 5V Type-C Port.
- Powering the Setup: Ensure the Raspberry Pi is powered. If using the 5V Touch Type-C Port, the monitor will draw power from the Raspberry Pi. If using separate touch and power cables, connect the provided 5V/3A power adapter to the monitor's 5V Socket or 5V Type-C Port.
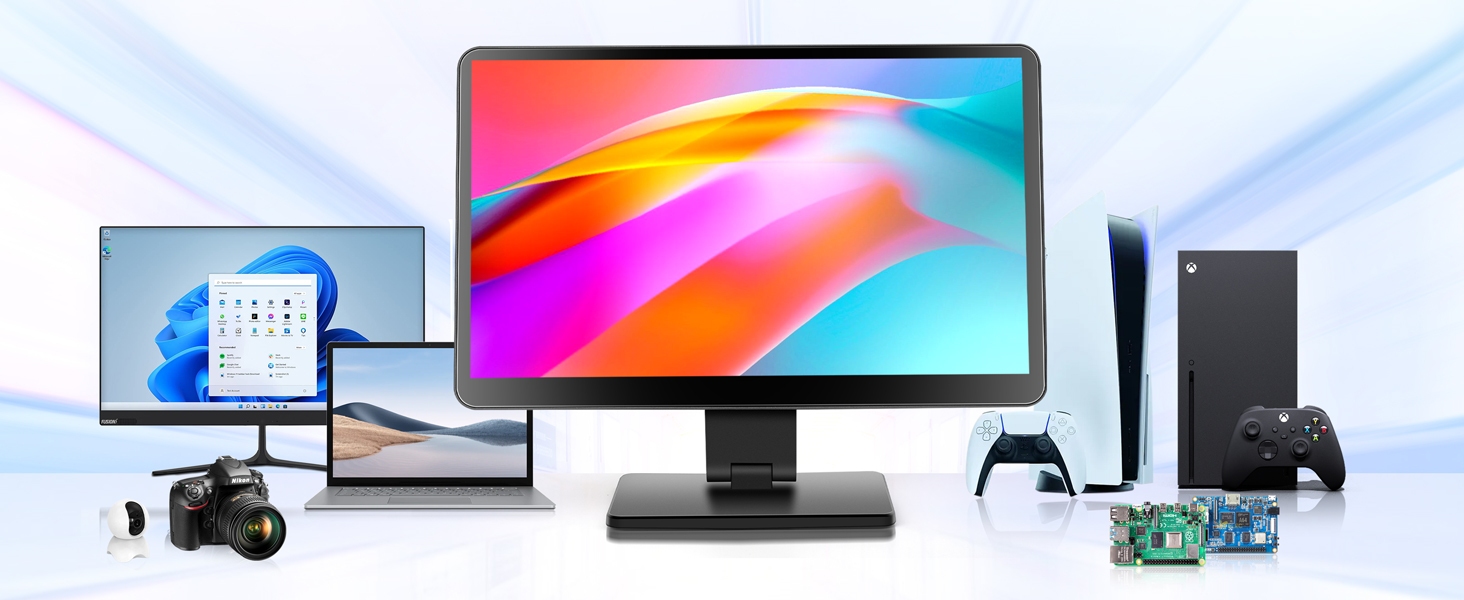
Figure 5: Connecting to Raspberry Pi 3

Figure 6: Connecting to Raspberry Pi 4/5
5.3 Connecting to Other Devices
The monitor is compatible with various devices including laptops, game consoles (XBOX/PS4/PS5), and TV boxes.
- Video Connection: Connect your device's HDMI output to the monitor's HDMI port using an appropriate HDMI cable.
- Touch Functionality (if applicable): For devices supporting touch input via USB, connect a USB-A to Type-C cable from your device's USB port to the monitor's 5V Touch Type-C Port.
- Power: Connect the provided 5V/3A power adapter to the monitor's 5V Socket or 5V Type-C Port.
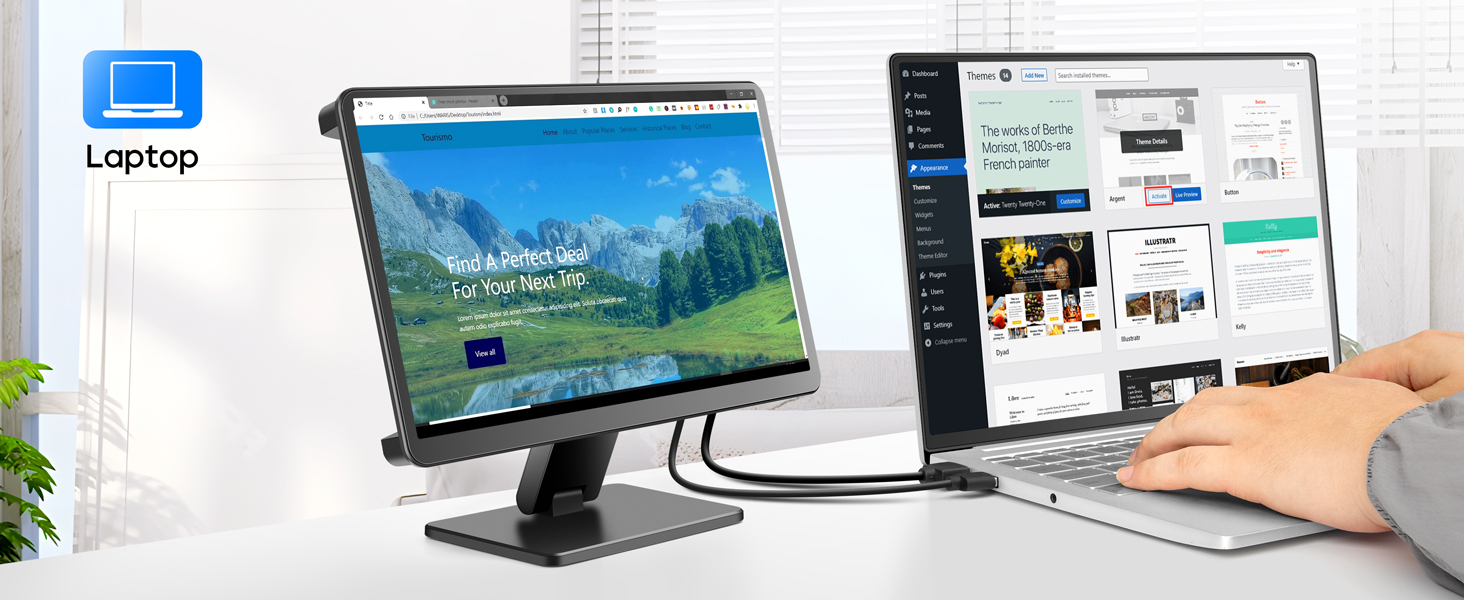
Figure 7: Monitor connected to a Laptop
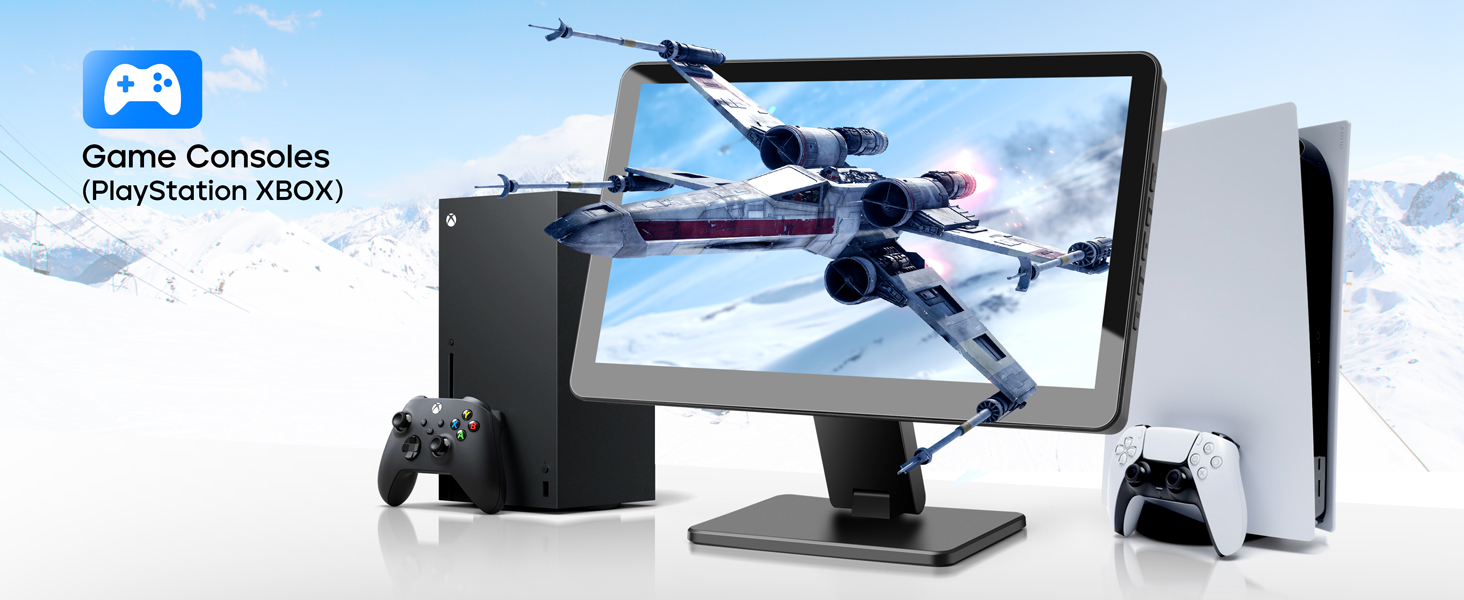
Figure 8: Monitor connected to Game Consoles
6. Operating Instructions
6.1 Power On/Off
Press the Power Button on the side of the monitor to turn it on or off.
6.2 Touch Functionality
The monitor supports 5-point capacitive touch. It integrates seamlessly with Windows, Noobs, Debian, Ubuntu, and Kodi operating systems without requiring additional drivers. Touch functionality is disabled on iOS systems.
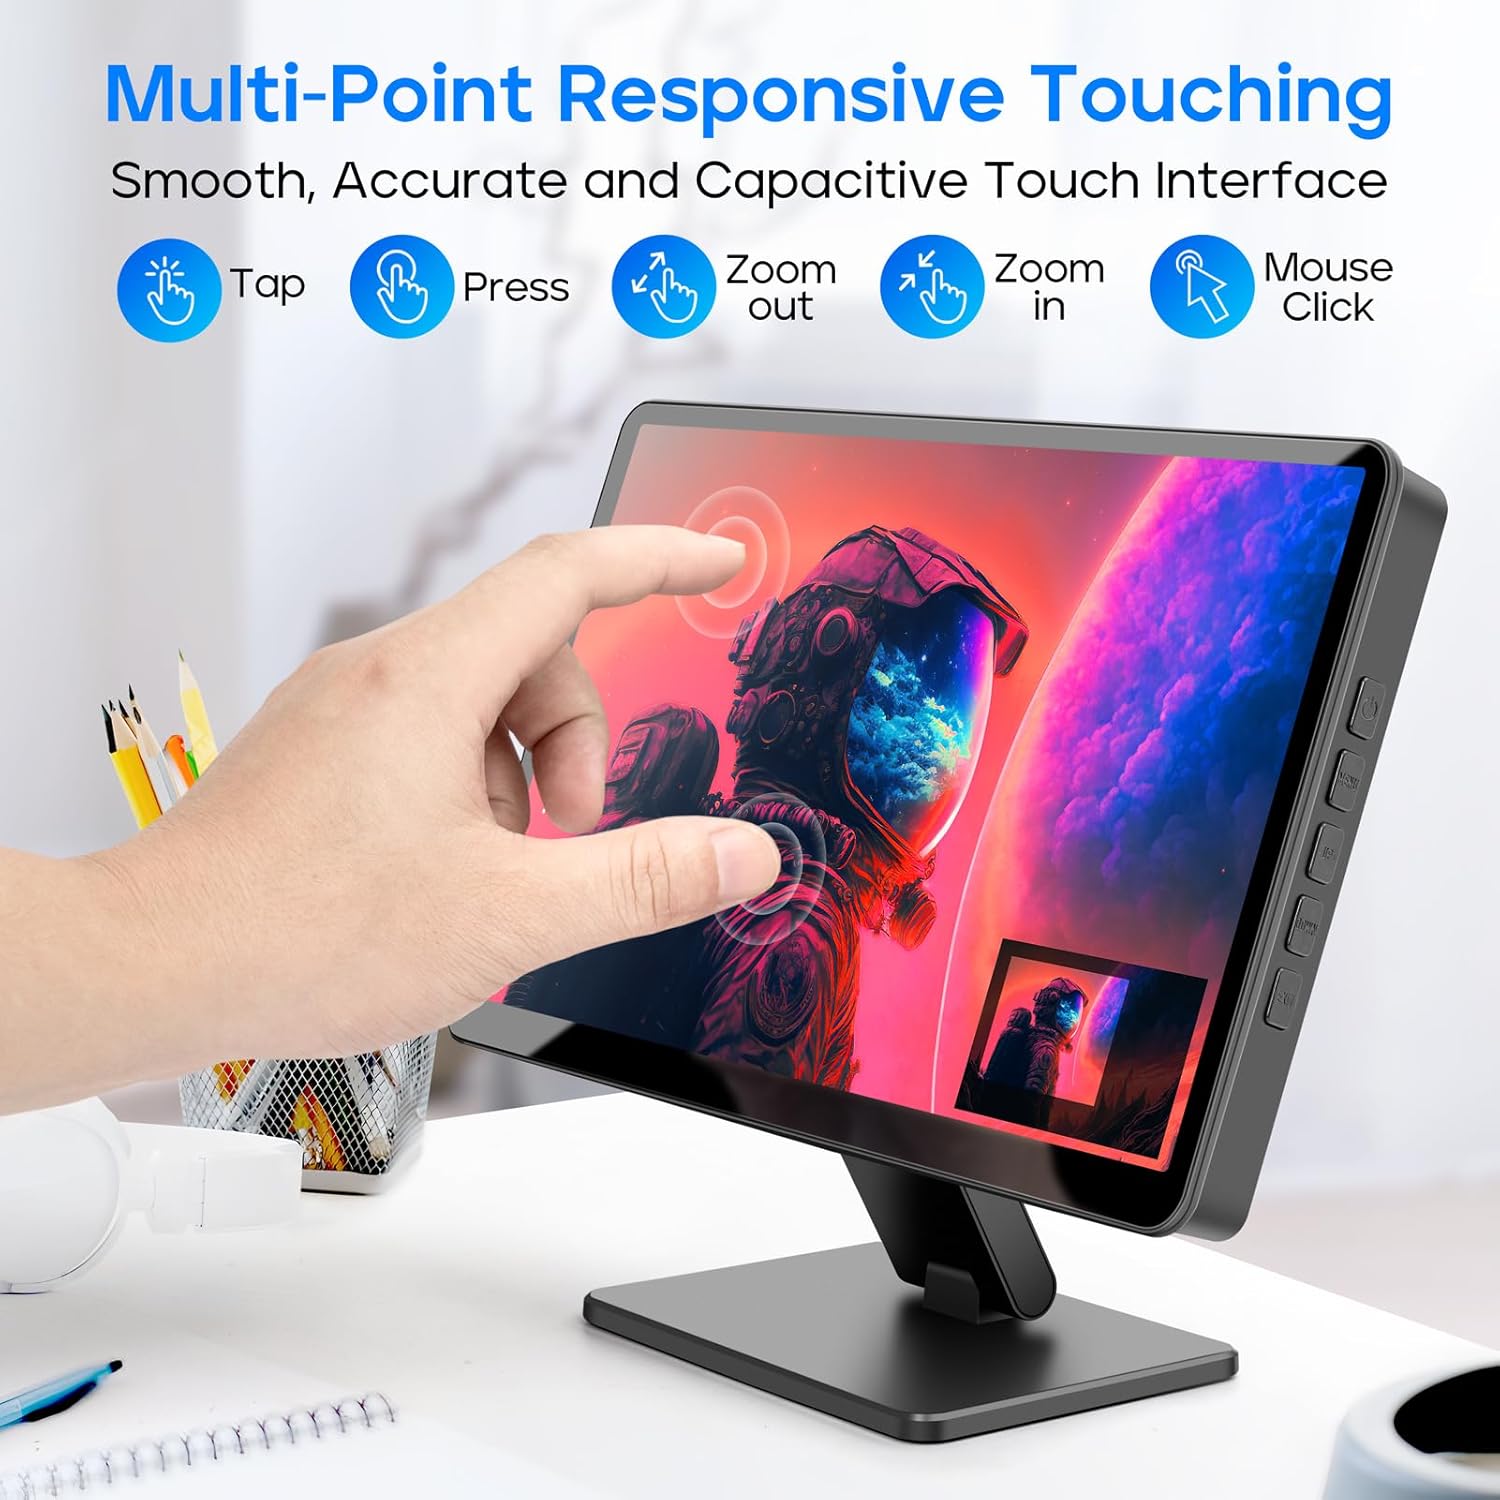
Figure 9: Multi-Point Responsive Touch Interface
6.3 Menu Navigation (OSD)
Use the Menu, Up, Down, and Exit buttons on the side of the monitor to navigate and adjust settings in the On-Screen Display (OSD) menu. The Up button also serves as a shortcut for brightness control, and the Down button for volume control.
6.4 Audio
The monitor features dual built-in speakers for audio output. You can also connect external audio devices via the 3.5MM Audio Out Port.

Figure 10: Built-in Dual Speakers
6.5 Display Modes
When connected to a computer, the monitor supports various display modes:
- Duplicate Mode: Displays the same content as your primary screen.
- Extend Mode: Extends your desktop across both screens.
- Second Screen Mode: Uses only the monitor as the display.

Figure 11: Display Modes
7. Maintenance
7.1 Cleaning the Screen
To clean the screen, gently wipe it with a soft, lint-free cloth. For stubborn smudges, slightly dampen the cloth with water or a screen-cleaning solution. Avoid using harsh chemicals or abrasive materials.
7.2 Screen Protector
For optimal image quality and touch responsiveness, consider removing the pre-installed screen protector.
8. Troubleshooting
8.1 No Display
- Ensure the monitor is properly powered. Check the power adapter and cable connections.
- Verify the HDMI cable is securely connected to both the monitor and the source device.
- Confirm the source device (e.g., Raspberry Pi, computer) is powered on and outputting video.
- Try a different HDMI cable or port if available.
8.2 Touch Functionality Not Working
- Ensure the USB cable for touch is correctly connected from your source device to the monitor's 5V Touch Type-C Port or Touch Socket.
- Confirm your operating system supports touch input. Note that touch functionality is disabled on iOS systems.
- For Raspberry Pi OS (Bookworm) and multi-touch issues, refer to specific online resources or community forums for potential driver or configuration adjustments.
Video 1: ROADOM Touch Screen Monitor with Case, IPS FHD 1024*600. This video demonstrates the monitor's features and functionality, including its IPS FHD display and touch capabilities.
8.3 Audio Issues
- Check the volume settings on both the monitor (via OSD menu or shortcut) and your source device.
- Ensure the audio output is correctly routed to the monitor from your source device.
- If using external speakers, verify their connection to the 3.5MM Audio Out Port.
9. Specifications
| Feature | Specification |
|---|---|
| Screen Size | 10.1 Inches |
| Resolution | 1024 x 600 Pixels (FHD upgradable to 1920x1080) |
| Display Technology | IPS Panel |
| Viewing Angle | 178° Full Viewing Angle |
| Touch Type | 5-point Capacitive Touch |
| Response Time | 3-5 ms |
| Aspect Ratio | 16:9 |
| Image Brightness | 300 Candela |
| Audio | Dual Built-in Speakers |
| Connectivity | HDMI, 5V Type-C (Power/Touch), 5V Socket (Power), Touch Socket (Touch), 3.5mm Audio Out |
| Product Dimensions | 5 x 5.6 x 0.5 inches |
| Item Weight | 1.23 pounds |
10. Warranty and Support
ROADOM stands behind all its products. We are committed to providing top-quality electronic products and excellent usage experience. If you have any questions or encounter issues with your product, please feel free to contact us.
- Product Warranty: 12 Months
- Returns: 30 Days Free Returns
- Customer Service: 24 Hours After-sale Service

Figure 12: Warranty and Support Information


