
Bennett Read HVC212
Bennett Read Tough 12 Wet-Dry-Blow Vacuum Cleaner User Manual
Model: HVC212

Logo for the Tough 12 Wet-Dry-Blow Vacuum System, featuring the product name in bold orange text.
1. Introduction
Thank you for choosing the Bennett Read Tough 12 Wet-Dry-Blow Vacuum Cleaner. This robust and versatile appliance is designed for efficient cleaning of both wet and dry spills, and also functions as a powerful blower. Its compact design and durable construction make it an ideal solution for various cleaning tasks around your home or workshop. Please read this manual carefully before operating the appliance to ensure safe and optimal performance.

The Bennett Read Tough 12 Wet-Dry-Blow Vacuum Cleaner, showcasing its orange and grey body with hose and floor nozzle attached.
2. Safety Instructions
Always follow basic safety precautions when using electrical appliances to reduce the risk of fire, electric shock, and personal injury.
- Read all instructions before use.
- Do not leave the appliance unattended when plugged in. Unplug from outlet when not in use and before servicing.
- Do not use outdoors or on wet surfaces unless specifically designed for it.
- Do not allow to be used as a toy. Close attention is necessary when used by or near children.
- Use only as described in this manual. Use only manufacturer’s recommended attachments.
- Do not use with damaged cord or plug. If appliance is not working as it should, has been dropped, damaged, left outdoors, or dropped into water, return it to a service center.
- Do not pull or carry by cord, use cord as a handle, close a door on cord, or pull cord around sharp edges or corners. Do not run appliance over cord. Keep cord away from heated surfaces.
- Do not unplug by pulling on cord. To unplug, grasp the plug, not the cord.
- Do not handle plug or appliance with wet hands.
- Do not put any object into openings. Do not use with any opening blocked; keep free of dust, lint, hair, and anything that may reduce air flow.
- Keep hair, loose clothing, fingers, and all parts of body away from openings and moving parts.
- Do not pick up anything that is burning or smoking, such as cigarettes, matches, or hot ashes.
- Use extra care when cleaning on stairs.
- Do not use to pick up flammable or combustible liquids, such as gasoline, or use in areas where they may be present.
- Do not use without dust bag and/or filters in place.
- Turn off all controls before unplugging.
- Store your appliance indoors in a cool, dry area.
3. Components and Assembly
Before assembly, ensure all components are present and undamaged.
Package Contents:
- Vacuum Cleaner Unit (Motor Head, Tank)
- Flexible Hose
- Extension Wands (usually 2 pieces)
- Floor Nozzle (for wet and dry use)
- Crevice Tool
- Dusting Brush (if included)
- Reusable Microparticle Filter
- Foam Filter (for wet vacuuming)
- Collection Bag (for dry vacuuming)
- User Manual
Assembly Instructions:
- Unpack: Carefully remove all components from the packaging.
- Attach Wheels: If not pre-assembled, attach the caster wheels to the base of the tank.
- Secure Motor Head: Place the motor head onto the tank and secure it with the side latches.
- Connect Hose: Insert the flexible hose into the suction inlet on the tank. Ensure it clicks securely into place. For blower function, connect the hose to the blower port.
- Assemble Extension Wands and Nozzle: Connect the extension wands to the hose handle, then attach the desired floor nozzle or accessory to the end of the wands.

An alternative view of the Bennett Read Tough 12 Vacuum Cleaner, highlighting its compact design and components.
4. Operating Instructions
The Bennett Read Tough 12 offers three primary modes of operation: Dry Vacuuming, Wet Vacuuming, and Blower Function.
4.1 Dry Vacuuming
For dry vacuuming, ensure the reusable microparticle filter and a collection bag are properly installed inside the tank. This setup is ideal for dust, dirt, and debris on various surfaces.
- Ensure the microparticle filter is clean and securely in place.
- Insert a dry collection bag over the inlet port inside the tank.
- Attach the flexible hose, extension wands, and desired dry floor nozzle or accessory.
- Plug the power cord into a suitable electrical outlet.
- Turn the vacuum cleaner ON using the power switch.
- Begin vacuuming. Empty the collection bag when full or suction power decreases.

The vacuum cleaner in action, effectively cleaning a carpeted surface, demonstrating its dry vacuuming capability.
4.2 Wet Vacuuming
For wet vacuuming, it is crucial to remove the collection bag and replace the microparticle filter with the foam filter. This prevents damage to the motor and ensures proper liquid collection.
- Remove the collection bag and the microparticle filter.
- Install the foam filter over the motor cage.
- Attach the flexible hose, extension wands, and the wet floor nozzle.
- Plug the power cord into a suitable electrical outlet.
- Turn the vacuum cleaner ON.
- Begin vacuuming liquids. The vacuum will automatically shut off when the tank is full to prevent overflow.
- After wet vacuuming, empty the tank and clean the foam filter thoroughly.
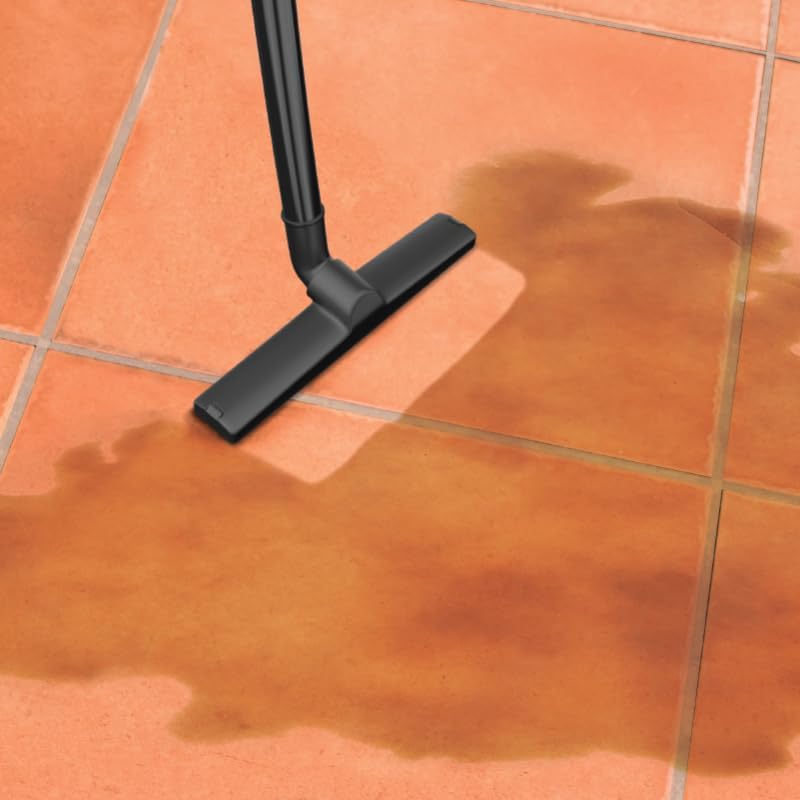
The vacuum cleaner's floor nozzle effectively cleaning a liquid spill on a tiled floor, demonstrating its wet vacuuming capability.
4.3 Blower Function
The vacuum cleaner can be converted into a powerful blower for clearing light debris like sawdust or leaves.
- Ensure the tank is empty and clean.
- Remove the hose from the suction inlet.
- Attach the flexible hose to the blower port located on the motor head.
- Plug the power cord into a suitable electrical outlet.
- Turn the vacuum cleaner ON.
- Direct the hose to blow away debris.
5. Maintenance and Cleaning
Regular maintenance ensures the longevity and optimal performance of your vacuum cleaner.
5.1 Emptying the Tank
- Always unplug the vacuum cleaner before emptying.
- Unlatch the motor head and lift it off the tank.
- Carefully dispose of collected dry debris or pour out liquids.
- Rinse the tank with water if necessary and allow it to dry completely before reassembly.
5.2 Filter Maintenance
- Reusable Microparticle Filter (Dry Use): Tap off excess dust. If heavily soiled, rinse under cool running water. Allow to air dry completely for at least 24 hours before reinstallation. Do not use a washing machine or dryer.
- Foam Filter (Wet Use): Rinse under cool running water after each wet use. Squeeze out excess water and allow to air dry completely before storing or re-using.
5.3 General Cleaning
- Wipe the exterior of the vacuum cleaner with a damp cloth. Do not use harsh chemicals or abrasive cleaners.
- Check the hose and attachments for blockages regularly and clear them if found.
- Store the vacuum cleaner in a cool, dry place, away from direct sunlight and extreme temperatures. The compact design allows for easy storage.

The vacuum cleaner stored compactly in a cabinet, illustrating its space-saving design.
6. Troubleshooting Guide
If you encounter issues with your vacuum cleaner, refer to the following table for common problems and solutions.
| Problem | Possible Cause | Solution |
|---|---|---|
| Vacuum does not turn on. | No power supply; Power switch OFF; Thermal cut-off activated. | Check power cord connection and outlet; Turn power switch ON; Allow unit to cool down for 30 minutes if thermal cut-off activated. |
| Low suction power. | Full collection bag/tank; Clogged filter; Blockage in hose/attachments; Improperly sealed motor head. | Empty collection bag/tank; Clean or replace filter; Clear any blockages; Ensure motor head is latched securely. |
| Water leaking during wet vacuuming. | Tank is full; Foam filter not installed or damaged; Motor head not sealed properly. | Empty tank; Ensure foam filter is correctly installed and undamaged; Check motor head latches. |
| Unusual noise. | Blockage; Damaged motor/fan. | Check for and clear blockages; If noise persists, contact customer support. |
7. Technical Specifications
| Feature | Specification |
|---|---|
| Brand | Bennett Read |
| Model Number | HVC212 |
| Capacity | 12 Liters |
| Voltage | 240 Volts |
| Item Weight | 5.52 kg |
| Special Features | Compact, Wet/Dry/Blow Function |
| Filter Type | HEPA Filter (Microparticle), Foam Filter |
| Power Source | Corded Electric |
| Surface Recommendation | All floors |
8. Warranty and Customer Support
Your Bennett Read Tough 12 Wet-Dry-Blow Vacuum Cleaner comes with a standard manufacturer's warranty. Please refer to the warranty card included in your packaging for specific terms and conditions, including warranty period and coverage details.
For technical assistance, spare parts, or warranty claims, please contact Bennett Read customer support. Keep your proof of purchase handy when contacting support.
Contact Information:
Please visit the official Bennett Read website or refer to your product packaging for the most up-to-date customer service contact details in your region.
Related documentsHVC212


Ask a question about this manual
Ask about setup, troubleshooting, compatibility, parts, safety, or missing instructions. Manuals+ will review the question and use this page’s manual context to help answer it.