1. Introduction
This manual provides detailed instructions for the safe and effective operation of your Dragonhawk Wireless Tattoo Gun Machine, Model YZBTD. Please read this manual thoroughly before using the device to ensure proper setup, operation, and maintenance. This machine is designed for professional tattoo artists and beginners, offering versatility and reliable performance.
2. Safety Information
Always prioritize safety when operating tattoo equipment. Failure to follow these guidelines may result in injury or damage to the device.
- For External Use Only: This device is intended for tattooing on skin.
- Sterilization: Ensure all needles, cartridges, and contact surfaces are properly sterilized before each use.
- Power Source: Use only the provided charging cable and compatible power adapters.
- Battery Safety: Do not expose batteries to extreme temperatures or puncture them. Dispose of used batteries responsibly.
- Handling: Handle the machine with care. Avoid dropping or subjecting it to strong impacts.
- Moisture: Keep the device dry. It is water-resistant, but not waterproof. Avoid submerging it in liquids.
- Children: Keep out of reach of children.
3. Product Overview & Components
The Dragonhawk Wireless Tattoo Gun Machine YZBTD is a cordless pen-style rotary tattoo machine featuring an adjustable stroke length and a powerful coreless motor.

Figure 3.1: Overview of the tattoo machine's control panel and battery.
Key Components:
- Machine Body: Main housing containing the motor and drive system.
- Battery Pack: Detachable power source with OLED display and control buttons.
- Adjustable Grip: Rotates to adjust needle depth.
- Stroke Adjustment Knob: Allows selection of 7 stroke lengths (2.4mm - 4.2mm).
- Needle Cartridge Slot: Where tattoo needle cartridges are inserted.
- Type-C Charging Port: For recharging the battery.
4. Setup
4.1 Battery Installation
The machine comes with two replaceable batteries to ensure continuous operation.
- Ensure the machine is powered off.
- Gently twist the battery pack counter-clockwise to detach it from the machine body.
- Align a charged battery pack with the machine body and twist clockwise until securely fastened.

Figure 4.1: The machine is equipped with two replaceable batteries for extended use.
4.2 Needle Cartridge Installation
Use only compatible Dragonhawk cartridge needles for optimal performance.
- Select the desired needle cartridge.
- Insert the needle cartridge into the machine's slot, pushing firmly until it clicks into place.
- To remove, twist the cartridge slightly and pull it out.

Figure 4.2: Proper insertion of a needle cartridge into the machine.
5. Operating Instructions
Familiarize yourself with the control panel for efficient operation.
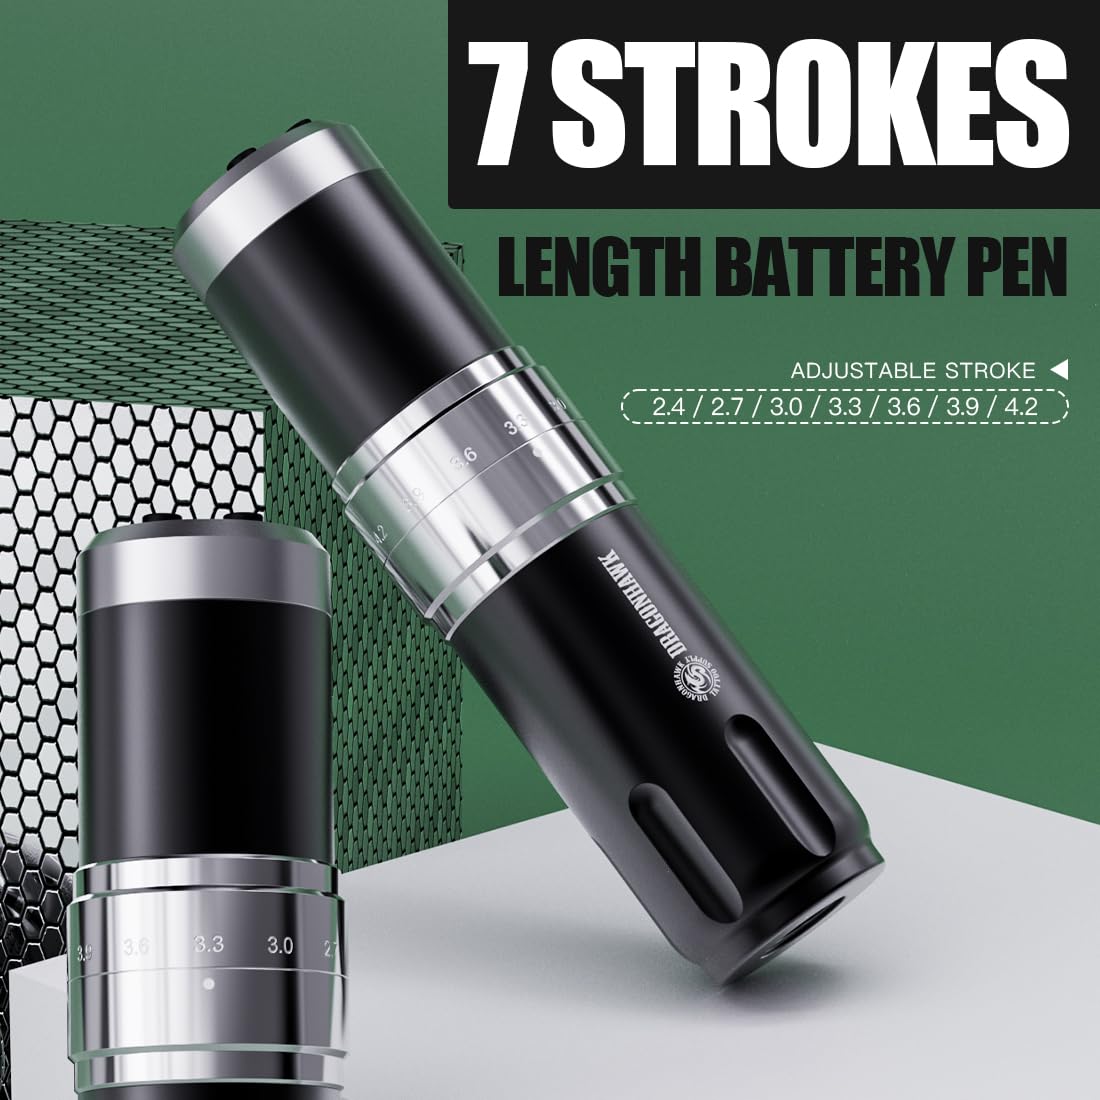
Figure 5.1: Control panel and stroke adjustment.
5.1 Power On/Off
- Press and hold the 'O' (Switch Button) for a few seconds to power the machine on or off.
- The OLED display will show the current voltage and battery level.
5.2 Adjusting Voltage
- Use the '+' (Voltage Increase Key) and '-' (Voltage Reduction Key) buttons to adjust the voltage in 0.1V increments.
- The recommended voltage range is 4V-12V.
5.3 Changing Mode (Liner/Shader)
- Press the 'M' (Switch Mode) button to switch between Liner (L) and Shader (S) gears.
- The machine automatically memorizes the voltage settings for each mode.
5.4 Adjusting Stroke Length
The machine offers 7 adjustable stroke lengths from 2.4mm to 4.2mm.
- Rotate the adjustment knob located on the machine body to select the desired stroke length.
- Available lengths: 2.4mm, 2.7mm, 3.0mm, 3.3mm, 3.6mm, 3.9mm, 4.2mm.

Figure 5.2: Adjusting the stroke length by rotating the knob.
5.5 Official Product Video
Video 5.1: An official video demonstrating the features and operation of the Dragonhawk Fold3 Wireless Tattoo Gun.
6. Maintenance
6.1 Cleaning
- Always disconnect the power before cleaning.
- Wipe the machine body with a soft, damp cloth and a mild disinfectant.
- Do not use abrasive cleaners or submerge the machine in liquid.
- Ensure no liquid enters the motor or charging port.
6.2 Charging
The machine is equipped with a Type-C charging port.
- Connect the provided Type-C cable to the charging port on the battery pack.
- Connect the other end to a compatible USB power adapter.
- A full charge takes approximately 1.5 hours.
- The battery indicator on the OLED display will show charging status.
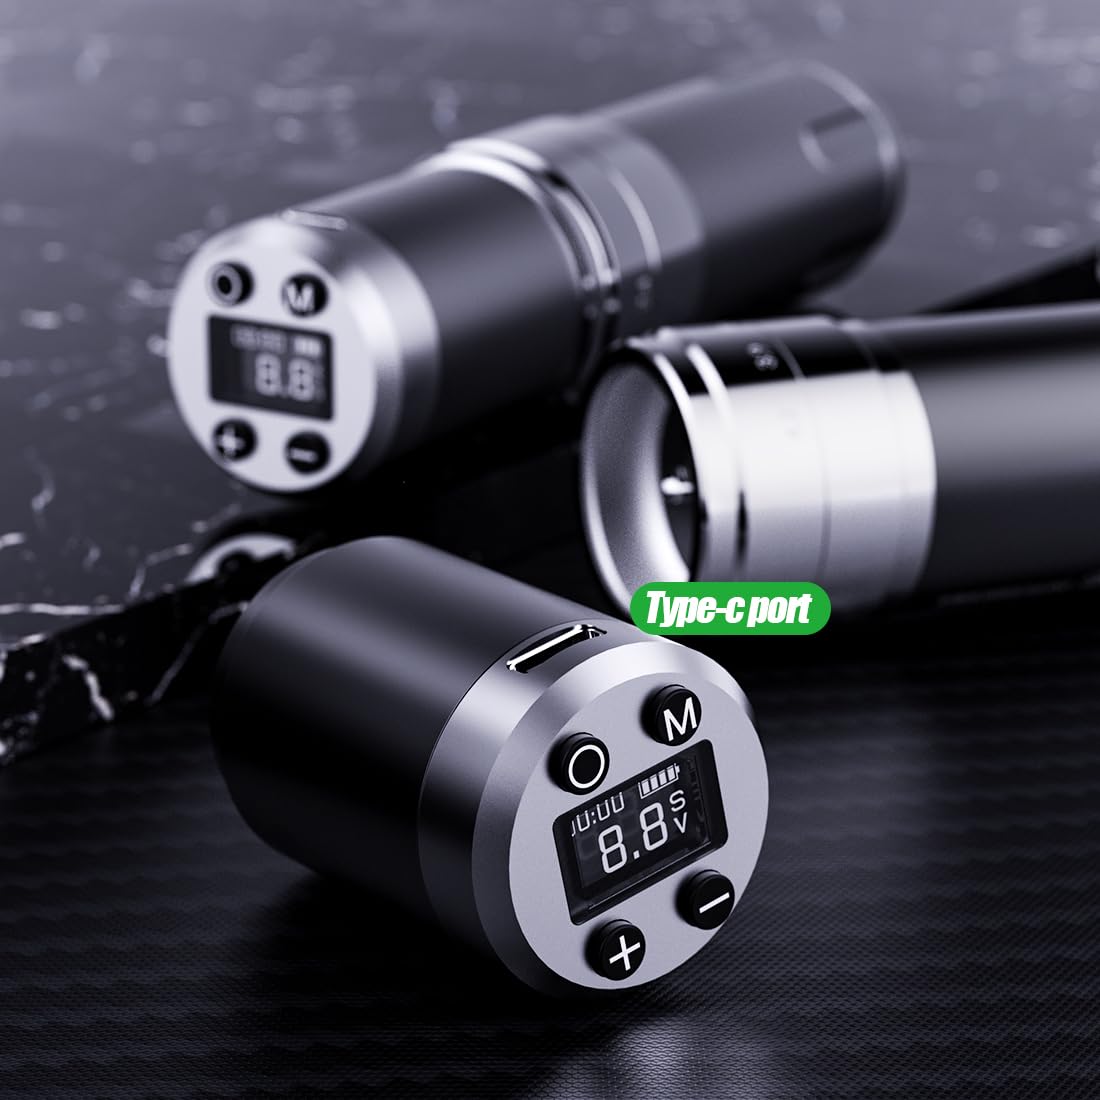
Figure 6.1: Type-C charging port on the battery pack.
6.3 Battery Care
- To prolong battery life, avoid fully discharging the battery frequently.
- Store the machine and spare batteries in a cool, dry place when not in use.
- If storing for an extended period, charge the batteries to about 50-60% capacity.
7. Troubleshooting
Refer to the table below for common issues and their solutions.
| Problem | Possible Cause | Solution |
|---|---|---|
| Machine does not turn on | Low battery; Battery not properly installed; Power button not pressed correctly. | Charge the battery; Reinstall the battery pack securely; Press and hold the power button firmly. |
| Needle not moving | Needle cartridge not installed correctly; Stroke length set too low; Motor issue. | Reinstall needle cartridge; Adjust stroke length; Contact support if motor issue persists. |
| Voltage display flickering | Loose battery connection; Low battery. | Ensure battery is securely attached; Charge the battery. |
| Machine overheating | Prolonged continuous use; High voltage setting. | Allow machine to cool down; Reduce voltage if necessary. |
8. Specifications
Technical details of the Dragonhawk Wireless Tattoo Gun Machine YZBTD.
| Feature | Detail |
|---|---|
| Model Number | YZBTD |
| Product Dimensions | 3.94 x 3.94 x 7.87 inches |
| Item Weight | 10.58 ounces (300 Grams) |
| Motor | Mcore Coreless Motor |
| Stroke Lengths | 7 adjustable (2.4mm - 4.2mm) |
| Voltage Range | 4V - 12V |
| Battery Capacity | 1500mAh (per battery) |
| Battery Life | 6-8 hours (per battery) |
| Charging Time | Approx. 1.5 hours |
| Charging Port | Type-C |
| Water Resistance Level | Water Resistant |
9. Warranty & Support
Dragonhawk is committed to providing high-quality products and excellent customer service.
- Product Coverage: Dragonhawk products typically include coverage for manufacturing defects. Please refer to your purchase documentation for specific warranty terms.
- Technical Support: For video tutorials, setup guides, and professional tips, visit Youtube.com/@Dragonhawkofficial.
- Customer Service: For any inquiries or issues with your order, please reach out through Amazon's messaging system.
- Returns: This product has a 30-day return policy for refund/replacement.


