
1. Introduction and Overview
The Freenove Basic Starter Kit for ESP32 CAM provides a comprehensive platform for learning and developing with the ESP32-WROVER microcontroller. This kit includes a powerful dual-core 32-bit 240 MHz microcontroller with onboard Wi-Fi, Bluetooth 4.2 (LE), and an integrated camera. It is designed to facilitate learning through detailed tutorials and project examples using both MicroPython and C programming languages. The kit contains 141 items for 58 projects, along with a 1GB memory card for file storage, making it suitable for a wide range of electronic projects and educational purposes.
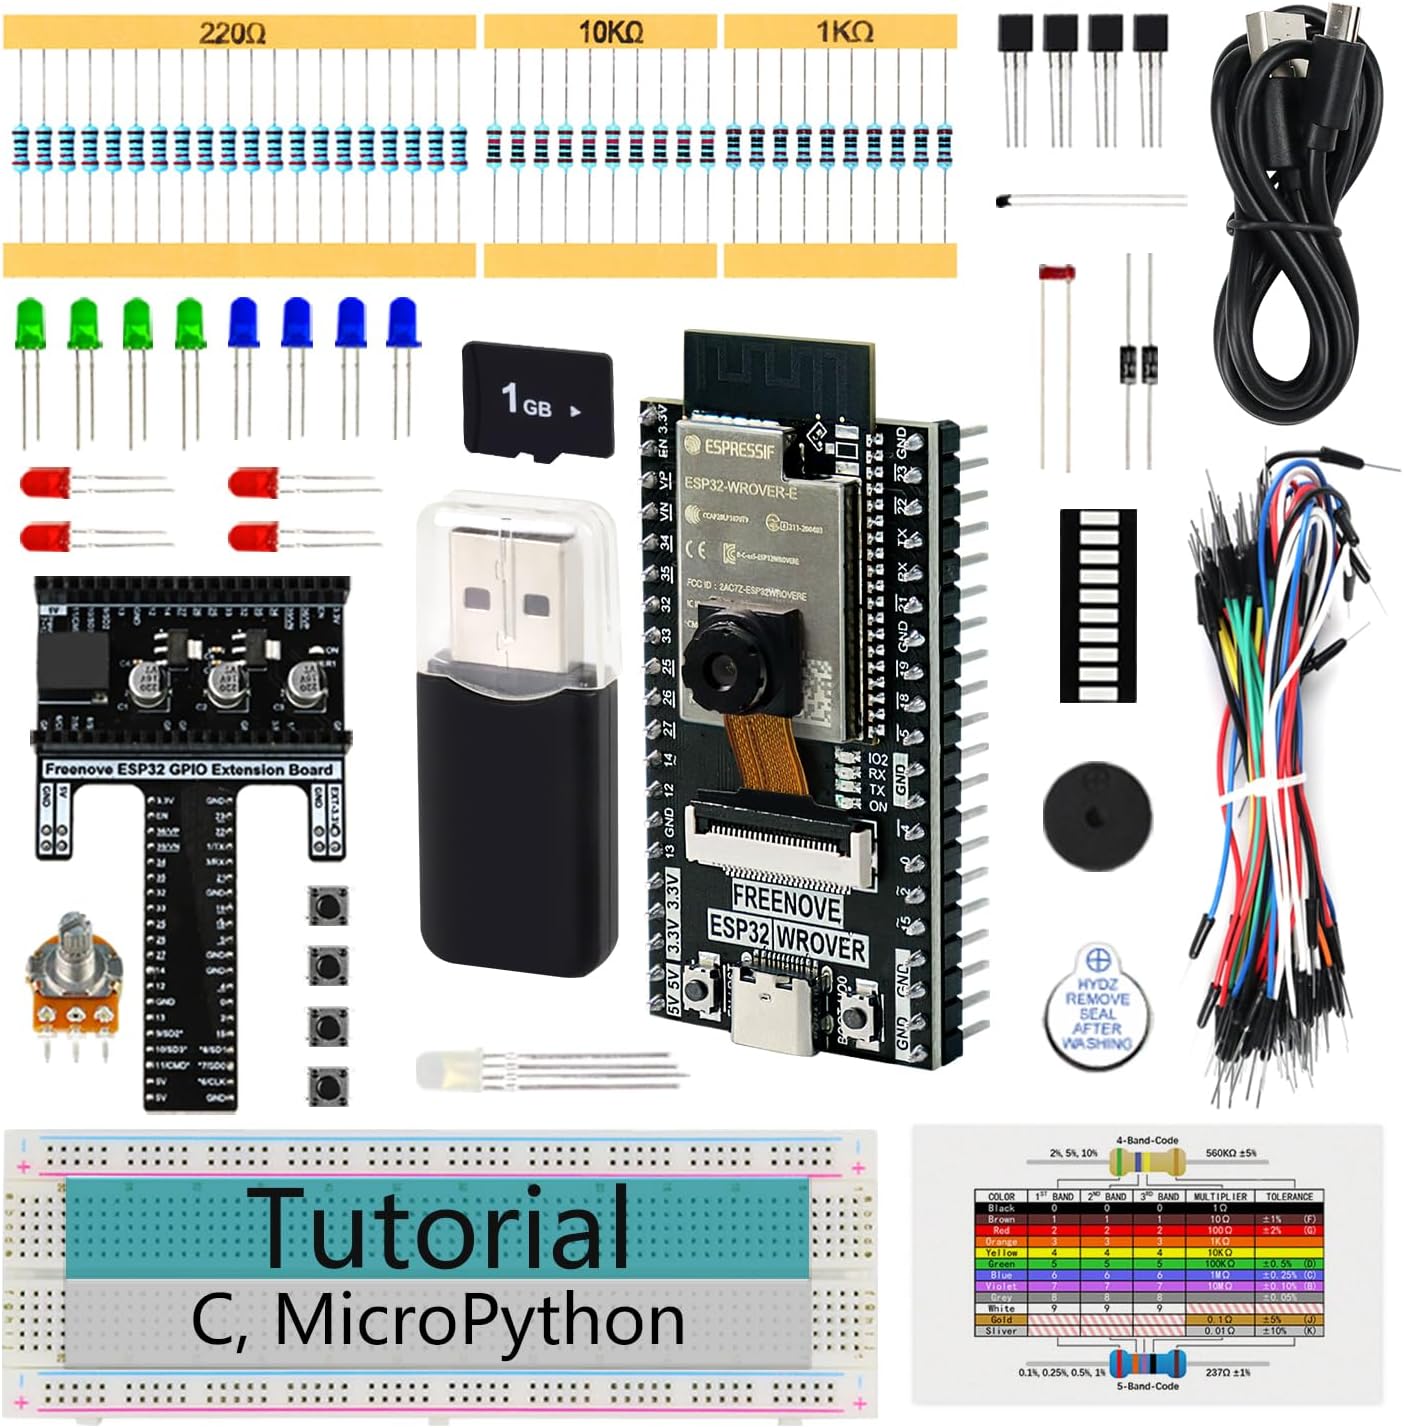
Image 1.1: Overview of the Freenove Basic Starter Kit for ESP32 CAM, showing the main components.
ESP32-WROVER Board Features
- Dual-core 32-bit microprocessor, up to 240 MHz
- 4 MB Flash memory
- 8 MB PSRAM
- Onboard 2.4 GHz Wi-Fi and Bluetooth 4.2 (LE)
- Integrated camera module
- Memory card slot for 1GB card (included)
- Compatible with Arduino IDE

Image 1.2: Detailed view of the ESP32-WROVER board, highlighting its key features and pinout.
2. Package Contents
The Freenove Basic Starter Kit for ESP32 CAM includes the following items:

Image 2.1: All components included in the Freenove Basic Starter Kit for ESP32 CAM, clearly labeled with quantities.
- 1x ESP32-WROVER Board
- 1x Camera Module
- 1x 1GB Memory Card
- 4x Blue LEDs
- 4x Red LEDs
- 4x Green LEDs
- 1x RGB LED
- 1x USB Cable
- 1x Card Reader
- 2x Rectifier Diodes
- 1x Thermistor
- 20x 220 Ohm Resistors
- 10x 10K Ohm Resistors
- 10x 1K Ohm Resistors
- 2x NPN Transistors
- 1x Active Buzzer
- 1x GPIO Extension Board
- 1x LED Bar Graph
- 4x Push Buttons
- 1x Photoresistor
- 2x PNP Transistors
- 1x Passive Buzzer
- 1x Potentiometer
- 1x Set of 65 Male-to-Male Jumper Wires
- 1x Resistor Color Code Card
- 1x Project Board (Breadboard)
- 1x Plastic Storage Box

Image 2.2: The Freenove Basic Starter Kit packaging and the organized contents within the plastic box.
3. Setup Instructions
Follow these steps to set up your Freenove Basic Starter Kit:
- Unpack Components: Carefully remove all components from the plastic storage box. Organize them for easy access.
- Download Tutorial and Software: The detailed tutorial and necessary code examples are available online. The download link can be found on the product box. Access this link to download the comprehensive guide.
- Install Development Environment: Install the required software, such as the Arduino IDE or a MicroPython development environment, on your computer. The tutorial will provide specific instructions for this step, including any necessary drivers.
- Connect ESP32-WROVER Board: Connect the ESP32-WROVER board to your computer using the provided USB cable. Ensure a secure connection.
- Verify Board Detection: After connecting, check your computer's device manager (Windows) or system information (macOS/Linux) to confirm that the ESP32 board is recognized. This indicates that the drivers are correctly installed.
4. Operating the Kit
The Freenove Basic Starter Kit supports programming in both MicroPython and C. The included tutorial provides step-by-step instructions for various projects, from basic LED control to advanced camera applications.

Image 4.1: Overview of the detailed tutorial, highlighting support for C and MicroPython, component knowledge, code examples, and technical support.
Project Examples
The tutorial includes dozens of projects designed to teach you how to program the ESP32 board and interact with various electronic components. Each project comes with schematics, wiring diagrams, complete code, and detailed explanations.

Image 4.2: Examples of projects that can be built with the kit, demonstrating various circuit configurations on a breadboard.
Tutorial Structure
The tutorial is structured to guide users through fundamental concepts and progressively more complex projects. Key chapters include:
- Software Environment Configuration
- GPIO Basics (e.g., LED Blink, Button & LED)
- Component Integration (e.g., LED Bar, Photoresistor)
- WiFi Working Modes (Station, AP, AP+Station)
- TCP/IP Communication (Client, Server)
- Camera Web Server and Video Web Server

Image 4.3: Sample pages from the detailed tutorial, illustrating circuit diagrams and code snippets for various projects.
5. Maintenance
Proper maintenance ensures the longevity and reliable operation of your Freenove Basic Starter Kit components:
- Storage: Always store the components in the provided plastic box when not in use. This protects them from dust, moisture, and physical damage.
- Cleanliness: Keep all components, especially the ESP32 board and breadboard, clean and free from debris. Use a soft, dry cloth for cleaning. Avoid using liquids or harsh chemicals.
- Handling: Handle electronic components with care. Avoid bending pins or applying excessive force. Static electricity can damage sensitive components, so consider using anti-static precautions if working in a dry environment.
- Connections: Periodically check jumper wire connections and component insertions into the breadboard to ensure they are secure and not loose.
6. Troubleshooting
If you encounter issues while using the Freenove Basic Starter Kit, consider the following troubleshooting steps:
- Board Not Detected:
- Ensure the USB cable is securely connected to both the ESP32 board and your computer.
- Try a different USB port or USB cable.
- Verify that the necessary USB drivers for the ESP32 board are correctly installed on your computer. Refer to the tutorial for driver installation instructions.
- Code Upload Failure:
- In your IDE (e.g., Arduino IDE), confirm that the correct board type (ESP32-WROVER) and serial port are selected.
- Ensure no other applications are using the serial port.
- Press and hold the BOOT button on the ESP32 board while initiating the upload, then release it once the upload starts.
- Component Not Working:
- Double-check all wiring against the provided schematics and wiring diagrams in the tutorial. A single misplaced wire can prevent a circuit from functioning.
- Ensure components with polarity (e.g., LEDs, diodes, transistors) are inserted in the correct orientation.
- Verify the code logic for controlling the specific component. Use simple test sketches to isolate the issue.
- Test individual components if possible (e.g., test an LED with a battery and resistor).
- Power Issues:
- Ensure the ESP32 board is receiving stable 5V power, typically supplied via the USB connection.
- Avoid short circuits on the breadboard, which can cause power fluctuations or damage components.
For more specific troubleshooting related to individual projects, consult the detailed online tutorial. If problems persist, contact Freenove technical support for further assistance.
7. Specifications
| Feature | Specification |
|---|---|
| Processor | Dual-core 32-bit microprocessor, up to 240 MHz |
| Flash Memory | 4 MB |
| PSRAM | 8 MB |
| SRAM | 520 KB |
| Wireless Connectivity | 2.4 GHz Wi-Fi, Bluetooth 4.2 (LE) |
| Onboard Features | Camera, Memory Card Slot |
| Programming Languages | MicroPython, C |
| Model Number | FNK0061B |
| Item Weight | Approximately 10.6 ounces (300g) |
| Package Dimensions | Approximately 7.4 x 3.7 x 1.85 inches (18.8 x 9.4 x 4.7 cm) |
8. Warranty and Support
Freenove is committed to providing quality products and support. For any technical questions or issues not covered in this manual or the detailed online tutorial, please contact Freenove customer service. Information regarding product warranty is typically included with the product packaging or can be found on the official Freenove website.
For the most up-to-date support resources and contact information, please visit the Freenove website or refer to the contact details provided on your product box.