1. Introduction
Thank you for choosing the Ledvion 150cm IP65 LED Batten Fixture with Sensor. This product is designed for both indoor and outdoor use, featuring a robust, shock-resistant plastic housing for extended durability. Its IP65 certification ensures protection against dust and water, making it suitable for various environments such as garages, workshops, and warehouses. This fixture is compatible with various LED TL tubes (not included) and comes with all necessary installation materials, including stainless steel clips, for quick and easy setup.
2. Safety Instructions
- Always disconnect power before installation, maintenance, or cleaning.
- Installation should be performed by a qualified electrician in accordance with local wiring regulations.
- Ensure the mounting surface can support the weight of the fixture.
- Do not use the fixture if any part is damaged.
- This fixture is designed for LED TL tubes only. Do not use incandescent or fluorescent tubes.
- Avoid direct eye exposure to the light source when illuminated.
- Keep out of reach of children.
3. Package Contents
Verify that all components are present before proceeding with installation:
- Ledvion 150cm IP65 LED Batten Fixture (housing with integrated sensor)
- Stainless Steel Mounting Clips
- Installation Accessories (screws, wall plugs)
- User Manual
Note: LED TL tubes are NOT included and must be purchased separately.
4. Setup & Installation
4.1 Mounting the Fixture
- Prepare the Mounting Surface: Choose a suitable location on a ceiling or wall. Ensure the surface is clean, dry, and capable of supporting the fixture's weight.
- Mark Drilling Points: Use the fixture or mounting clips as a template to mark the drilling points for the mounting clips.
- Drill Holes: Drill holes at the marked points and insert appropriate wall plugs (if necessary).
- Attach Mounting Clips: Secure the stainless steel mounting clips to the surface using the provided screws.
- Mount the Fixture: Carefully clip the LED batten fixture into the secured mounting clips. Ensure it is firmly seated.
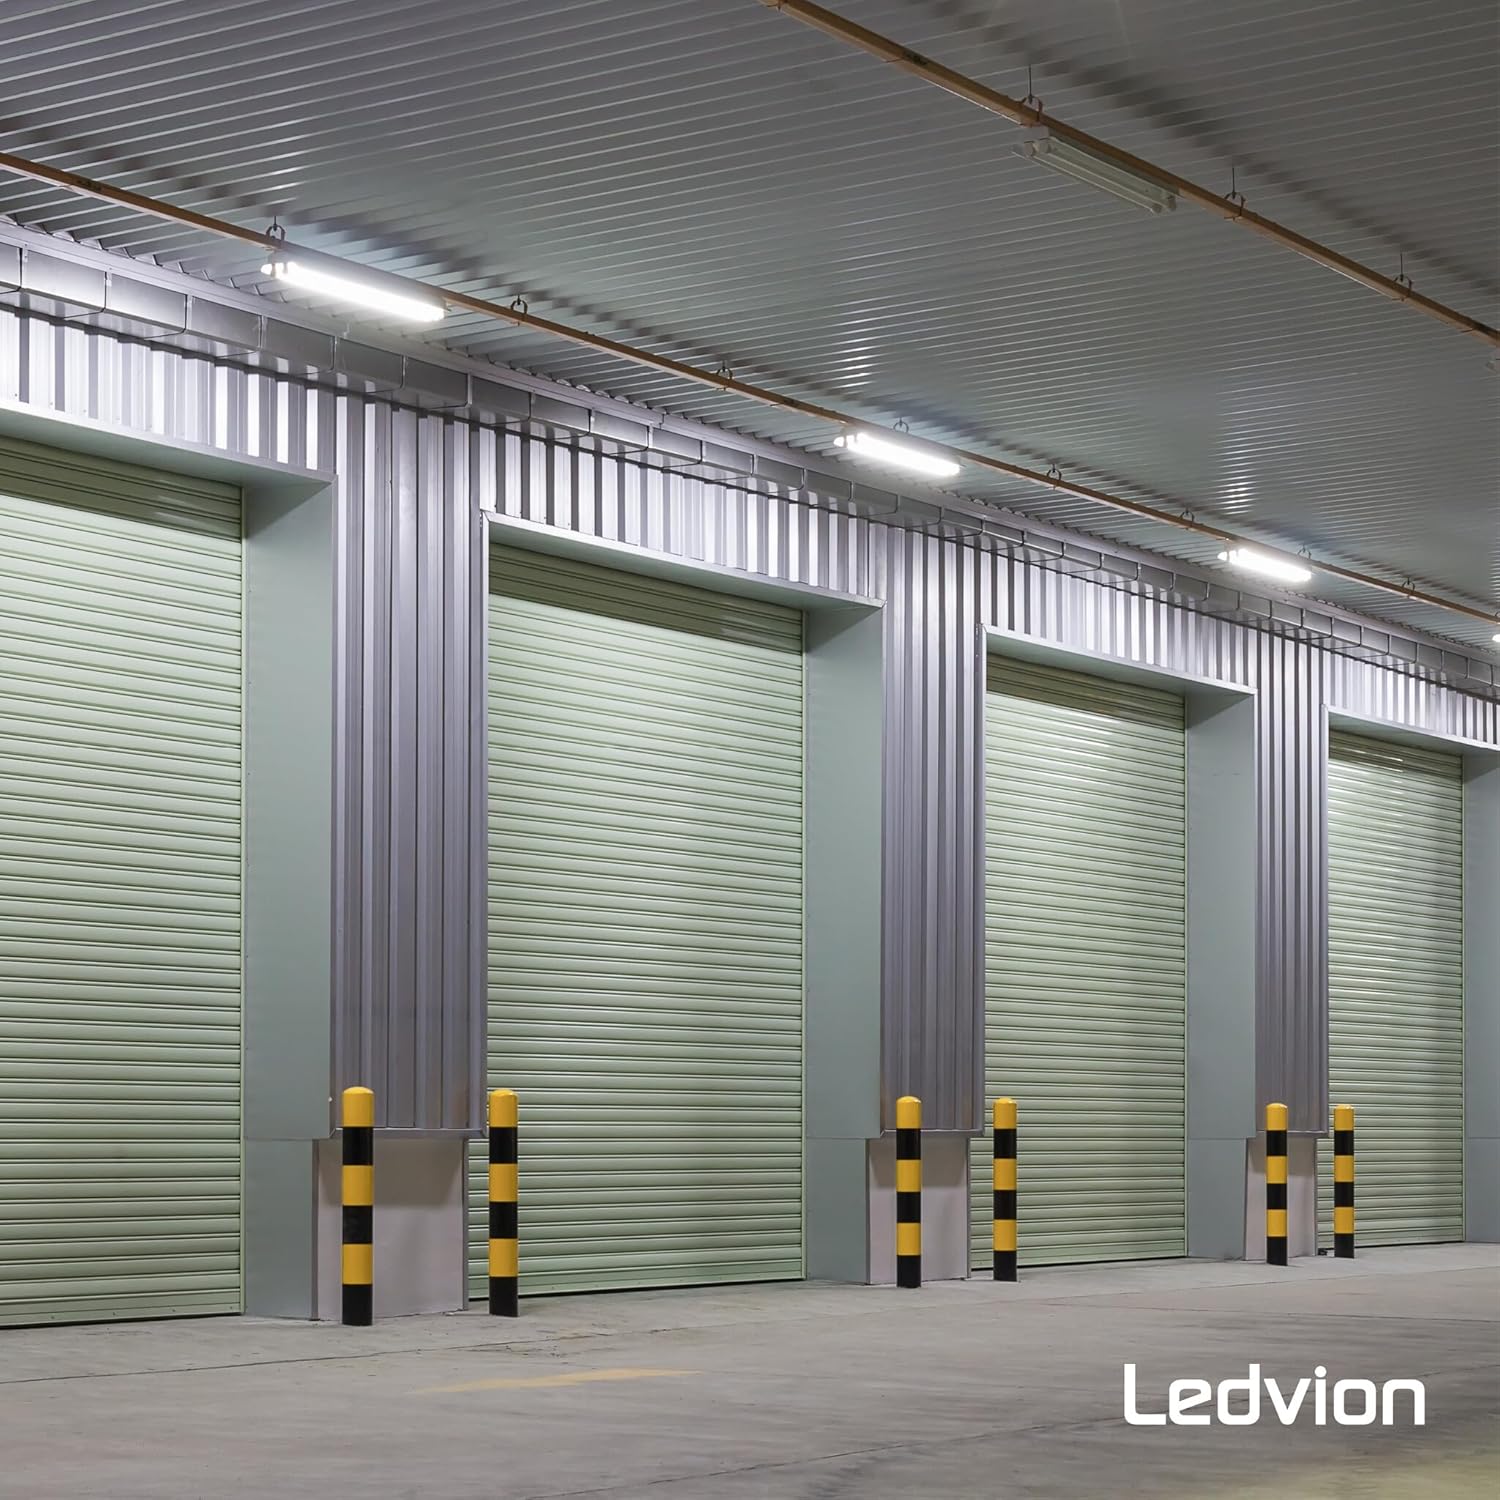
Image 4.1: Example installation of Ledvion LED Batten Fixtures in a warehouse environment.

Image 4.2: Detailed view of the fixture's robust design, highlighting the stainless steel clips for secure mounting.
4.2 Wiring the Fixture
Important: Ensure power is disconnected at the main circuit breaker before wiring.
- Open the Wiring Compartment: Carefully open the end cap or wiring compartment of the fixture.
- Connect Wires: Connect the live (L), neutral (N), and earth (E) wires from your power supply to the corresponding terminals inside the fixture. Ensure all connections are secure.
- Close Compartment: Close the wiring compartment securely, ensuring the IP65 seal is maintained.
4.3 Installing LED TL Tubes
This fixture is designed to house LED TL tubes (not included).
- Open the Diffuser: Unclip or open the transparent diffuser cover of the fixture.
- Insert LED Tube: Carefully insert the LED TL tube into the lamp holders. Ensure it is properly seated and secured.
- Close Diffuser: Close the diffuser cover, ensuring all clips are engaged to maintain the IP65 rating.

Image 4.3: Internal structure of the fixture, showing where the LED tube is inserted and the integrated iron reflector.
5. Operating Instructions
5.1 Powering On
Once installation is complete and all connections are secure, restore power at the main circuit breaker. The fixture is now ready for operation.
5.2 Motion Sensor Operation
This fixture includes an integrated microwave motion sensor for automatic illumination. The sensor detects movement within its adjustable range and activates the light. The light will remain on for a set duration after the last detected movement.

Image 5.1: Visual representation of the microwave sensor's detection capabilities and adjustable parameters.
5.3 Adjusting Sensor Settings
The motion sensor features adjustable settings for detection range, hold time, and daylight threshold. These settings are typically adjusted via small dials or switches located on the sensor module inside the fixture. Refer to the specific markings on your sensor for precise adjustments.
- Detection Range: Adjustable from approximately 4 to 10 meters. This controls how far the sensor can detect movement.
- Hold Time: Adjustable settings such as 5 seconds, 1 minute, 3 minutes, or 10 minutes. This determines how long the light stays on after motion is no longer detected.
- Daylight Threshold: Adjustable (e.g., 30 Lux or Disable). This setting determines the ambient light level below which the sensor will activate the light. If set to "Disable," the light will activate with motion regardless of ambient light.
To access these settings, you may need to carefully open the fixture's diffuser cover. Ensure power is off before making adjustments.
6. Maintenance
6.1 Cleaning
- Disconnect Power: Always turn off power to the fixture before cleaning.
- Exterior Cleaning: Wipe the exterior of the fixture with a soft, damp cloth. Do not use abrasive cleaners or solvents, as these can damage the finish or the IP65 seal.
- Diffuser Cleaning: If necessary, carefully remove the diffuser and clean it with a mild soap solution and water. Ensure it is completely dry before reattaching.
6.2 LED Tube Replacement
When an LED TL tube reaches the end of its lifespan:
- Disconnect Power: Turn off power to the fixture.
- Open Diffuser: Carefully unclip or open the transparent diffuser cover.
- Remove Old Tube: Gently twist and remove the old LED TL tube from its holders.
- Insert New Tube: Insert a new, compatible LED TL tube, ensuring it is properly seated.
- Close Diffuser: Close the diffuser cover, ensuring all clips are engaged to maintain the IP65 rating.
- Restore Power: Restore power to the fixture.
7. Troubleshooting
| Problem | Possible Cause | Solution |
|---|---|---|
| Light does not turn on. | No power supply. Faulty LED tube. Sensor settings incorrect. | Check circuit breaker and wiring connections. Replace LED tube. Adjust sensor's daylight threshold or sensitivity. |
| Light stays on continuously. | Sensor detecting constant motion. Hold time set too long. Sensor faulty. | Check for objects causing constant detection. Adjust sensor's hold time to a shorter duration. Contact support if sensor is faulty. |
| Light turns on/off randomly. | Interference with sensor. Sensor sensitivity too high. | Ensure no external factors (e.g., moving branches, reflections) are triggering the sensor. Reduce sensor sensitivity. |
| Water or dust inside fixture. | Improperly sealed housing/diffuser. Damaged IP65 seal. | Ensure diffuser and wiring compartment are securely closed. Inspect seals for damage; replace fixture if necessary. |
8. Specifications
| Feature | Detail |
|---|---|
| Model Number | LV30012 |
| Dimensions (L x W x H) | 156 x 9 x 8 cm |
| Weight | 1.46 kg |
| Material | ABS Plastic |
| Ingress Protection (IP) Rating | IP65 (Dust and water jet protected) |
| Impact Protection (IK) Rating | IK06 |
| Voltage | 230 Volts (220-240V, 60Hz) |
| Power Consumption (Fixture only) | 1 Watt |
| Light Type | LED (compatible with LED TL tubes) |
| Special Feature | Motion Sensor (Microwave) |
| Sensor Detection Range | Approx. 4-10 meters |
| Sensor Hold Time | Adjustable (e.g., 5s, 1min, 3min, 10min) |
| Sensor Daylight Threshold | Adjustable (e.g., 30 Lux, Disable) |
| Country of Origin | China |

Image 8.1: Dimensional drawing of the 150cm fixture (1500mm length).

Image 8.2: Visual confirmation of the IP65 rating, indicating protection against dust and water.
Image 8.3: Details on the fixture's durability, IK06 impact rating, and construction materials (polycarbonate and stainless steel).
9. Warranty & Support
9.1 Warranty Information
This Ledvion product comes with a 2-year warranty from the date of purchase, covering defects in materials and workmanship. This warranty does not cover damage caused by improper installation, misuse, accidents, or unauthorized modifications. Please retain your proof of purchase for warranty claims.
9.2 Customer Support
For technical assistance, troubleshooting, or warranty inquiries, please contact Ledvion customer support through the retailer where the product was purchased or visit the official Ledvion website for contact information.
When contacting support, please have your product model number (LV30012) and proof of purchase readily available.


