
1. Introduction
This manual provides comprehensive instructions for the Hoymiles HMS-1800-4T Micro-inverter, a device designed for converting solar energy from up to four photovoltaic modules into AC power. It covers product features, safety guidelines, installation procedures, operational details, maintenance, and troubleshooting to ensure efficient and safe use. Please read this manual thoroughly before installation and operation.
The Hoymiles HMS-1800-4T is a state-of-the-art micro-inverter suitable for mini photovoltaic systems and scalable PV installations. Its lightweight and compact design (4.7 kg with 0.5m AC connection cable) supports solar power generation with up to four solar panels, each up to 600W peak power. It features a very low startup voltage (22V) and a wide DC input range (16-60VDC), ensuring long operating hours and broad PV module compatibility. Each input is monitored by its own Maximum Power Point Tracker (MPPT) to optimize system yield.
2. Safety Instructions
Adherence to safety precautions is crucial during installation, operation, and maintenance of the Hoymiles HMS-1800-4T Micro-inverter. Failure to follow these instructions may result in serious injury or equipment damage.
- Qualified Personnel: Installation and maintenance must be performed by qualified personnel with electrical training.
- Electrical Hazard: The micro-inverter generates high voltage. Do not touch live parts. Disconnect all power sources before servicing.
- Grounding: Ensure proper grounding of the micro-inverter and all connected components.
- Environmental Conditions: Install the device in a well-ventilated area, away from flammable materials, and within specified operating temperatures.
- Water and Moisture: The device has an IP67 rating, but avoid submerging it or exposing it to excessive moisture.
- Cable Connections: Use appropriate cables and connectors. Ensure all connections are secure and properly insulated.
- Emergency Shutdown: Familiarize yourself with the system's emergency shutdown procedures.
3. Product Overview
3.1 Key Features
- Easy Installation: Plug & Play design for simplified setup.
- High Efficiency: Optimized power conversion with individual MPPT for each input.
- Robust Design: IP67 protection rating for outdoor use.
- Natural Convection Cooling: Fanless design ensures quiet operation.
- Wide Input Voltage Range: DC input range of 16-60VDC, with a low startup voltage of 22V.
- Integrated WiFi: For monitoring and control.
- Compliance: Meets standards such as EN 50549-1:2019, VDE-AR-N 4105:2018, IEC/EN 62109-1/-2, and others.
3.2 Components
The Hoymiles HMS-1800-4T Micro-inverter unit includes:
- HMS-1800-4T Micro-inverter unit
- Integrated AC connection cable (0.5m)
- DC input connectors for up to four solar modules
Note: Additional cables for 230V AC connection to the grid are not included and must be purchased separately.
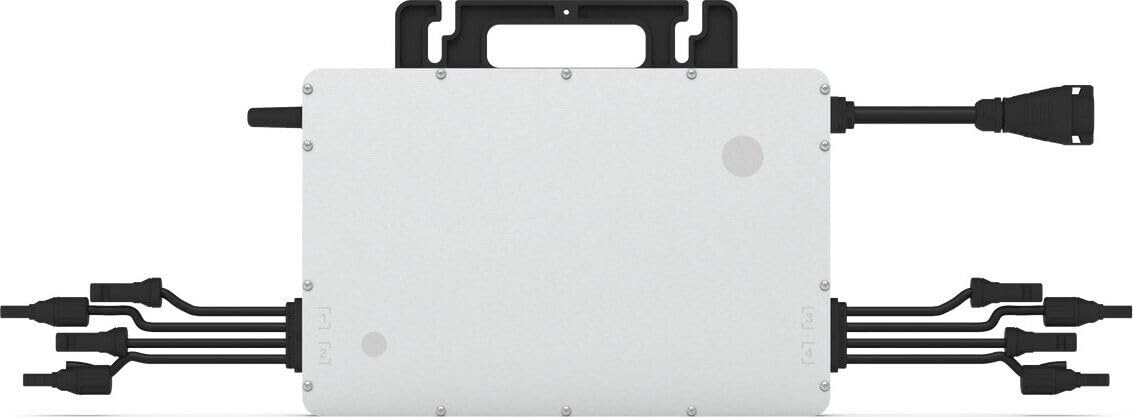
Figure 1: Front view of the Hoymiles HMS-1800-4T Micro-inverter, showing the main unit with cooling fins, AC output cable on the left, and four DC input connectors on the bottom right.
4. Setup and Installation
Before beginning installation, ensure all safety instructions are understood and followed. This section outlines the general steps for installing the micro-inverter.
4.1 Pre-installation Checklist
- Verify that the solar panels are compatible with the micro-inverter's input specifications (voltage and current).
- Ensure the mounting location is suitable, providing adequate ventilation and protection from direct sunlight or extreme weather if not rated for it (though IP67 rated, optimal conditions prolong life).
- Gather all necessary tools and additional components (e.g., AC connection cable, mounting hardware).
4.2 Mounting the Micro-inverter
- Attach the micro-inverter to the solar panel frame or a suitable mounting structure using appropriate hardware. Ensure it is securely fastened.
- Position the micro-inverter to allow for proper cable management and air circulation around the cooling fins.
4.3 Electrical Connections
- DC Connection: Connect the DC cables from each solar panel to the corresponding DC input connectors on the micro-inverter. Ensure correct polarity (+ to + and - to -).
- AC Connection: Connect the integrated AC output cable of the micro-inverter to your AC grid connection point using a suitable AC cable (not supplied). Ensure the AC connection is properly grounded and protected by a circuit breaker.
- Multiple Units: If installing multiple micro-inverters, connect their AC output cables in series to form an AC trunk cable, then connect to the grid. Refer to local electrical codes for maximum string length.
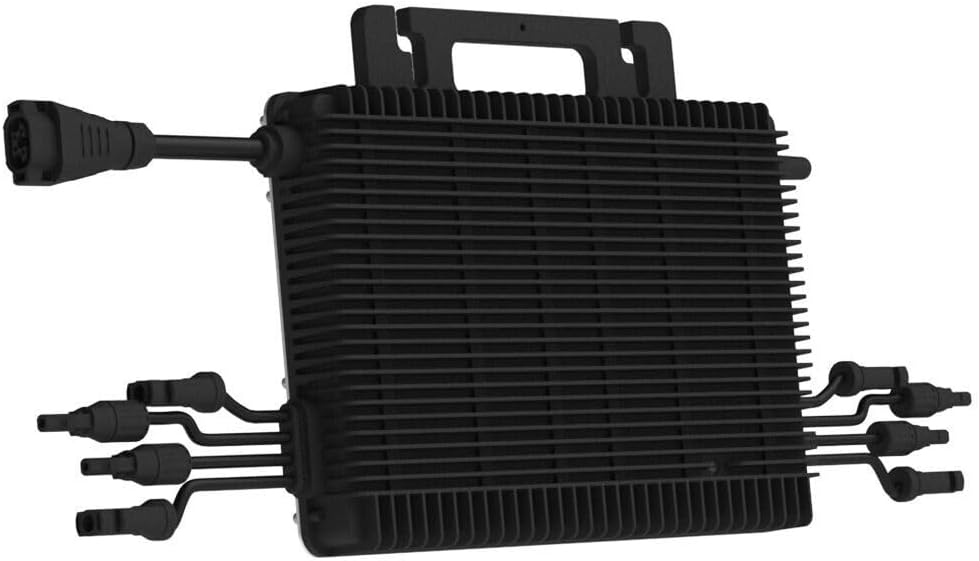
Figure 2: Hoymiles HMS-1800-4T Micro-inverter showing the various cable connections for DC input from solar panels and AC output to the grid.
5. Operating Instructions
Once installed, the Hoymiles HMS-1800-4T Micro-inverter operates largely automatically. This section details initial startup and monitoring.
5.1 Initial Startup
- After all electrical connections are secure, turn on the AC circuit breaker supplying power to the micro-inverter.
- Next, ensure the solar panels are exposed to sufficient sunlight. The micro-inverter will automatically begin converting DC power from the panels to AC power for the grid once the input voltage reaches the startup threshold (22V).
- Observe the indicator lights on the micro-inverter (if present) or use the monitoring system to confirm proper operation.
5.2 Monitoring with WiFi
The HMS-1800-4T includes integrated WiFi for remote monitoring. To utilize this feature:
- Download the Hoymiles monitoring application (e.g., S-Miles Cloud app) on your smartphone or access the web portal.
- Follow the app's instructions to connect the micro-inverter to your local WiFi network.
- Once connected, you can monitor real-time power generation, historical data, and system status.
6. Maintenance
The Hoymiles HMS-1800-4T Micro-inverter is designed for minimal maintenance. However, periodic checks can ensure optimal performance and longevity.
- Visual Inspection: Periodically inspect the micro-inverter and all cables for any signs of damage, corrosion, or loose connections.
- Cleaning: Ensure the cooling fins are free from dust, dirt, or debris to maintain efficient heat dissipation. Use a soft brush or cloth for cleaning. Do not use high-pressure water jets directly on the unit.
- Software Updates: Check the Hoymiles monitoring platform for any available firmware updates for the micro-inverter. Follow instructions carefully for updates.
- Solar Panel Cleaning: Keep solar panels clean to maximize energy production.
Always disconnect power to the micro-inverter before performing any physical maintenance.
7. Troubleshooting
This section provides guidance on common issues you might encounter with your Hoymiles HMS-1800-4T Micro-inverter.
7.1 No Power Output
- Check AC Breaker: Ensure the AC circuit breaker connected to the micro-inverter is in the "ON" position.
- Check DC Connections: Verify that all DC cables from the solar panels are securely connected and have correct polarity.
- Sufficient Sunlight: Confirm that solar panels are receiving adequate sunlight and are not shaded. The micro-inverter requires a minimum DC input voltage (22V) to start.
- Grid Connection: Ensure the AC grid connection is stable and within acceptable voltage and frequency ranges.
7.2 WiFi Connection Issues
- Router Proximity: Ensure the micro-inverter is within range of your WiFi router.
- Network Credentials: Double-check that the correct WiFi network name (SSID) and password have been entered into the monitoring app.
- Router Settings: Some routers may require specific settings (e.g., 2.4GHz band enabled). Consult your router's manual.
- Restart: Try restarting your WiFi router and the micro-inverter (by disconnecting and reconnecting AC power).
7.3 Low Power Production
- Panel Cleanliness: Dirty solar panels can significantly reduce output. Clean them as described in the maintenance section.
- Shading: Even partial shading on solar panels can reduce overall system performance.
- Panel Health: Inspect individual solar panels for damage or degradation.
- MPPT Function: The individual MPPTs should optimize output. If one panel consistently underperforms, check its connections and health.
If issues persist, contact Hoymiles customer support or a qualified electrician.
8. Specifications
The following table details the technical specifications for the Hoymiles HMS-1800-4T Micro-inverter.
| Feature | Specification |
|---|---|
| Brand | Hoymiles |
| Model Name | HMS-1800-4T |
| Power Source | Solar Energy |
| Rated Power | 1800 Watts |
| Output Power | 1800 Watts |
| Input Voltage | 22 Volts (startup) |
| DC Input Range | 16 - 60 VDC |
| Max Input Current per MPPT | 13.3 A |
| Output Voltage | 230 Volts |
| Efficiency | 19 % |
| Item Weight | 4.7 Kilograms |
| Protection Rating | IP67 |
| Cooling | Natural Convection (Fanless) |
| Compliance Standards | EN 50549-1:2019, VDE-AR-N 4105:2018, VFR2019, IEC/EN 62109-1/-2, IEC/EN 61000-6-1/-2/-3/-4, IEC/EN 61000-3-2/3 |
| Manufacturer | Hoymiles |
| Country of Origin | China |

Figure 3: Overview of the Hoymiles Micro-inverter datasheet, highlighting key features and models including HMS-1800-4T.

Figure 4: Detailed technical specifications table for Hoymiles HMS-1600-4T, HMS-1800-4T, and HMS-2000-4T micro-inverters, showing electrical and mechanical data.
9. Warranty and Support
Information regarding specific warranty periods is not provided in the product description. Please refer to the official Hoymiles website or your point of purchase for detailed warranty terms and conditions.
For technical support, troubleshooting assistance beyond this manual, or warranty claims, please contact Hoymiles customer service or your authorized dealer. Ensure you have your product model number (HMS-1800-4T) and purchase details available when contacting support.
Manufacturer: Hoymiles
Contact Information: Refer to the official Hoymiles website for the most current contact details and support resources.


