Introduction
Thank you for choosing the ENOKER Smart Deadbolt Fingerprint Door Lock. This manual provides detailed instructions for installation, operation, and maintenance to ensure optimal performance and security. This smart lock offers multiple convenient unlocking methods, including fingerprint, passcode, APP control, temporary codes, and physical keys.
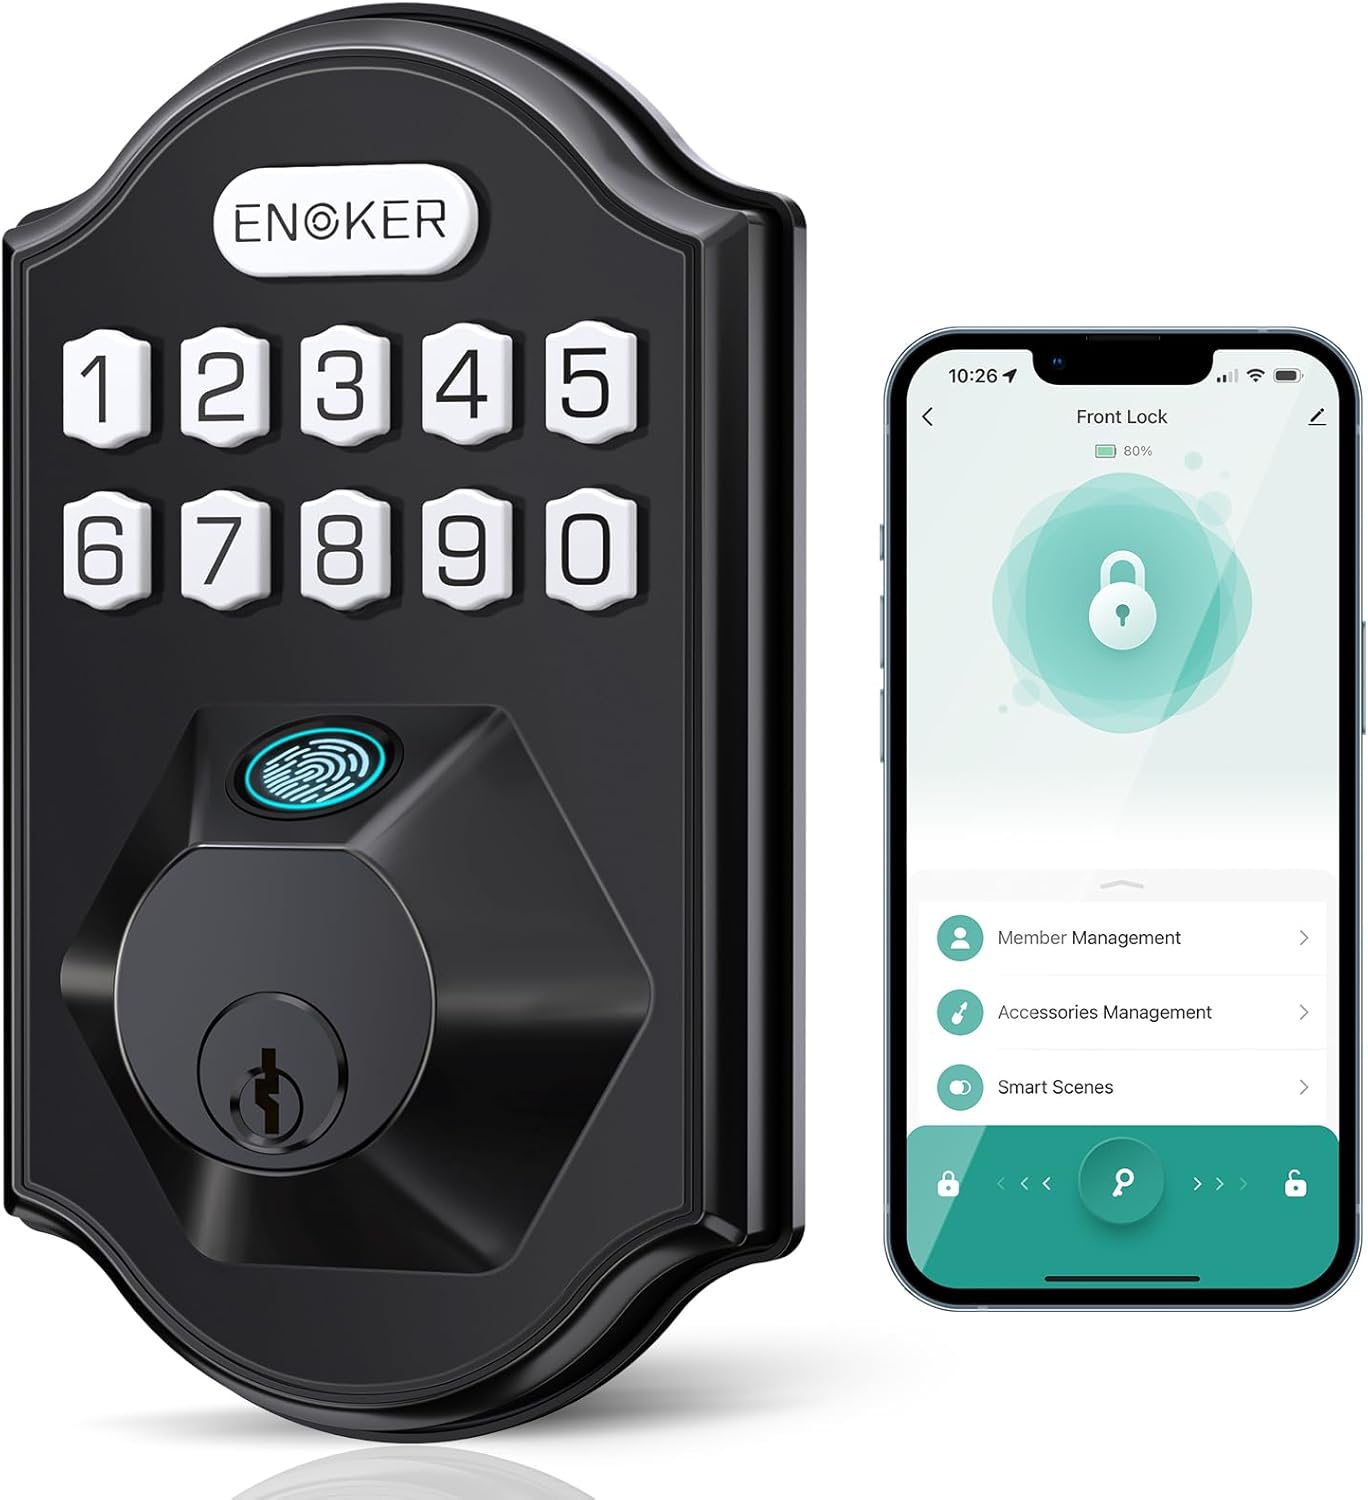
The ENOKER Smart Deadbolt Fingerprint Door Lock, showcasing its sleek design and smartphone application interface.
What's in the Package
Before beginning installation, please verify that all components are present and in good condition:
- Exterior Assembly
- Interior Assembly
- Mounting Plate
- Latch
- Strike
- Drive-In Collar
- Key (x2)
- Mounting Plate Screws (x2)
- Strike Screws (x4)
- Interior Assembly Screws (x3)
- Reset Tool

All components of the ENOKER Smart Deadbolt Fingerprint Door Lock package.
Setup and Installation
Follow these steps carefully for a successful installation. For a visual guide, please refer to the official installation video below.
Official installation video for the ENOKER Keyless Entry Smart Door Lock. This video provides a step-by-step visual guide for the entire installation process.
Step 1: Measure the Dimensions
Ensure your door meets the required dimensions for installation. This lock fits most US standard doors.
- Door Thickness: 1-3/8" to 1-3/4" (35mm-51mm)
- Cross Bore: 2-1/8" (54mm)
- Edge Bore: 1" (25mm)
- Backset: Adjustable for 2-3/8" (60mm) or 2-3/4" (70mm)

Detailed diagram illustrating the necessary door dimensions for proper installation. (Refer to video: 0:04 - 0:09)
Step 2: Install the Latch and Strike
Install the latch into the door edge. Ensure the latch direction is correct (up arrow pointing up). Secure it with the provided latch screws. Test the deadbolt mechanism with a screwdriver to ensure smooth operation.

The smart lock is compatible with both left-handed and right-handed door installations. (Refer to video: 0:10 - 0:32)
Step 3: Install Exterior Assembly
Feed the cable and torque blade from the exterior assembly through the door hole. Ensure the torque blade is horizontal and aligns with the latch hole. If your door panel is thin, you may need to cut the iron sheet shorter as indicated.
Note: The iron sheet can be adjusted according to the thickness of the door. If the thickness of the door panel is not enough, please cut the iron sheet short.
Ensure the torque blade is horizontal and the cable is routed below the latch.
Install the mounting plate over the exterior assembly, securing it with the mounting plate screws. You can use self-tapping screws for additional stability.
Note: You can choose to use self-tapping screws to fix the mounting plate on the door.
(Refer to video: 0:33 - 1:02)
Step 4: Install Interior Assembly
Connect the cable from the exterior assembly to the socket on the interior assembly. Push it in firmly until it's fully attached. Ensure the thumbturn on the interior assembly is in a vertical position. Align the interior assembly with the mounting plate and secure it with the interior assembly screws.
Ensure the thumbturn is in the vertical position before installation.
(Refer to video: 1:03 - 1:23)
Step 5: Detect Left or Right Hand Door Installation & Factory Reset
Keep the door open and unlocked. Load 4 AA batteries into the interior assembly. After battery installation, the lock will automatically detect the door's orientation. Press and hold the reset button (located inside the battery compartment, accessible with the reset tool) for 3 seconds until you hear a long "BEEP" sound. The latch bolt will extend and retract to learn the door's orientation. This step is crucial for normal operation after installation.
Note: After installation, the lock can only be used normally after a factory reset. Must operate in unlocked state.
(Refer to video: 1:24 - 1:44)
Operating Instructions
Unlocking Methods
- Fingerprint Unlock: Place your registered finger on the sensor for quick access. The lock unlocks in approximately 0.2 seconds with a 99% recognition rate.

The sensitive fingerprint sensor allows for quick and reliable unlocking.
- Passcode Unlock: Enter your 6-8 digit passcode on the keypad. The lock supports anti-peeping functionality, allowing you to enter random digits before or after your actual code to protect your privacy.

Utilize the anti-peeping feature for secure passcode entry.
- APP Control (TUYA App): Use the TUYA App (Bluetooth only) to unlock/lock the door, check log records, manage users, and adjust settings. Remote unlocking is not available via the app; you must be within Bluetooth range.

Manage your smart lock conveniently through the TUYA App.
- Temporary Code: Generate temporary passcodes via the TUYA App for guests or service providers.

Easily share temporary access codes with others.
- Physical Keys: Two backup physical keys are provided for traditional unlocking.
Locking Methods
- Auto-Lock: The lock can be set to automatically lock after 1-99 seconds once the door closes. This feature is turned off by default and can be configured in the app.

The auto-lock feature provides convenience and peace of mind.
- One-Touch Locking: Press any key on the keypad for 2 seconds to lock the door.
- Free Passage Mode: This mode keeps the door unlocked for frequent entry, ideal for parties or when carrying multiple items.
User Management
The lock supports up to 200 users, 100 fingerprints, and 100 group pin codes. Manage users, add/delete fingerprints and passcodes, and view unlocking records through the TUYA App.

Easily manage users and settings via the app.

Share access with up to 200 fingerprints and codes.
Maintenance
Battery Replacement
The lock requires 4 AA batteries (included) and offers up to 12 months of battery life depending on usage frequency. A low battery voice alert will notify you when replacement is needed. The lock can still be unlocked approximately 50 times after the low battery alert. For emergency situations, use the backup physical keys or connect a 5V Type-C power bank to the emergency power port.

Information on battery life and emergency power supply.
Cleaning
Wipe the lock surface with a soft, dry cloth. Avoid using abrasive cleaners or solvents that could damage the finish or electronic components.
Troubleshooting
- Fingerprint not recognized: Ensure your finger is clean and dry. Try re-registering your fingerprint.
- Keypad not responding: Check battery levels. Ensure the cable connection inside the interior assembly is secure.
- Lock not locking/unlocking: Perform a factory reset (refer to Setup Step 5). Ensure the latch is installed correctly and moves freely.
- Excessive battery drain: Ensure the lock is properly installed and not experiencing excessive friction. Check for any continuous motor activity.
- App connectivity issues: Ensure Bluetooth is enabled on your device and you are within range of the lock.
For more detailed troubleshooting, refer to the TUYA App's log records for error messages or contact customer support.
Specifications
| Feature | Detail |
|---|---|
| Model Name | DS07 |
| Lock Type | Biometric, APP Control, Deadbolt, Keypad |
| Unlocking Methods | Fingerprint, Passcode, APP Control, Temporary Code, Physical Keys |
| User Capacity | 200 users (100 fingerprints, 100 group pin codes) |
| Fingerprint Recognition Speed | 0.2 seconds |
| Connectivity | Bluetooth (via TUYA App) |
| Power Source | 4 AA batteries (included) |
| Battery Life | Up to 12 months (depending on usage) |
| Emergency Power | Backup keys, 5V Type-C power bank |
| Material | Zinc |
| Dimensions (L x W x H) | 3 x 0.6 x 5.1 inches |
| Weight | 2.4 pounds |
| Operating Temperature | -25℃ to 70℃ (-13°F to 158°F) |
| Water Resistance | IP53 Waterproof |
| Security Rating | ANSI Grade 3 |

The lock is designed for outdoor and indoor use with IP53 waterproof rating and wide temperature tolerance.

The lock meets ANSI Grade 3 standards for durability and security.
Warranty and Support
ENOKER offers at least a 1-year product warranty from the date of purchase. For any questions, concerns, or technical assistance, please contact our customer support team. We provide 24/7 email support to ensure your satisfaction.
Email Support: Refer to your product packaging or the ENOKER official website for contact details.


