
1. Introduction
This manual provides essential information for the safe and efficient operation, installation, and maintenance of your De'Longhi Tasciugo Ariadry Multi Dehumidifier, model DEXD216RF. Please read these instructions thoroughly before using the appliance and retain them for future reference.
The De'Longhi DEXD216RF dehumidifier is designed to reduce humidity levels in indoor environments, contributing to a more comfortable and healthier living space. It features a 3-action filtration system, a dry function for laundry, and is built with portability and environmental considerations in mind.
2. Safety Information
Always observe the following safety precautions to prevent electric shock, injury, or damage to the appliance:
- Ensure the power supply voltage matches the rating label on the appliance.
- Do not operate the dehumidifier with a damaged cord or plug.
- Keep the appliance away from heat sources and direct sunlight.
- Do not block air inlets or outlets. Maintain adequate clearance around the unit.
- Do not insert objects into the air vents.
- Always unplug the appliance before cleaning or performing maintenance.
- This appliance uses R290 refrigerant. Do not puncture the refrigerant circuit.
- Keep children and pets away from the appliance during operation.
- Do not use the appliance in wet rooms such as bathrooms without proper ventilation.
3. Product Overview
The De'Longhi DEXD216RF dehumidifier is a compact and efficient unit designed for various indoor environments. Key features include a multi-stage filtration system, a removable water tank, and integrated portability features.
3.1 Main Components


- Control Panel: Located on the top front, for setting modes and humidity levels.
- Air Inlet/Filter Cover: Located on the rear, housing the 3-action filtration system.
- Air Outlet: Located on the top, where dry air is expelled.
- Water Tank: Removable transparent tank at the front for collected water.
- Continuous Drainage Outlet: Located on the rear for connecting a drainage hose.
- Integrated Handle: For easy transportation.
- Caster Wheels: For enhanced mobility.
3.2 Control Panel


The control panel features intuitive buttons and a digital display:
- Power Button: Turns the unit on or off.
- Mode Selection Button: Cycles through operating modes (e.g., Dehumidification, Laundry Dry).
- Humidity Setting Buttons: Adjusts the desired humidity level.
- Timer Button: Sets the operating timer.
- Display: Shows current humidity, target humidity, and error codes.
- Water Tank Full Indicator: Illuminates when the water tank needs emptying.
4. Setup
4.1 Unpacking and Placement
- Carefully remove the dehumidifier from its packaging.
- Remove all packing materials and ensure no components are missing or damaged.
- Place the dehumidifier on a flat, stable surface.
- Ensure there is at least 20 cm (8 inches) of clear space around the air inlets and outlets for proper airflow.


4.2 Power Connection
Plug the power cord into a suitable electrical outlet. Ensure the outlet meets the electrical requirements specified on the appliance's rating label.
4.3 Continuous Drainage (Optional)
For continuous operation without needing to empty the water tank, you can set up continuous drainage:
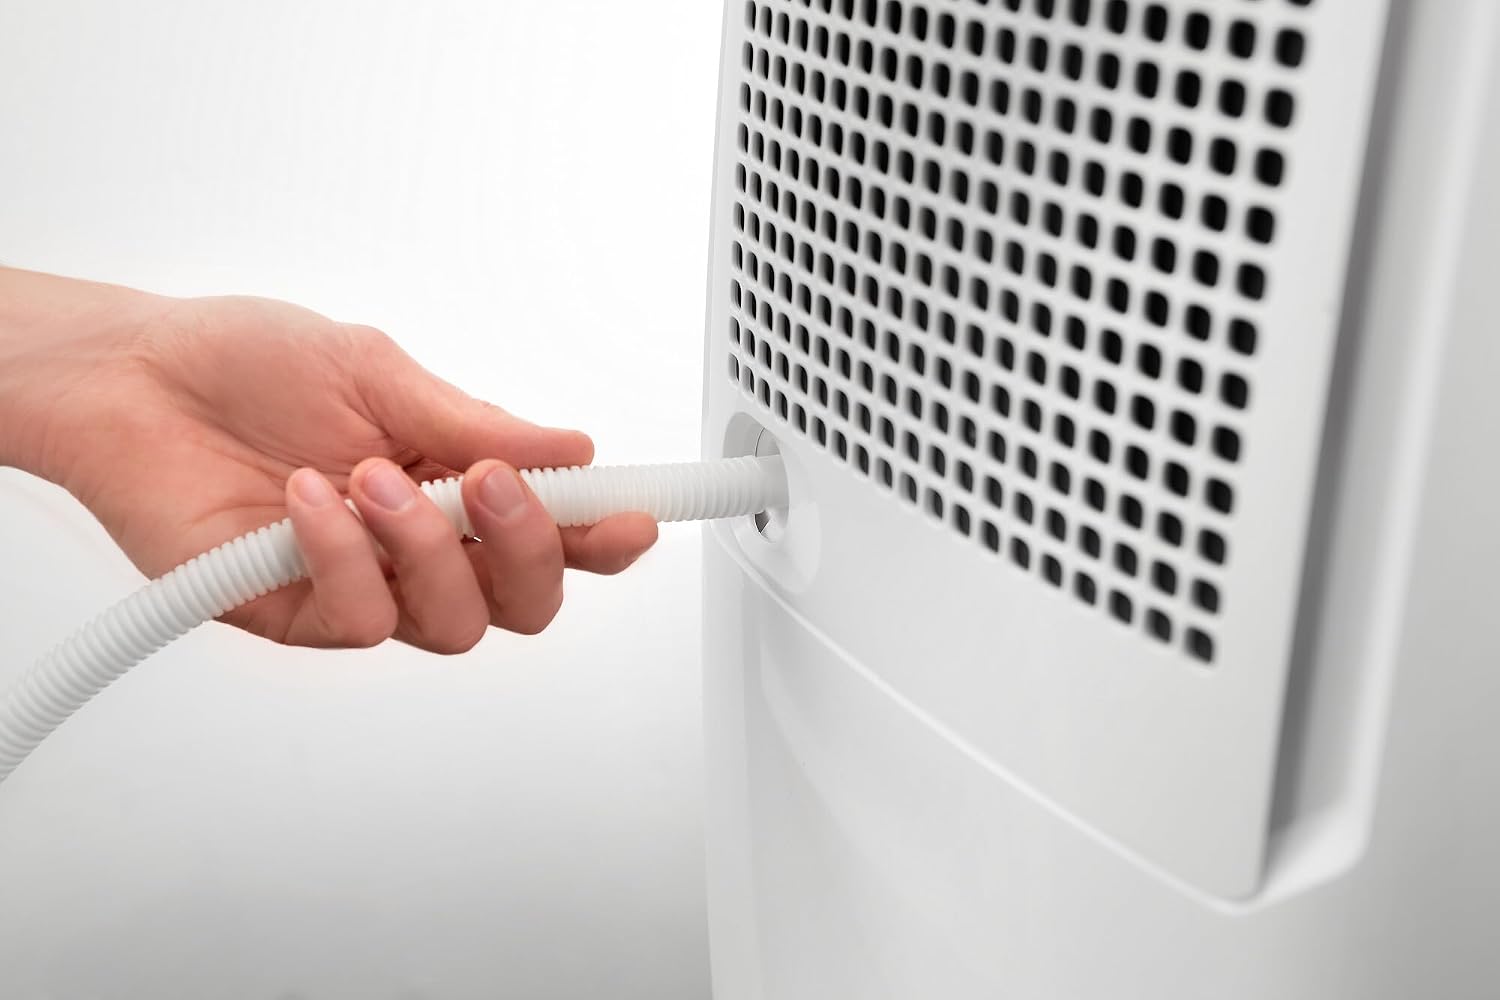
- Locate the continuous drainage outlet on the rear of the unit.
- Connect the provided drainage hose to this outlet.
- Ensure the hose is routed downwards to a suitable drain (e.g., floor drain, large container) and is free of kinks or blockages.
- Verify that the hose connection is secure to prevent leaks.
5. Operating Instructions
5.1 Powering On/Off
Press the Power Button on the control panel to turn the unit on or off.
5.2 Setting Desired Humidity
- With the unit powered on, press the Mode Selection Button until the desired dehumidification mode is active.
- Use the Humidity Setting Buttons (usually up/down arrows) to adjust the target humidity level. The display will show the set percentage.
- The unit will operate until the ambient humidity reaches the set level, then it will cycle on and off to maintain it.
5.3 Laundry Drying Function
The dehumidifier includes a dedicated function for drying laundry:
- Place the dehumidifier in the room where laundry is drying.
- Press the Mode Selection Button until the Laundry Dry mode indicator illuminates (refer to Figure 4 for visual).
- In this mode, the unit operates continuously at maximum dehumidification to accelerate drying.
5.4 Water Tank Full Indicator
When the 2.1-liter transparent water tank is full, the unit will automatically stop operating, and the Water Tank Full Indicator will illuminate. Empty the tank and reinsert it correctly for the unit to resume operation.
6. Maintenance
Regular maintenance ensures optimal performance and extends the lifespan of your dehumidifier.
6.1 Cleaning the Air Filters
The DEXD216RF features a 3-action filtration system (anti-dust, anti-allergen, active carbon). Clean the filters regularly, approximately every two weeks, or more frequently depending on usage and air quality.
- Ensure the unit is turned off and unplugged from the power outlet.
- Locate the filter cover on the rear of the unit and open it.
- Carefully remove the filters.
- Clean the anti-dust filter with a vacuum cleaner or wash it with lukewarm water and mild detergent. Rinse thoroughly and allow to air dry completely before reinstallation.
- The anti-allergen and active carbon filters should be replaced periodically according to manufacturer recommendations, as they cannot be washed.
- Reinsert the dry filters and close the filter cover securely.

6.2 Cleaning the Water Tank
Empty and clean the water tank regularly to prevent mold and bacteria growth.
- Remove the water tank from the unit.
- Empty any collected water.
- Wash the tank with lukewarm water and a small amount of mild detergent.
- Rinse thoroughly and dry before placing it back into the dehumidifier.
6.3 Exterior Cleaning
Wipe the exterior of the dehumidifier with a soft, damp cloth. Do not use abrasive cleaners or solvents.
7. Troubleshooting
If you encounter issues with your dehumidifier, refer to the following common problems and solutions:
| Problem | Possible Cause | Solution |
|---|---|---|
| Unit does not turn on. | No power supply; power cord not plugged in; water tank full or incorrectly inserted. | Check power connection; empty and reinsert water tank correctly. |
| No water collected. | Ambient humidity is too low; temperature is too low; air filters are clogged; continuous drainage hose is connected. | Verify ambient conditions; clean or replace filters; if continuous drainage is active, water will not collect in the tank. |
| Unit is noisy. | Unit not on a level surface; air filter clogged. | Place unit on a flat surface; clean air filter. |
| Airflow is weak. | Air filters are clogged. | Clean or replace air filters. |
If the problem persists after attempting these solutions, please contact customer support.
8. Specifications
| Feature | Detail |
|---|---|
| Model Number | DEXD216RF |
| Moisture Absorption Capacity | 16 Liters/Day |
| Water Tank Capacity | 2.1 Liters |
| Refrigerant | R290 (Natural Gas) |
| Voltage | 240 Volts |
| Wattage | 300 Watts |
| Sound Level | 40 Decibels |
| Product Dimensions (W x D x H) | 22 x 34 x 51 cm |
| Item Weight | 10.5 kg |
| Floor Area Coverage | 1292 Square Feet |
| Special Features | Portable, Removable Tank, 3-Action Filtration, Dry Function |

9. Warranty and Support
For warranty information, technical assistance, or customer support, please refer to the warranty card included with your product or visit the official De'Longhi website. Ensure you have your model number (DEXD216RF) and purchase details available when contacting support.
You can find more information and support resources on the De'Longhi Store.