1. Introduction
This manual provides detailed instructions for the installation, operation, and maintenance of your Keonjinn 24 Inch LED Round Bathroom Mirror. Please read this manual thoroughly before installation and use to ensure proper function and safety.
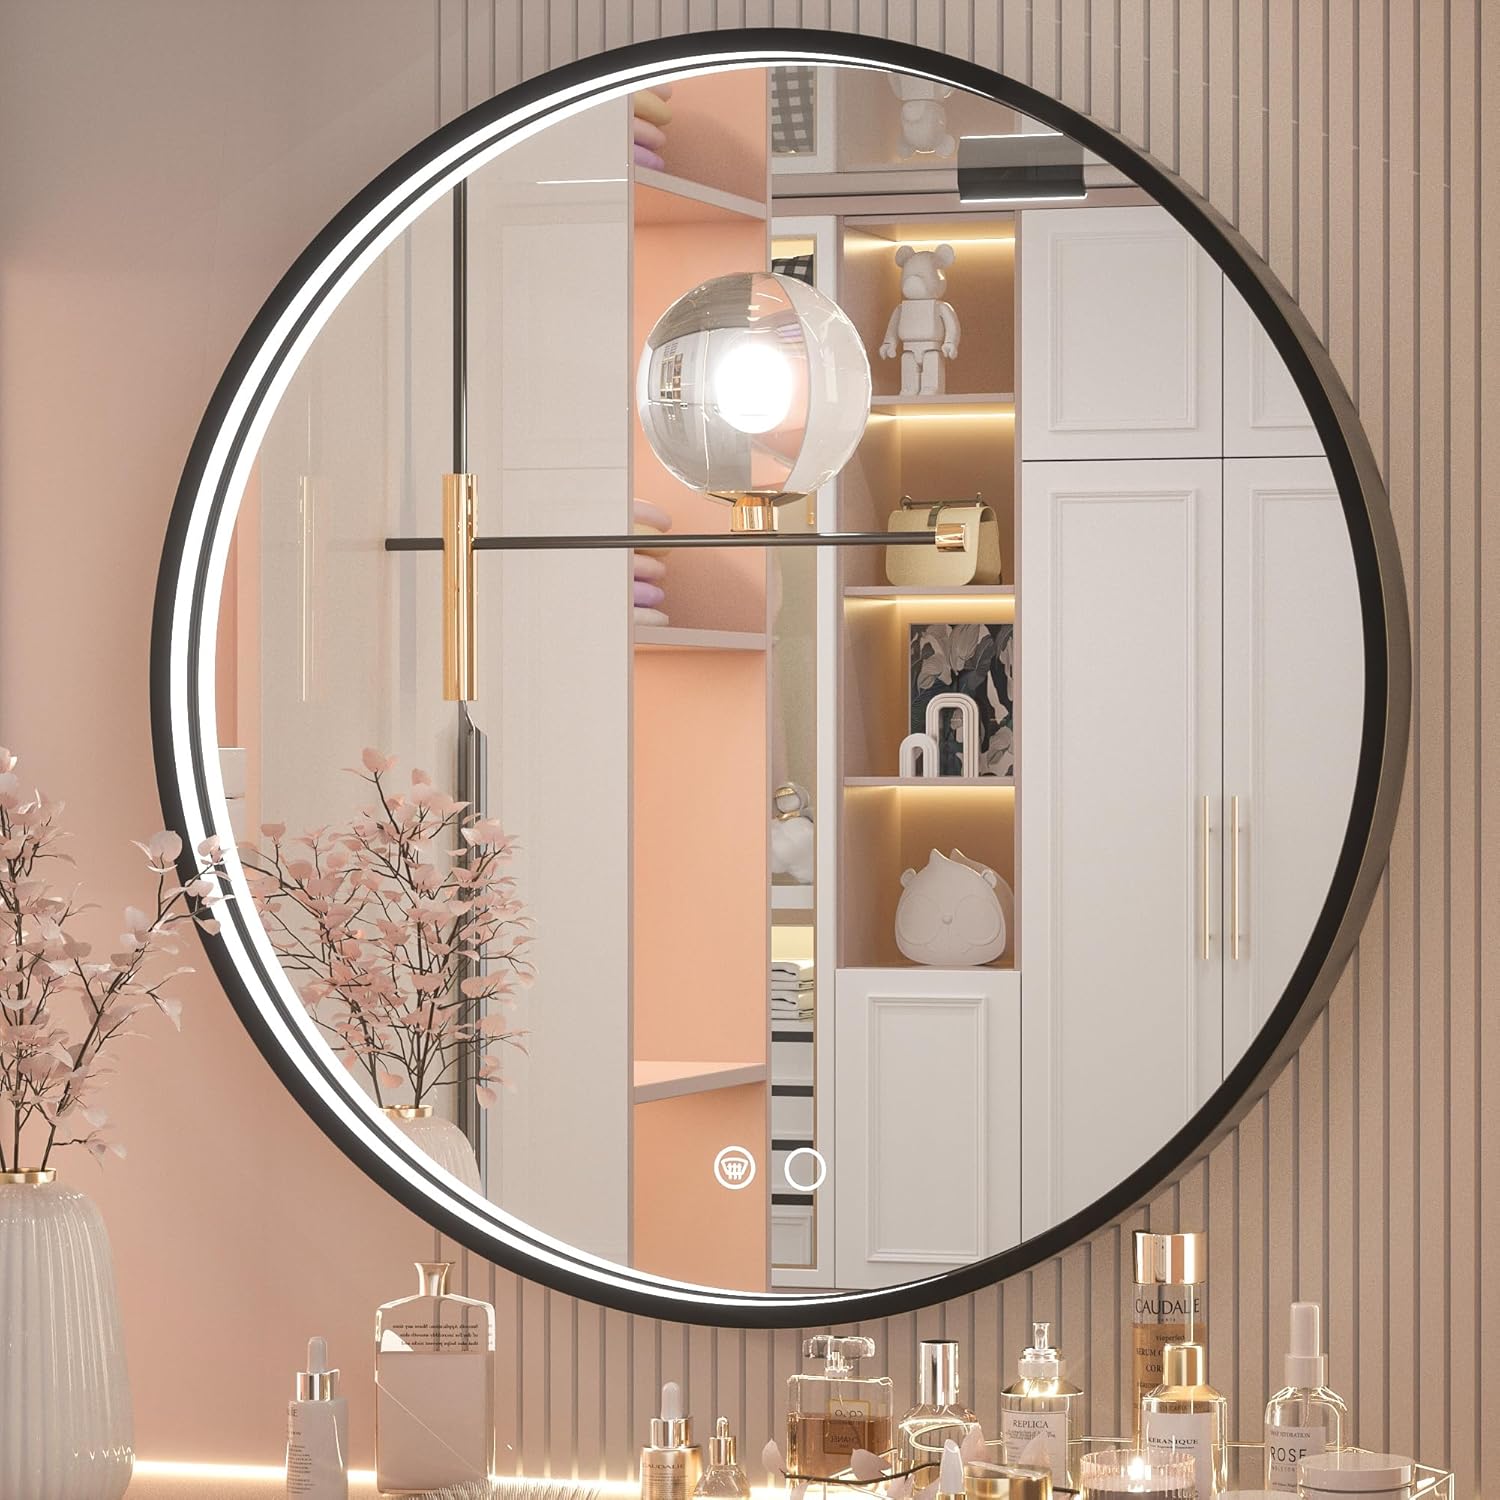
Image 1.1: Keonjinn 24 Inch LED Round Bathroom Mirror, showcasing its round shape and integrated LED lighting.
2. Safety Information
Please observe the following safety precautions to prevent injury or damage to the product:
- Always disconnect power before installation, maintenance, or cleaning.
- Installation should be performed by a qualified electrician to ensure compliance with local electrical codes.
- Do not attempt to modify the mirror or its electrical components.
- Keep the mirror away from direct water spray or excessive humidity.
- Handle the mirror with care to avoid breakage. The mirror features an anti-explosion film for added safety.
3. Package Contents
Verify that all components are present before beginning installation:
- Keonjinn 24 Inch LED Round Bathroom Mirror (1 unit)
- Mounting hardware (screws, wall anchors, hanging cleat)
- Instruction Manual
4. Setup and Installation
Follow these steps for safe and proper installation:
4.1 Site Preparation
- Ensure the wall surface is clean, dry, and capable of supporting the mirror's weight.
- Confirm adequate reserved space for the mirror. For a 24-inch mirror, a vanity size of 30-36 inches is recommended, with at least 3 inches of reserved space on either side and above.
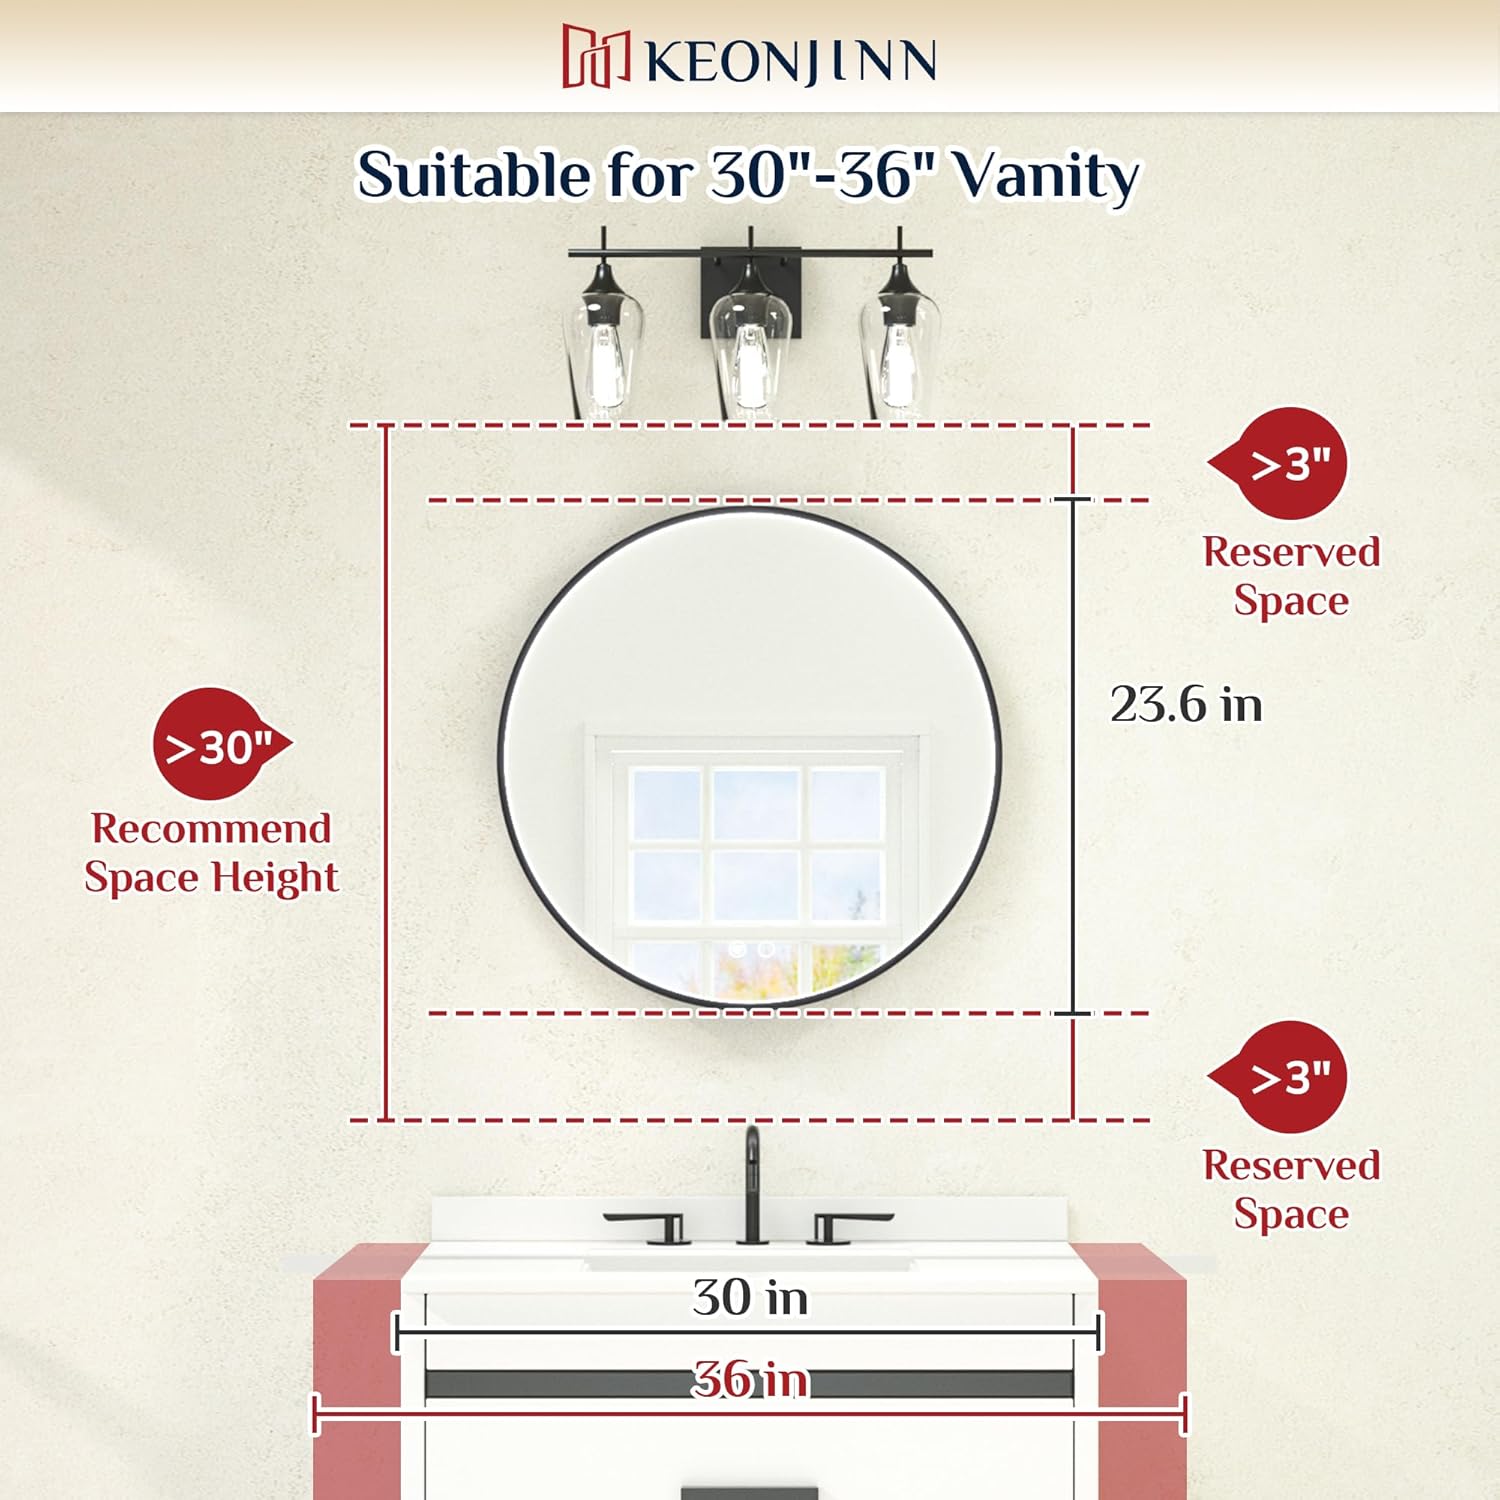
Image 4.1: Diagram illustrating recommended vanity size and reserved space for mirror installation.
4.2 Mounting the Mirror
- Mount the hanging cleat: Securely attach the provided hanging cleat to the wall using appropriate screws and wall anchors. Ensure it is level.
- Align and hang the mirror: Carefully align the notch on the back of the mirror with the hanging cleat. Gently lower the mirror until it is securely seated on the cleat.
Image 4.2: Visual guide for mounting the mirror using the hanging cleat system.
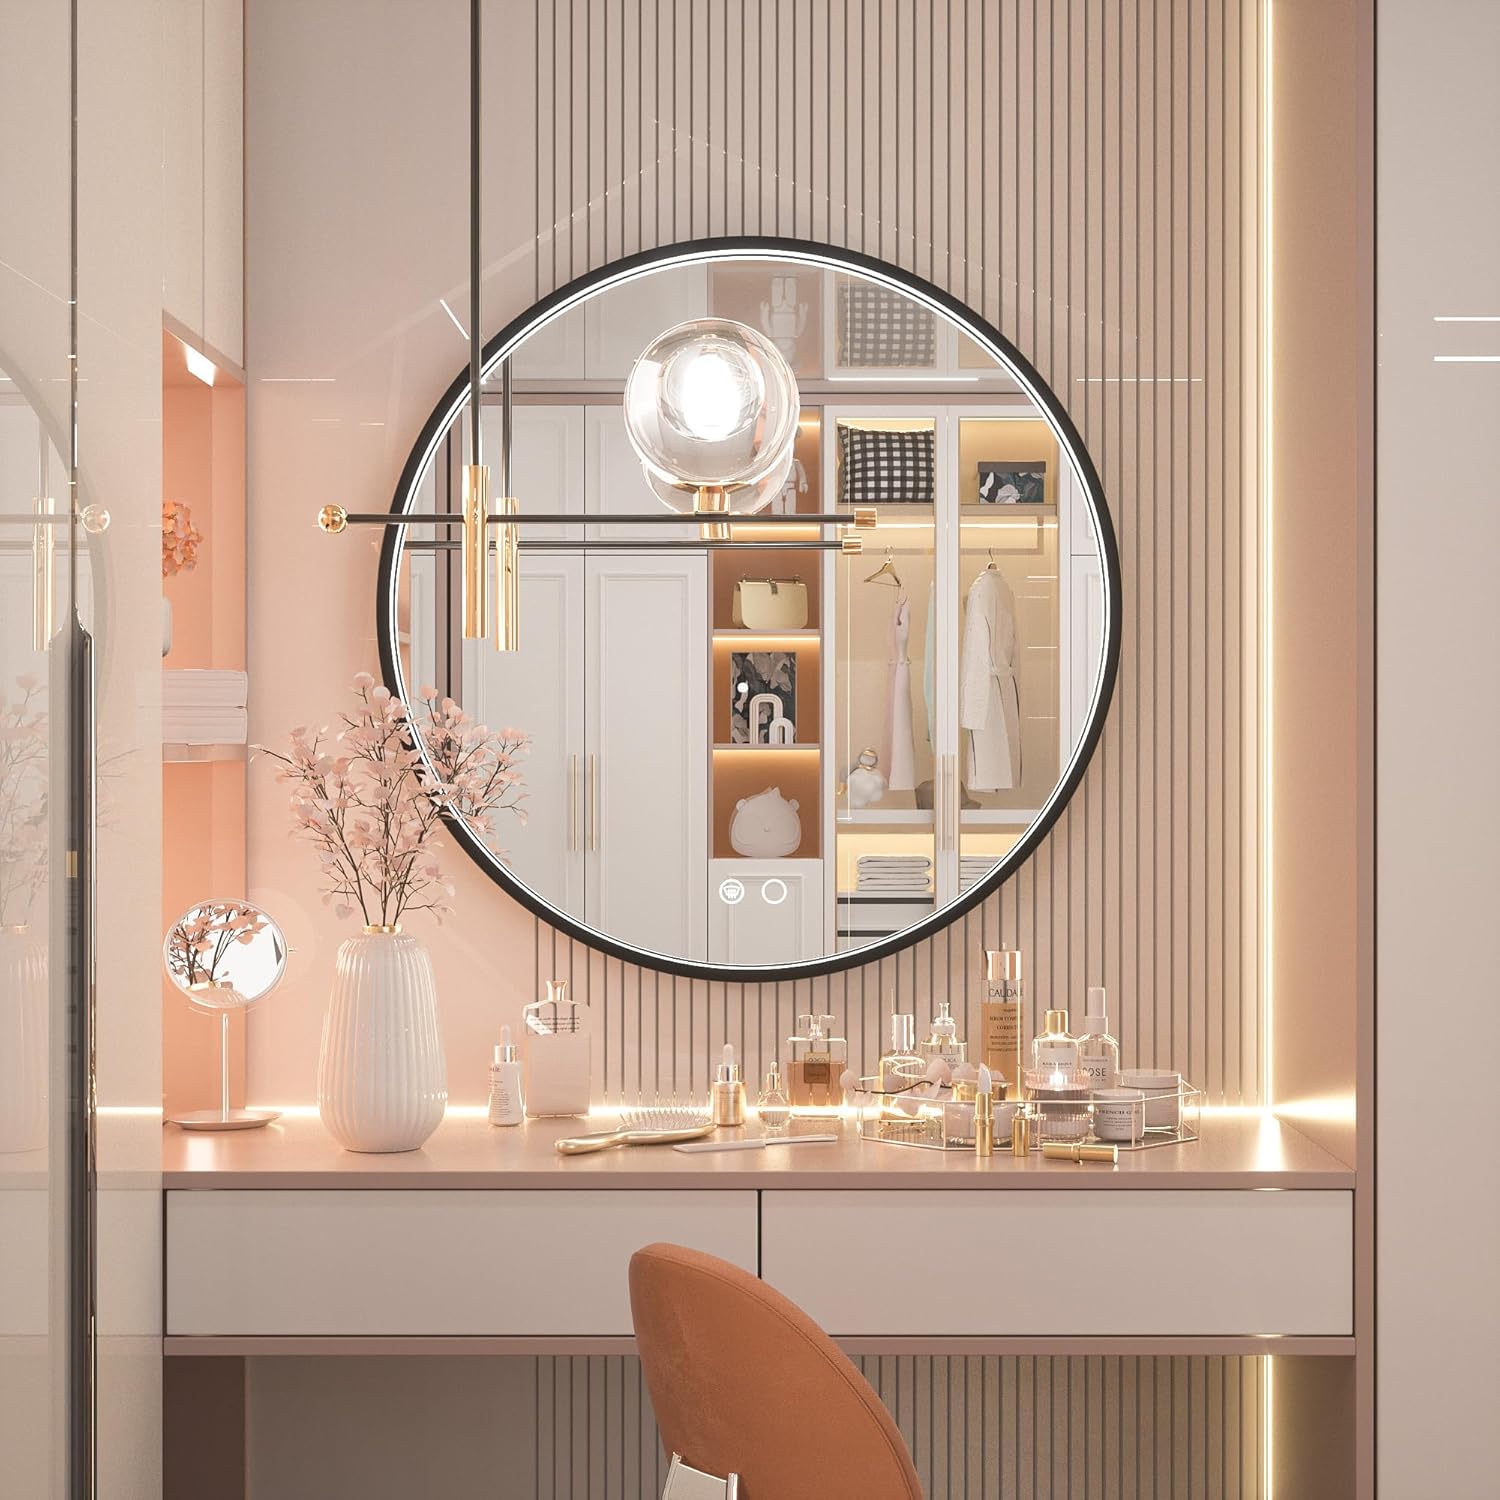
Image 4.3: Rear view of the mirror, highlighting the hook mounting mechanism and the waterproof electrical box.
4.3 Electrical Connection
The mirror supports both plug-in and hardwired connections. It is recommended that wiring be handled by a professional electrician.
- Plug Connection: Connect the mirror's power cord to a standard electrical outlet.
- Hardwired Connection: Connect the mirror's wiring directly to a wall switch circuit. Ensure the power is off at the circuit breaker before making any connections.
- Important Note: This mirror is not designed to be controlled by a wall dimmer switch. Use an ordinary on/off wall switch or connect directly to a socket.
5. Operating Instructions
The mirror features touch controls for various functions.

Image 5.1: Overview of the mirror's key features, including touch controls for LED brightness and anti-fog.
5.1 Power On/Off and Brightness Adjustment
- Tap the power touch button to turn the LED lights on or off.
- Press and hold the power touch button to adjust the brightness level. The brightness will cycle from 10% to 100%. Release the button at your desired brightness.

Image 5.2: Visual representation of the mirror's dimmable LED function, showing brightness levels from 10% to 100%.
5.2 Color Temperature Adjustment
- Tap the color temperature touch button to cycle through the three available color temperatures: 3000K (warm white), 4500K (neutral white), and 6000K (cool white).

Image 5.3: Display of the three color temperature options: 6000K, 4500K, and 3000K.
5.3 Defogging Function
- Tap the defogging touch button to activate the anti-fog feature.
- The defogging function may take 5-10 minutes to fully clear the mirror surface.
- To prevent overheating, the defogging function will automatically turn off after one hour of continuous use. If further defogging is needed, tap the button again.
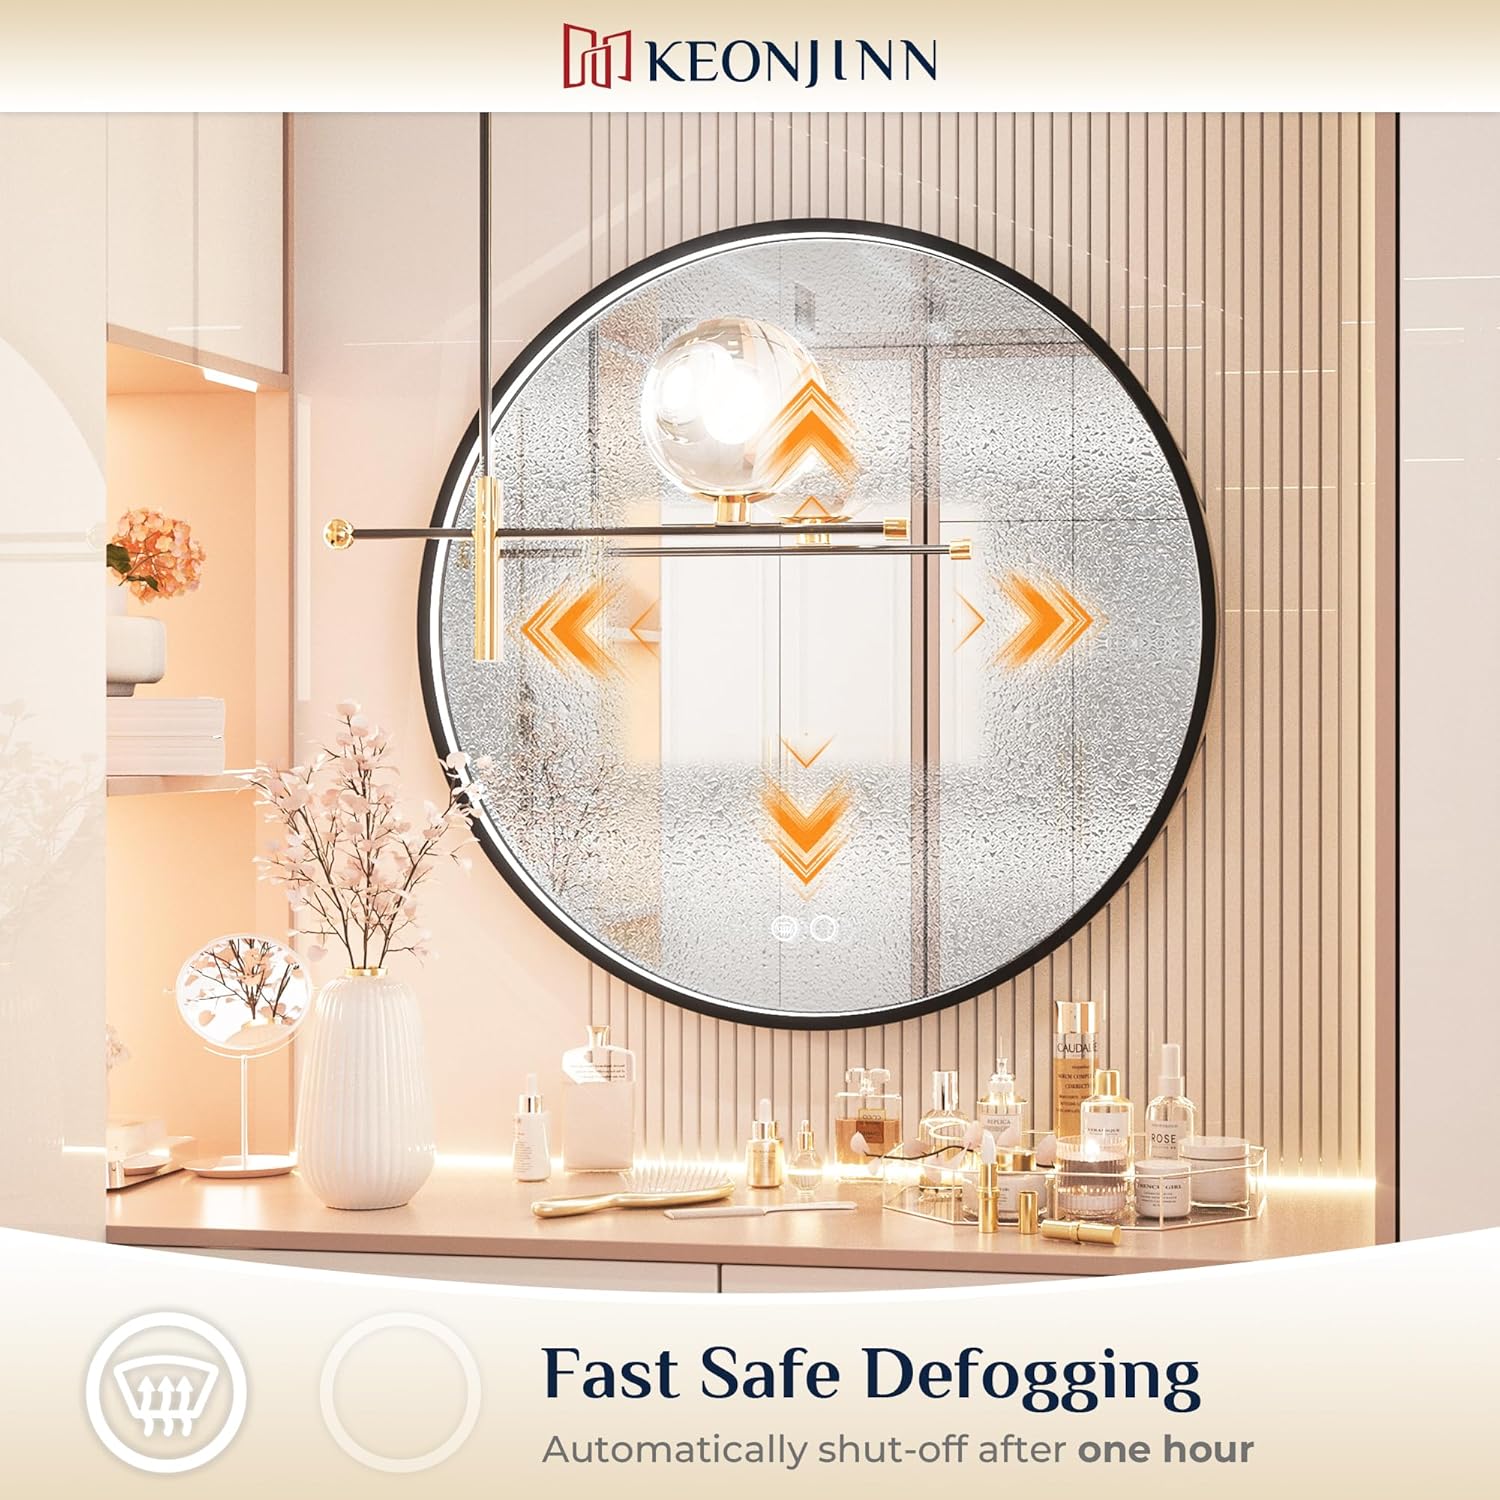
Image 5.4: Illustration of the mirror's fast defogging capability and its automatic shut-off after one hour.
5.4 Memory Function
The mirror is equipped with a memory function that retains the last used brightness and color temperature settings when the mirror is turned off and on again.
6. Maintenance
Proper maintenance ensures the longevity and performance of your mirror.
- Cleaning: Use a soft, damp cloth and a mild glass cleaner to clean the mirror surface. Avoid abrasive cleaners or harsh chemicals that could damage the mirror or frame.
- Frame Care: The aluminum frame can be wiped clean with a soft, dry cloth.
- Electrical Components: Ensure all electrical connections remain dry. Do not spray water directly onto the mirror's electrical components.
7. Troubleshooting
If you encounter issues with your mirror, refer to the following common problems and solutions:
| Problem | Possible Cause | Solution |
|---|---|---|
| LED lights do not turn on. | No power supply; loose connection; faulty LED driver. | Check power outlet/circuit breaker. Ensure all connections are secure. Contact customer support if the issue persists. |
| Defogging function is not working. | Function not activated; automatic shut-off engaged. | Tap the defogging button to activate. If it was on for over an hour, reactivate it. Allow 5-10 minutes for full effect. |
| Brightness or color temperature cannot be adjusted. | Incorrect operation of touch button. | Ensure you are pressing and holding for brightness, and tapping for color temperature. |
If you experience any issues not listed here or if the suggested solutions do not resolve the problem, please contact Keonjinn customer support.
8. Specifications
| Feature | Detail |
|---|---|
| Brand | Keonjinn |
| Model | 24 Inch LED Round Bathroom Mirror |
| Shape | Round |
| Product Dimensions | 24"L x 24"W |
| Frame Material | Aluminum |
| Mounting Type | Wall Mount |
| Special Features | Dimmable, Fogless, Hardwired, Lighted, Shatterproof |
| Color | Black-3 Color Lights |
| Item Weight | 13.42 pounds |
9. Warranty and Support
Keonjinn is committed to providing quality products and customer satisfaction.
- Damaged Products: For products that arrive in damaged condition, please send photos of the damaged mirror to customer support. A free replacement will be provided without requiring the return of the damaged item.
- Free Repair: Free mirror repair is available within 3 years of purchase.
9.1 How to Contact Support
If you need support regarding Keonjinn products or orders, follow these steps:
- Locate the product on the purchase platform (e.g., Amazon).
- Select the option to "Ask a question" to access the Seller Messaging Assistant.
- In the chat window, follow the prompts to type your question and submit it. Include any relevant details such as product name, order number, and a clear description of the issue.

Image 9.1: Visual guide on how to contact Keonjinn customer support through the seller messaging system.


