1. Introduction
This manual provides detailed instructions for the setup, operation, and maintenance of your Braun BC14B Digital Wall Clock. Please read this manual thoroughly before using the product to ensure correct usage and optimal performance. Keep this manual for future reference.
2. Product Overview
The Braun BC14B is a digital wall clock designed for clear readability and essential information display. It features a large inverted LCD screen showing time, indoor temperature, date, and day of the week. It also includes a crescendo alarm function and offers flexible placement options.

Image 2.1: Front view of the Braun BC14B Digital Wall Clock, displaying time, date, day of the week, and indoor temperature. An alarm icon is also visible.
3. Package Contents
Please check the package for the following items:
- Braun BC14B Digital Wall Clock
- User Manual (this document)
Note: 2x AA batteries are required for operation and are not included in the package. Please ensure you have new alkaline batteries available for optimal performance.
4. Controls and Display
4.1. Display Elements
- Time: Displays current time in 12-hour (with AM/PM indicator) or 24-hour format.
- Date: Shows the day and month.
- Day of Week: Indicates the current day.
- Indoor Temperature: Displays the ambient temperature in Celsius (°C) or Fahrenheit (°F).
- Alarm Icon: Appears when the alarm is activated.

Image 4.1: Detailed view of the clock's inverted LCD display, highlighting the date (day and month), day of the week, and indoor temperature reading.
4.2. Control Buttons and Switches
The control buttons and switches are located on the back of the clock. Familiarize yourself with their functions:

Image 4.2: Rear view of the Braun BC14B clock, showing the battery compartment, setting buttons, and the foldable stand.
- SET Button: Used to enter and confirm settings.
- +/- Buttons: Used to adjust values (time, date, alarm) up or down.
- ALARM ON/OFF Switch: Activates or deactivates the alarm function.
- SNOOZE Button: Located on the top edge. Press to temporarily silence the alarm.
- °C/°F Switch: Toggles temperature display between Celsius and Fahrenheit.
- 12/24 HR Switch: Toggles time display between 12-hour and 24-hour format.
5. Setup
5.1. Battery Installation
- Open the battery compartment cover on the back of the clock.
- Insert 2 new AA alkaline batteries, ensuring correct polarity (+ and -).
- Close the battery compartment cover securely.
5.2. Initial Settings (Time, Date, Temperature Unit)
- After installing batteries, the clock may automatically display a default time.
- Press and hold the SET button for a few seconds until the time display starts flashing.
- Use the +/- buttons to adjust the hour. Press SET to confirm and move to minutes.
- Adjust minutes using +/-, then press SET.
- Continue this process to set the year, month, and day. The day of the week will adjust automatically.
- Use the °C/°F switch on the back to select your preferred temperature unit.
- Use the 12/24 HR switch on the back to select your preferred time format.
- Once all settings are confirmed, the display will stop flashing.
5.3. Placement Options
The Braun BC14B offers versatile placement:
- Desk or Tabletop: Extend the integrated foldable stand on the back of the clock to place it on any flat surface.

Image 5.1: The Braun BC14B clock positioned on a surface using its integrated foldable stand.
- Wall Mounting: Use the central wall mounting hook on the back of the clock to hang it securely on a wall. Ensure the wall fixture is appropriate for the clock's weight (approximately 494g).
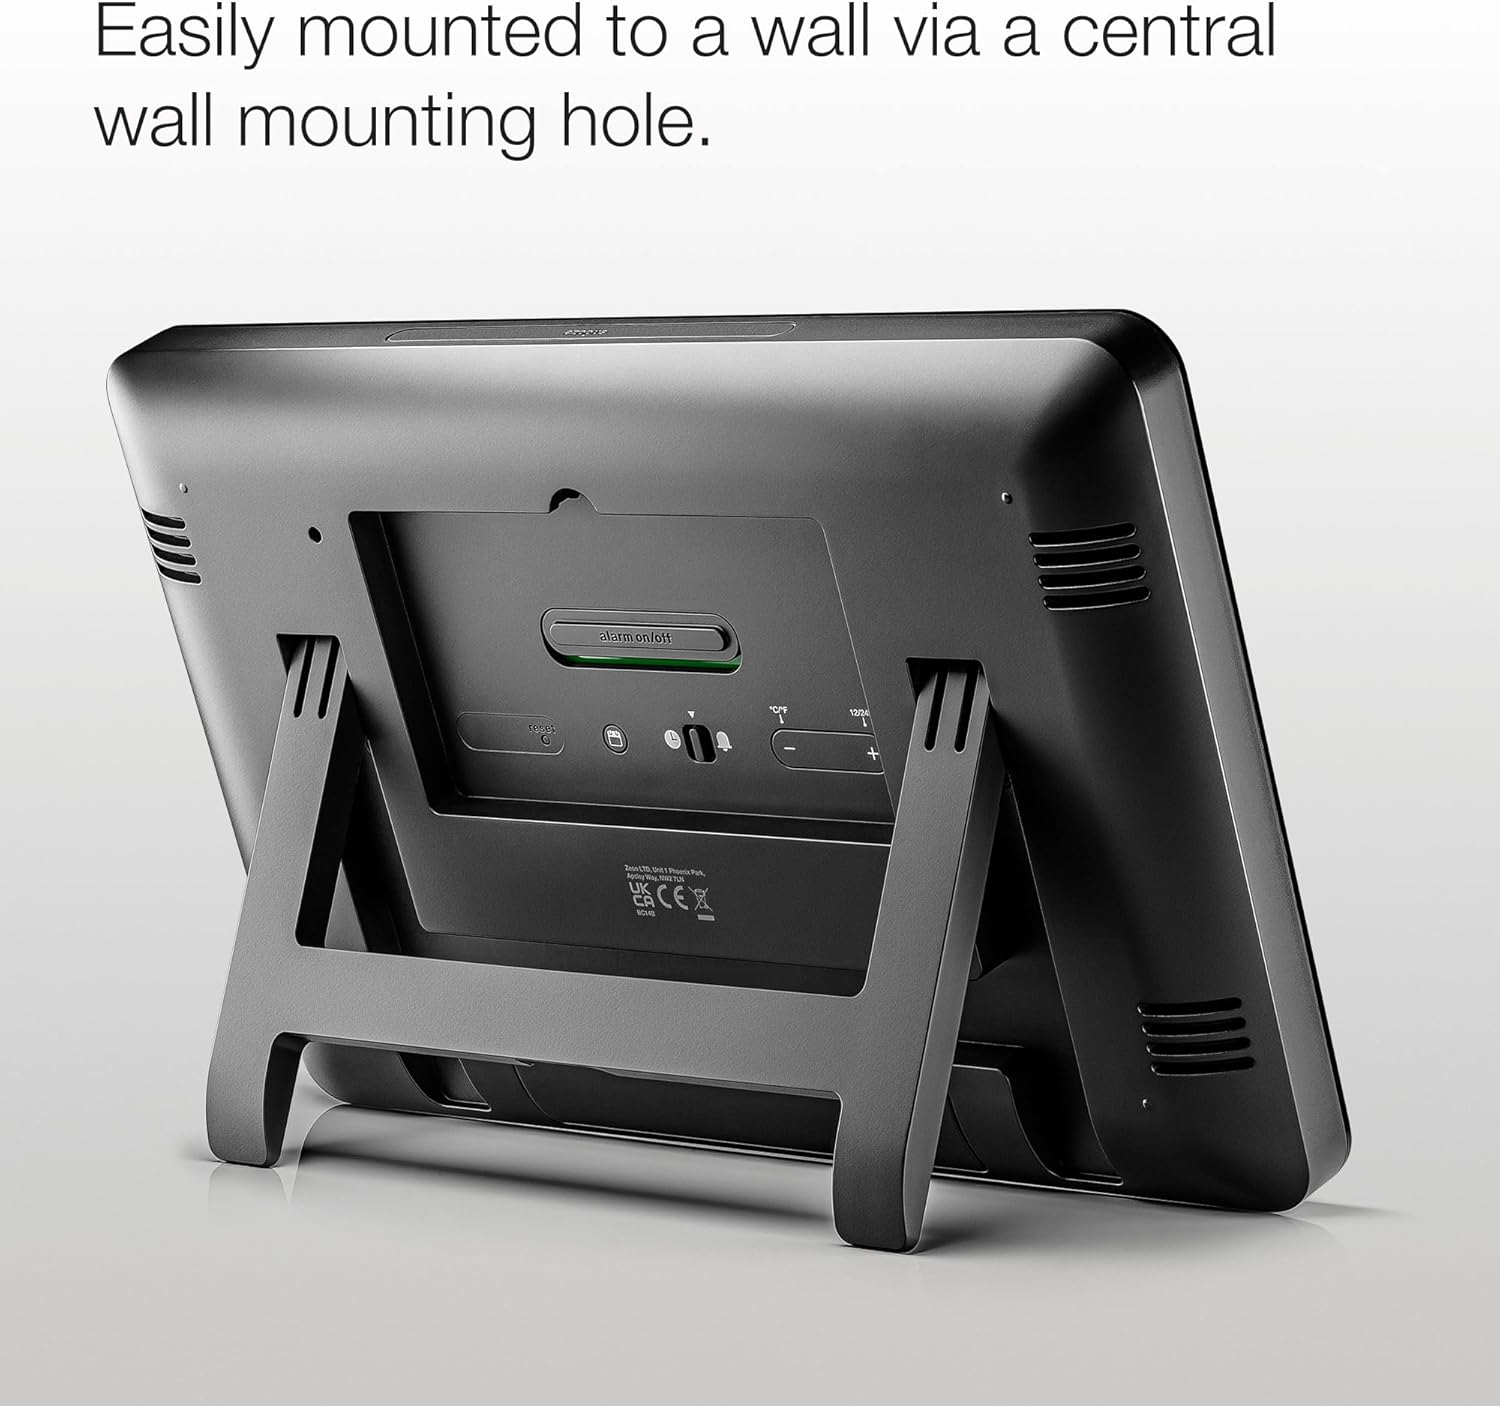
Image 5.2: Rear view of the clock, highlighting the central keyhole for wall mounting.
6. Operation
6.1. Viewing Time, Date, and Temperature
The clock continuously displays the current time, date, day of the week, and indoor temperature on its large LCD screen. No special action is required to view these details.
6.2. Setting and Using the Alarm
- Setting Alarm Time: Press the SET button once (short press) to enter alarm setting mode. The alarm time will flash. Use the +/- buttons to adjust the hour and minutes. Press SET to confirm.
- Activating/Deactivating Alarm: Use the ALARM ON/OFF switch on the back of the clock to turn the alarm function on or off. When activated, an alarm icon will appear on the display.
- Crescendo Alarm: The alarm features a crescendo sound, meaning the beeping frequency and volume will gradually increase if not turned off.
- Snooze Function: When the alarm sounds, press the large SNOOZE button on the top edge of the clock to temporarily silence it. The alarm will sound again after a few minutes (typical snooze duration is 5-10 minutes, refer to product specifics if available).
- Stopping the Alarm: To stop the alarm completely, slide the ALARM ON/OFF switch to the OFF position.

Image 6.1: The clock display with the alarm icon visible, indicating the alarm function is active.
7. Maintenance
7.1. Cleaning
To clean your clock, gently wipe the surface with a soft, dry cloth. Do not use abrasive cleaners, solvents, or chemical sprays, as these may damage the display or casing.
7.2. Battery Replacement
When the display dims or the clock functions become erratic, it is time to replace the batteries. Follow the steps in Section 5.1 for battery installation. Always use new AA alkaline batteries for best performance.
8. Troubleshooting
- Display is dim or blank:
- Check if batteries are correctly installed and not depleted. Replace with new alkaline batteries if necessary.
- Ensure the clock is not exposed to extreme temperatures.
- Display is difficult to read from certain angles:
- The inverted LCD display's contrast can vary with lighting conditions and viewing angles. Adjust the clock's position or your viewing angle for better clarity.
- Alarm does not sound:
- Ensure the ALARM ON/OFF switch is in the ON position and the alarm icon is visible on the display.
- Verify that the alarm time is set correctly.
- Check battery level and replace if low.
- Incorrect time or date:
- Re-set the time and date following the instructions in Section 5.2.
- Ensure batteries are providing sufficient power.
- Temperature reading seems inaccurate:
- Ensure the clock is not placed near heat sources (e.g., direct sunlight, heating vents) or cold drafts, which can affect the sensor.
9. Specifications
| Feature | Detail |
|---|---|
| Brand | Braun |
| Model Number | BC14B |
| Color | Black |
| Product Dimensions (L x W x H) | 26.1 x 3.81 x 17.3 cm |
| Weight | 494 grams |
| Material | Plastic |
| Display Type | Digital, Inverted LCD |
| Special Features | Indoor Temperature Display, Crescendo Alarm |
| Power Source | Battery Powered (2 x AA batteries, not included) |
| Placement | Wall Mount or Tabletop |
| Country of Origin | China |
10. Warranty and Support
Information regarding specific warranty terms and customer support contacts is not provided within this manual. For warranty details, technical assistance, or to inquire about replacement parts, please refer to the documentation included with your purchase or contact Braun customer service directly through their official website or the retailer where the product was purchased.


