1. Introduction
This manual provides detailed instructions for the proper use and maintenance of your BAOFENG UV-10R Two Way Radio. Please read this manual thoroughly before operating the device to ensure safe and optimal performance.
1.1 Package Contents
Upon opening the package, please verify that all items listed below are present and in good condition:
- Portable Radio
- 771 Antenna
- Battery
- High Gain Antenna
- Charger
- Belt Clip
- Hand Strap
- User's Manual (this document)
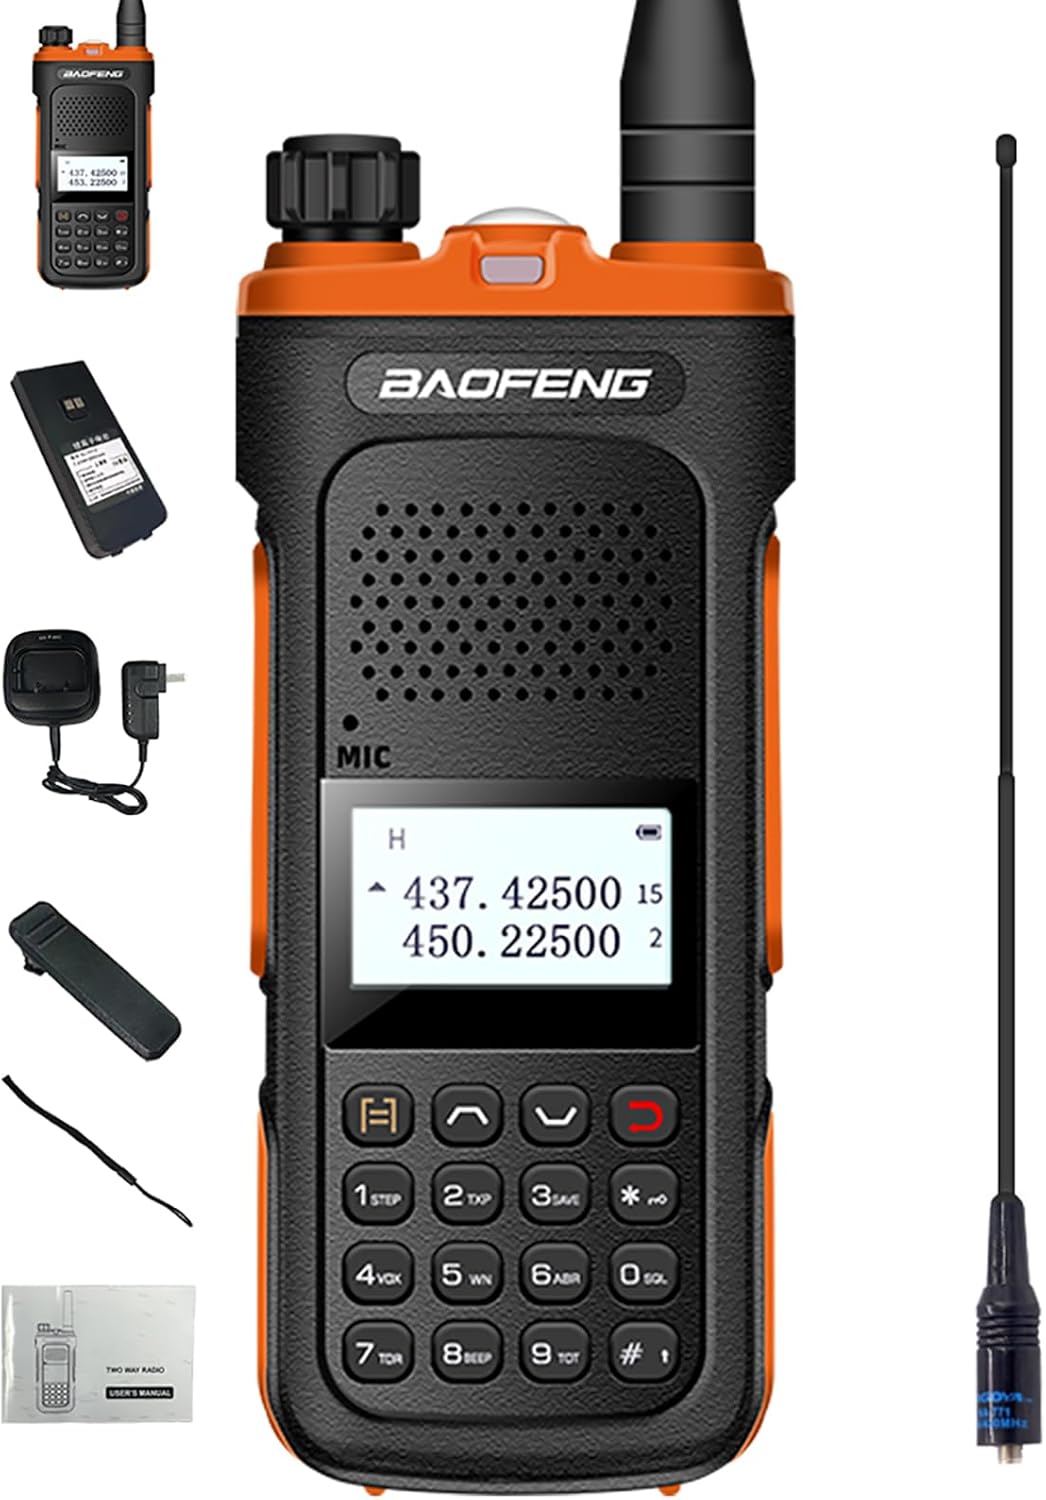
Image 1.1: The BAOFENG UV-10R radio with its standard accessories, including the radio unit, 771 antenna, battery, high gain antenna, charger, belt clip, hand strap, and user manual.
2. Product Features
The BAOFENG UV-10R is a versatile two-way radio designed for reliable communication. Key features include:
- Dual Band Operation: Supports both 144-148MHz and 420-450MHz frequency ranges.
- Extensive Channel Capacity: 999 programmable channels for diverse communication needs.
- USB-C Charging: Convenient direct charging via USB-C cable, compatible with power banks, PCs, car chargers, and laptops. Also supports traditional charger base.
- NOAA Weather Alert: Stay informed with real-time weather alerts.
- Multimode Scanning: Efficiently scan through channels to find active transmissions.
- VOX Function: Voice-operated transmission for hands-free communication.
- DTMF: Dual-Tone Multi-Frequency signaling for advanced functions.
- LED Strong Flashlight: Integrated flashlight for illumination in low-light conditions.
- Long-term Stand-by: Optimized power management for extended battery life.

Image 2.1: The BAOFENG UV-10R highlighting its portability, multi-band capability, long-term standby, and multimode scanning features.

Image 2.2: Visual representation of the radio's dual-band functionality, 999 channels, NOAA weather alert, DTMF, and frequency range of 144-148MHz and 420-450MHz.
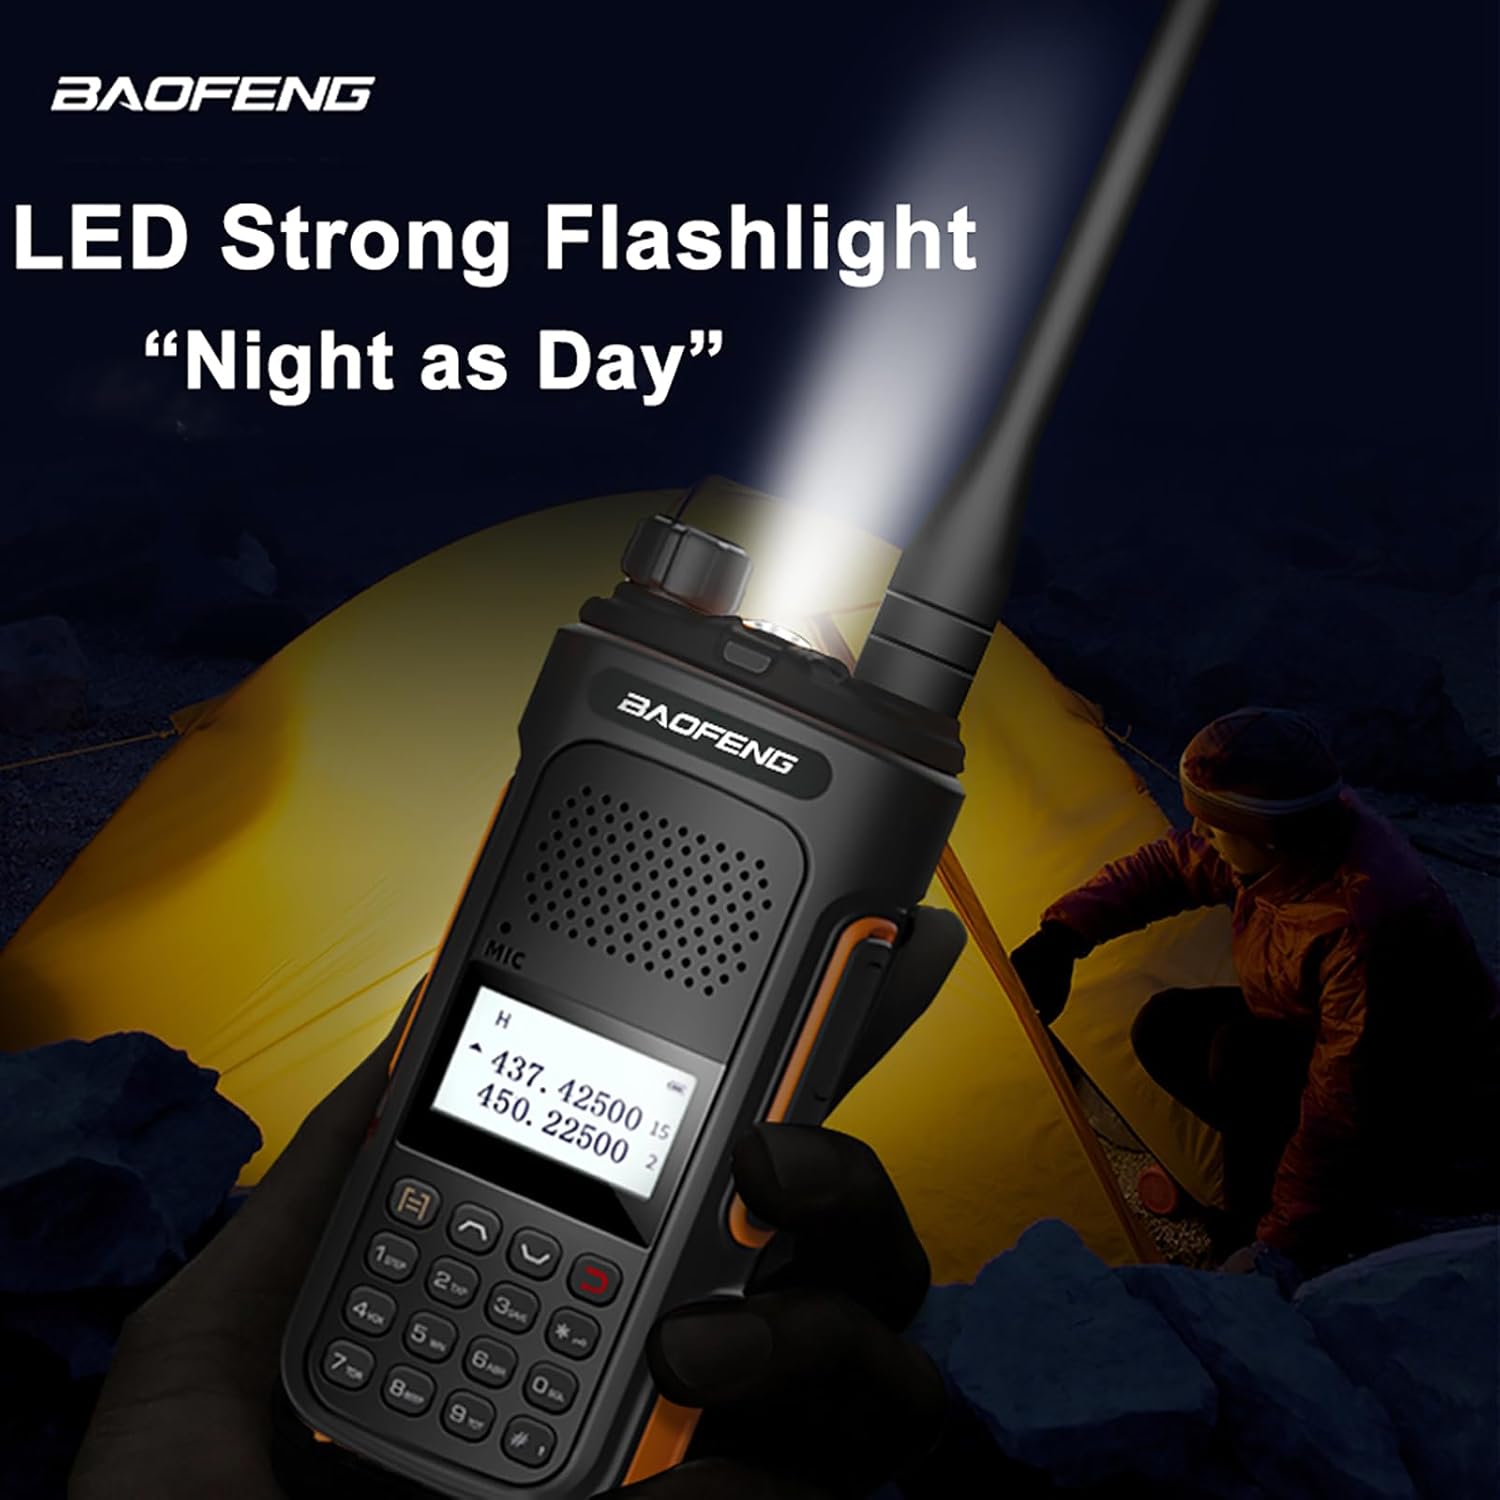
Image 2.3: The integrated LED strong flashlight of the BAOFENG UV-10R, demonstrating its utility in dark environments.
3. Components and Controls
Familiarize yourself with the various parts and controls of your UV-10R radio:
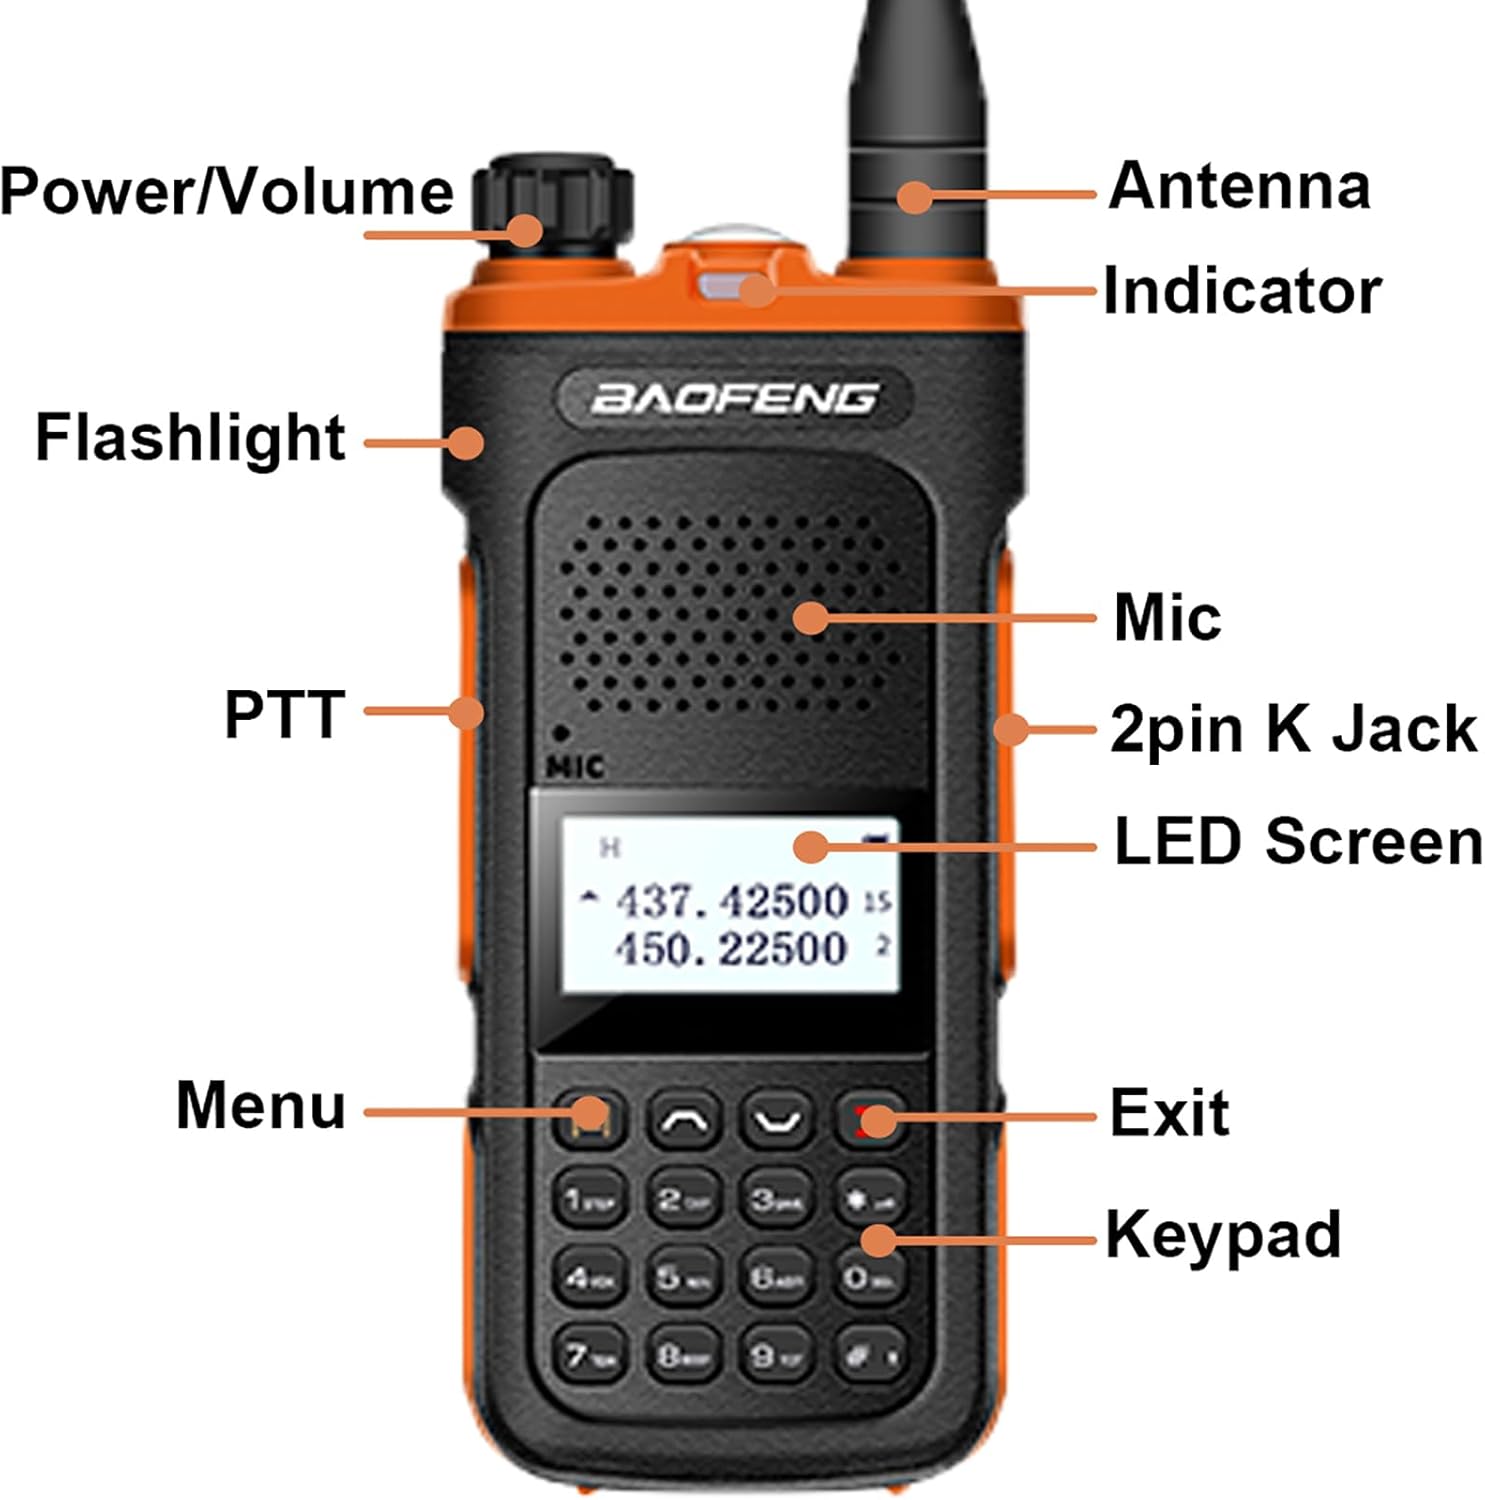
Image 3.1: Labeled diagram of the BAOFENG UV-10R radio, indicating the location of the Power/Volume knob, Antenna, Indicator light, Flashlight, PTT (Push-to-Talk) button, Microphone, 2-pin K Jack, LED Screen, Menu button, Exit button, and Keypad.
- Power/Volume Knob: Rotates to turn the radio on/off and adjust volume.
- Antenna: Connects for signal transmission and reception.
- Indicator: LED light indicating radio status (e.g., transmitting, receiving).
- Flashlight: Activates the built-in LED flashlight.
- PTT (Push-to-Talk) Button: Press and hold to transmit, release to receive.
- Mic: Built-in microphone for voice input.
- 2-pin K Jack: Port for external audio accessories like headsets or programming cables.
- LED Screen: Displays channel information, frequency, battery status, and menu options.
- Menu Button: Accesses the radio's menu system for settings adjustments.
- Exit Button: Used to exit menu options or cancel operations.
- Keypad: Numeric and function keys for inputting frequencies, channel numbers, and navigating menus.
4. Setup
4.1 Battery Installation and Charging
The UV-10R uses a Lithium Ion battery. Ensure the battery is fully charged before first use.
- Install Battery: Align the battery with the grooves on the back of the radio and slide it into place until it clicks securely.
- Charging: The radio can be charged using the included USB-C cable or the charging base.
- USB-C Direct Charging: Insert the USB-C cable into the port on the side of the radio. Connect the other end to a compatible USB power source (e.g., power bank, PC, car charger, wall adapter).
- Charging Base: Place the radio into the charging base. Ensure the charging contacts on the radio align with those on the base. The indicator light on the charger will show charging status.
- Charging Indicator: The radio's screen or a dedicated LED will indicate charging status. A full charge typically takes several hours.

Image 4.1: The BAOFENG UV-10R demonstrating its USB-C direct charging capability, compatible with various power sources like charger banks, car chargers, and PC chargers. The Type-C jack location is also shown.
4.2 Antenna Installation
Proper antenna installation is crucial for optimal performance.
- Screw the antenna clockwise into the connector on the top of the radio until it is finger-tight. Do not overtighten.
- Ensure a secure connection for best signal quality.
5. Operating Instructions
5.1 Basic Operation
- Power On/Off: Rotate the Power/Volume knob clockwise to turn on the radio. Rotate counter-clockwise until it clicks to turn off.
- Volume Adjustment: Rotate the Power/Volume knob to adjust the listening volume.
- Channel/Frequency Selection: Use the keypad to directly input frequencies or channel numbers. Use the UP/DOWN arrow keys (often integrated with keypad buttons) to navigate through channels.
- Transmitting: Press and hold the PTT button on the side of the radio to transmit. Speak clearly into the microphone. Release the PTT button to stop transmitting and return to receive mode.
- Receiving: When not transmitting, the radio is in receive mode. The indicator light will illuminate when a signal is received.
5.2 Advanced Functions
- Multimode Scanning: To activate scanning, press the dedicated scan button or access the scan function through the menu. The radio will cycle through programmed channels or frequencies until a signal is detected.
- NOAA Weather Alert: Access the NOAA weather alert function through the menu to receive real-time weather broadcasts and alerts. Refer to the full user manual for specific menu navigation.
- VOX (Voice Operated Transmit): Enable VOX in the menu to transmit automatically when you speak, without needing to press the PTT button. Adjust VOX sensitivity as needed.
- DTMF (Dual-Tone Multi-Frequency): DTMF tones can be sent by pressing the keypad buttons during transmission. This is used for various control functions on repeaters or other systems.
- Flashlight: Press the dedicated flashlight button or a combination of keys (refer to the full manual) to turn the LED flashlight on or off.
6. Maintenance
6.1 Cleaning
- Wipe the radio's surface with a soft, damp cloth. Do not use harsh chemicals or abrasive cleaners.
- Ensure the charging port and accessory jack are free of dust and debris.
6.2 Battery Care
- To prolong battery life, avoid overcharging or completely draining the battery.
- Store the radio and battery in a cool, dry place when not in use for extended periods.
- If the radio will not be used for a long time, remove the battery.
7. Troubleshooting
If you encounter issues with your BAOFENG UV-10R, refer to the table below for common problems and solutions.
| Problem | Possible Cause | Solution |
|---|---|---|
| Radio does not power on. | Battery is not installed correctly or is depleted. | Ensure battery is securely installed. Charge the battery fully. |
| Cannot transmit or receive. | Incorrect frequency/channel, antenna loose, or low battery. | Verify frequency/channel settings. Check antenna connection. Charge battery. Ensure PTT button is pressed correctly. |
| Poor audio quality. | Weak signal, incorrect squelch level, or microphone/speaker obstruction. | Move closer to the other radio. Adjust squelch level. Check for obstructions on mic/speaker. |
| Battery drains quickly. | Frequent transmission, high power setting, or aging battery. | Reduce transmission time. Use lower power setting if possible. Consider replacing battery if old. |
8. Specifications
Detailed technical specifications for the BAOFENG UV-10R Two Way Radio:
| Brand | BAOFENG |
| Model Number | BF-UV10/UV-10R |
| Frequency Range | 144-148MHz, 420-450MHz |
| Number of Channels | 999 |
| Max Range | 3.1 miles |
| Input Voltage | DC 7.4V |
| Antenna Impedance | 50 Ω |
| Battery Type | 1 Lithium Ion battery required |
| Display Type | LED |
| Item Weight | 1.38 pounds (approx. 22.08 ounces) |
| Product Dimensions | 1.1 x 1.96 x 4.72 inches |
| Water Resistance Level | Not Water Resistant |
| Country of Origin | China |

Image 8.1: Physical dimensions of the BAOFENG UV-10R radio, showing its height (4.72 inches), width (1.96 inches), and depth (1.1 inches).
9. Warranty and Support
Your BAOFENG UV-10R Two Way Radio comes with a limited warranty.
- Warranty Period: 1 year warranty from the date of purchase.
- Warranty Provider: Warranty is provided only through "Shiqun Electronics Co., Ltd".
- Claiming Warranty: For warranty claims or technical support, please contact Shiqun Electronics Co., Ltd. directly. Refer to your purchase documentation for contact details.
For further assistance or detailed operational procedures not covered in this condensed manual, please refer to the comprehensive user manual included in your package or visit the official BAOFENG support website.


