
Waring 040072098499
Waring Commercial Pulp Juice Extractor User Manual
Model: 040072098499
Product Overview
The Waring Commercial Pulp Eject Juice Extractor is designed for efficient and continuous juicing of fruits and vegetables in commercial settings. Its robust construction and powerful motor make it suitable for high-volume use in juice shops, bars, restaurants, and health clubs. The compact design and quiet operation allow for versatile placement, even in front-of-house areas.

Image: Front view of the Waring Commercial Pulp Juice Extractor, showcasing its sleek silver and black design.
Important Safety Information
Please read all instructions thoroughly before operating the juicer. Failure to follow these safety guidelines may result in injury or damage to the appliance.
- Always ensure the unit is unplugged before assembly, disassembly, or cleaning.
- Do not operate the juicer with a damaged cord or plug.
- Keep hands and utensils out of the feed chute during operation. Always use the provided food pusher.
- Ensure all parts are correctly assembled and the locking arm is securely in place before turning on the unit.
- Do not immerse the motor base in water or other liquids.
- This appliance is for commercial use only.
- Supervise children and individuals with reduced capabilities when near the appliance.
Components
Familiarize yourself with the main components of your Waring Commercial Pulp Juice Extractor:
- Motor Base: The main unit housing the 1.2 HP brushless induction motor.
- Feed Chute: A wide 3.15-inch opening for inserting fruits and vegetables.
- Food Pusher: Used to guide produce into the feed chute.

Image: Close-up of the ergonomic food pusher, designed for easy grip and safe operation.
- Stainless Steel Filter Basket & Shredder Disc: Components responsible for extracting juice and separating pulp.

Image: Detailed view of the stainless steel filter basket and shredder disc, designed for optimal juice yield.
- Pulp Container: A large 12-quart container for collecting ejected pulp.

Image: The large 12-quart pulp container attached to the juicer, designed for continuous operation.
- Rotating No-Drip Spigot: Dispenses juice directly into a container, preventing drips.
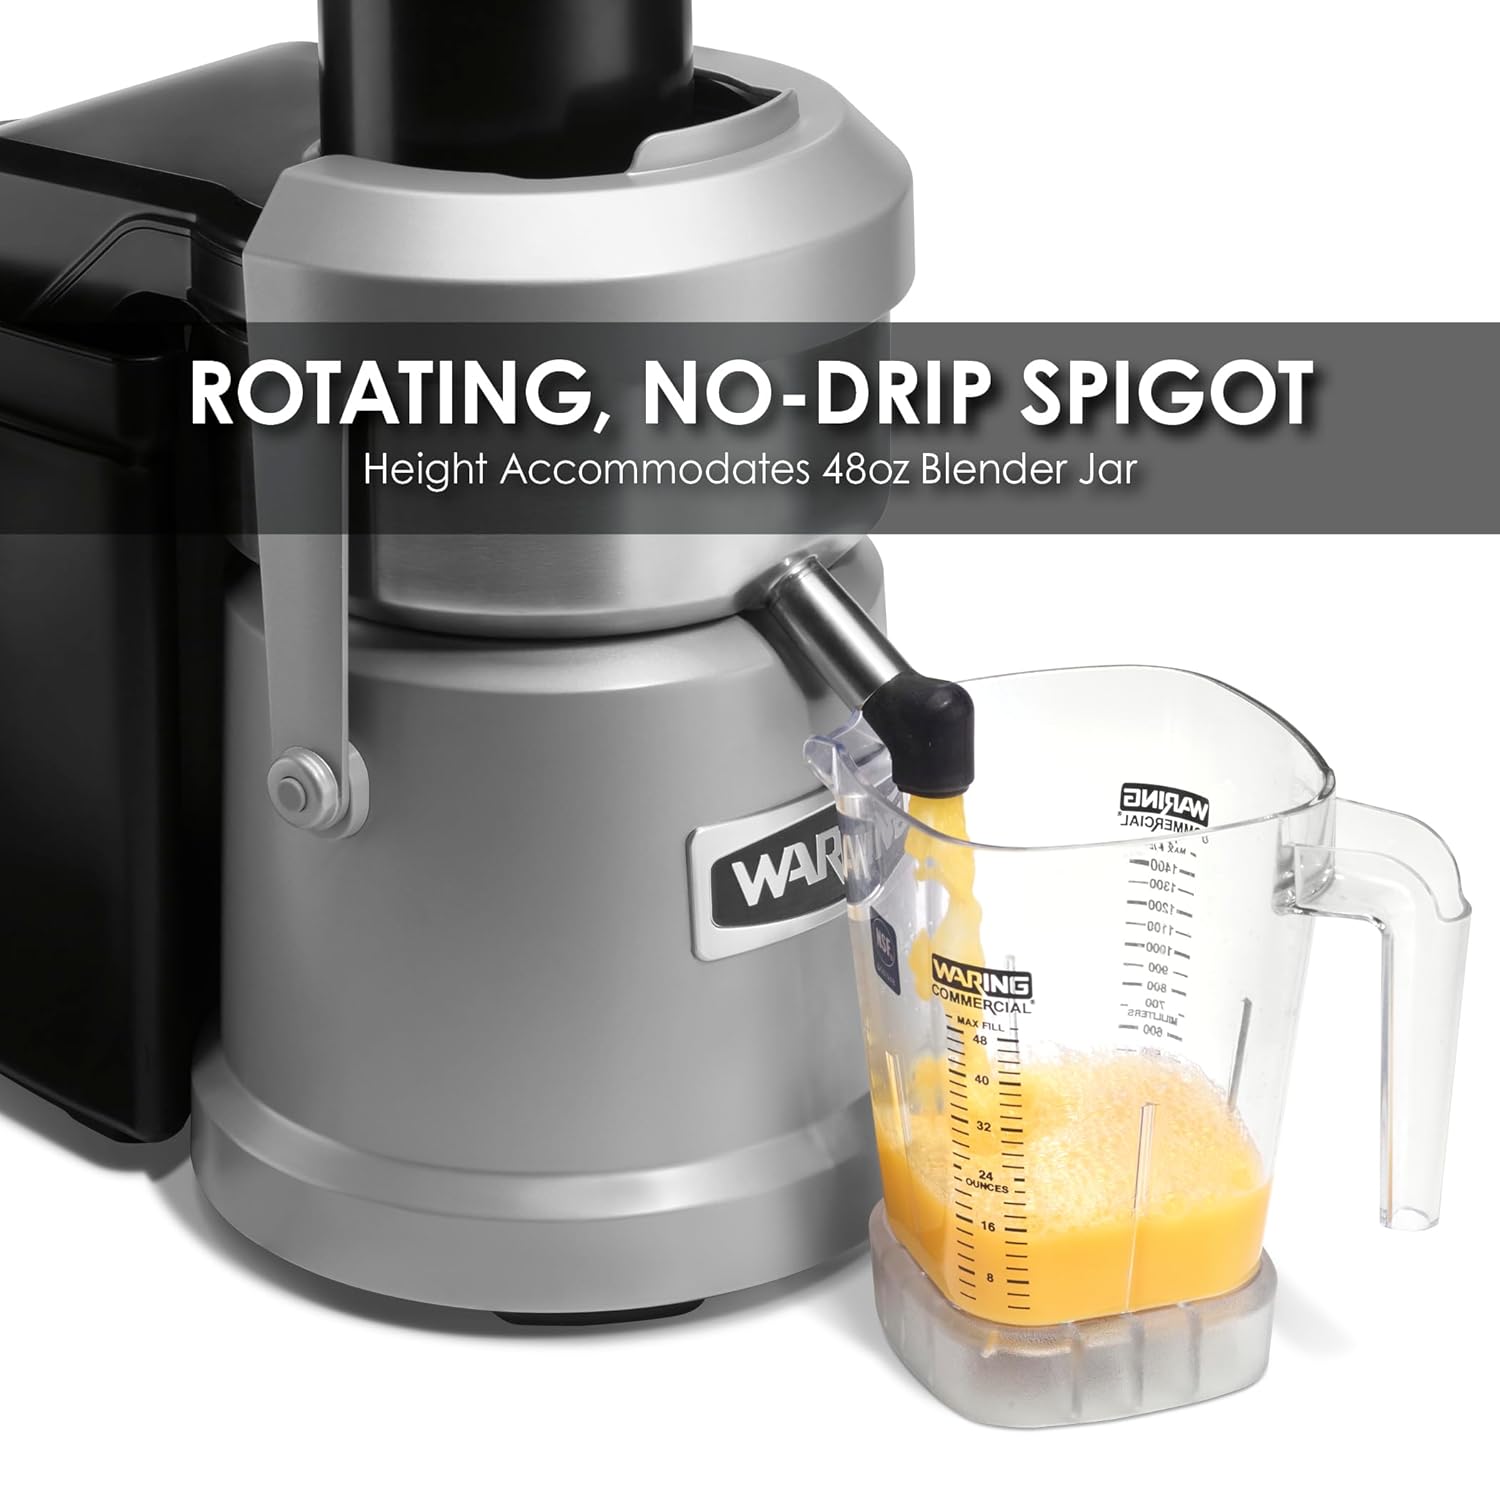
Image: Close-up of the rotating no-drip spigot, positioned above a measuring jar to show its height accommodation.
- Locking Arm: Secures the juicer components during operation.
- On/Off Switch with Guard: Controls power to the unit.
Setup
- Place the motor base on a stable, flat, and dry surface.
- Ensure the power switch is in the "OFF" position and the unit is unplugged.
- Insert the stainless steel filter basket and shredder disc securely into the motor base.
- Place the juicer cover onto the motor base, aligning it properly.
- Attach the pulp container to the side of the juicer, ensuring it clicks into place.
- Lower the locking arm and secure it into the grooves on the juicer cover until it locks firmly. The unit will not operate unless the locking arm is engaged.
- Position a juice collection container (e.g., a glass or pitcher) under the rotating no-drip spigot.
Operating Instructions
Follow these steps for optimal juicing performance:
- Prepare Produce: Wash all fruits and vegetables thoroughly. For larger items, cut them into pieces that fit easily into the 3.15-inch wide feed chute. Most fruits and vegetables do not require peeling or coring, but remove large seeds or pits (e.g., from peaches, avocados).

Image: A large 3.15-inch feed chute, demonstrating its capacity to accommodate whole apples and other large produce.
- Power On: Plug the juicer into a grounded electrical outlet. Flip the power switch to the "ON" position. The motor will start.
- Begin Juicing: Slowly feed prepared fruits and vegetables into the feed chute. Use the food pusher to gently guide the produce down. Do not force the produce, as this can strain the motor and reduce juice yield.
- Continuous Operation: The juicer is designed for continuous use. The pulp will automatically eject into the 12-quart pulp container. Monitor the pulp container and empty it as needed to prevent overflow and maintain efficiency.
- Juice Collection: Ensure your juice collection container is properly positioned under the spigot. The no-drip spigot can be rotated to prevent drips when not actively dispensing juice.
- Finish Juicing: Once you have finished juicing, turn the power switch to the "OFF" position and unplug the unit from the outlet.
Cleaning and Maintenance
Regular cleaning and maintenance will ensure the longevity and optimal performance of your juicer.
Daily Cleaning:
- Unplug: Always unplug the juicer before cleaning.
- Disassemble: Remove the pulp container, locking arm, juicer cover, and stainless steel filter basket/shredder disc.
- Rinse: Rinse all removable parts under warm running water immediately after use to prevent pulp from drying and sticking.
- Wash: Wash the removable parts with warm, soapy water using a brush to clean the mesh of the filter basket thoroughly.
- Wipe Base: Wipe the motor base with a damp cloth. Never immerse the motor base in water.
- Dry: Dry all parts completely before reassembling or storing.
Deep Cleaning (As Needed):
- For stubborn stains or mineral buildup, a solution of water and white vinegar can be used to soak parts before washing.
- Refer to the full product manual for detailed instructions on disassembling the spigot for thorough cleaning if necessary.
Troubleshooting
| Problem | Possible Cause | Solution |
|---|---|---|
| Juicer does not turn on. |
|
|
| Low juice yield or excessive pulp. |
|
|
| Unit vibrates excessively or makes unusual noise. |
|
|
Specifications
| Feature | Detail |
|---|---|
| Brand | Waring |
| Model Number | 040072098499 |
| Product Dimensions | 18"D x 10.75"W x 24.5"H |
| Weight | 29.3 Pounds |
| Motor | 1.2 HP Brushless Induction Motor |
| Pulp Container Capacity | 12 Quarts |
| Feed Chute Size | 3.15 inches |
| Special Features | Indicator Light, Powerful Motor, Whole Fruit Processing, Pulp Control |
| Finish Type | Powder Coated |
| Color | White |
Warranty and Support
For warranty information, technical support, or to order replacement parts, please contact Waring Commercial customer service. Keep your purchase receipt and model number handy for faster service.
Visit the official Waring Commercial website for the most up-to-date contact information and product resources: www.waringcommercialproducts.com
Related documents040072098499


Ask a question about this manual
Ask about setup, troubleshooting, compatibility, parts, safety, or missing instructions. Manuals+ will review the question and use this page’s manual context to help answer it.