Important Safety Information
Please read and understand all instructions before beginning installation. Improper installation may result in electric shock, fire, or personal injury. Always consult a qualified electrician if you are unsure about any part of the installation process.
- Ensure power is disconnected at the circuit breaker before installation or maintenance.
- All wiring must be in accordance with national and local electrical codes.
- The mounting bracket must be securely fastened to a ceiling joist or a suitable support structure capable of supporting the fan's weight.
- Do not bend blade holders during installation or cleaning.
- Keep hands clear of fan blades when the fan is operating.
Setup and Installation
Most functional components of this ceiling fan have been pre-assembled for easier installation. We recommend installation by a qualified electrician for your safety.
Components List
- 1 x 65-Inch 8-Blade Black Ceiling Fan Motor
- 1 x Remote Control and Receiver Kit
- 2 x Down Rods (7" and 12")
- 8 x ABS Blades
- 1 x LED Light Kit
- 1 x Mounting Bracket
- Hardware (screws, washers, wire nuts)
Pre-Installation Checklist
Before you begin, ensure you have all components listed above and the necessary tools (screwdriver, wire strippers, ladder).
Mounting Bracket Installation
Secure the mounting bracket to the ceiling junction box. Ensure the junction box is rated for ceiling fan support.
Downrod Assembly
Select the appropriate downrod (7" or 12") based on your ceiling height. Thread the fan's electrical wires through the downrod. Secure the downrod to the fan motor housing using the provided pin and screws.

Image: Detailed dimensions of the 65-inch ceiling fan, illustrating the two included downrod lengths (7 inches and 12 inches) and their impact on overall fan height. This helps in selecting the correct downrod for various ceiling heights.
Wiring Connections
Connect the fan's wiring to the household electrical supply according to the wiring diagram in the user manual. Ensure all connections are secure and insulated with wire nuts. Install the remote receiver unit within the canopy.
Blade Attachment
Attach each of the 8 ABS blades to the fan motor using the provided screws. Ensure all screws are tightened securely.
Light Kit Installation
Connect the LED light kit wires to the corresponding wires from the fan motor. Secure the light kit to the bottom of the fan housing with the provided screws. Finally, twist the lampshade into place.
Operating Instructions
Your Breezary ceiling fan is operated using the included multi-function remote control.

Image: The multi-function remote control for the Breezary ceiling fan, highlighting buttons for fan speeds (1-6), fan ON/OFF, fan forward/reverse, timer settings (1H, 2H, 4H, 8H), light ON/OFF (with color temperature change), and natural wind mode.
Fan Speed Control
Use the '1' through '6' buttons on the remote to select your desired fan speed. '1' is the lowest speed, and '6' is the highest.
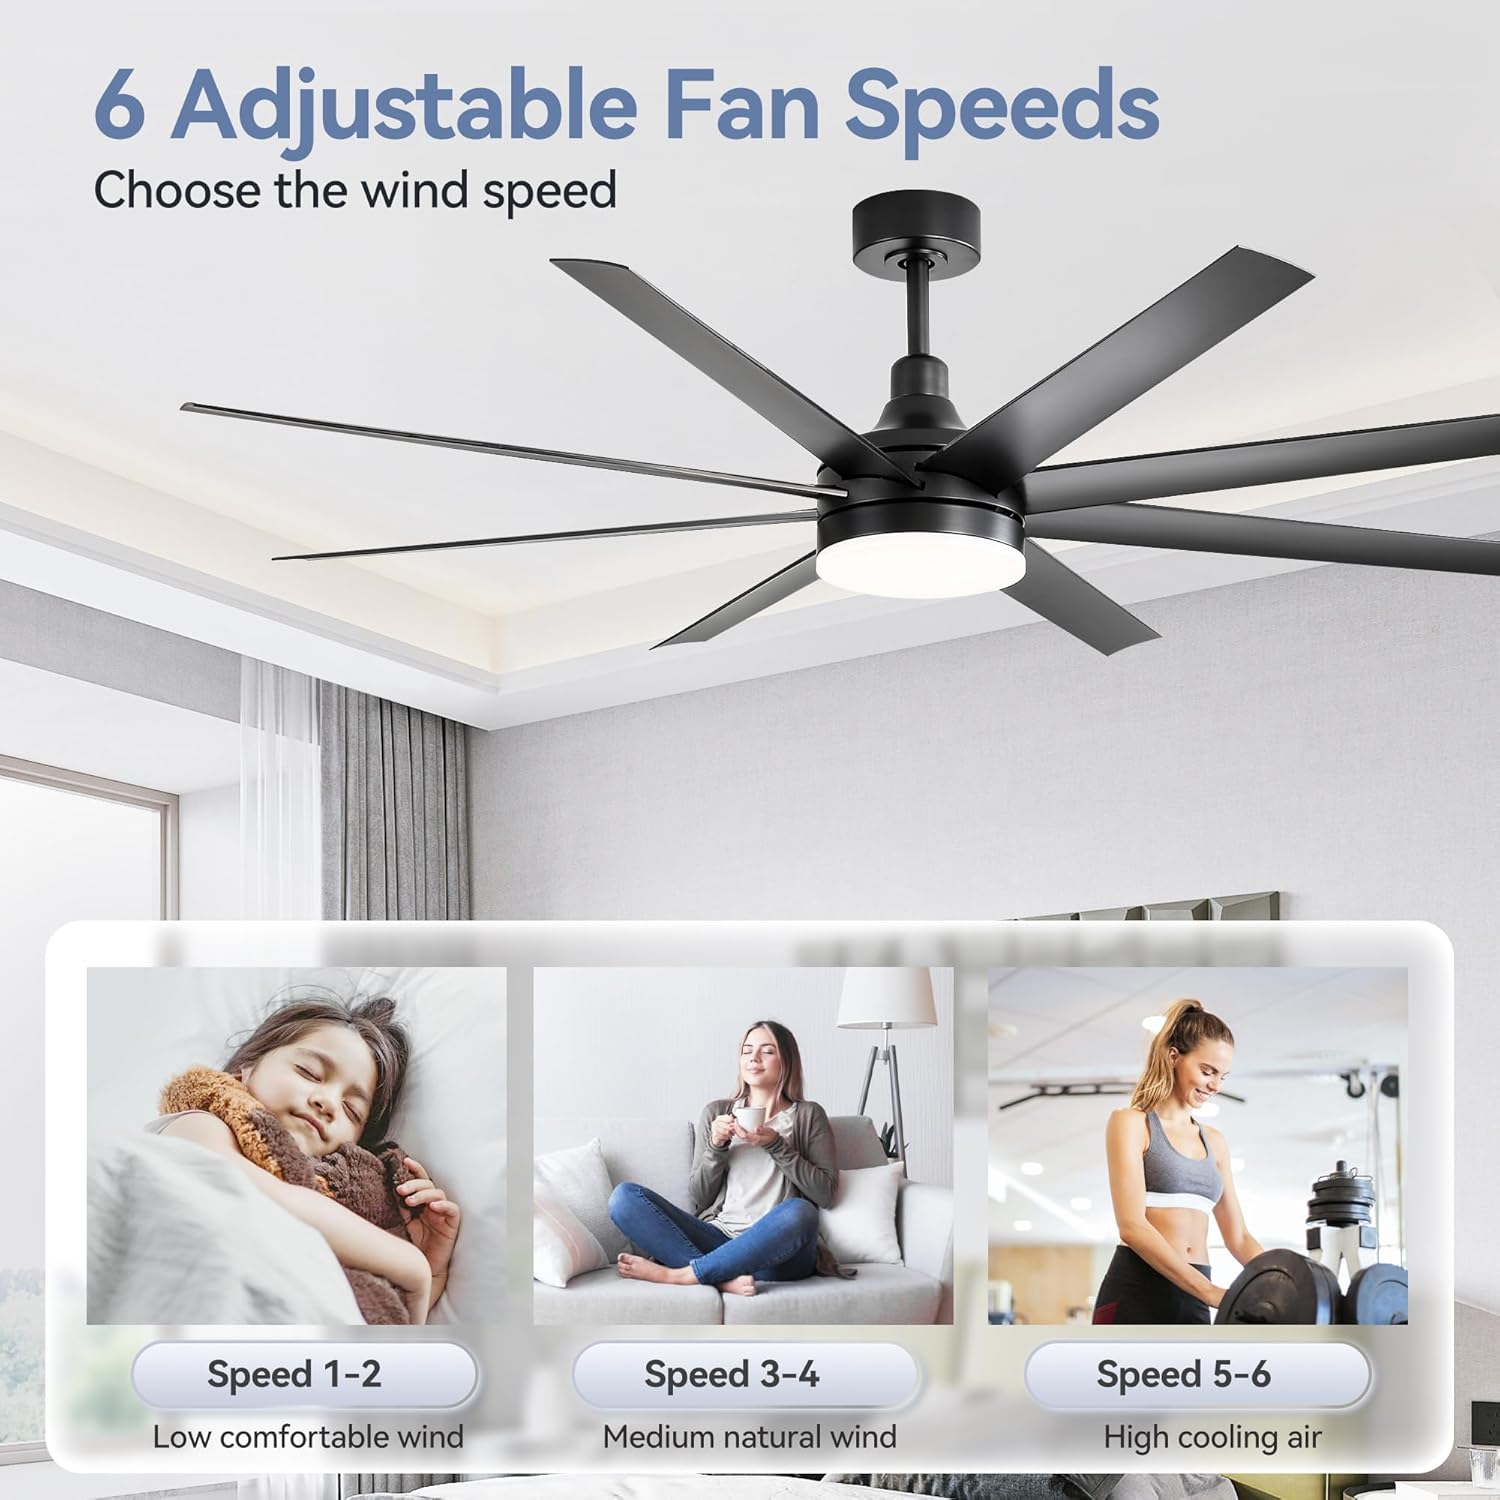
Image: A visual representation of the 6 adjustable fan speeds, categorizing speeds 1-2 as 'low comfortable wind', speeds 3-4 as 'medium natural wind', and speeds 5-6 as 'high cooling air'.
Light Control
Press the light ON/OFF button to toggle the light. To change the color temperature (3000K Warm White, 4500K Neutral Light, 6500K White Light), press the light button repeatedly. The light also features a dimming function.
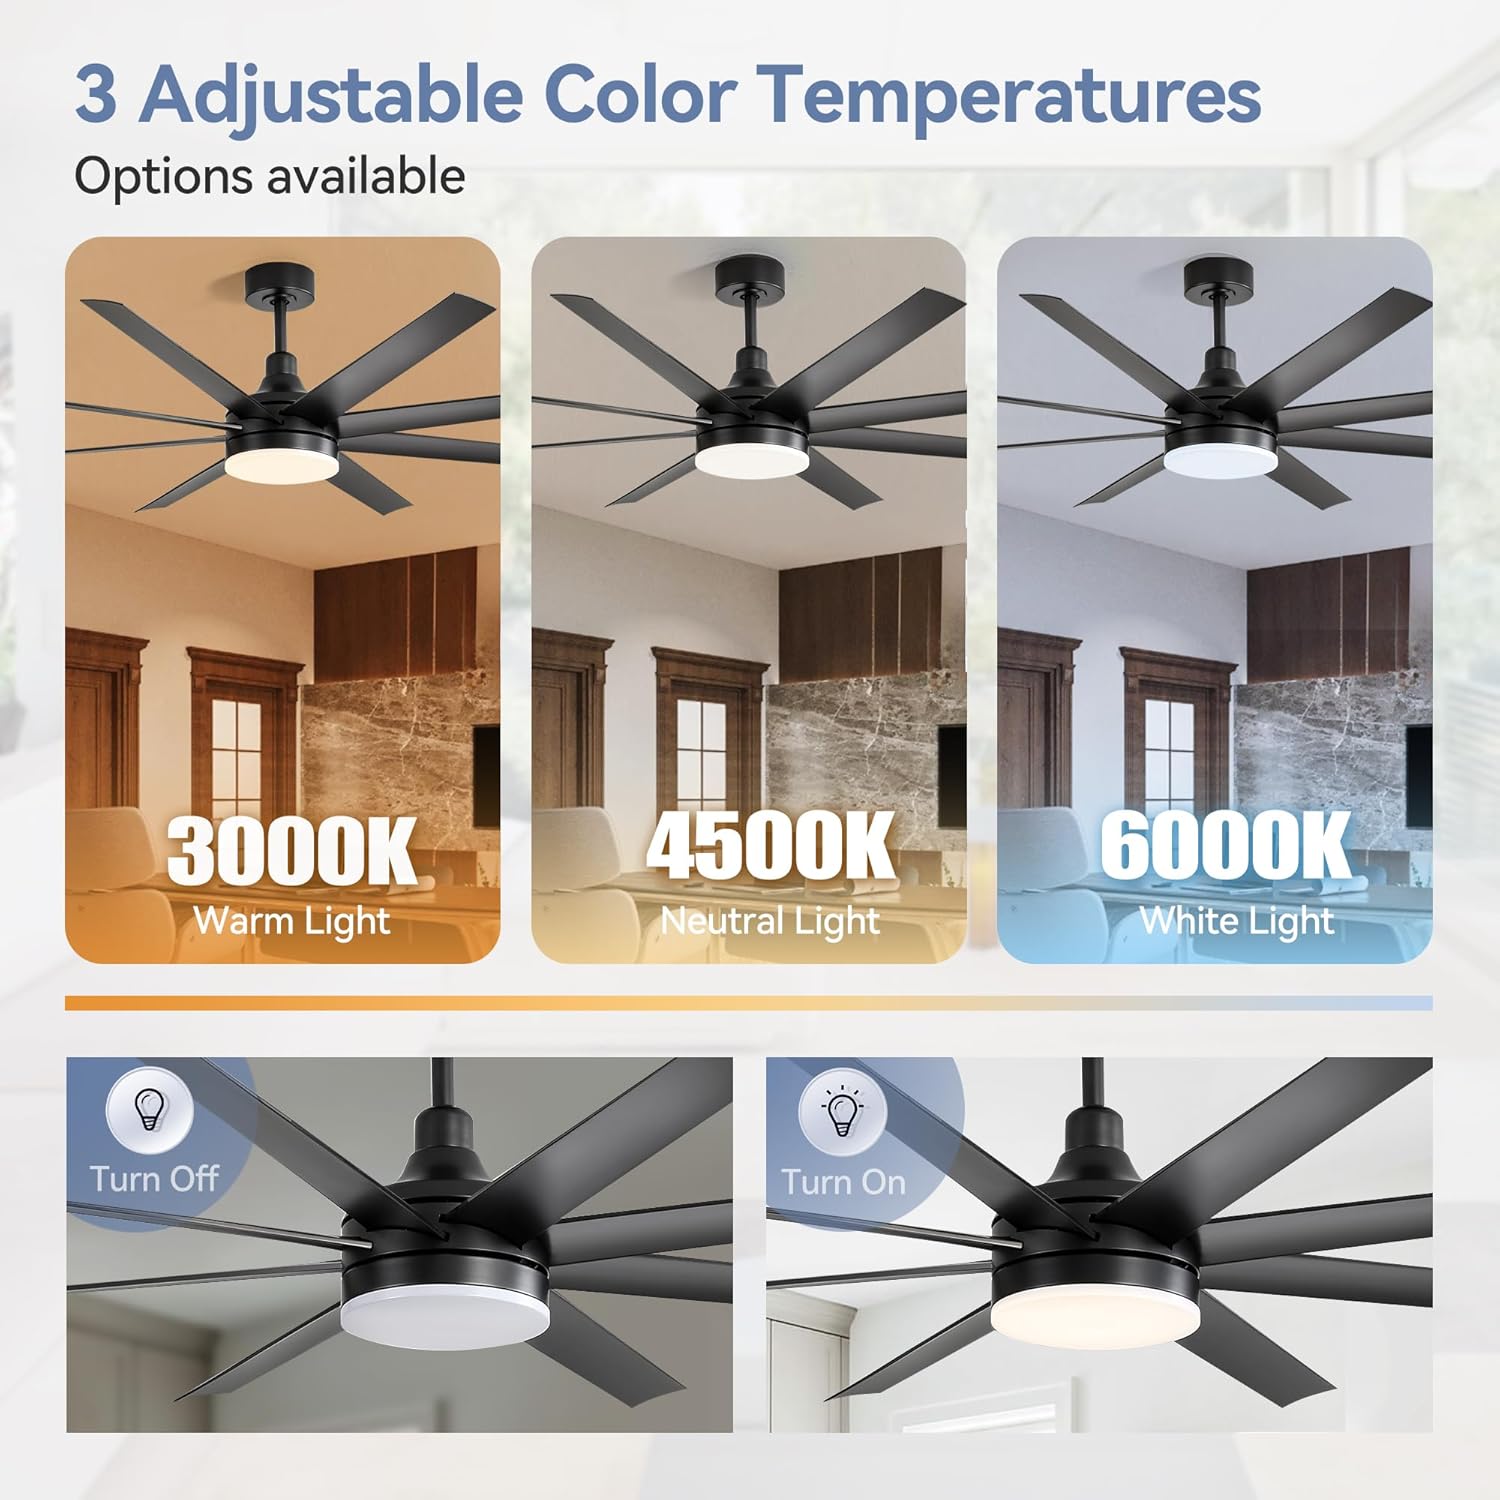
Image: This image displays the fan's integrated LED light offering three adjustable color temperatures: 3000K (Warm Light), 4500K (Neutral Light), and 6000K (White Light), demonstrating its versatility for different ambiance needs.
Reversible Motor Function
The fan features a reversible DC motor. Press the forward/reverse button on the remote to change the blade direction. In summer, blades rotate counter-clockwise to push air downwards for a cooling effect. In winter, blades rotate clockwise to circulate warm air upwards, enhancing room warmth.
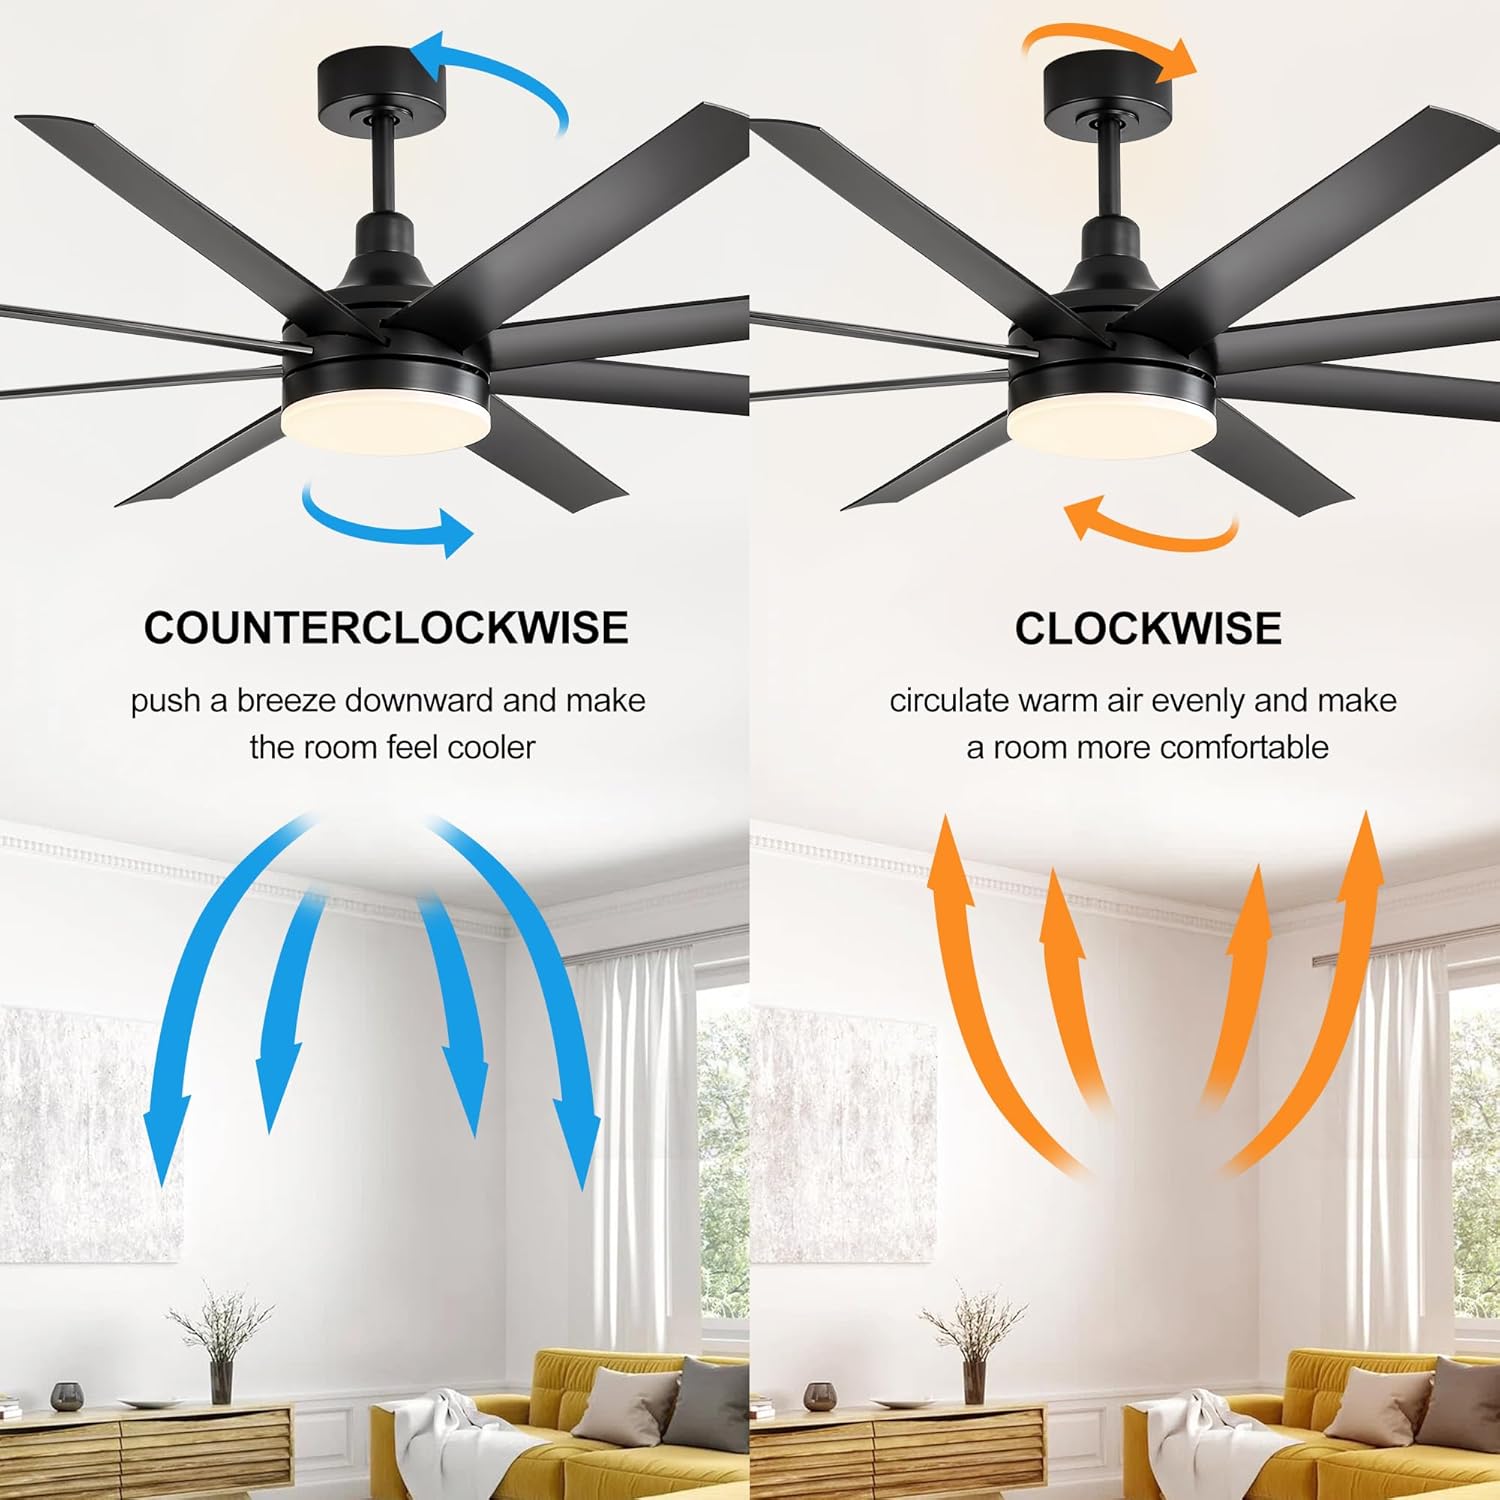
Image: A diagram showing the reversible function of the fan blades. Counter-clockwise rotation pushes air downward for cooling (summer mode), while clockwise rotation circulates warm air upward (winter mode).
Timer Function
Set the fan to automatically turn off after 1, 2, 4, or 8 hours using the dedicated timer buttons on the remote.
Official Product Video
Video: An official product video from Breezary demonstrating the 65 Inch Industrial Ceiling Fan with Lights and Remote Control in operation, showcasing its features and design.
Video: An official product video from Breezary showcasing the 65 Inch Farmhouse Ceiling Fan with LED Light, highlighting its aesthetic and functional aspects.
Maintenance
Cleaning
To clean the fan, wipe the blades and motor housing with a soft, damp cloth. Do not use abrasive cleaners or solvents that could damage the finish. Ensure the fan is turned off and power is disconnected before cleaning.
Troubleshooting
Fan Does Not Operate
- Check that the power supply to the fan is on.
- Ensure all wire connections are secure.
- Verify that the remote control batteries are installed correctly and are not depleted.
Fan Wobbles
- Check that all blade screws are tightened securely.
- Ensure the mounting bracket is firmly attached to the ceiling.
- Verify that the downrod is properly seated and secured.
Light Does Not Work
- Check the light kit wiring connections.
- Ensure the light ON/OFF button on the remote is pressed.
Specifications
| Feature | Detail |
|---|---|
| Brand | Breezary |
| Model Name | 65-Inch Black Ceiling Fan Fandelier |
| Model Number | 23012-AB-AMZ |
| Product Dimensions | 65"D x 65"W x 22.6"H (with 12" downrod) |
| Blade Length | 29 Inches |
| Number of Blades | 8 (ABS) |
| Motor Type | Reversible DC Motor |
| Fan Speeds | 6 |
| Light Type | 3-Color Temperature LED (3000K, 4500K, 6500K) |
| Control Method | Remote Control |
| Noise Level | 30 Decibels |
| Voltage | 120 Volts |
| Wattage | 30 watts |
| Air Flow Capacity | 4800 Cubic Feet Per Minute |
| Indoor/Outdoor Usage | Indoor |
| Certification | ETL |
Warranty & Support
For warranty information or technical support, please refer to the contact details provided in your product packaging or visit the official Breezary website. Keep your purchase receipt for warranty claims.


