1. Product Overview
The Y&H Solar Charge Controller is designed to optimize the energy utilization efficiency of photovoltaic systems. It achieves this by real-time detection of solar panel power and tracking the maximum voltage current value (VI) to ensure maximum power output for battery charging. This controller is a core component in off-grid solar PV systems, coordinating the operation of solar panels, batteries, and loads.
The device features an LCD display for operational status, running parameters, and control parameters. Users can adjust various parameters via buttons to adapt to different system requirements. It incorporates comprehensive electronic fault self-test and robust protection functions to prevent damage from installation errors or system faults.
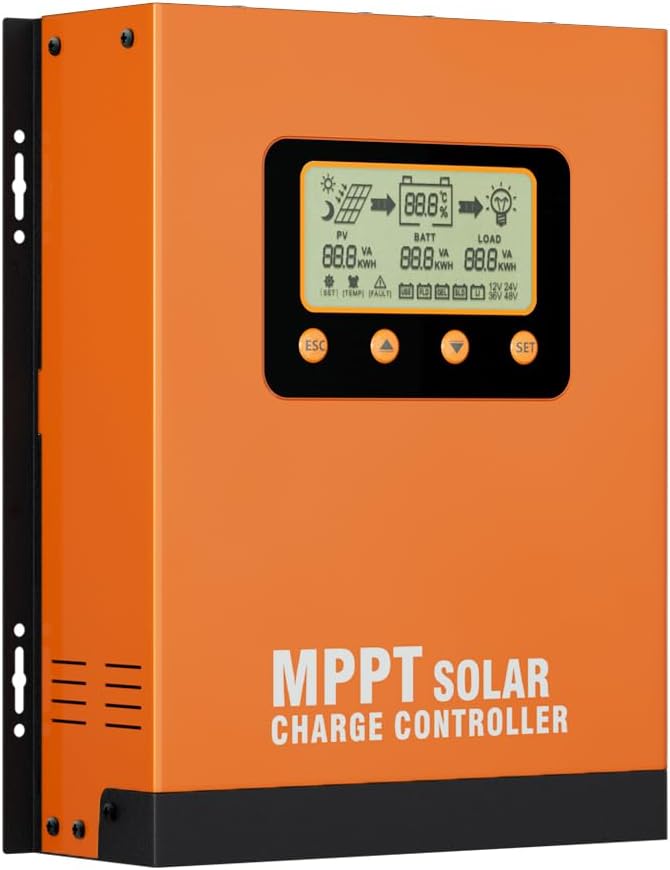
Figure 1.1: Front view of the Y&H 60A MPPT Solar Charge Controller, showing the LCD screen and control buttons.
2. Key Features
- MPPT Technology: Built-in Maximum Power Point Tracking algorithm significantly improves energy utilization efficiency, increasing charging efficiency by 15% to 20% compared to conventional PWM methods.
- High Efficiency: A combination of multiple tracking algorithms ensures accurate tracking of the optimum working point on the I-V curve in a short time, achieving an MPPT tracking efficiency of up to 99.9%. Advanced digital power supply technologies contribute to a circuit energy conversion efficiency as high as 98%.
- Battery Compatibility: Suitable for FLD, GEL, SLD, LI (Lithium), and User-defined battery types.
- Limited Current Charging: When solar panel power exceeds a certain level and the charging current is larger than the rated current, the controller automatically lowers the charging power to maintain the rated current.
- Automatic Voltage Recognition: Supports automatic recognition of 12V, 24V, 36V, and 48V battery system voltages.
- LCD Display: Features a clear LCD for displaying system status, parameters, and fault indications.
- Over-Temperature Protection: Built-in mechanism to reduce charging current and halt discharging if temperature surpasses a set value, preventing overheating damage.
- Temperature Compensation: Automatically adjusts charging and discharging parameters based on temperature to extend battery service life.
- 0V Lithium-Ion Battery Charging: Supports charging for completely discharged lithium-ion batteries.
- Robust Design: Features an aluminum housing for improved heat dissipation and dual fan cooling.
- Electronic Protection: Comprehensive electronic protection functions are integrated.
- RS485 Protocol Support: Optional support for RS485 protocol to meet various communication needs.
3. Setup and Installation
Proper installation is crucial for the safe and efficient operation of your MPPT solar charge controller. Please follow these guidelines carefully.
3.1 Unpacking and Inspection
- Carefully unpack the controller and inspect it for any visible damage.
- Ensure all components listed in the packaging are present.
3.2 Mounting Location
- Mount the controller indoors, away from direct sunlight, high temperatures, and water.
- Ensure adequate air circulation around the controller. The aluminum housing and dual fans require space for effective heat dissipation.
- Mount the controller vertically on a wall or suitable surface to allow for proper airflow through the cooling fins and fans.
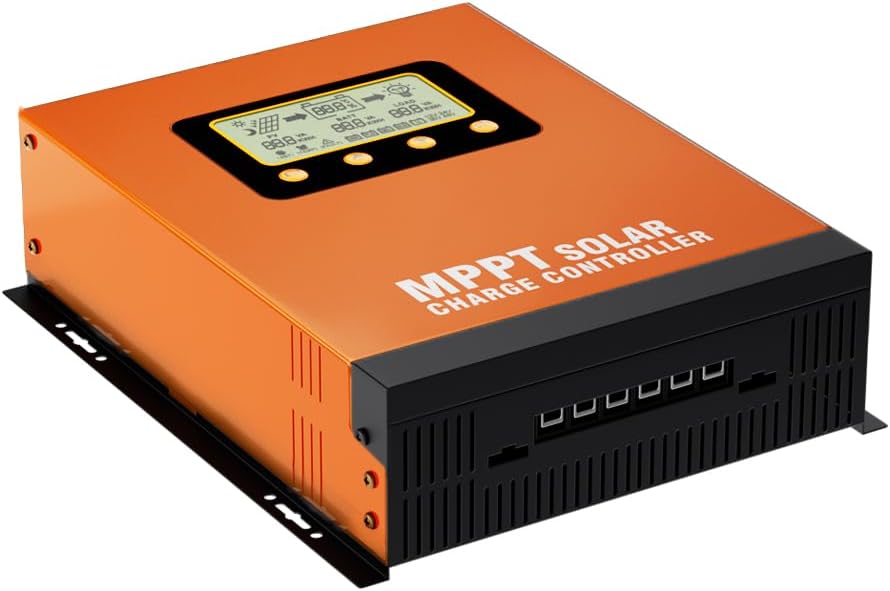
Figure 3.1: Angled view of the controller, highlighting its robust construction and mounting points.
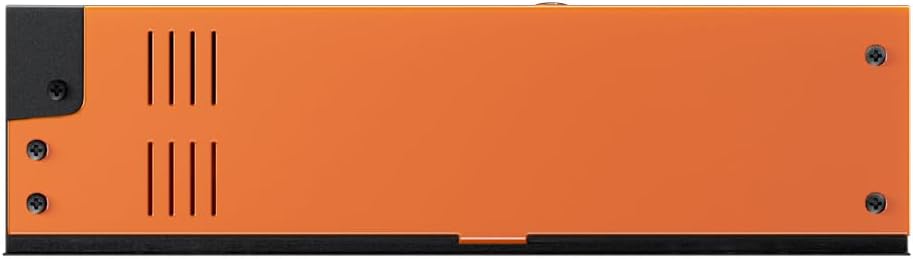
Figure 3.2: Side view of the controller, illustrating the ventilation slots for heat dissipation.
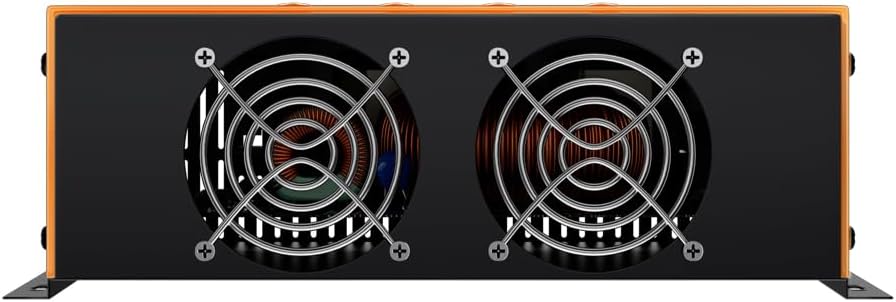
Figure 3.3: Rear view of the controller, showing the dual cooling fans for active heat management.
3.3 Wiring Sequence
Always connect components in the following order to prevent damage to the controller or other system components:
- Connect the Battery: First, connect the battery to the controller's battery terminals. Ensure correct polarity. The controller will automatically detect the battery voltage (12V/24V/36V/48V).
- Connect the Solar Panel: Next, connect the solar panel array to the controller's PV terminals. Ensure correct polarity.
- Connect the Load: Finally, connect the DC load to the controller's load terminals. Ensure correct polarity.
Important: Disconnect in the reverse order: Load, then Solar Panel, then Battery.
4. Operating Instructions
The controller's LCD provides real-time system information and allows for parameter adjustments.
4.1 LCD Display Interface
The main interface displays critical system parameters. Refer to the diagram below for an explanation of each indicator.

Figure 4.1: Detailed diagram of the LCD display, explaining each icon and parameter.
- PV: Indicates solar panel status and power output.
- BATT: Shows battery status, charge level, and voltage.
- LOAD: Displays load status and power consumption.
- Icons: Daytime/Nighttime, Solar Panel, Charging, Battery, Discharging, Load, Battery Percentage, Units (VA, KWH), Parameter Value, Setting, Load Time, Abnormality, Battery Type, System Voltage.
4.2 Button Functions
- ESC: Exit current menu or return to the previous screen.
- Up Arrow: Navigate up through menu options or increase parameter values.
- Down Arrow: Navigate down through menu options or decrease parameter values.
- SET: Enter menu, confirm selection, or save parameter changes.
4.3 Battery Type Selection and Parameters
The controller supports various battery types. It is essential to select the correct battery type for optimal charging and battery longevity. The default parameters for each battery type are shown in the table below.
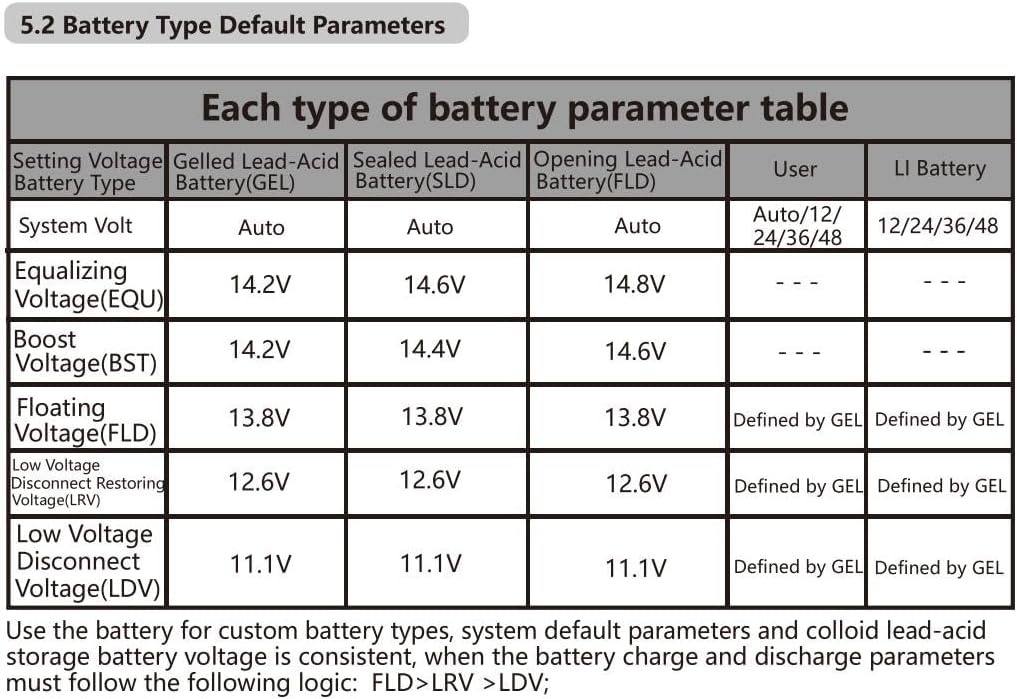
Figure 4.2: Battery Type Default Parameters Table.
- GEL: Gelled Lead-Acid Battery.
- SLD: Sealed Lead-Acid Battery.
- FLD: Flooded (Opening) Lead-Acid Battery.
- LI: Lithium Battery.
- User: Allows custom setting of charging and discharging parameters. For custom battery types, ensure the following logical sequence for voltage settings: FLD > LRV > LDV.
To change the battery type or adjust user-defined parameters, navigate through the LCD menu using the Up/Down arrows and confirm with the SET button.
5. Maintenance
Regular maintenance ensures the longevity and optimal performance of your Y&H MPPT Solar Charge Controller.
- Cleaning: Periodically clean the controller's exterior with a dry cloth. Ensure the ventilation slots and cooling fans (if visible) are free from dust and debris to maintain proper airflow and heat dissipation.
- Connections: Annually inspect all wiring connections to ensure they are tight and free from corrosion. Loose connections can lead to power loss or overheating.
- Environment: Ensure the operating environment remains within specified temperature and humidity ranges. Avoid exposing the controller to moisture or corrosive gases.
- Firmware Updates: Check the manufacturer's website periodically for any available firmware updates that may improve performance or add features.
6. Troubleshooting
The controller is equipped with self-diagnostic functions to help identify and resolve common issues. The LCD display will show fault codes or indicators in case of an abnormality.
- LCD Display Errors: If the LCD shows a fault icon (as indicated in Figure 4.1), refer to the specific fault code or symbol for diagnosis. Common issues include over-voltage, under-voltage, over-current, or over-temperature.
- No Charging:
- Check solar panel connections and ensure they are receiving sufficient sunlight.
- Verify battery connections and voltage.
- Ensure the battery type setting matches the connected battery.
- No Load Output:
- Check load connections and ensure the load is not exceeding the controller's rated capacity.
- Verify battery voltage is above the Low Voltage Disconnect Voltage (LDV).
- Check load control settings (e.g., timer settings).
- Over-Temperature: The controller has an over-temperature protection mechanism. If the temperature exceeds the set value, the charging current will decrease, and discharging may be halted. Ensure adequate ventilation and clear any obstructions from the cooling fans.
- System Faults: The comprehensive electronic fault self-test function helps identify internal issues. If persistent faults occur despite checking external connections and settings, contact customer support.
7. Specifications
| Parameter | Value |
|---|---|
| Model | 60A MPPT Solar Charge Controller |
| System Voltage | 12V/24V/36V/48V Auto Recognition |
| Rated Charging Current | 60A |
| MPPT Tracking Efficiency | Up to 99.9% |
| Conversion Efficiency | Up to 98% |
| Battery Types Supported | FLD, GEL, SLD, LI, User-defined |
| Cooling Method | Aluminum Housing, Dual Fan Cooling |
| UPC | 716963268516 |
| First Available Date | Sept. 14 2023 |
8. Warranty and Support
For warranty information and technical support, please refer to the documentation provided with your purchase or visit the official Y&H website. Specific warranty terms and conditions may vary by region and retailer.
When contacting support, please have your product model number (60A MPPT Solar Charge Controller) and purchase date readily available.


