
ANNKE AU-N931BB0-V1+JHJ014-K-5WEH
Contents
ANNKE 32 Channel 12MP NVR PoE Security Camera System User Manual
Model: AU-N931BB0-V1+JHJ014-K-5WEH
1. Introduction
This manual provides comprehensive instructions for the installation, operation, and maintenance of your ANNKE 32 Channel 12MP NVR PoE Security Camera System. Please read this manual thoroughly before using the product to ensure proper setup and functionality. Keep this manual for future reference.
2. Package Contents
Verify that all items listed below are included in your package. If any items are missing or damaged, please contact ANNKE customer support.
- 1 x 32-Channel 12MP NVR (Network Video Recorder)
- 1 x 16-Port PoE Switch
- 32 x Wired 3K PoE Cameras
- 32 x Network Cables (various lengths)
- 1 x Power Adapter for NVR
- 1 x 1m Ethernet Cable
- 1 x USB Mouse
- 1 x Quick Instruction Guide

Figure 2.1: Overview of the ANNKE 32 Channel NVR PoE Security Camera System components, including the NVR, PoE switch, and multiple cameras.
3. Setup Instructions
Follow these steps to set up your ANNKE security camera system.
3.1 NVR and PoE Switch Connection
- Connect the NVR to a monitor using an HDMI or VGA cable.
- Connect the USB mouse to the NVR's USB port.
- Connect the NVR to your router using the provided Ethernet cable.
- Connect the PoE switch to a power outlet.
- Connect the NVR's LAN port to an uplink port on the PoE switch using an Ethernet cable.
- Power on the NVR using its power adapter.
3.2 Camera Installation and Connection
- Mount each PoE camera in your desired location. Ensure the mounting surface is secure.
- Connect each camera to an available PoE port on the PoE switch using the provided network cables. The PoE switch will supply both power and data to the cameras.
- Once connected, the cameras should automatically be detected by the NVR.
3.3 Initial NVR Configuration
- Follow the on-screen prompts to complete the initial setup wizard, which includes setting a password, time zone, and network settings.
- Ensure the NVR is connected to the internet for remote viewing capabilities.
- Refer to the Quick Instruction Guide for detailed steps on initial NVR configuration.
4. Operating Instructions
4.1 Smart Dual-Light Technology
The cameras feature Smart Dual-Light technology. This allows the camera to automatically switch from infrared (IR) night vision to white light mode when a person or vehicle is detected. This provides color night vision for clearer identification.
- Infrared Range: Up to 30 meters.
- White Light Range: Up to 20 meters.
- Modes: You can manually configure the camera to use pure infrared, pure white light, or the automatic smart dual-light mode via the NVR settings.

Figure 4.1: Illustration of Smart Dual-Light technology, where a camera's spotlight activates upon detecting human or vehicle motion in low-light conditions.
4.2 3K Clarity and Wide Viewing Experience
The cameras provide a 3K (3072x1728) resolution with a 16:9 aspect ratio. This aspect ratio is optimized for modern displays, offering a wider and more immersive view without distortion compared to traditional 4:3 aspect ratios.

Figure 4.2: Visual comparison demonstrating the wider and undistorted view provided by the 3K 16:9 aspect ratio compared to a 4:3 display.
4.3 Enhanced Person and Vehicle Detection
The system utilizes Deep Learning Algorithms for accurate human and vehicle detection, significantly reducing false alerts from other movements. You can customize sensitivity settings and define specific monitoring areas through the NVR interface or mobile application.

Figure 4.3: An example of the system detecting a person and a vehicle, with corresponding app push notifications, email alerts, and buzzer activation.
4.4 IP67 Waterproof Rating and Audio
The cameras are rated IP67, indicating they are dust-tight and protected against immersion in water up to 1 meter for 30 minutes. This makes them suitable for various outdoor weather conditions. Each camera includes a highly sensitive built-in microphone for real-time audio monitoring and recording.

Figure 4.4: Visual representation of the camera's Listen-In Microphone for noise-cancelling audio recording and its IP67 dust and waterproof rating.
4.5 Flexible Storage Options
The NVR supports hard drives for continuous recording (HDD not included). Additionally, each camera has an SD card slot, allowing it to function as a standalone recording device with a microSD card (up to 256 GB). Cameras can also be used as add-on units to the NVR system.
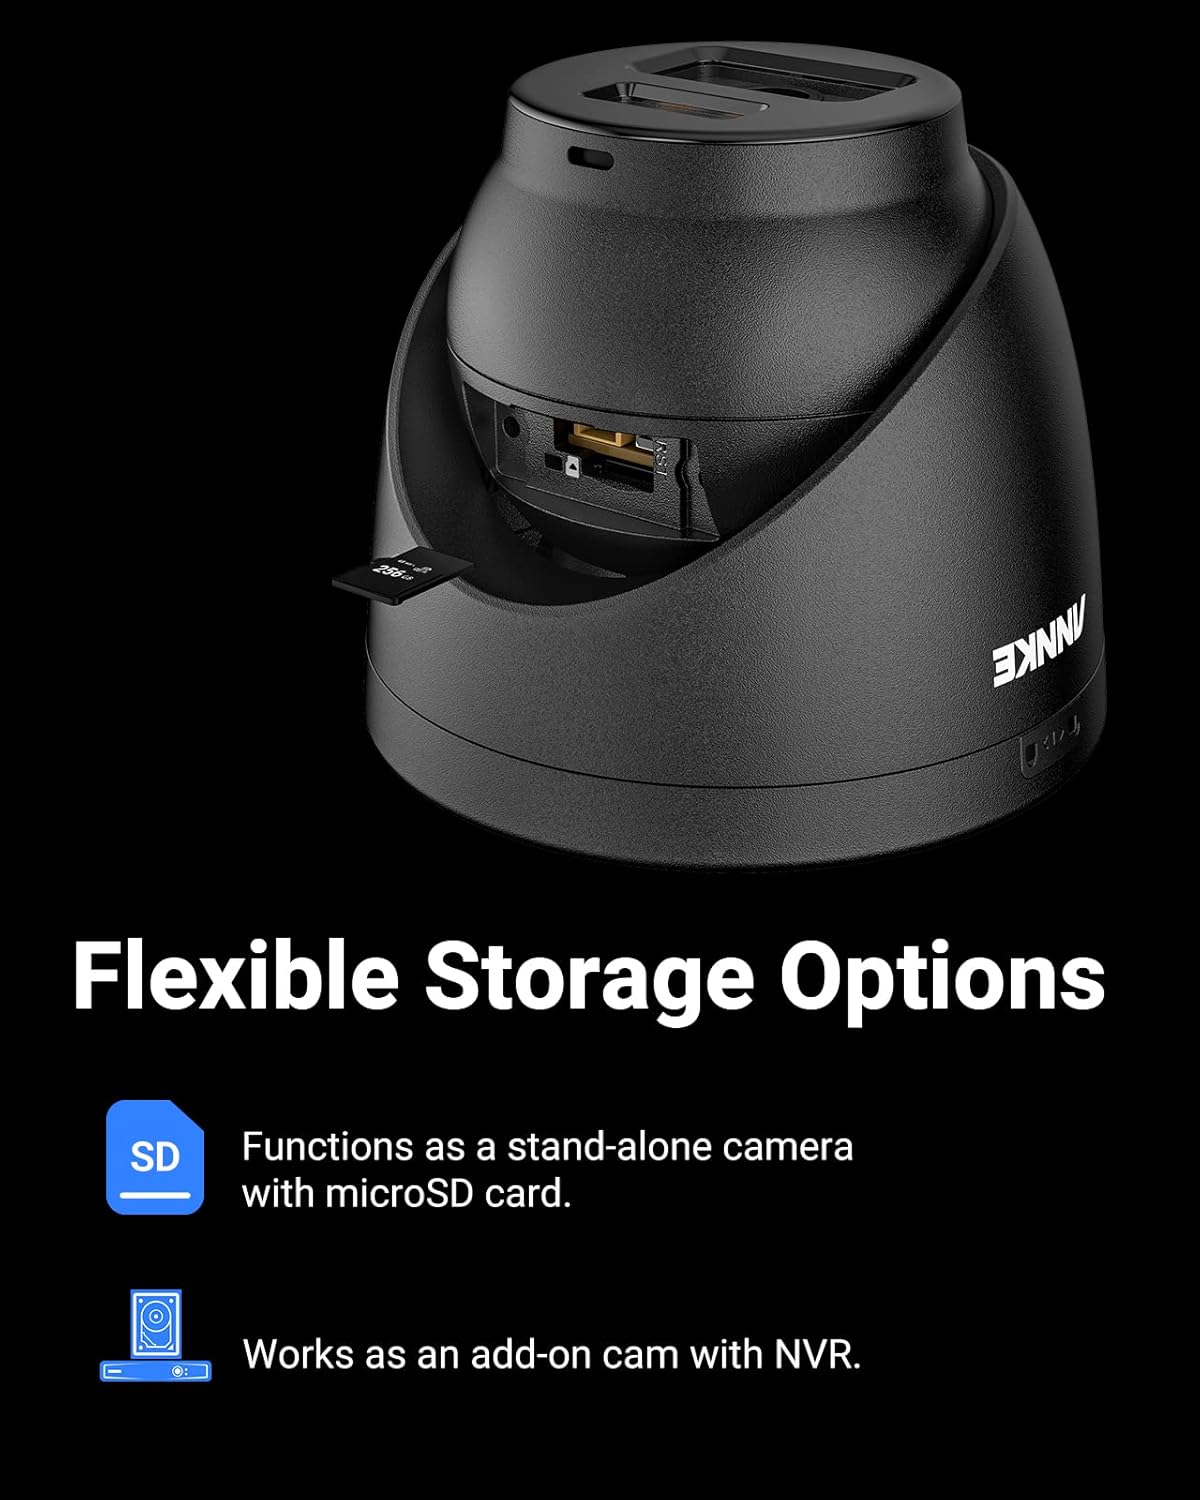
Figure 4.5: Close-up of a camera showing its microSD card slot, illustrating flexible storage options for standalone use or integration with the NVR.
4.6 Night Vision Capabilities
The cameras offer both infrared and color night vision. Infrared night vision provides clear black and white images in complete darkness up to 100 feet. Color night vision, activated by the smart dual-light feature, can provide color images up to 66 feet in low-light conditions.

Figure 4.6: Side-by-side comparison of a scene captured with color night vision (up to 66ft) and infrared night vision (up to 100ft).
4.7 Region of Interest (ROI) Setting
The Region of Interest (ROI) feature allows you to define specific areas within the camera's view for enhanced monitoring and recording quality. This helps in focusing on critical zones and optimizing storage by allocating higher resolution to important areas.

Figure 4.7: An example demonstrating how to set a Region of Interest (ROI) within the camera's field of view to prioritize monitoring in specific areas.
5. Maintenance
- Regular Cleaning: Periodically clean the camera lenses with a soft, damp cloth to ensure clear image quality. Avoid abrasive cleaners.
- Firmware Updates: Check the ANNKE official website regularly for firmware updates for your NVR and cameras. Keeping firmware updated ensures optimal performance and security.
- Cable Inspection: Inspect all network and power cables for any signs of wear or damage. Replace damaged cables immediately to prevent system malfunction.
- NVR Ventilation: Ensure the NVR is placed in a well-ventilated area to prevent overheating. Do not block ventilation openings.
- Data Backup: Regularly back up important video footage from the NVR to an external storage device.
6. Troubleshooting
| Problem | Possible Cause | Solution |
|---|---|---|
| No video display from camera |
|
|
| NVR not connecting to network |
|
|
| False motion alerts |
|
|
For further assistance, please contact ANNKE customer support.
7. Specifications
| Model Number | AU-N931BB0-V1+JHJ014-K-5WEH |
| NVR Channels | 32 Channels |
| Camera Resolution | 12MP (3K, 3072x1728) |
| Aspect Ratio | 16:9 |
| Lens | 2.8mm@F1.6 |
| Video Compression | H.265+ |
| Detection | AI Human & Vehicle Detection (Motion Detection 2.0) |
| Night Vision | Smart Dual-Light (IR up to 30m, White Light up to 20m), 3D DNR, 120DB WDR |
| Audio | Built-in Microphone (Listen-In Audio) |
| Storage | NVR (HDD not included), Camera SD card slot (up to 256 GB) |
| Weatherproof Rating | IP67 |
| Power Supply | PoE & DC12V |
| Product Dimensions | 18.9 x 18.11 x 11.81 inches |
8. Warranty and Support
ANNKE provides lifetime technical support for this product. For warranty information, technical assistance, or any inquiries, please visit the official ANNKE website or contact their customer service department.
ANNKE Official Website: www.annke.com
Ask a question about this manual
Ask about setup, troubleshooting, compatibility, parts, safety, or missing instructions. Manuals+ will review the question and use this page’s manual context to help answer it.