1. Introduction
Thank you for choosing the Geevon Digital Indoor Outdoor Thermometer. This manual provides detailed instructions for the setup, operation, and maintenance of your models 228646 and 23190 thermometers. These devices are designed to accurately measure indoor and outdoor temperature and humidity, helping you monitor your environment for optimal comfort and health.
Both models feature a large LCD display, wireless sensors, and various functions such as Max/Min records and temperature/humidity alerts. The 23190 model additionally offers a 5-inch display with a USB-powered backlight for continuous illumination.
Package Contents:
- Indoor Outdoor Thermometer Main Unit (Model 228646 or 23190)
- 3 x Remote Outdoor Sensors
- User Manual
2. Product Overview
The Geevon Digital Indoor Outdoor Thermometer system consists of a main display unit and three wireless remote sensors. The main unit displays indoor temperature and humidity, along with readings from the three outdoor sensors.
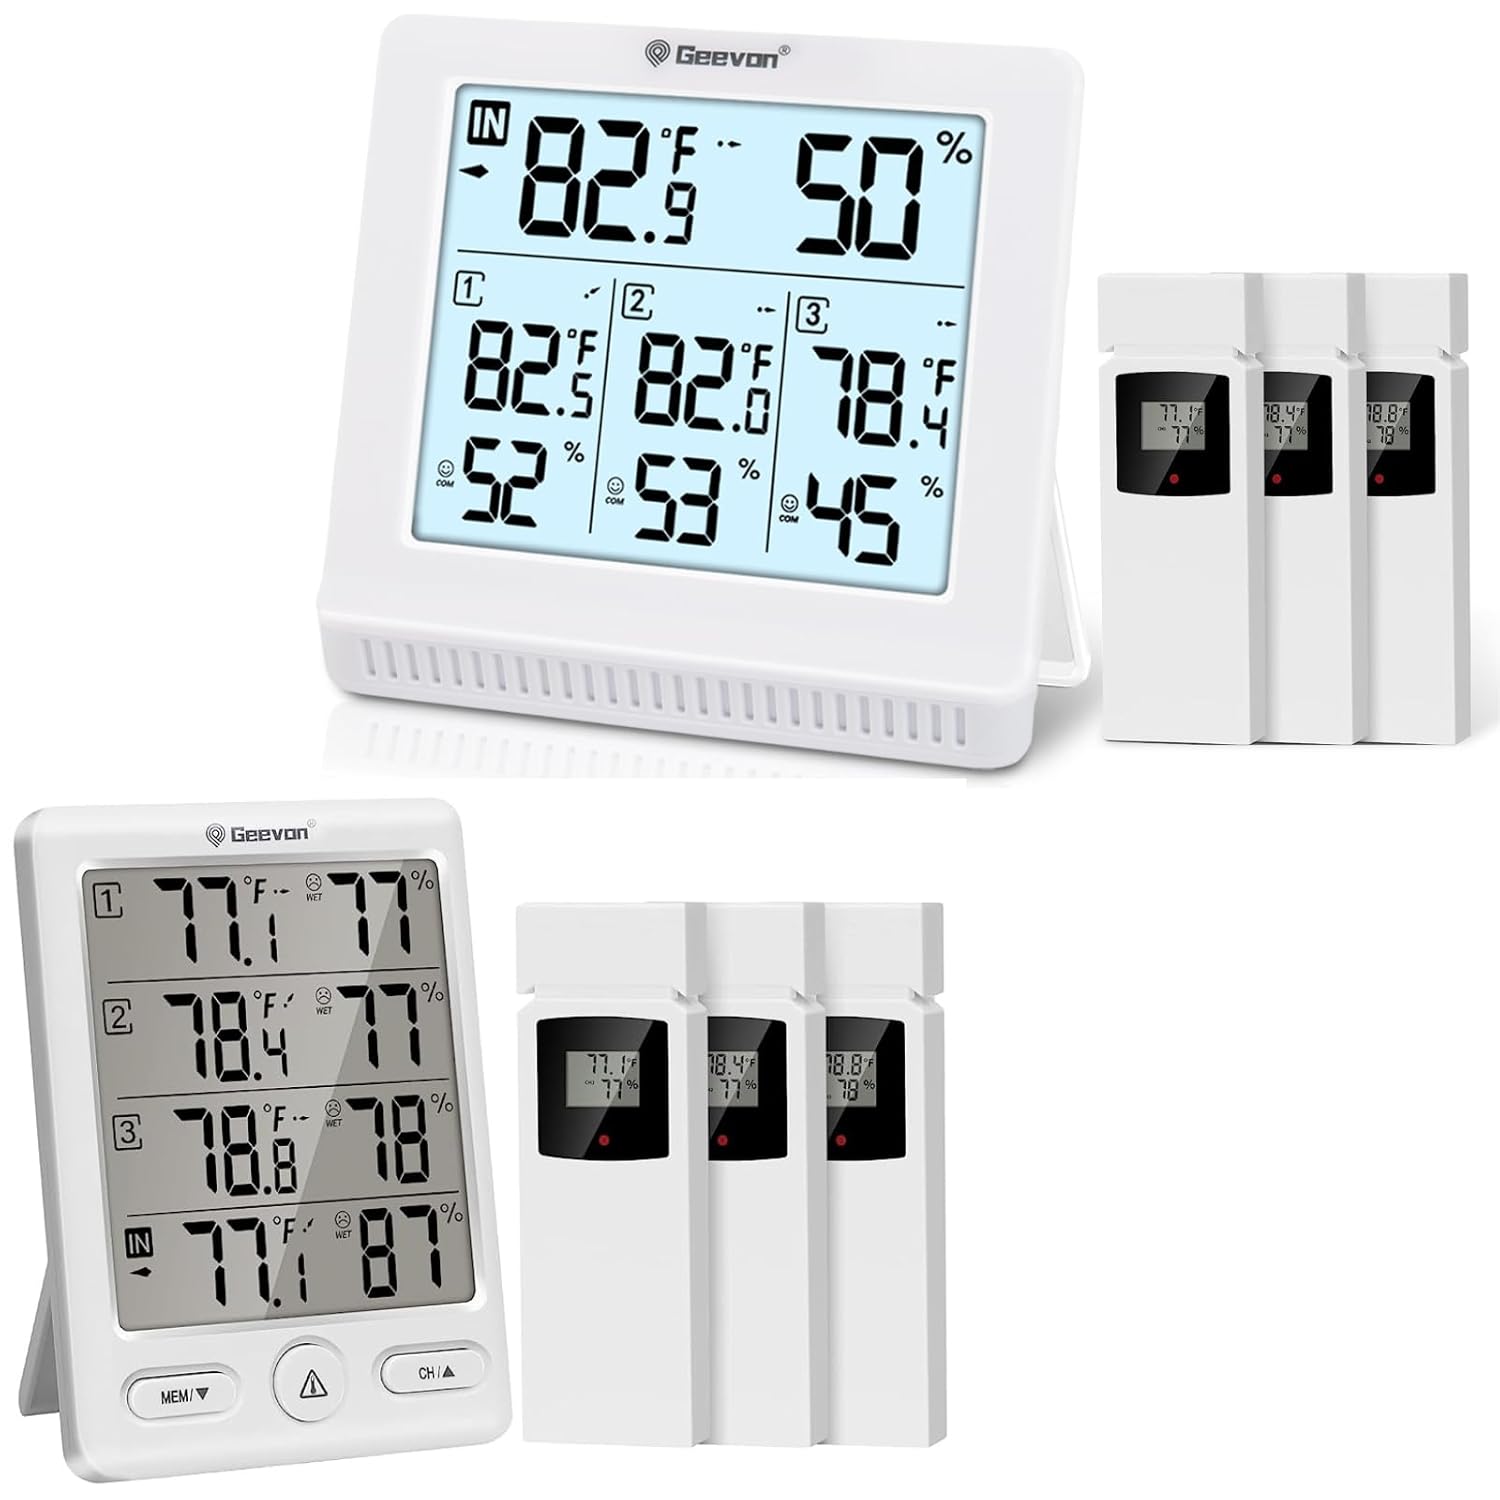
Figure 2.1: Geevon Digital Indoor Outdoor Thermometer main units (Models 228646 and 23190) and three remote sensors.
Main Display Unit (Model 23190 shown):

Figure 2.2: The 5-inch large LCD display of Model 23190, featuring a backlight for easy readability in various lighting conditions.
- Large LCD Display: Provides clear, bold numbers for easy reading of temperature and humidity.
- Backlight (Model 23190): USB power feature keeps the backlight continuously on for enhanced visibility.
- Indoor Readings: Displays current indoor temperature and humidity.
- Outdoor Readings: Shows temperature and humidity from up to three wireless sensors.
- Max/Min Records: Tracks the highest and lowest temperature and humidity readings over 24 hours.
- Trend Arrows: Indicates whether temperature and humidity are rising, falling, or remaining stable.
- Comfort Indicator: Face icons provide a quick assessment of indoor comfort levels (Dry, Comfort, Wet).
- Alert Function: Allows setting of high/low temperature and humidity alarms.
Wireless Remote Sensors:

Figure 2.3: Mounting options for the main unit (tabletop stand, wall mount) and remote sensor (hang hole, wall mount).
- Each sensor transmits temperature and humidity data wirelessly to the main unit.
- Equipped with a channel switch (1, 2, 3) to assign a unique channel.
- Designed for indoor or outdoor use, with a transmission range of up to 200 feet (60 meters) in open air.
3. Setup
3.1 Battery Installation
- For Remote Sensors:
- Open the battery compartment cover on the back of each remote sensor.
- Insert the required batteries (typically AAA, refer to the battery compartment for exact type and polarity).
- Select a unique channel (1, 2, or 3) for each sensor using the channel switch inside the battery compartment.
- Close the battery compartment cover securely.
- For Main Display Unit:
- Open the battery compartment cover on the back of the main unit.
- Insert the required batteries (typically AA, refer to the battery compartment for exact type and polarity).
- For Model 23190, you may also connect a USB power adapter (not always included) to keep the backlight on continuously.
- Close the battery compartment cover securely.
3.2 Sensor Pairing
After installing batteries, the main unit will automatically search for and connect to the remote sensors. Ensure all sensors are within range (up to 200ft/60m in open air) and have unique channels selected.
Note: If you have multiple Geevon thermometer sets, be aware that sensors from one set may be received by another display if they are on the same channel. Each display unit will only show readings for channels 1, 2, and 3, regardless of how many physical display units you have.
3.3 Placement Options
Both the main unit and remote sensors offer flexible placement options:

Figure 3.1: Examples of various placement options for the main unit and remote sensors.
- Main Unit: Can be placed on a tabletop using its integrated stand or mounted on a wall using the hang hole.
- Remote Sensors: Can be wall-mounted or hung in suitable locations. For outdoor use, place sensors in a shaded, dry area to ensure accurate readings and prolong battery life. Avoid direct sunlight and rain.
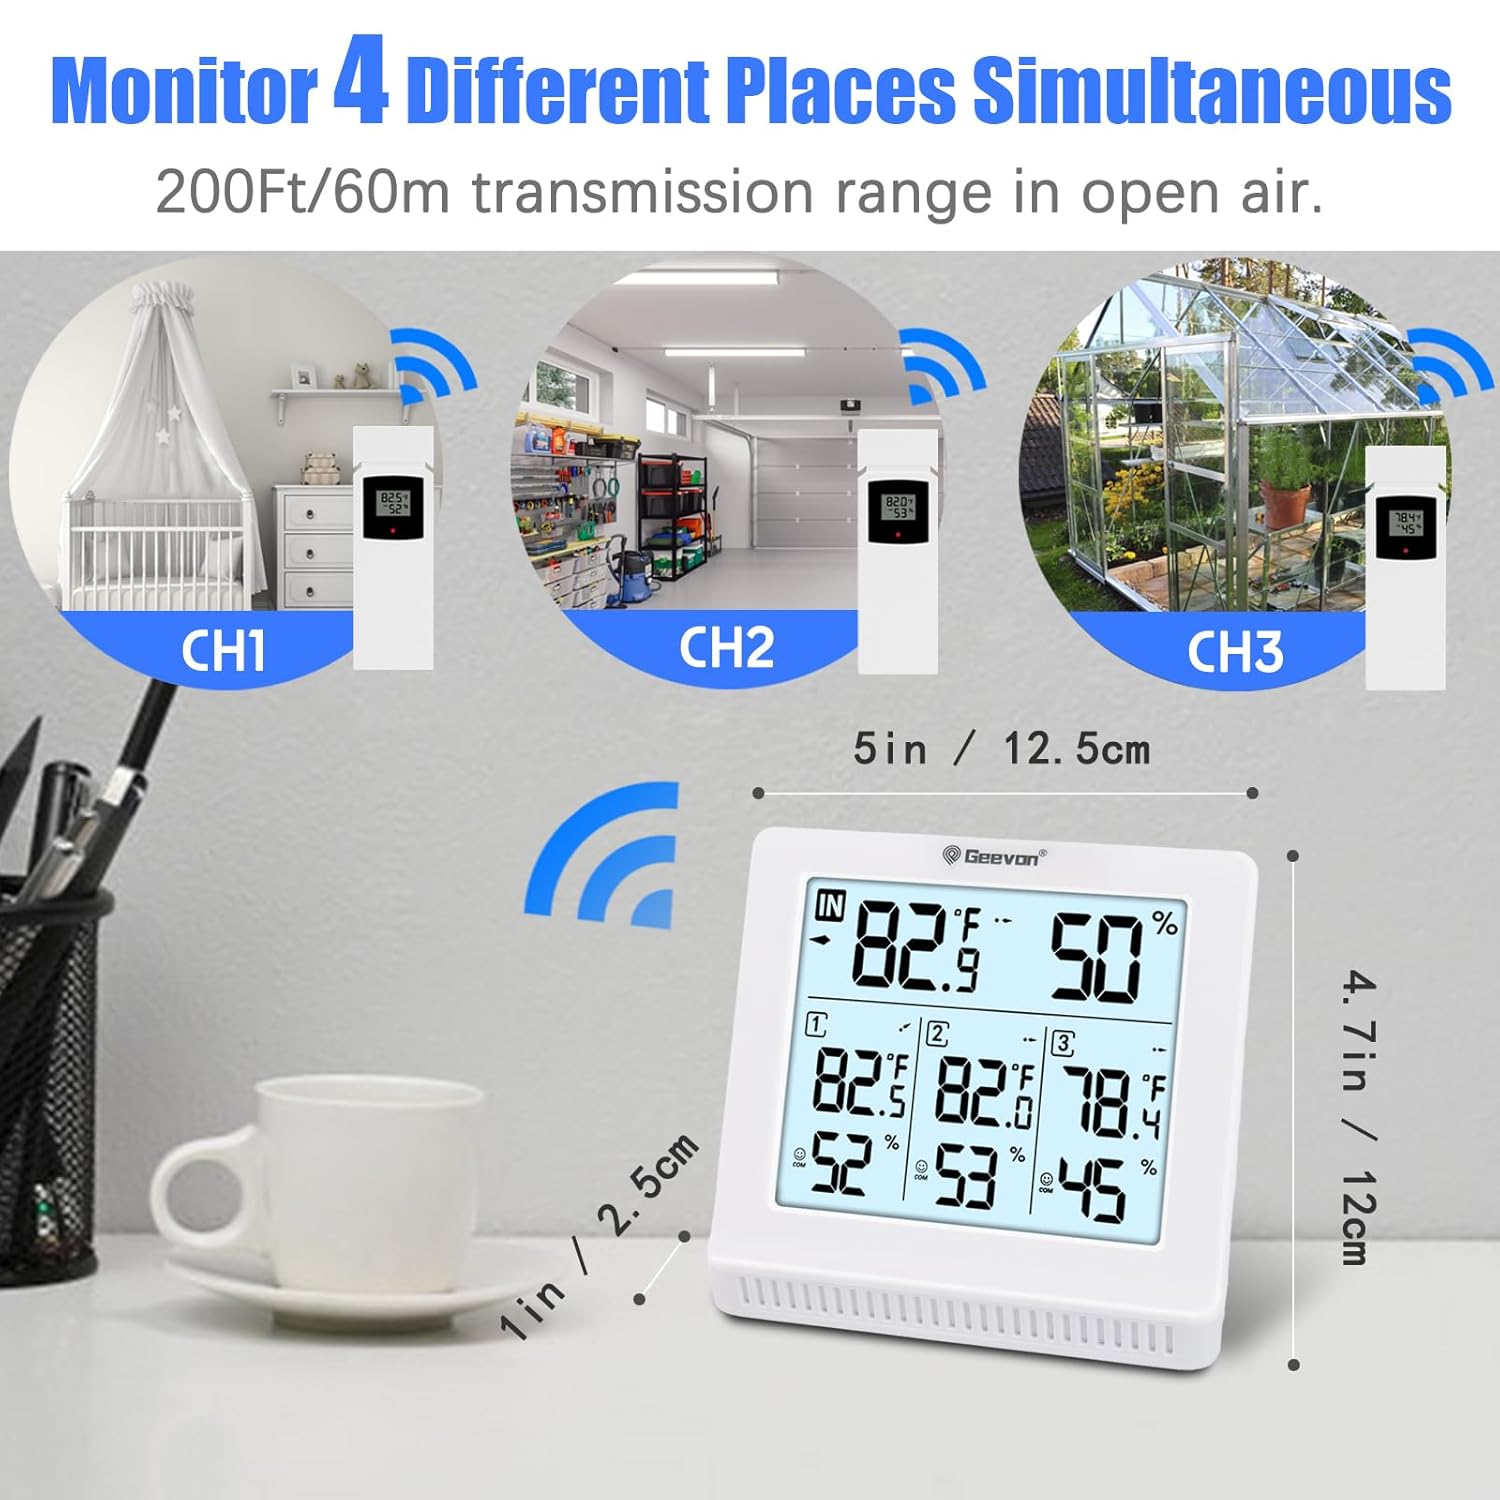
Figure 3.2: The system allows monitoring of up to four different places simultaneously (one indoor, three outdoor) within a 200ft/60m transmission range.
4. Operating Instructions
4.1 Display Readings
The main unit displays the following information:
- Indoor Temperature & Humidity: Shown prominently at the top of the display.
- Outdoor Sensor Readings: Temperature and humidity for each connected sensor (CH1, CH2, CH3) are displayed below the indoor readings.
- Trend Arrows: Small arrows next to temperature/humidity readings indicate if the value is rising (↑), falling (↓), or stable (→).
4.2 Max/Min Records
The thermometer records the maximum and minimum temperature and humidity values over a 24-hour period. These records update every 24 hours.
- Press the "MEM" button (or similar, refer to your specific model's buttons) to cycle through current, maximum (MAX), and minimum (MIN) readings for both indoor and outdoor channels.
- To clear the Max/Min records, press and hold the "MEM" button for a few seconds.
4.3 Temperature Unit Selection (°C/°F)
To switch between Celsius (°C) and Fahrenheit (°F), press the "MEM" button (or a dedicated °C/°F button if available) once while viewing current readings.
4.4 Comfort Indicator
The main unit features a comfort indicator, represented by face icons, to quickly assess the indoor environment:

Figure 4.1: Face Icon Comfort Indicator provides a quick visual cue for indoor conditions.
- DRY: Humidity < 40%
- COMFORT: 40% ≤ Humidity ≤ 70% AND 68°F ≤ Temperature ≤ 82.4°F
- WET: Humidity ≥ 70%
4.5 Temperature and Humidity Alerts
You can set audible alarms for high and low temperature and humidity values. When the measured value reaches the pre-set alarm point, the unit will sound an alert.
- Press the "ALERT" button (or similar) to enter alert setting mode.
- Use the "UP/DOWN" or "MEM" buttons to adjust the desired high and low alert values for temperature and humidity.
- Press the "ALERT" button again to confirm each setting and move to the next.
- Once all alerts are set, the alarm icon will appear on the display, indicating that the alert function is active.
4.6 Backlight Operation (Model 23190)
For Model 23190, if powered via USB, the backlight will remain continuously on. If operating on batteries only, the backlight may activate briefly when a button is pressed and then turn off to conserve power.
5. Maintenance
- Cleaning: Wipe the main unit and sensors clean with a soft, damp cloth. Do not use abrasive cleaners or solvents.
- Battery Replacement: Replace batteries in both the main unit and remote sensors when the low battery indicator appears on the display. Ensure correct polarity.
- Storage: If storing the device for an extended period, remove all batteries to prevent leakage and damage.
6. Troubleshooting
| Problem | Possible Cause | Solution |
|---|---|---|
| No display on main unit. | Batteries are dead or incorrectly installed. | Check battery polarity and replace with fresh batteries. |
| Outdoor sensor reading is not displayed or inaccurate. | Sensor out of range; interference; low sensor battery; incorrect channel selected. |
|
| Inconsistent readings. | Sensor exposed to direct sunlight, rain, or extreme temperature fluctuations. | Relocate outdoor sensors to a shaded, protected area. Ensure proper ventilation. |
| Multiple display units show the same sensor data. | All sensors transmit on channels 1, 2, or 3. If you have two main units, they will both pick up the same three sensor channels. | This is expected behavior. The system is designed to monitor 3 distinct locations, not 6 unique locations across two main units. |
7. Specifications
| Feature | Description |
|---|---|
| Model Names | 228646 & 23190 |
| Brand | Geevon |
| Display Type | Digital LCD |
| Connectivity Technology | Wireless (433 MHz), USB (for Model 23190 backlight) |
| Wireless Transmission Range | Up to 200 feet (60 meters) in open air |
| Power Source (Main Unit) | Battery Powered (specific type varies by model, typically AA) |
| Power Source (Sensors) | Battery Powered (specific type varies, typically AAA) |
| Special Features | Alarm, Max/Min Record, Comfort Indicator, Backlight (Model 23190) |
| Outer Material | Plastic |
| Product Care Instructions | Wipe Clean |
8. Warranty and Support
Geevon products are manufactured with high-quality standards. For any questions, technical support, or warranty inquiries, please contact Geevon customer service through the retailer where the product was purchased or visit the official Geevon website for contact information.
Please retain your purchase receipt as proof of purchase for warranty purposes.


