
1. Introduction
This manual provides essential information for the safe and effective operation, maintenance, and troubleshooting of your ASPERX AX2000 Jump Starter. Please read this manual thoroughly before using the device to ensure proper function and to prevent damage or injury.
2. Product Overview
The ASPERX AX2000 is a versatile portable jump starter designed to quickly start vehicles with low voltage or completely drained batteries. It also functions as a power bank and features an integrated LED flashlight.
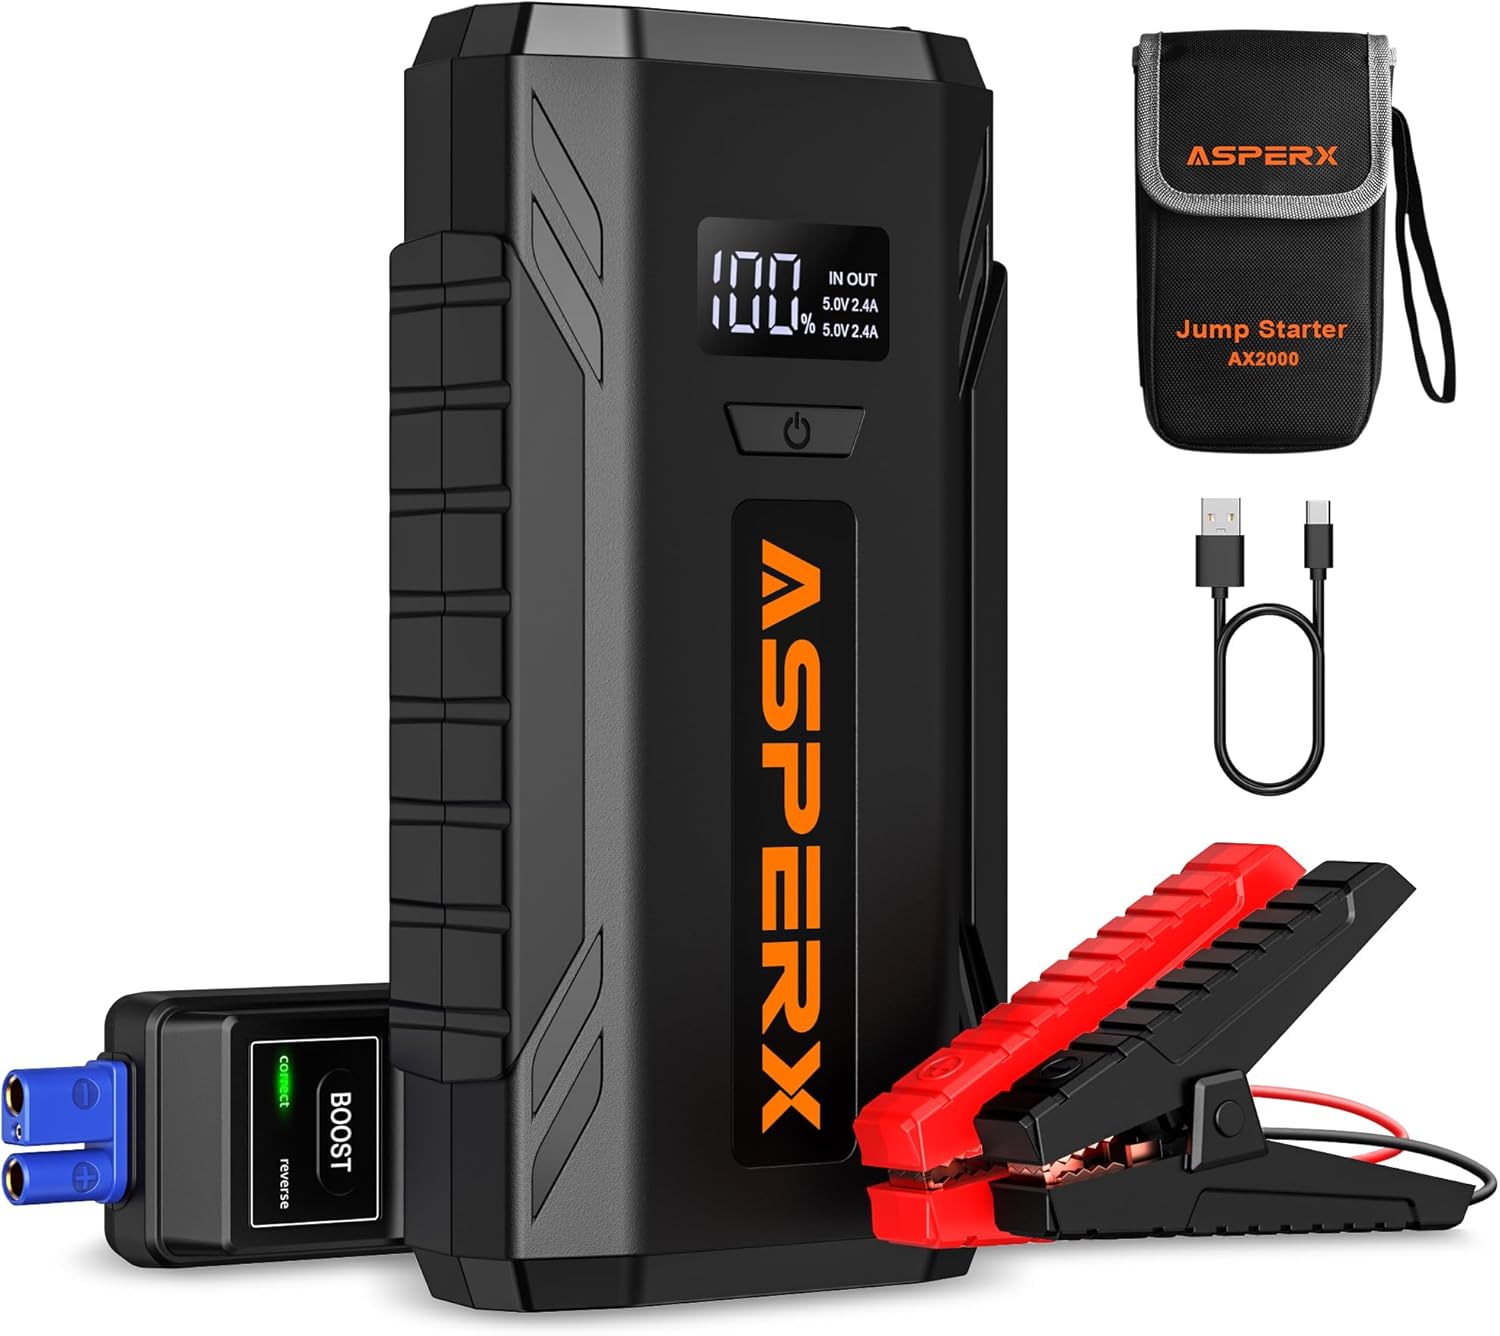
Figure 2.1: ASPERX AX2000 Jump Starter and included accessories.
Key Features:
- Powerful Jump Starting: 2000A peak current, capable of starting up to 8.0L gas or 6.5L diesel engines. Operates in extreme climates (-4°F to 140°F).
- 1.4-inch LCD Display: Provides clear indication of usage status and remaining power.
- 10 Upgrade Protections: Incorporates multiple safety protections, including zero voltage start function.
- 400 Lumens LED Flashlight: Features Flash Light, Strobe Light, and SOS Light modes for various situations.
- Dual USB Power Bank: Capable of charging various USB devices.

Figure 2.2: Labeled components of the ASPERX AX2000 Jump Starter.
3. Setup
Initial Charging:
Before first use, fully charge the jump starter. It is recommended to charge the device every 3-6 months to maintain optimal battery health, especially if not used regularly.
- Connect the provided charging cable to the USB-C input port on the jump starter.
- Connect the other end of the charging cable to a compatible USB wall charger (not included).
- The LCD display will show the charging progress. Charging typically takes 5-6 hours for a full charge.

Figure 3.1: Charging the ASPERX AX2000 Jump Starter.
4. Operating Instructions
4.1. How to Jump Start Your Vehicle
Follow these steps to safely jump start your vehicle:
- Step 1: Insert Jump Cable. Insert the blue end of the jump cable into the 12V Jump Cable Port on the jump starter.
- Step 2: Connect Clamps. Connect the red clamp to the positive (+) terminal of the vehicle's battery and the black clamp to the negative (-) terminal. Ensure a secure connection.
- Step 3: Start Vehicle. Once the clamps are securely connected and the indicator light on the jump cable is green, start your car engine within 30 seconds.
- Step 4: Remove Jump Cable. After the vehicle starts, immediately remove the jump cable from the jump starter, then disconnect the clamps from the vehicle battery.

Figure 4.1: Visual guide for jump starting a vehicle.
Video 4.1: Official demonstration of the ASPERX 2000A Jump Starter in action, showing the connection process and successful engine start.
4.2. Charging Other Devices (Power Bank Function)
The AX2000 can also charge your electronic devices via its USB output ports.
- Connect your device's USB charging cable to the USB 5V/2.4A Output port on the jump starter.
- The jump starter will automatically begin charging your device. The LCD display will show the output status.

Figure 4.2: Using the AX2000 as a dual USB power bank.

Figure 4.3: The AX2000 can charge a variety of USB-powered devices.
4.3. LED Flashlight Operation
The integrated LED flashlight offers three modes for different lighting needs.
- To turn on/off: Press and hold the flashlight button.
- To cycle modes: Once on, short press the flashlight button to switch between Flash Light, Strobe Light, and SOS Light modes.

Figure 4.4: Using the AX2000's LED flashlight function.
5. Maintenance
Proper maintenance ensures the longevity and performance of your jump starter.
- Regular Charging: To prolong battery lifespan, charge the unit fully every 3-6 months, even if not in use. The built-in smart chip extends battery lifespan.
- Storage: Store the jump starter in a cool, dry place away from direct sunlight and extreme temperatures.
- Cleaning: Use a soft, dry cloth to clean the device. Do not use harsh chemicals or abrasive materials.

Figure 5.1: The AX2000 features a 24-month standby time due to its smart chip.
6. Troubleshooting
If you encounter issues with your ASPERX AX2000 Jump Starter, refer to the following common problems and solutions:
| Problem | Possible Cause | Solution |
|---|---|---|
| Unit does not turn on. | Low battery charge. | Charge the jump starter fully. |
| Vehicle does not start. | Incorrect clamp connection, battery too low, or vehicle issue. | Ensure clamps are connected correctly (red to positive, black to negative). Press the "BOOST" button if the vehicle battery is below 0V. Consult a mechanic if the issue persists. |
| LCD display is blank or dim. | Low battery or extreme temperature. | Charge the unit. Ensure the unit is within its operating temperature range (-4°F to 140°F). |
| Device not charging from USB output. | Cable issue or device incompatibility. | Try a different USB cable. Ensure your device is compatible with 5V/2.4A output. |
7. Specifications
| Specification | Value |
|---|---|
| Brand | AsperX |
| Model Number | AX2000 |
| Peak Output Current | 2000 Amps |
| Engine Compatibility | Up to 8.0L Gas / 6.5L Diesel |
| Product Dimensions | 1.55"D x 3.25"W x 6.49"H |
| Item Weight | 14.6 ounces (415 Grams) |
| Battery Type | Lithium Polymer (included) |
| LED Flashlight Lumens | 400 Lumens |
| USB Output | 5V/2.4A |
| Operating Temperature | -4°F to 140°F |
8. Warranty and Support
The ASPERX AX2000 Jump Starter comes with a 2-year product quality assurance. For any inquiries or support needs, please contact customer service. 24-hour customer service is available to assist you.
For further assistance, please refer to the contact information provided with your purchase or visit the official AsperX website.