
1. Product Overview
This manual provides essential information for the safe and effective use of your Makita TD173 Impact Driver. Please read this manual thoroughly before operation and keep it for future reference. The Makita TD173 is a high-performance cordless impact driver designed for various fastening applications, offering powerful torque, compact design, and enhanced user-friendly features.
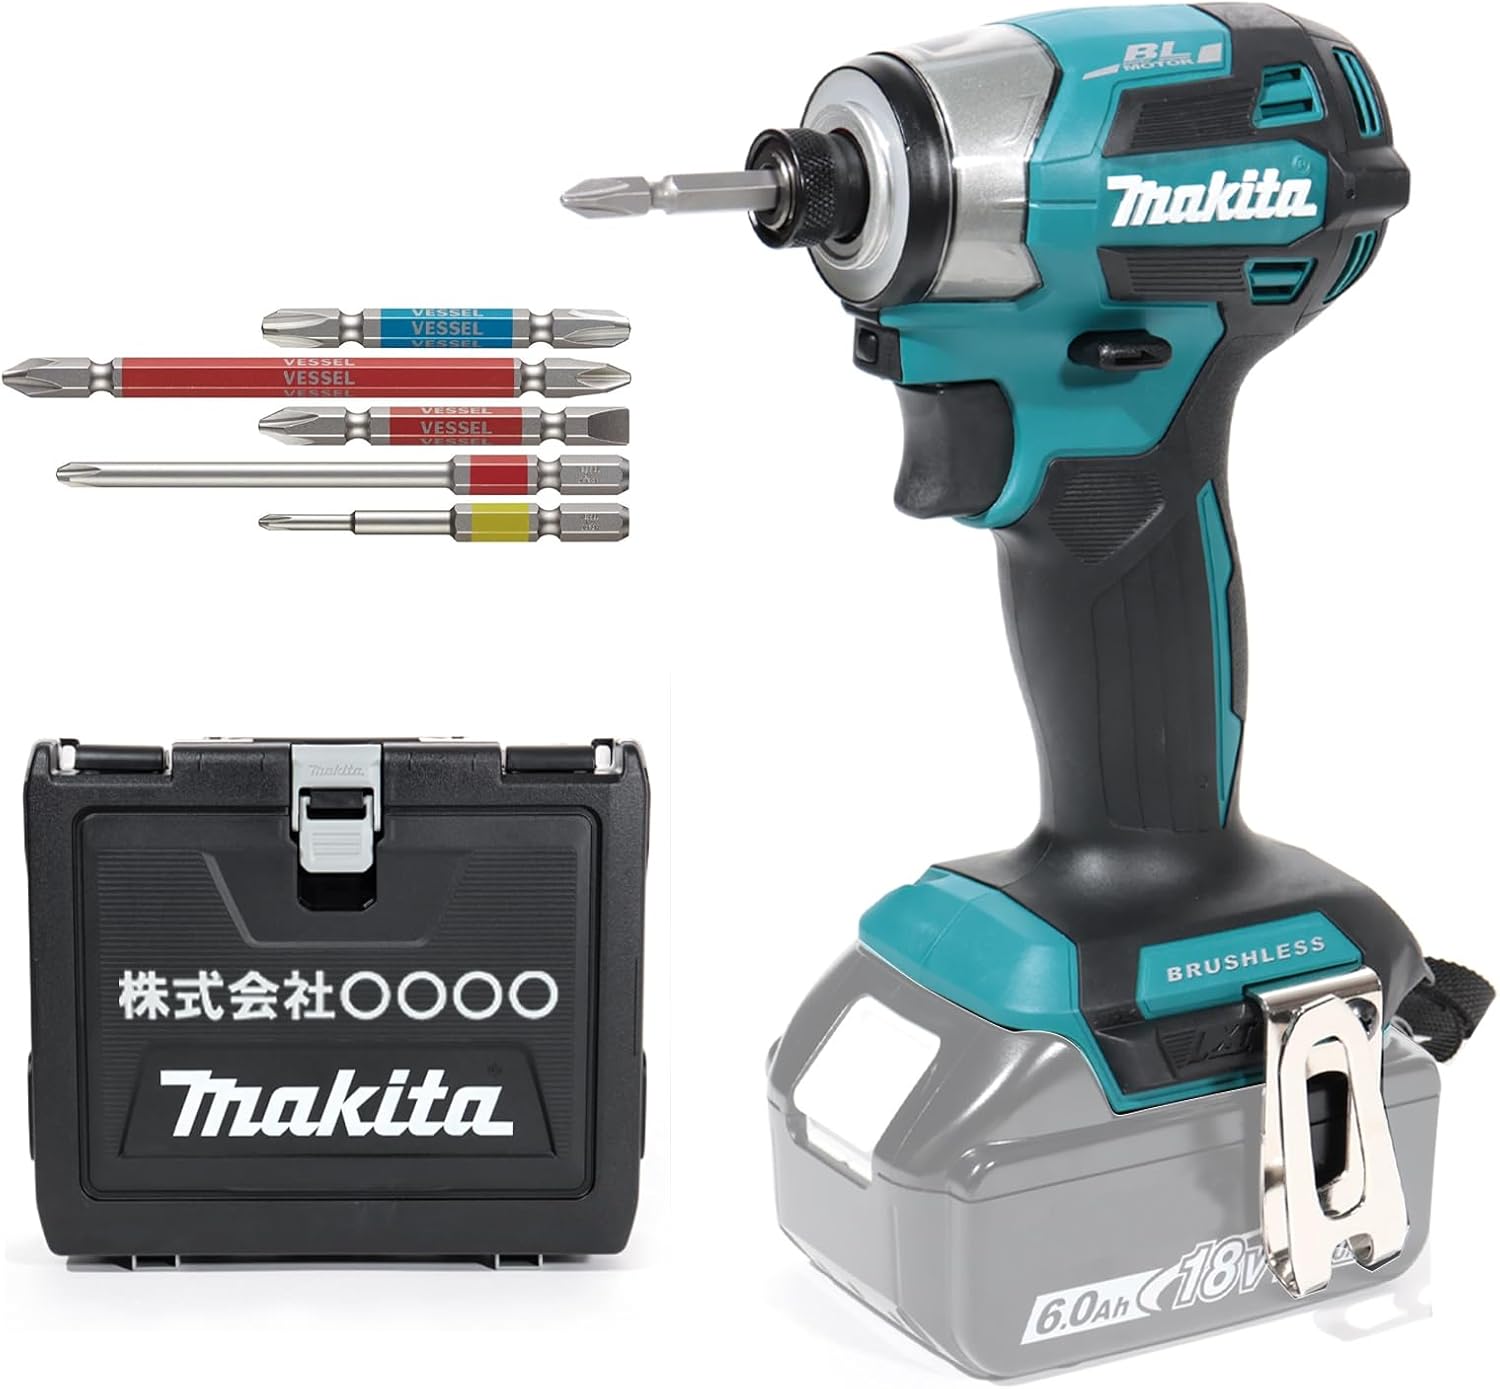
Image 1.1: The Makita TD173 Impact Driver, shown with its dedicated storage case and a set of VESSEL bits. The driver features a teal and black body with a brushless motor.
2. Package Contents
Verify that all items listed below are included in your package. If any items are missing or damaged, please contact your retailer.
- Makita TD173 Impact Driver Body (Battery and charger sold separately)
- Dedicated TD173 Storage Case
- VESSEL Bit Set (5 pieces)

Image 2.1: The included VESSEL 5-piece bit set, featuring various sizes and lengths for diverse fastening tasks. These bits are designed for high hardness and durability.
3. Technical Specifications
| Feature | Specification |
|---|---|
| Model | TD173 |
| Type | Impact Driver |
| Maximum Fastening Torque | 180 N·m |
| Compatible Voltage | 18V |
| Impact Modes | 4 levels |
| Impacts per Minute (IPM) | Fastest: 0-3800, Strong: 0-3600, Medium: 0-2600, Weak: 0-1100 |
| Revolutions per Minute (RPM) | Fastest: 0-3600, Strong: 0-3200, Medium: 0-2100, Weak: 0-1100 |
| Dimensions (L×W×H) | 111 × 81 × 234 mm |
| Weight (with BL1860B battery) | 1.5 kg |
| Case Protection | IP65 Dustproof/Waterproof (excluding small item compartment) |
4. Key Features
- All-Around Ring-Emitting LED Light: The TD173 features an innovative LED light that significantly improves visibility during work. It is approximately 2.5 times brighter than conventional 18V models and offers 3 brightness levels (Strong/Medium/Weak).

Image 4.1: The TD173's powerful all-around LED light illuminates the work area, enhancing visibility. The compact 111mm head length allows access to tight spaces.
- Work Light Mode: The tool can also be used as a simple work light in 'Light Mode', providing illumination for approximately 1 hour.
- Enhanced Ergonomics and Compactness: With an overall length of 111mm and a weight of 1.5kg (with battery), the TD173 is designed for ease of use and maneuverability, while still delivering a high maximum fastening torque of 180 N·m.
- New Trigger Switch: The intuitive trigger allows for precise speed control from low to high ranges.
- Optimal Balance and Placement: The grip is positioned close to the axis, and the hand holding the tool is near the head, making it easier to apply pressure along the axis and reducing cam-out.
- Rear Battery Offset: The battery is offset to the rear, optimizing the center of gravity for balanced fastening in all directions and reducing interference with obstacles.

Image 4.2: Illustration showing the battery offset for improved balance (top) and the minimal tilt angle of approximately 10.5 degrees for edge fastening (bottom).
- Easy-to-Use Control Panel: The control panel is conveniently located at the rear, allowing users to check the mode and battery capacity while holding the tool.
- Minimal Bit Runout: Featuring double ball bearings and a new bit sleeve design with ribs on the edge, the TD173 minimizes bit runout and reduces the likelihood of scratching materials.
- Industry's Smallest Edge Fastening Tilt: The tool boasts an approximate tilt angle of 10.5° for edge fastening, reducing cam-out and making work near walls more comfortable.
- 'Easy 4 Modes': The TD173 offers four optimized modes to assist with various tasks, allowing users to select the most suitable mode for their specific application.
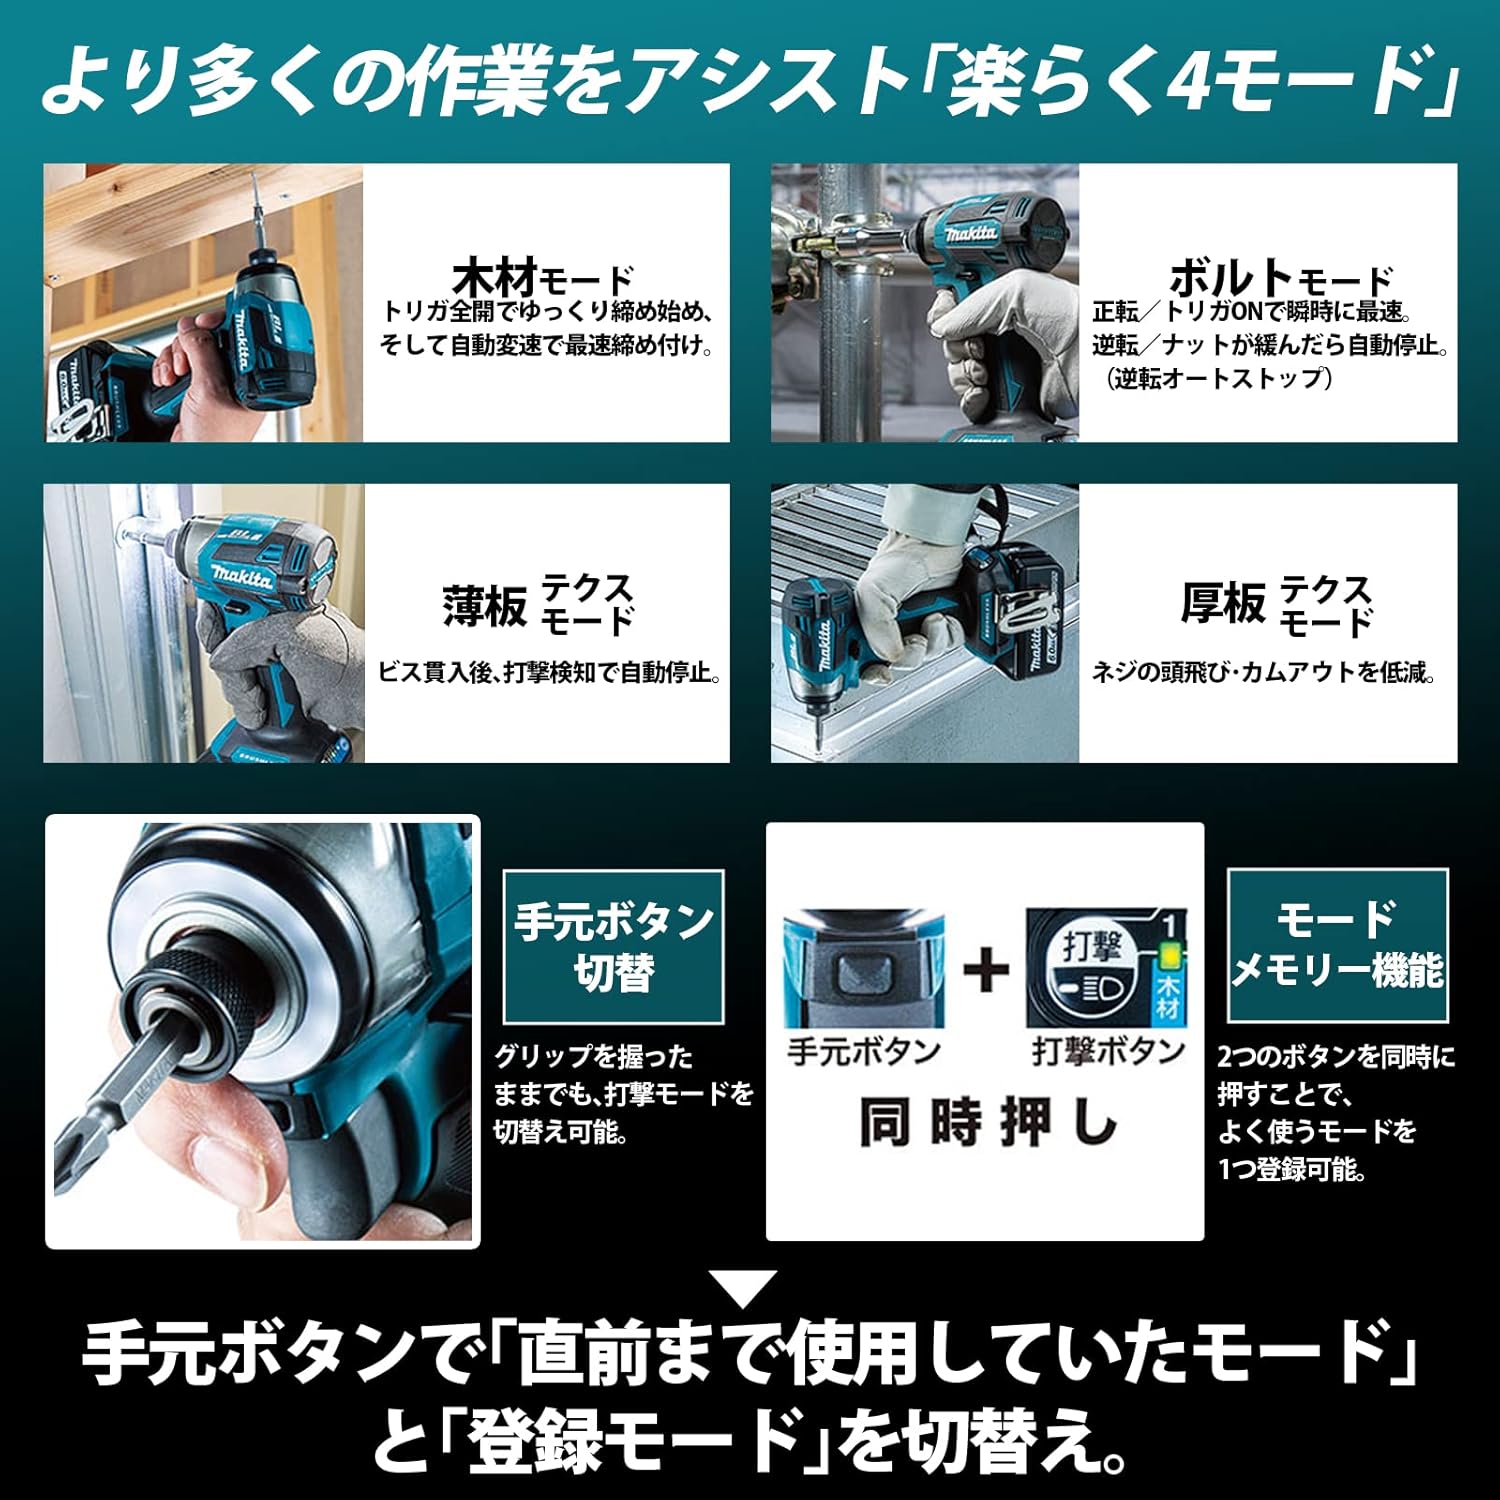
Image 4.3: Visual representation of the 'Easy 4 Modes' (Wood, Bolt, Thin Plate, Thick Plate) and the rear control panel for mode selection and battery check.
5. Setup
5.1 Battery Installation (Battery sold separately)
- Ensure the tool is switched off and the trigger is locked.
- Align the battery pack with the battery housing on the tool.
- Slide the battery into the housing until it clicks into place. Ensure it is securely latched.
- To remove, press the release button on the battery and slide it out.
5.2 Bit Installation
- Pull the bit sleeve forward.
- Insert the desired 1/4" hex shank bit fully into the chuck.
- Release the bit sleeve. The bit should be securely held. Pull on the bit to ensure it is locked.
- To remove, pull the bit sleeve forward and pull the bit out.
6. Operating Instructions
6.1 Powering On/Off
Press the trigger switch to turn the tool on. The speed will vary depending on the pressure applied to the trigger. Release the trigger to turn the tool off.
6.2 Changing Rotation Direction
The forward/reverse switch is located above the trigger. Push it to the left for forward rotation (tightening) and to the right for reverse rotation (loosening).
6.3 Selecting Operating Modes ('Easy 4 Modes')
The TD173 offers four specialized modes for optimal performance. Use the mode selection button on the rear control panel to cycle through them:
- Wood Mode: Starts slowly and gradually increases speed for controlled fastening in wood.
- Bolt Mode: Optimized for tightening and loosening bolts, with automatic stop features.
- Thin Plate Mode: Designed for fastening into thin materials, with automatic stop upon impact detection.
- Thick Plate Mode: Reduces screw head stripping and cam-out when fastening into thick materials.
You can also register a frequently used mode for quick access by pressing two buttons simultaneously on the control panel.
6.4 LED Light Operation
The LED light automatically illuminates when the trigger is pressed. You can adjust the brightness (Strong/Medium/Weak) or activate the dedicated 'Light Mode' for continuous illumination (approx. 1 hour) via the control panel.
7. Maintenance
Regular maintenance ensures the longevity and optimal performance of your impact driver.
7.1 Cleaning
- Always disconnect the battery before cleaning.
- Wipe the tool body with a soft, damp cloth. Do not use harsh chemicals or abrasive cleaners.
- Keep the ventilation openings clear of dust and debris to prevent overheating. Use compressed air if necessary.
- Clean the chuck regularly to ensure smooth bit insertion and removal.
7.2 Storage
- Store the tool and battery in a cool, dry place, away from direct sunlight and moisture.
- Use the dedicated storage case to protect the tool from dust and physical damage. The IP65 rated case is designed to be dustproof and waterproof, though it does not guarantee against malfunction in extreme conditions.
- Store batteries separately from the tool and ensure they are partially charged for long-term storage.
8. Troubleshooting
If you encounter issues with your Makita TD173, refer to the table below for common problems and solutions.
| Problem | Possible Cause | Solution |
|---|---|---|
| Tool does not start | Battery not charged or improperly installed. | Ensure battery is fully charged and securely inserted. |
| Reduced power or speed | Low battery charge. Overload protection activated. | Recharge battery. Reduce load on the tool. |
| Bit not holding securely | Chuck is dirty or damaged. Bit not fully inserted. | Clean chuck. Ensure bit is fully inserted and sleeve is released. |
| Tool overheating | Blocked ventilation. Continuous heavy use. | Clear ventilation openings. Allow tool to cool down. |
If the problem persists after trying these solutions, please contact customer support.
9. Warranty and Support
This product is covered by the manufacturer's standard warranty. Please refer to the warranty card included with your purchase for specific terms and conditions, including warranty period and coverage details. Keep your proof of purchase for warranty claims.
For technical assistance, spare parts, or service, please contact your authorized Makita service center or the retailer from whom you purchased the product. You can find contact information on the manufacturer's official website or through your local distributor.


