
Introduction
The KODAK Mini Shot 3 ERA is a versatile 2-in-1 device that functions as both an instant camera and a portable photo printer. Utilizing 4PASS technology, it produces high-quality, laminated 3x3 inch prints that are resistant to fingerprints and water. This manual provides essential information for setting up, operating, and maintaining your device.
What's in the Box
Upon unboxing your KODAK Mini Shot 3 ERA, please ensure all the following items are present:
- KODAK Mini Shot 3 ERA Camera (Model MS300)
- Initial Cartridge (8 Sheets of 3x3 inch photo paper)
- Additional 30 Sheets of 3x3 inch photo paper
- User Guide
- USB C-Type Charging Cable
- Strap

Image: KODAK Mini Shot 3 ERA Camera and its accessories, including photo paper, user guide, and USB-C cable.
Setup
1. Charging the Device
Before initial use, fully charge your KODAK Mini Shot 3 ERA using the provided USB C-Type cable. Connect the cable to the charging port on the device and a compatible USB power source. The charging indicator will show the charging status.

Image: Close-up of the KODAK Mini Shot 3 ERA showing the USB-C charging port.
2. Loading the Cartridge
The KODAK Mini Shot 3 ERA uses an all-in-one cartridge system that includes both the photo paper and ink ribbon. To load a new cartridge:
- Open the cartridge compartment cover on the side of the camera.
- Insert the new cartridge into the compartment, ensuring it clicks securely into place.
- Close the compartment cover.
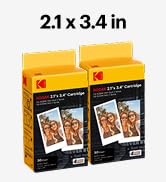
Image: A KODAK 3x3 inch photo cartridge, ready for insertion.

Image: Step-by-step visual guide on inserting the photo paper cartridge into the KODAK Mini Shot 3 ERA.
Operating the Camera
1. Taking Photos
To take a photo, power on the camera using the power button. Frame your shot using the LCD screen. The camera features Auto Focus and Face Detection to ensure clear and sharp images. Press the shutter button to capture the image.

Image: Visual representation of the camera's Auto Focus and Face Detection capabilities, highlighting how subjects are brought into sharp focus.
2. On-Camera Editing and Settings
After taking a photo, you can preview it on the 1.77-inch LCD screen. Use the navigation buttons to access various settings and editing options:
- Borders: Choose between borderless prints or prints with a classic white border.
- Filters: Apply different visual effects such as Monochrome, Light Blue, Retro, Sepia, or keep it Clear/Normal.
- Timer & Flash: Adjust the self-timer settings or control the flash (On/Off/Auto).
- Language: Select your preferred language for the camera interface.

Image: The camera's LCD screen showing options for borders, filters, timer/flash, and language settings.
Operating the Printer
1. Printing from the Camera
After capturing a photo and making any desired adjustments, you will be presented with options to either Print or Cancel the image. Selecting 'Print' will initiate the printing process directly from the camera. You can also choose to print multiple copies of the same image.

Image: The camera's LCD screen displaying the options to 'Cancel' or 'Print' a captured photo.
2. Printing from a Mobile Device (Bluetooth)
The KODAK Mini Shot 3 ERA can also function as a portable printer for your mobile device. Connect your camera to your smartphone or tablet via Bluetooth. Once connected, you can select photos from your device's gallery and print them using the dedicated mobile application.

Image: A smartphone connected via Bluetooth to the KODAK Mini Shot 3 ERA, demonstrating the ability to print photos directly from the phone.
Mobile Application
Enhance your printing experience by downloading the official KODAK Photo Printer app, compatible with Apple iPhone, iPad, and Android devices. The app allows you to:
- Select and print photos directly from your mobile device's gallery.
- Apply various filters and frames to your photos before printing.
- Create collages and customize your prints.

Image: The KODAK Photo Printer mobile application interface, showing photo selection and editing options.
Download the app:
Maintenance and Care
1. Print Quality
The KODAK Mini Shot 3 ERA utilizes 4PASS technology to produce high-quality prints with 34-bit / 16.7 million colors, enhanced saturation, and improved color display. The prints are laminated, making them resistant to fingerprints and water, ensuring your memories last.

Image: Diagram illustrating the multi-layered printing process of 4PASS technology for premium photo quality.

Image: A printed photo with water droplets, showcasing the laminated, water-resistant feature of KODAK 4PASS prints.
2. Environmental Considerations
KODAK is committed to sustainability. The cartridges are made of 100% recycled plastic, and the product packaging uses recycled paper. The use of a universal USB-C cable also helps reduce electrical waste.

Image: Recycled plastic pellets, representing the 100% recycled plastic used in KODAK cartridges.
Video Demonstrations
Introducing the KODAK Mini Shot 3 ERA
Video: An introductory overview of the KODAK Mini Shot 3 ERA Instant Camera, highlighting its key features and design.
How to Use Your KODAK Mini Shot 3 ERA Camera
Video: A demonstration of the basic functions and usage of the KODAK Mini Shot 3 ERA camera, including taking photos and navigating menus.
Instant Printing and App Connectivity
Video: Demonstrates the instant printing capability of the camera and how to print photos using the mobile application.
Specifications
| Brand | KODAK |
| Model Name | Mini 2 ERA 4PASS (Note: Product title refers to Mini Shot 3 ERA, model name in specs is Mini 2 ERA 4PASS. MS300 is the item model number.) |
| Item Model Number | MS300 |
| Special Feature | Compact |
| Film Format Type | Instant |
| Film Color | Colored |
| Compatible Devices | Camera, Mobile Devices (via Bluetooth) |
| Max Shutter Speed | 1/2000s seconds |
| Batteries | 1 Lithium Ion battery required (included) |
| Item Weight | 2.01 pounds (912 Grams) |
| Package Dimensions | 12.09 x 9.02 x 2.64 inches |
| Manufacturer | Prinics Co.Ltd |
| Date First Available | September 12, 2023 |
Troubleshooting
If you encounter any issues with your KODAK Mini Shot 3 ERA, please refer to the following common solutions:
- Device not powering on: Ensure the battery is fully charged. Connect the camera to a power source using the USB-C cable and try again.
- Poor print quality: Check if the photo cartridge is correctly installed. Ensure the photo paper is not expired or damaged. Clean the print head if necessary (refer to the detailed user guide for instructions).
- No prints coming out: Verify that there is a cartridge loaded and that it contains sufficient paper. Ensure the device is not displaying an error message.
- Bluetooth connectivity issues: Make sure Bluetooth is enabled on both your mobile device and the camera. Ensure the camera is within range of your mobile device. Try restarting both devices.
- App not connecting: Confirm the KODAK Photo Printer app is updated to the latest version. Restart the app and try reconnecting.
Warranty and Support
For detailed warranty information and customer support, please refer to the official KODAK Photo Printer website or contact their customer service. Keep your proof of purchase for any warranty claims.