1. Introduction
This manual provides essential information for the safe and effective use of your AODSK UPB-85 Digital Piano and UAP-10 Piano Bench. Please read this manual thoroughly before assembly and operation to ensure optimal performance and longevity of your instruments. Keep this manual for future reference.

Figure 1.1: The AODSK UPB-85 Digital Piano and UAP-10 Piano Bench bundle. This image displays the complete product set, including the 88-key digital piano with its integrated stand and three pedals, alongside the matching padded piano bench.
2. Key Features
2.1 Digital Piano (Model: UPB-85)
- 88-Key Graded Hammer Action: Replicates the feel of an acoustic piano with heavier touch in the bass range and lighter touch in the treble range.
- Adjustable Touch Response: Allows customization of key sensitivity to suit individual playing styles.
- Rich Sound Engine: Utilizes a pure sound source for realistic piano tones, featuring 32 demo songs and 128-note polyphony.
- Versatile Functions: Includes volume control, multiple tone selections, recording, playback, duet mode, and teaching functionalities.
- Connectivity: Supports MP3 input and playback, features built-in speakers, and offers connectivity options for external speakers or headphones (3.5mm Jack). USB-MIDI for connecting to tablets/phones.
- Integrated Design: Features a keyboard cover that protects the keys and can also serve as a desk surface.
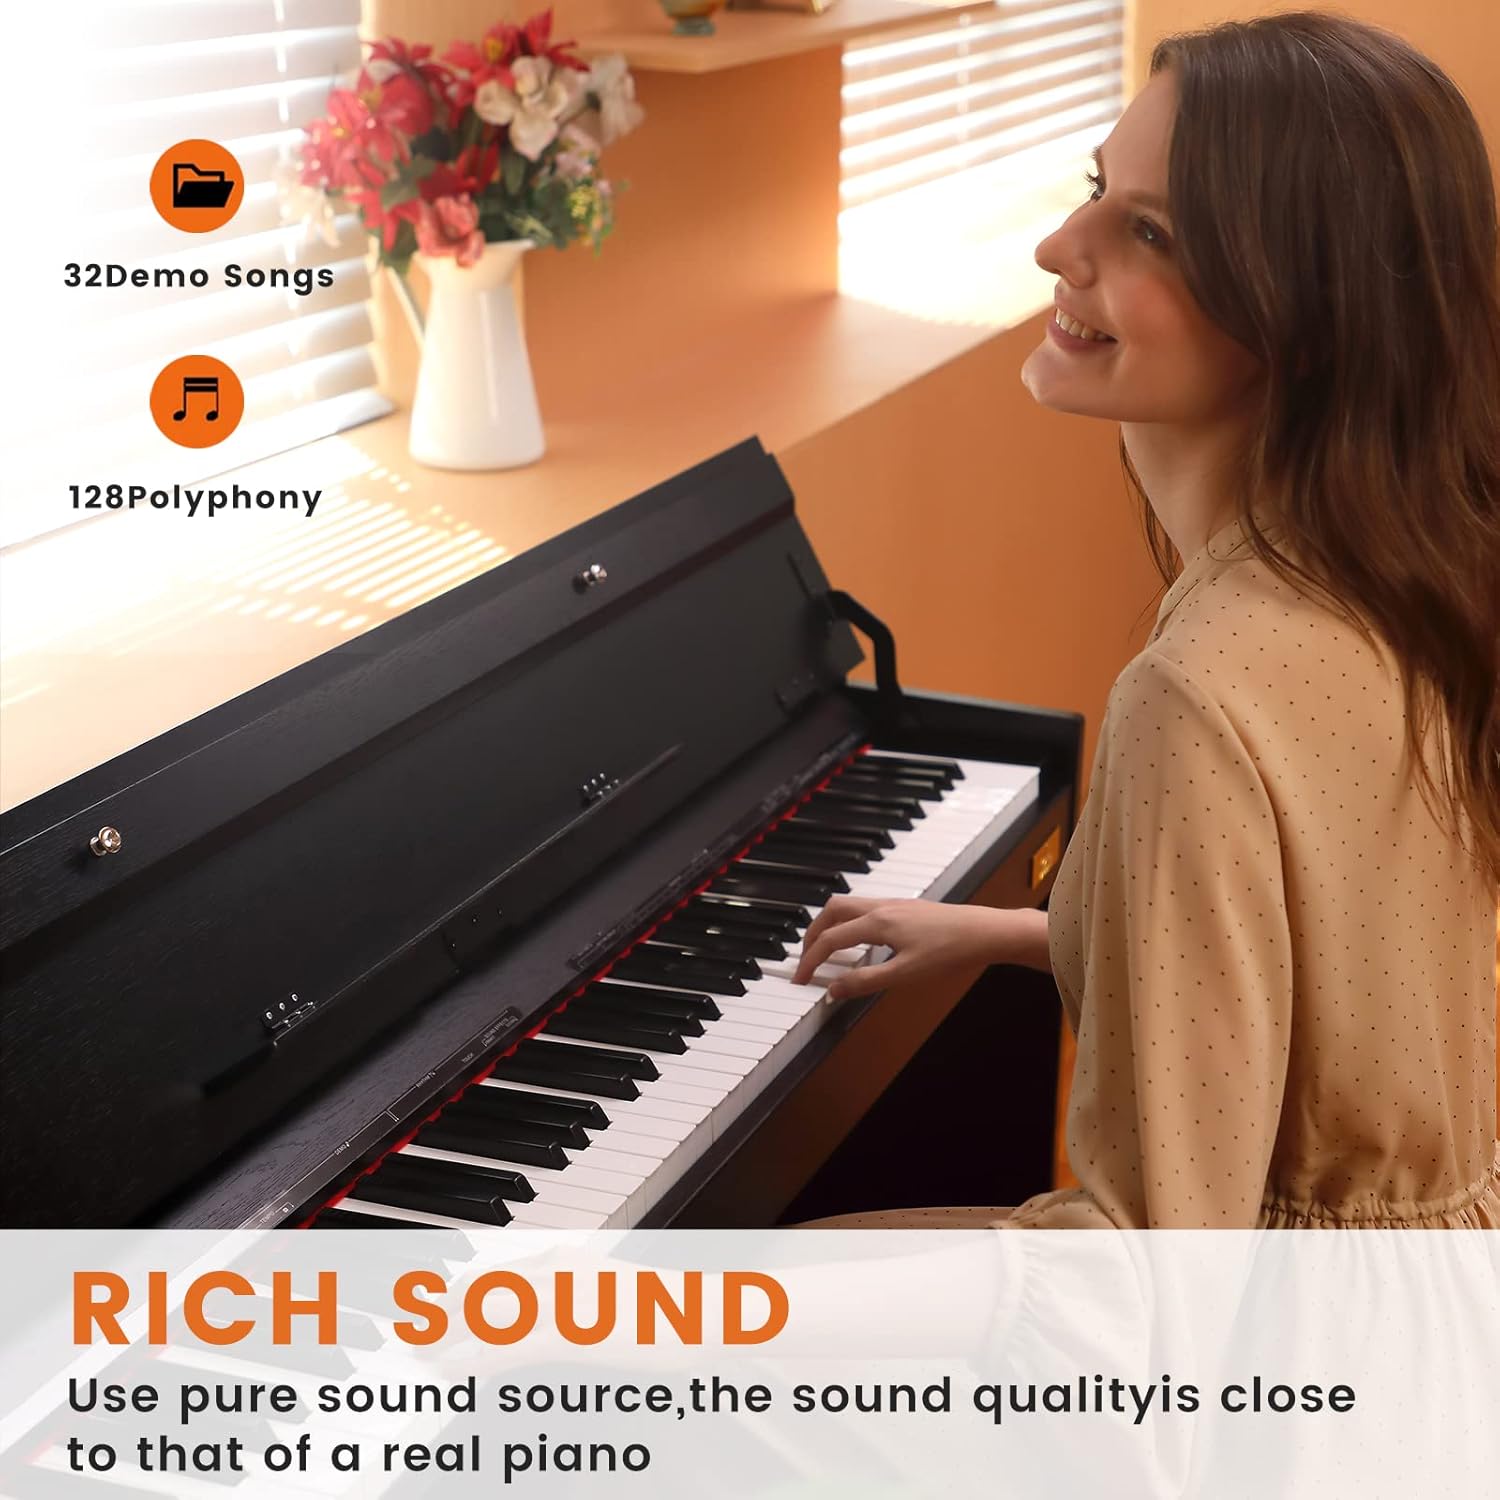
Figure 2.1: An image highlighting the rich sound capabilities of the digital piano, indicating 32 demo songs and 128-note polyphony. A person is shown playing the piano.

Figure 2.2: This image illustrates the fully-weighted hammer-action keyboard, showing weights on keys to demonstrate the graded touch response from low to high keys. It emphasizes adjustable touch response, full-sized weighted keys, and quality key material.
2.2 Piano Bench (Model: UAP-10)
- Durable Construction: Features a black wooden frame for stability and durability.
- Comfortable Seating: Padded seat with high-quality PU leather for ventilation and comfort during extended playing sessions.
- Design Details: Includes soft and plump seat cushion, resin foot pads for floor protection, and high-quality metal locks for secure assembly.

Figure 2.3: A close-up view of the piano bench's cushion, highlighting the high-quality PU leather for ventilation and comfort.
3. Setup and Assembly
3.1 Unpacking
Carefully remove all components from the packaging. Verify that all parts listed in the packing list are present and undamaged. Retain packaging materials for potential future transport or service.
3.2 Digital Piano Assembly
- Attach the side panels to the main keyboard unit using the provided hardware.
- Secure the pedal unit to the assembled stand.
- Ensure all connections are firm and stable.
3.3 Piano Bench Assembly
- Attach the four legs to the bench seat using the provided screws and metal locks.
- Ensure all legs are securely fastened and the bench is stable.
3.4 Connecting Power and Accessories
Connect the AC adapter to the DC 9-15V power socket on the piano's rear panel, then plug it into a standard electrical outlet. Connect the sustain pedal cable to the designated SUSTAIN PEDAL input. For private practice, plug headphones into the EARPHONE jack. For external amplification, use the AUDIO IN/OUT jacks.

Figure 3.1: An illustration of the multi-function interface on the digital piano, detailing connection points for USB-MIDI, Audio Input/Output, Earphone, Sustain Pedal, and DC Power Socket.
4. Operating Instructions
4.1 Power On/Off
Press the power button to turn the digital piano on or off. Allow a few seconds for the system to initialize.
4.2 Volume Adjustment
Use the dedicated volume control knob or buttons to adjust the overall output level of the piano. Adjust to a comfortable listening level.
4.3 Tone Selection
Refer to the control panel for buttons or menus to select different instrument voices (e.g., Grand Piano, Electric Piano, Strings, Organ). Each tone offers a unique sound characteristic.
4.4 Using Demo Songs
The piano includes 32 built-in demo songs. Press the 'Demo' button and use navigation controls to select and play a demonstration piece.
4.5 Recording and Playback
To record your performance, press the 'Record' button. Play your piece, then press 'Stop'. To listen, press 'Playback'. Consult the full manual for advanced recording features.
4.6 Duet Mode and Teaching Functions
Activate Duet Mode to split the keyboard into two identical pitch ranges, allowing two players to play simultaneously in the same octave. Utilize teaching functions for guided practice and learning exercises.
4.7 External Device Connectivity
- USB-MIDI: Connect to a computer, tablet, or smartphone for MIDI data transfer, allowing use with music software.
- Audio Input (3.5mm Jack): Connect an external audio player (e.g., MP3 player, phone) to play along with your favorite music through the piano's speakers.
- Audio Output (3.5mm Jack): Connect to external amplifiers, mixers, or recording devices.
5. Specifications
5.1 Digital Piano (Model: UPB-85)
| Feature | Detail |
|---|---|
| Number of Keys | 88 |
| Key Action | Graded Hammer Action, Weighted |
| Polyphony | 128-note |
| Connectivity | USB-MIDI, Audio In (3.5mm), Audio Out (3.5mm), Earphone (3.5mm), Sustain Pedal |
| Power Source | AC Adapter |
| Dimensions (L x W x H) | 52.36 x 29.92 x 12 inches |
| Color | Black |
| Age Range | Adult |

Figure 5.1: A diagram illustrating the dimensions of the AODSK UPB-85 Digital Piano, showing its length, width, and height.
5.2 Piano Bench (Model: UAP-10)
| Feature | Detail |
|---|---|
| Material Type | PU Leather (seat), Wood (frame) |
| Color | Black |
| Dimensions (L x W x H) | 17.72 x 11.61 x 19.49 inches |
| Special Feature | Padded, Adjustable (implied by 'Adjustable' in specs, though bench is fixed height) |

Figure 5.2: A diagram illustrating the dimensions of the AODSK UAP-10 Piano Bench, showing its length, width, and height.
6. Maintenance
6.1 Cleaning
- Digital Piano: Use a soft, dry cloth to wipe down the keys and cabinet. For stubborn dirt, slightly dampen the cloth with water and mild soap, then wipe dry immediately. Avoid abrasive cleaners or solvents.
- Piano Bench: Wipe the wooden frame with a soft, dry cloth. For the PU leather seat, use a damp cloth with mild soap if necessary, then dry thoroughly.
6.2 Protection and Storage
- Keep the digital piano away from direct sunlight, heat sources, and excessive humidity to prevent damage.
- Always use the integrated keyboard cover when the piano is not in use to protect the keys from dust and spills.
- When moving the piano, ensure it is powered off and disconnected from all cables.
7. Troubleshooting
| Problem | Possible Cause | Solution |
|---|---|---|
| No sound from speakers/headphones | Volume too low; headphones connected; incorrect tone selected; power issue. | Increase volume; disconnect headphones; select a valid tone; check power connection. |
| Keys not responding | Piano not powered on; specific function active (e.g., silent mode). | Ensure piano is on; check active functions and settings. |
| Distorted sound | Volume too high; faulty cable; external interference. | Reduce volume; check/replace cables; move away from electronic devices. |
| Pedal not working | Pedal cable not connected properly. | Ensure pedal cable is fully inserted into the correct jack. |
8. Warranty and Support
For warranty information, technical support, or service inquiries, please contact AODSK customer service through the retailer where the product was purchased or visit the official AODSK website. Please have your model number (UPB-85 for piano, UAP-10 for bench) and purchase date available when contacting support.


