
1. Introduction
The Radtel RT-470 is a versatile 10-watt tri-band handheld radio designed for various communication needs, including amateur radio, NOAA weather reception, and FM radio. It features a 1.77-inch TFT color screen, 256 memory channels, and advanced functions like One-Key Frequency Match, DTMF, VOX, and more. This manual provides detailed instructions for setting up, operating, and maintaining your RT-470 radio.
2. What's in the Box
- Radtel RT-470 10W Radio (x1)
- Speaker Microphone (x1)
- Original Dual Band Antenna (x1)
- Air Band Antenna (x1)
- 2800mAh Rechargeable Battery (x1)
- Programming Cable (x1)
- Desktop Charger (x1)
- Belt Clip (x1)
- User's Manual (x1)

Image: All components included with the Radtel RT-470 radio.
3. Product Features
- Multi-Band Operation: Built-in bands for VHF (144-148MHz), VHF2 (222-225MHz), UHF (420-450MHz) for transmit/receive, and AM Air Band (108-136MHz) for receive only.
- NOAA Weather Receiver: Supports NOAA weather alerts for enhanced safety.
- USB-C Charging: Convenient and modern charging capability.
- Frequency Hopping & Scramble: Enhances call privacy.
- One-Key Frequency Match: Simplifies pairing and grouping with other radios (within 1 meter by air).
- High Power Output: Up to 10 watts for extended range.
- Large Battery Capacity: 2800mAh for prolonged use.
- 1.77" TFT Large Screen: Clear and vibrant display.
- 256 Memory Channels: Ample storage for your preferred frequencies.
- Additional Functions: DTMF, VOX, Alarm, LED flashlight, Squelch, Battery save, Repeater, CTCSS and DCS, Scan, TOT, BCL function, Power-on logo display, Firmware Update, Roger beep Frog Sound.
4. Product Specifications
| Specification | Value |
|---|---|
| Item Weight | 1.54 pounds |
| Package Dimensions | 8.82 x 6.46 x 3.39 inches |
| Item Model Number | RT 47070 |
| Batteries | 1 Lithium Ion batteries required (included) |
| Brand | radtel |
| Number of Channels | 256 |
| Special Feature | 10W Power, USB-C, Air Band RX |
| Frequency Range | 144-148/420-450/222 Mhz TX/RX |
| Talking Range Maximum | 10 Kilometer |
| Tuner Technology | AM/FM |
| Voltage | 7.4 Volts |
| Water Resistance Level | Not Water Resistant |
5. Setup Guide
5.1 Battery Installation
- Align the battery pack with the grooves on the back of the radio.
- Slide the battery pack upwards until it clicks securely into place.
- To remove, press the release latch at the bottom of the battery and slide it downwards.
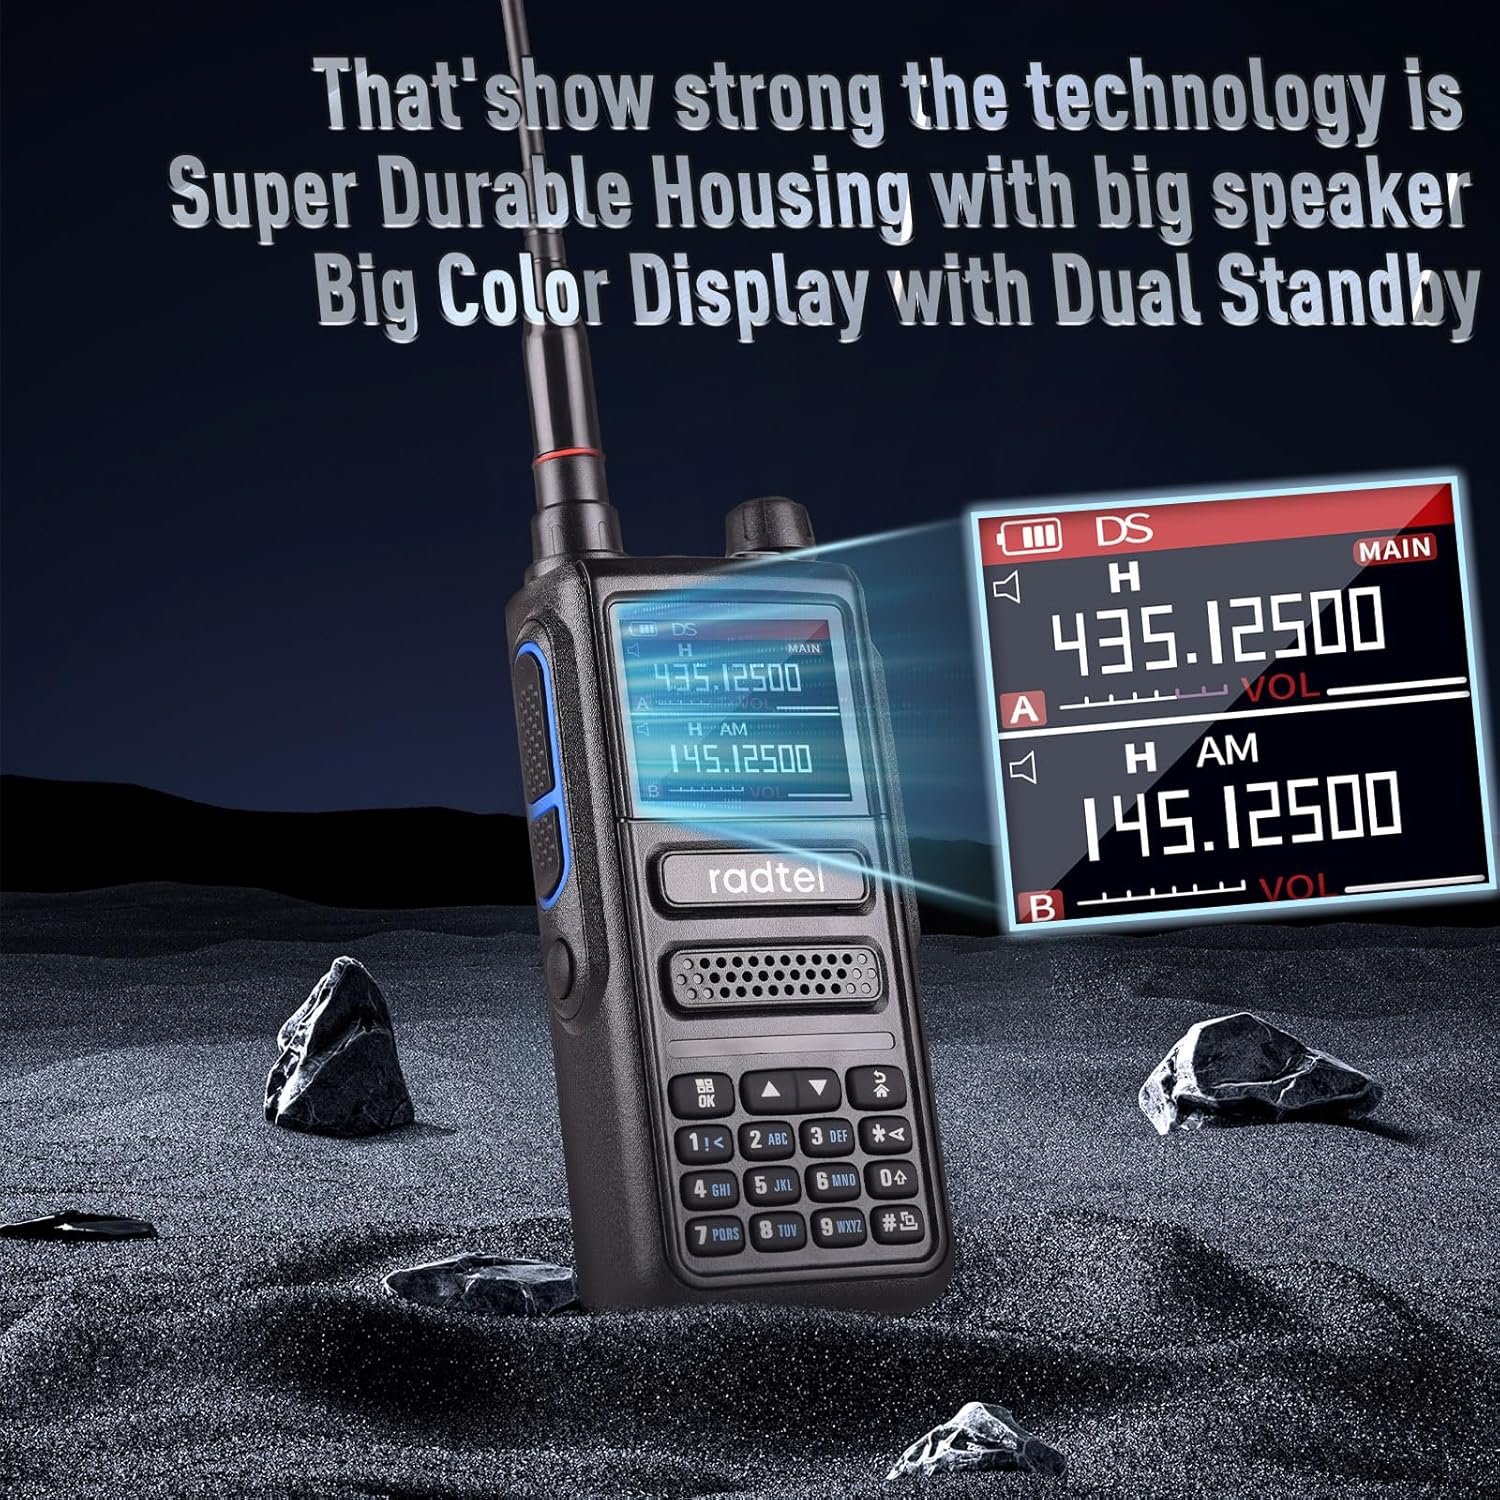
Image: The radio body and its detachable battery pack.
5.2 Antenna Installation
- Select the appropriate antenna for your desired frequency band (dual band or air band).
- Screw the antenna clockwise onto the antenna connector at the top of the radio until it is finger-tight. Do not overtighten.
Image: The radio with its antenna connection point.
5.3 Charging the Battery
The RT-470 radio can be charged using either the included desktop charger or directly via its USB-C port.
Desktop Charger:
- Connect the desktop charger to a power outlet using the provided adapter. The charger's indicator light will turn green.
- Place the radio (with battery installed) into the charging slot. The indicator light will turn red, indicating charging is in progress.
- Once fully charged, the indicator light will turn green.
USB-C Charging:
- Locate the USB-C port on the side of the radio, usually protected by a rubber flap.
- Open the flap and insert the USB-C charging cable.
- Connect the other end of the cable to a compatible USB power source (e.g., wall adapter, power bank, computer USB port). The radio's screen or an indicator light will show charging status.

Image: The USB-C charging port on the Radtel RT-470.
6. Operating Instructions
6.1 Power On/Off and Volume Control
To power on the radio, rotate the top knob clockwise. Continue rotating to increase the volume. Rotate counter-clockwise to decrease volume and power off.
6.2 Frequency Mode (VFO) vs. Channel Mode (MR)
The RT-470 supports both VFO (Variable Frequency Oscillator) mode for direct frequency input and MR (Memory Recall) mode for accessing stored channels. Use the appropriate button (often labeled VFO/MR or similar) to switch between modes.
6.3 Entering Frequencies
In VFO mode, use the numeric keypad to directly enter the desired frequency. Press the OK or ENTER button to confirm the entry.
6.4 One-Key Frequency Match
This feature allows for quick pairing with another compatible radio. Activate the One-Key Frequency Match function on both radios. Ensure they are within 1 meter of each other for successful pairing. This will copy the channel settings between the devices.

Image: Demonstrating the One-Key Frequency Match function.
6.5 NOAA Weather Radio
The RT-470 can receive NOAA weather broadcasts. Refer to your local NOAA frequencies and input them into the radio to receive weather alerts.
6.6 FM Radio Reception
The radio can receive standard FM broadcast radio. Activate the FM radio function (often via a dedicated button or menu option) and tune to your desired station.
6.7 Air Band Reception
The RT-470 can receive AM Air Band frequencies (108-136MHz), allowing you to listen to aviation communication. Tune to the specific air band frequencies as needed.

Image: The radio's ability to receive AM Airband frequencies.
6.8 Flashlight
The radio includes a built-in LED flashlight. Activate it via a dedicated button or menu option for illumination in low-light conditions.
6.9 Roger Beep
The Roger Beep function provides an audible tone at the end of your transmission, signaling to the receiving party that you have finished speaking. This can be enabled or disabled in the menu settings.

Image: Visual representation of the Roger Beep feature.
6.10 Other Key Functions
- VOX (Voice Operated Transmit): Allows hands-free transmission when your voice is detected.
- DTMF (Dual-Tone Multi-Frequency): Used for signaling and control functions.
- Squelch: Adjusts the receiver's sensitivity to block out weak signals and background noise.
- TOT (Time-Out Timer): Limits the duration of a single transmission to prevent accidental continuous transmission.
- BCL (Busy Channel Lockout): Prevents transmission on an occupied channel.
- Dual Standby: Allows the radio to monitor two different frequencies simultaneously.
- SOS Emergency Alarm: Activates an alarm signal in emergency situations.
6.11 Basic Operation Demonstration
Watch this video for a demonstration of the RT-470's basic functions, including power on, frequency input, and feature activation.
Video: A visual guide to the RT-470's display and basic operational features.
7. Programming the Radio (CPS Software)
The Radtel RT-470 can be programmed using Computer Programming Software (CPS) for advanced customization of frequencies, channels, and various settings. A programming cable is required to connect the radio to your computer.
7.1 Connecting to PC and Driver Installation
- Connect the programming cable to the radio's side port (usually under a rubber flap) and to a USB port on your computer.
- Your computer may automatically install the necessary drivers. If not, you may need to manually install drivers for the USB-to-serial chip (e.g., CH340) from the manufacturer's website or the provided CD.
- Verify the COM port number assigned to the programming cable in your computer's Device Manager.
7.2 Using the CPS Software
- Launch the Radtel RT-470 CPS software on your computer.
- In the software, navigate to the 'Settings' or 'Port' menu and select the correct COM port identified in Device Manager.
- To read the current settings from your radio, click the 'Read' button (often represented by a radio-to-computer icon). This will populate the software with your radio's existing channel and feature configurations.
- Modify frequencies, CTCSS/DCS tones, power levels, and other parameters as desired within the software interface.
- To write the new settings to your radio, click the 'Write' button (often represented by a computer-to-radio icon). Ensure the radio remains connected and powered on during the writing process.
7.3 Firmware Update Instructions
This video demonstrates the process of updating the firmware on your RT-470 radio using the Bootloader Pro software.
Video: Step-by-step guide on how to update the RT-470 radio firmware.
7.4 CPS Programming Guide
This video provides a detailed guide on how to use the CPS software to program your RT-470 radio, including reading and writing channel information.
Video: Comprehensive tutorial on programming the RT-470 using CPS software.
8. Maintenance
- Cleaning: Use a soft, damp cloth to clean the radio's exterior. Do not use harsh chemicals or abrasive cleaners.
- Battery Care: To prolong battery life, avoid overcharging or completely draining the battery. Store the radio and battery in a cool, dry place when not in use for extended periods.
- Antenna: Ensure the antenna is securely attached. Avoid bending or stressing the antenna, as this can damage the connector.
- Storage: If storing the radio for a long time, remove the battery.
9. Troubleshooting
- Radio not powering on: Check battery charge, ensure battery is properly installed, or try charging the radio.
- No reception/transmission: Verify antenna is connected, check frequency/channel settings, ensure you are within range of other radios or repeaters.
- Poor audio quality: Adjust squelch level, check antenna connection, ensure clear line of sight.
- Programming issues: Ensure correct programming cable drivers are installed, verify COM port selection in CPS, ensure radio is powered on and connected during read/write operations.
- Keypad unresponsive: Check if keypad lock is enabled.
For persistent issues, consult the official Radtel support resources or contact customer service.
10. Safety Information
- Do not operate the radio in explosive atmospheres (e.g., near flammable gas, dust particles, metallic powders).
- Do not expose the radio to extreme temperatures, direct sunlight, or excessive moisture.
- Use only approved batteries and chargers to prevent damage or injury.
- Do not disassemble or modify the radio. Repairs should only be performed by qualified technicians.
- Keep the radio out of reach of children.
- Avoid prolonged exposure to high volume levels when using headphones to prevent hearing damage.
11. Warranty and Support
Radtel products typically come with a limited warranty. Please refer to the warranty card included with your product or visit the official Radtel website for detailed warranty terms and conditions. For technical support, troubleshooting assistance, or inquiries about replacement parts, please contact Radtel customer service directly.


