1. Introduction
This manual provides essential information for the safe and efficient use of your Electrolux LFP326AB telescopic hood. Please read these instructions carefully before installation and use, and keep them for future reference. This appliance is designed to extract cooking fumes and odors from your kitchen environment.
2. Safety Information
Always observe the following safety precautions to reduce the risk of fire, electric shock, injury to persons, or damage to the appliance.
- Ensure the electrical installation complies with local regulations.
- Do not operate the hood with wet hands or bare feet.
- Never allow children to operate the appliance without supervision.
- Regularly clean the grease filters to prevent fire hazards.
- Ensure adequate ventilation in the room when the hood is used simultaneously with gas or other fuel-burning appliances.
- Do not flambé under the range hood.
- Disconnect the appliance from the power supply before any cleaning or maintenance.
3. Setup and Installation
The Electrolux LFP326AB is designed for under-cabinet mounting. Proper installation is crucial for optimal performance and safety.
3.1 Dimensions and Clearances
The product dimensions are approximately 18 x 59 x 28 cm. Ensure sufficient space for installation. Maintain the following minimum distances between the cooking surface and the lower part of the hood:
- Minimum 420 mm for electric hobs.
- Minimum 650 mm for gas hobs.

Figure 1: Installation dimensions and minimum clearances. This diagram illustrates the overall dimensions of the hood and the recommended minimum distances from electric (min. 420mm) and gas (min. 650mm) cooking surfaces for safe and effective operation.
3.2 Mounting
Mount the hood securely under a cabinet. Refer to the detailed installation template (if provided with the product packaging) for precise drilling and mounting instructions. Ensure all electrical connections are made by a qualified electrician.
4. Operating Instructions
Your Electrolux LFP326AB telescopic hood features push-button controls for fan speed and lighting.
4.1 Control Panel
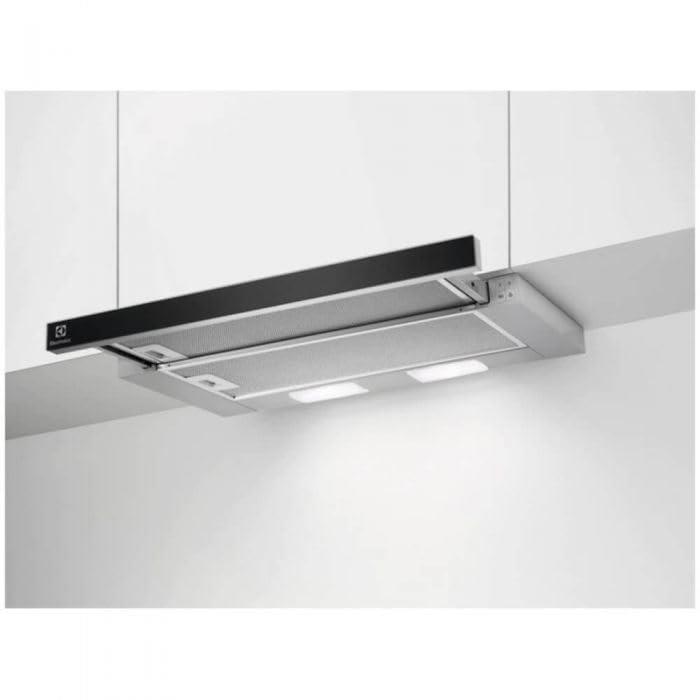
Figure 2: Control panel. The panel features buttons for fan speeds (1, 2, 3), power on/off (0|1), and lighting (light bulb icon).
4.2 Fan Operation
- Power On/Off: Press the '0|1' button to turn the hood on or off.
- Fan Speed Selection: Once powered on, press buttons '1', '2', or '3' to select the desired extraction speed. Speed '1' is for light cooking, '2' for normal cooking, and '3' for intensive cooking or strong odors.
- Timer Function: This model includes a special timer function. Consult the full product manual for specific instructions on activating and setting the timer.
4.3 Lighting
- Turn Light On/Off: Press the button with the light bulb icon to switch the LED lighting on or off.

Figure 3: LED lighting. The hood features integrated LED lights to illuminate the cooking surface.
5. Maintenance
Regular maintenance ensures the longevity and efficiency of your hood.
5.1 Cleaning Grease Filters
The hood is equipped with stainless steel or aluminum grease filters. These filters trap grease particles and should be cleaned regularly (approximately every 2-4 weeks, depending on usage) to maintain optimal performance and prevent fire hazards.
- Removal: Carefully unlatch and remove the filters.
- Cleaning: Wash the filters by hand in hot water with a mild detergent or in a dishwasher on a low-temperature cycle. Ensure they are completely dry before reinstallation.
- Reinstallation: Insert the dry filters back into their slots until they click into place.
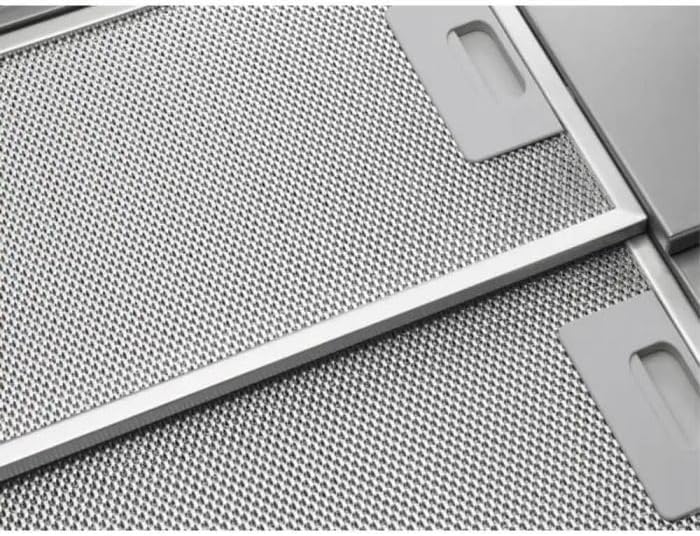
Figure 4: Grease filters. These metallic filters are removable for cleaning and are crucial for trapping grease.
5.2 Cleaning Surfaces
Clean the exterior surfaces of the hood with a soft cloth and a non-abrasive cleaner. Avoid using harsh chemicals or abrasive pads that could damage the finish.
5.3 LED Light Replacement
The hood uses LED lighting, which has a long lifespan. If a light needs replacement, ensure the appliance is disconnected from the power supply. Consult a qualified technician for replacement, as specific tools or knowledge may be required.
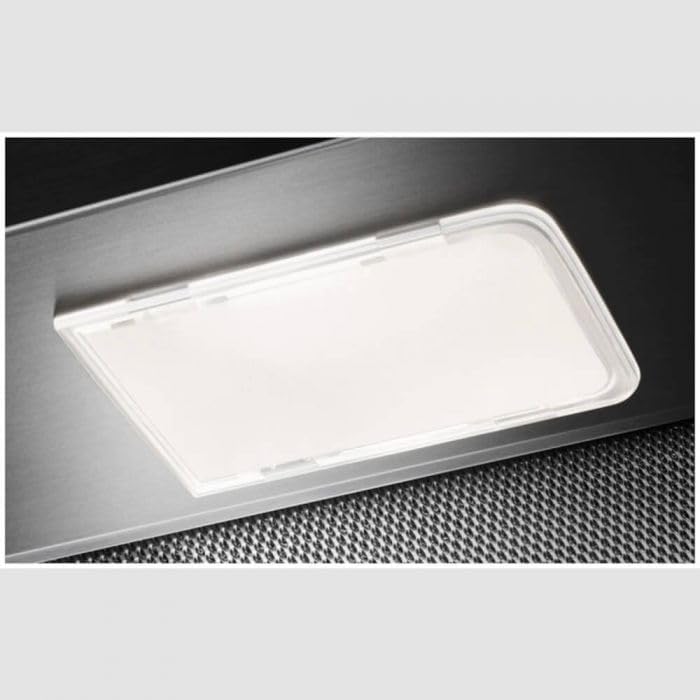
Figure 5: Integrated LED light. The hood's lighting system uses energy-efficient LED panels.
6. Troubleshooting
If you encounter issues with your hood, refer to the following common problems and solutions before contacting service.
| Problem | Possible Cause | Solution |
|---|---|---|
| Hood does not turn on | No power supply; power cord disconnected; fuse blown. | Check power connection; check household fuse box; ensure hood is plugged in. |
| Poor extraction performance | Grease filters are dirty; ducting is blocked or too long; fan speed too low. | Clean grease filters; check ducting for obstructions; increase fan speed. |
| Excessive noise | Loose components; improper installation; foreign object in fan. | Check for loose parts; ensure secure mounting; inspect fan for obstructions (with power off). |
| Lights not working | LED light failure; electrical connection issue. | Ensure power is on; if LED is faulty, contact service for replacement. |
7. Specifications
| Feature | Specification |
|---|---|
| Model Number | LFP326AB |
| Brand | Electrolux |
| Product Dimensions | 18 x 59 x 28 cm |
| Airflow Capacity | 410 m³/h |
| Control Type | Push Button |
| Lighting Type | LED |
| Material | Stainless steel or aluminum |
| Mounting Type | Under-cabinet mounting |
| Special Feature | Timer |
| Energy Efficiency Rating | C |
8. Warranty and Support
Your Electrolux LFP326AB telescopic hood comes with a manufacturer's warranty. Please refer to the warranty card included with your product for specific terms and conditions, including the duration and coverage.
8.1 Customer Support
For technical assistance, spare parts, or warranty claims, please contact Electrolux customer service. You can find contact information on the official Electrolux website or in the documentation provided with your appliance.
When contacting support, please have your model number (LFP326AB) and serial number ready.


