1. Introduction
This manual provides essential information for the safe and effective use of your CCLIFE 3-Jaw Oil Filter Wrench. Designed for versatility and durability, this tool simplifies the process of removing and installing oil filters on a wide range of vehicles and equipment. Please read these instructions thoroughly before operation.
2. Product Overview
The CCLIFE 3-Jaw Oil Filter Wrench is engineered for efficient oil filter removal. Its innovative three-claw design ensures a firm grip, minimizing the risk of slipping during operation. Constructed from high-quality Chrome Vanadium Steel, this tool offers high strength, wear resistance, and exceptional durability for long-term reliable service.
It features an adjustable jaw mechanism and an automatic locking design for secure attachment. The wrench is compatible with oil filters ranging from 69mm to 136mm in diameter and can be operated with 1/2-inch or 3/8-inch square drive ratchets, or a 22mm wrench.

Image 2.1: The CCLIFE 3-Jaw Oil Filter Wrench, a robust tool designed for efficient oil filter removal.

Image 2.2: Close-up of the three-claw design, highlighting the triangular stability principle and secure screw fixation for strong torque and durability.

Image 2.3: Illustration of the wrench's high hardness and high torque capabilities, featuring the auto-lock design for long-term operation without damage.
3. Safety Instructions
Always prioritize safety when working with automotive tools. Failure to follow these safety guidelines may result in injury or damage to property.
- Wear Eye Protection: Always wear ANSI-approved safety glasses or goggles to protect your eyes from debris.
- Ensure Vehicle Stability: Before working under a vehicle, ensure it is securely supported by jack stands on a level surface. Never rely solely on a jack.
- Allow Engine to Cool: Oil filters and surrounding engine components can be extremely hot. Allow the engine to cool down sufficiently before attempting to remove the oil filter to prevent burns.
- Use Correct Tool Size: Ensure the wrench is properly adjusted and securely gripping the oil filter. Using an improperly sized or adjusted tool can cause slippage and damage.
- Avoid Excessive Force: Apply steady, controlled force. Excessive force can cause the wrench to slip, damage the filter, or lead to personal injury.
- Keep Work Area Clean: Maintain a clean and well-lit work area to prevent accidents.
4. Setup
Before using the oil filter wrench, ensure you have the correct drive tool.
- Select Drive Tool: Choose a 1/2-inch or 3/8-inch square drive ratchet, or a 22mm wrench, depending on your preference and available tools.
- Attach Wrench: Insert the selected drive tool into the adapter on top of the oil filter wrench. Ensure it is securely seated.
- Verify Filter Size: Confirm that the oil filter to be removed falls within the wrench's operating diameter of 69mm to 136mm.

Image 4.1: The wrench demonstrating compatibility with 1/2-inch square drive ratchets, 3/8-inch square drive ratchets, and 22mm wrenches.
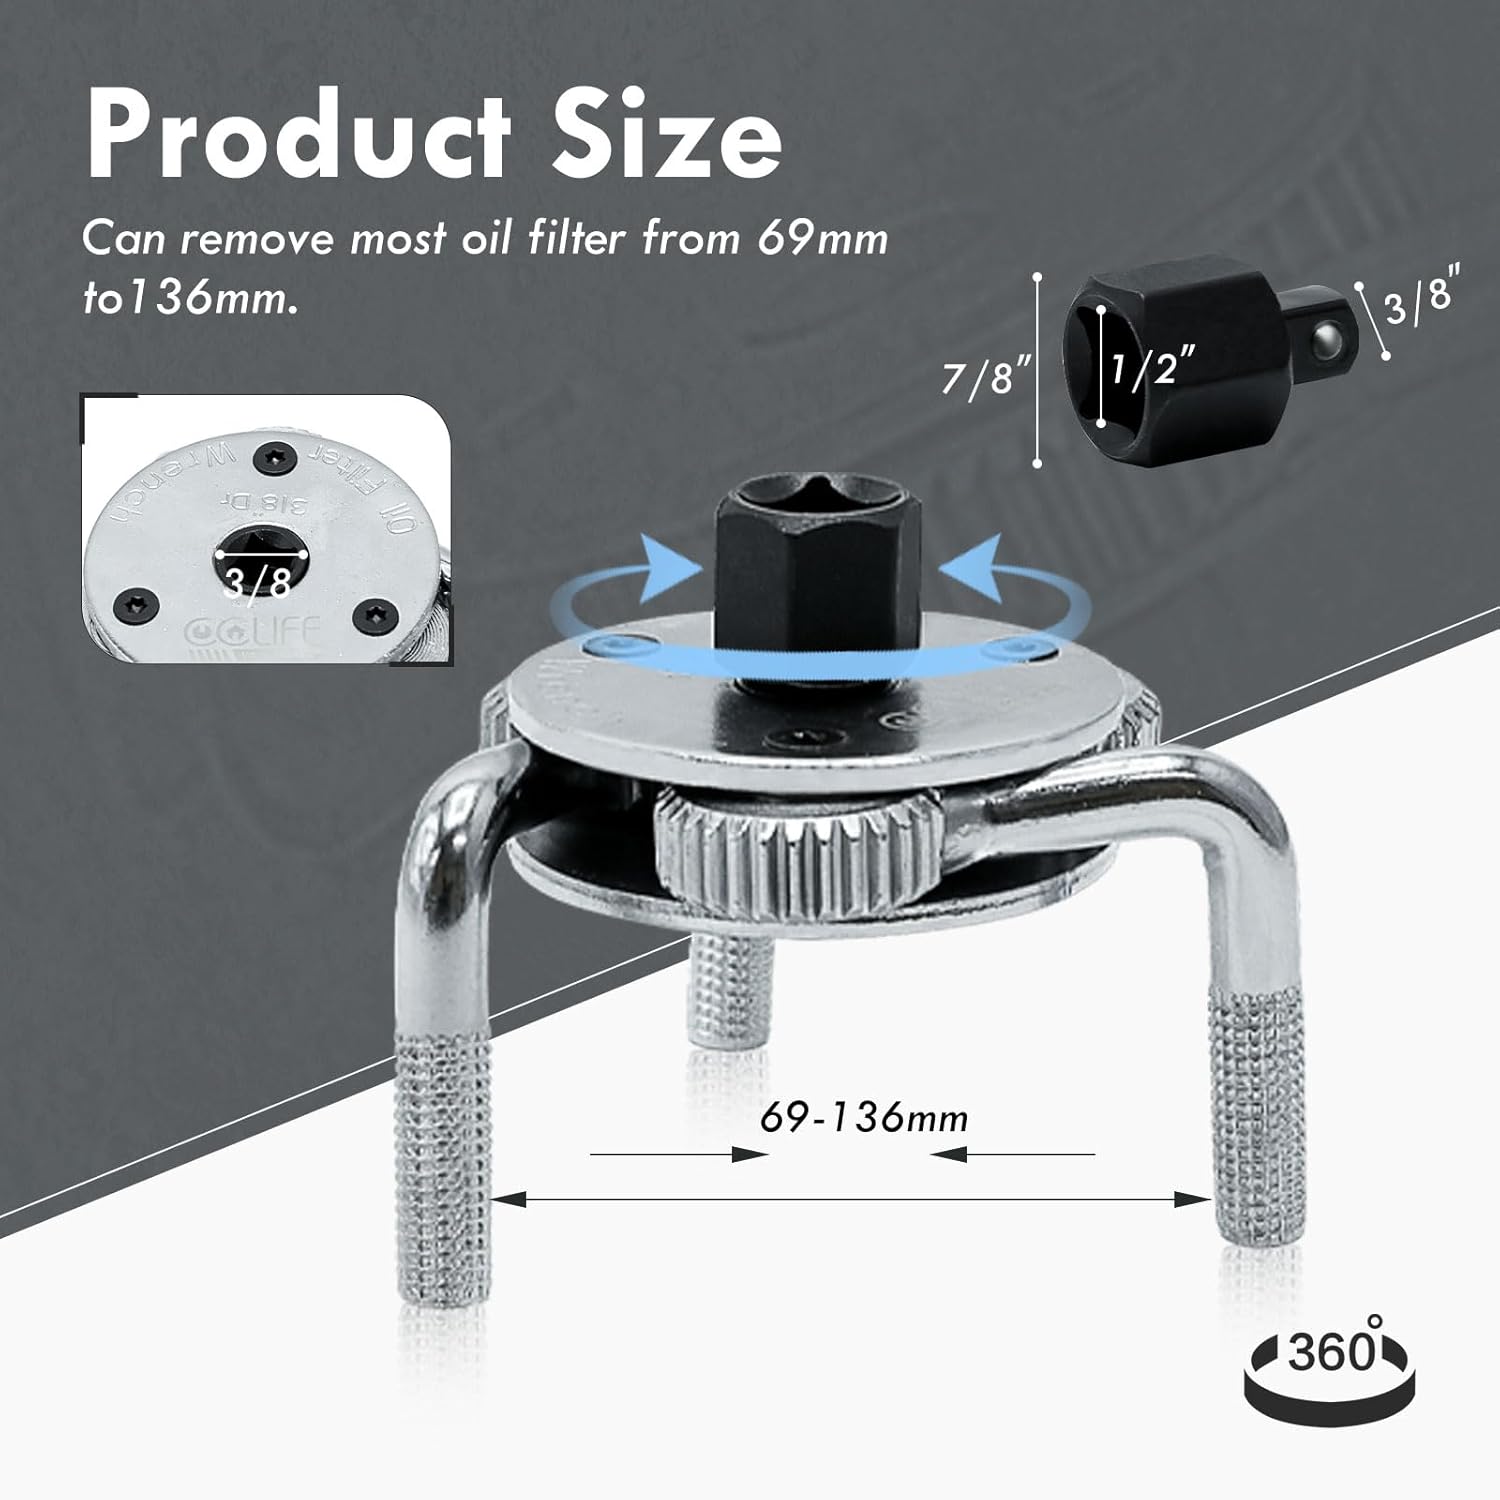
Image 4.2: Visual representation of the wrench's adjustable range (69-136mm) and its drive adapter sizes (1/2-inch, 3/8-inch, 7/8-inch or 22mm).
5. Operating Instructions
This section details the procedure for removing an oil filter using the CCLIFE 3-Jaw Oil Filter Wrench.
- Prepare the Vehicle: Ensure the vehicle is safely lifted and supported, and the engine has cooled sufficiently. Place a drain pan beneath the oil filter to catch any dripping oil.
- Position the Wrench: Place the 3-jaw oil filter wrench over the oil filter. The three claws will automatically adjust and grip the filter as you apply rotational force.
- Engage Auto-Lock: As you begin to turn the drive tool counter-clockwise, the auto-locking mechanism will engage, providing a secure and firm grip on the filter.
- Loosen the Filter: Steadily turn the drive tool counter-clockwise to loosen the oil filter. Once it breaks free, you can usually unscrew it by hand.
- Remove Filter: Carefully remove the loosened filter, allowing any remaining oil to drain into the pan.
- Dispose Properly: Dispose of the old oil filter and used oil according to local environmental regulations.
While this wrench can also be used for tightening, it is generally recommended to hand-tighten new oil filters and then apply a small additional turn with the wrench only if specified by the filter manufacturer, to avoid overtightening.
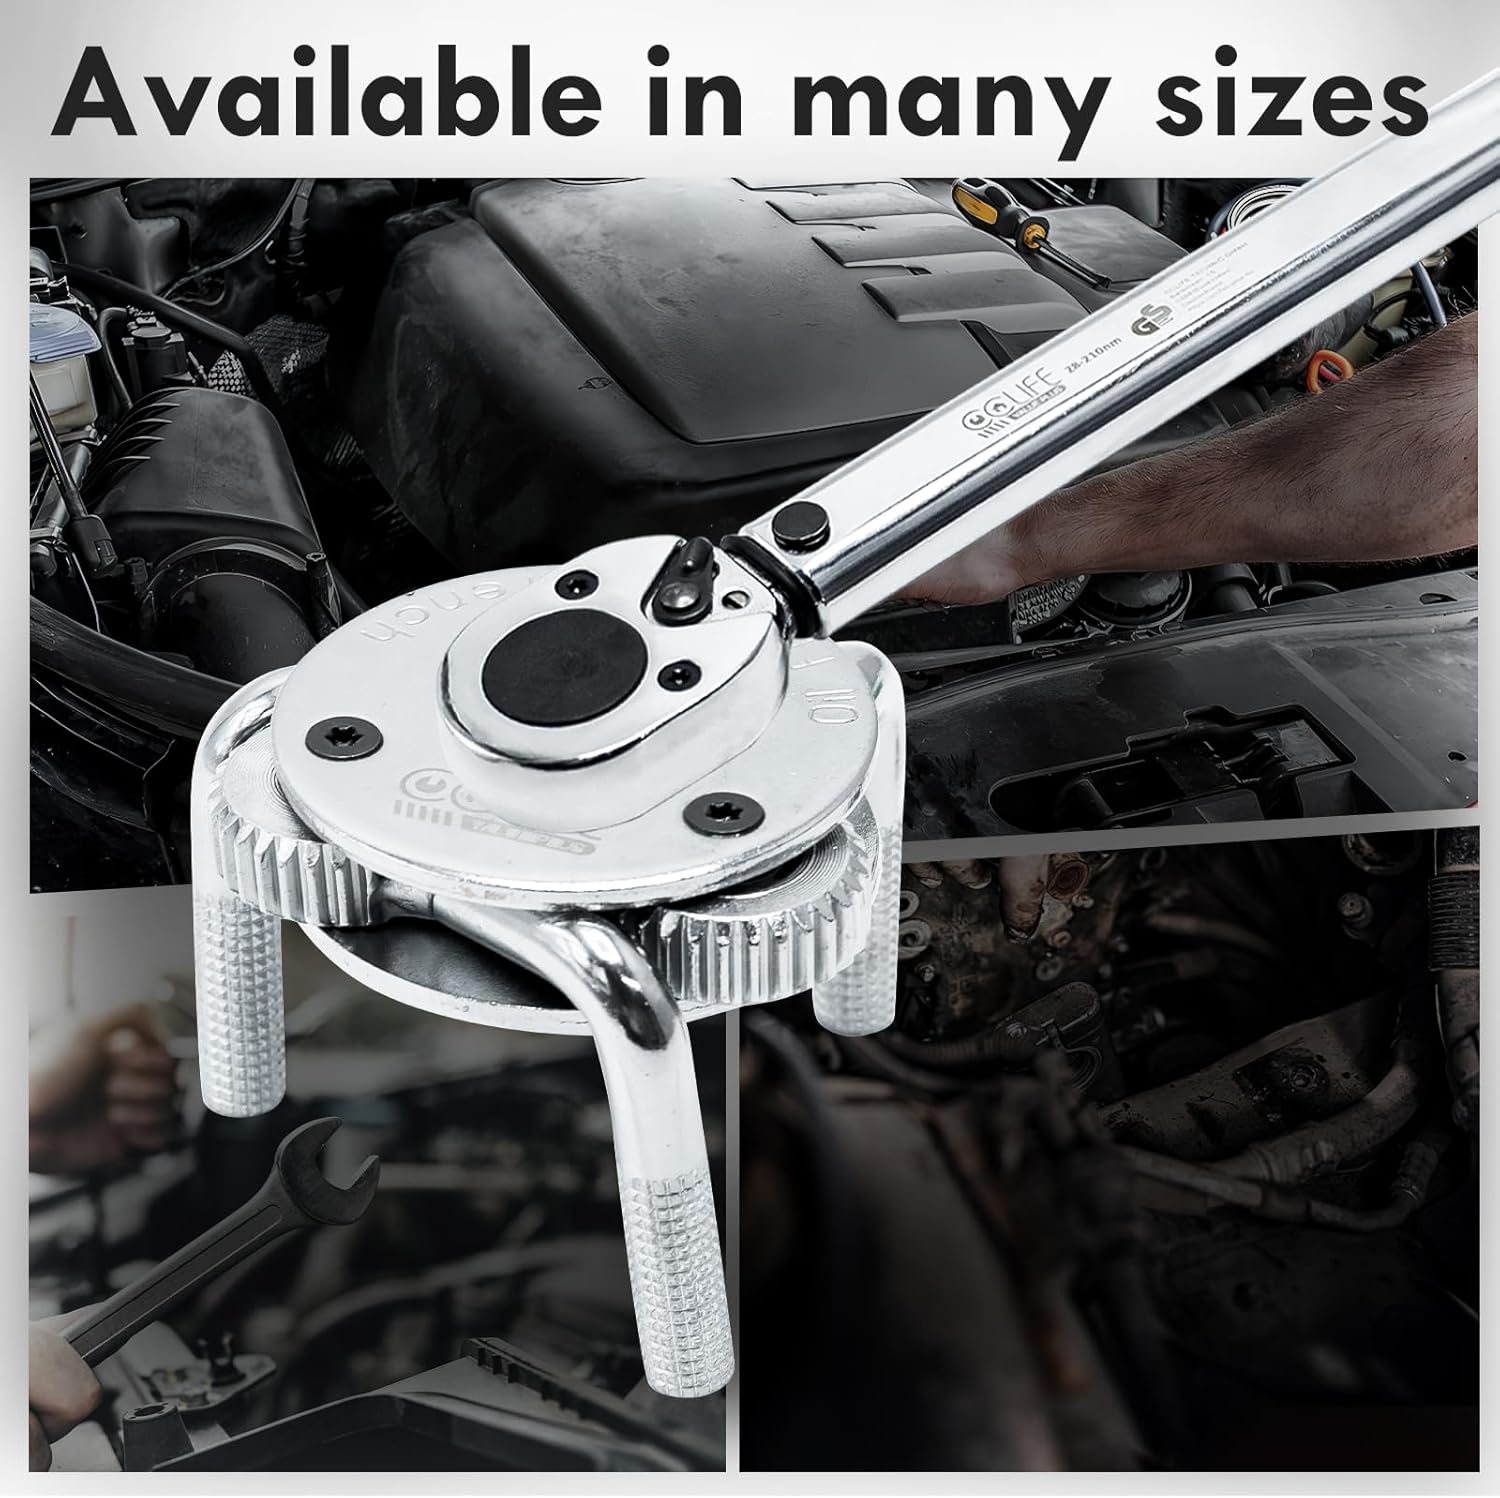
Image 5.1: The CCLIFE oil filter wrench attached to a torque wrench, demonstrating its application for filter removal or controlled tightening.

Image 5.2: A visual comparison of a dirty, used oil filter and a clean, new oil filter, with the wrench ready for use in the background.

Image 5.3: Examples of vehicles where the wrench can be used, including trucks, SUVs, cars, and motorcycles, highlighting its universal compatibility.
6. Maintenance
Proper maintenance will extend the life of your CCLIFE 3-Jaw Oil Filter Wrench.
- Cleaning: After each use, wipe the wrench clean with a cloth to remove any oil, grease, or dirt.
- Lubrication: Periodically apply a light coat of machine oil to the moving parts (jaws and gears) to ensure smooth operation and prevent rust.
- Storage: Store the wrench in a dry, clean environment, away from moisture and corrosive materials.
- Inspection: Regularly inspect the wrench for any signs of wear, damage, or deformation. Do not use a damaged tool.
7. Troubleshooting
If you encounter issues while using the oil filter wrench, consider the following:
- Wrench Slipping:
- Ensure the wrench is centered and fully engaged on the filter.
- Verify the filter diameter is within the 69-136mm range.
- Check for excessive oil or grease on the filter surface; clean if necessary.
- Filter Stuck/Difficult to Remove:
- Ensure the engine has cooled completely.
- Apply penetrating oil to the base of the filter and allow it to soak for a few minutes.
- Apply steady, increasing pressure rather than sudden jerks.
- Drive Tool Not Fitting:
- Confirm you are using a 1/2-inch or 3/8-inch square drive ratchet, or a 22mm wrench.
- Check the drive adapter for any obstructions or damage.
8. Specifications
| Brand | CCLIFE |
| Model | 1711 |
| Material | Chrome Vanadium Steel |
| Product Dimensions (L x W x H) | 10 x 10 x 10 cm |
| Product Weight | 600 grams |
| Filter Diameter Range | 69mm - 136mm |
| Drive Compatibility | 1/2-inch square drive, 3/8-inch square drive, 22mm wrench |
| Head Type | Three-jawed, Auto-locking |
9. Warranty and Support
Specific warranty information for the CCLIFE 3-Jaw Oil Filter Wrench (Model 1711) is not provided in the product details. For warranty claims or detailed support, please refer to the purchase documentation or contact CCLIFE customer service directly through their official website or the retailer where the product was purchased.
10. Official Product Videos
No official product videos from the seller are available for this item at this time.


