
1. Introduction
This manual provides essential information for the installation, operation, and maintenance of the Blooy Needle Bar and Thread Guide Assembly, specifically designed for the JUKI LBH-1790 Electronic Buttonhole Sewing Machine. Proper understanding and adherence to these instructions will ensure optimal performance and longevity of the parts.
2. Product Overview
The Blooy Needle Bar and Thread Guide Assembly consists of two primary components:
- Needle Bar (Part Code: 400-04215): This is the elongated component responsible for holding the sewing needle and facilitating its vertical movement during the sewing process.
- Needle Bar Thread Guide (Part Code: 137-06403): A smaller, metallic component that guides the thread from the machine's tension assembly to the needle eye, ensuring smooth thread flow and proper stitch formation.

Figure 2.1: The complete Blooy Needle Bar and Thread Guide Assembly. This image displays both the elongated needle bar and the smaller, metallic thread guide component.
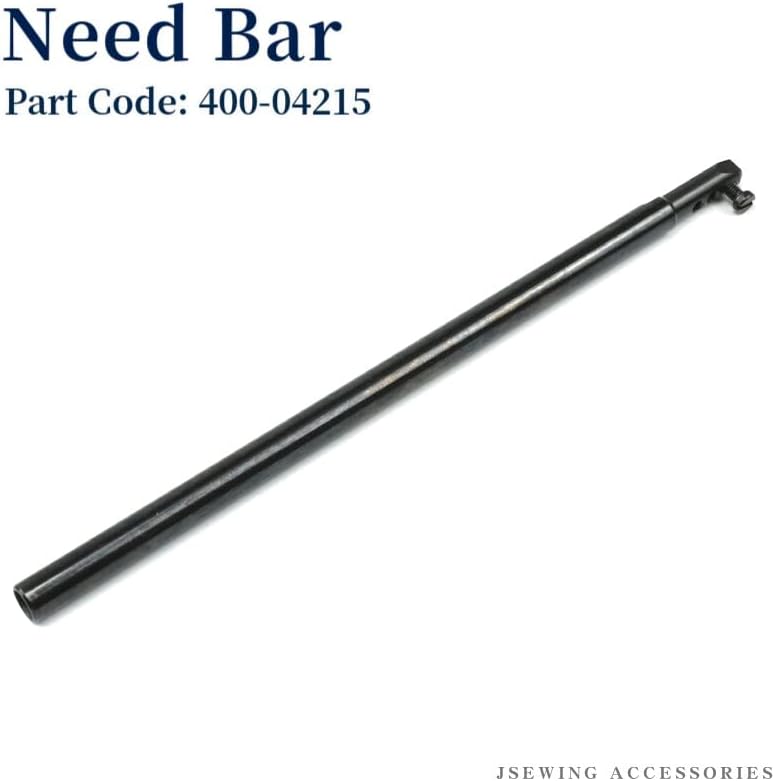
Figure 2.2: Close-up view of the Needle Bar (Part Code: 400-04215). This image highlights the main shaft and the needle clamping mechanism at its lower end.

Figure 2.3: Close-up view of the Needle Bar Thread Guide (Part Code: 137-06403). This image shows the small, curved metal piece with holes for thread passage and attachment points.
3. Specifications
| Attribute | Detail |
|---|---|
| Product Name | Needle Bar & Thread Guide Assembly |
| Brand | Blooy |
| Compatible Machine Model | JUKI LBH-1790 Electronic Buttonhole Sewing Machine |
| Needle Bar Part Code | 400-04215 |
| Needle Bar Thread Guide Part Code | 137-06403 |
| Product Dimensions (Approx.) | 8 x 4 x 2 inches (20.32 x 10.16 x 5.08 cm) |
| Needle Bar Length (Approx.) | 166 mm |
| Manufacturer | Blooy |
| Country of Origin | China |
| UPC | 794697681337 |

Figure 3.1: Needle Bar with approximate length measurement of 166mm. This image provides a visual reference for the length of the needle bar component.
4. Setup and Installation
Installation of the Needle Bar and Thread Guide Assembly requires careful handling and familiarity with the JUKI LBH-1790 sewing machine's internal components. It is recommended that this procedure be performed by a qualified technician or an experienced user.
4.1 Safety Precautions
- Always disconnect the sewing machine from the power supply before attempting any installation or maintenance.
- Wear appropriate personal protective equipment, such as safety glasses, to prevent injury from small parts or tools.
- Keep small components away from children and pets.
4.2 Installation Steps
- Prepare the Machine: Ensure the sewing machine is turned off and unplugged. Remove any existing needle, presser foot, and needle plate to gain access to the needle bar area.
- Remove Old Components (if applicable): Carefully loosen the set screw(s) holding the old needle bar in place. Gently slide out the old needle bar and thread guide. Note the orientation of the old parts for correct installation of the new ones.
- Install New Needle Bar: Insert the new Blooy Needle Bar (400-04215) into its designated slot. Ensure it is oriented correctly, with the needle clamping mechanism facing the front of the machine.
- Secure Needle Bar: Tighten the set screw(s) to firmly secure the needle bar in position. Do not overtighten, as this can damage the bar or the machine.
- Attach Thread Guide: Position the Needle Bar Thread Guide (137-06403) onto the needle bar. It typically attaches with small screws or clips. Ensure the thread path is clear and aligned.
- Test Movement: Manually turn the machine's handwheel to observe the needle bar's movement. It should move smoothly up and down without obstruction.
- Reassemble: Reinstall the needle plate, presser foot, and insert a new needle.
5. Operating Instructions
Once the Needle Bar and Thread Guide Assembly is correctly installed, the machine can be operated as usual. The new components are designed to integrate seamlessly with the JUKI LBH-1790's existing mechanisms.
5.1 Threading the Machine
The Needle Bar Thread Guide ensures proper thread path to the needle. Follow your JUKI LBH-1790's specific threading instructions, paying attention to guide the thread through the newly installed thread guide before inserting it into the needle eye.
5.2 Needle Insertion
The needle bar is designed to securely hold standard sewing machine needles. Insert the needle with the flat side facing the back (or as per your machine's manual) and push it up as far as it will go into the needle clamp. Tighten the needle clamp screw firmly but gently.
6. Maintenance
Regular maintenance of your sewing machine, including the needle bar and thread guide, is crucial for consistent performance and to extend the lifespan of the components.
- Cleaning: Periodically clean the needle bar and thread guide area to remove lint, dust, and thread residue. Use a small brush or compressed air. Ensure the machine is unplugged before cleaning.
- Lubrication: Refer to your JUKI LBH-1790 machine's manual for specific lubrication points. While the needle bar itself may not require direct lubrication, ensuring surrounding moving parts are properly oiled will contribute to smooth operation.
- Inspection: Regularly inspect the needle bar for any signs of bending or damage. Check the thread guide for wear or burrs that could snag the thread. Replace parts if significant wear or damage is observed.
7. Troubleshooting
If you encounter issues after installing the new assembly, consider the following common problems and solutions:
| Problem | Possible Cause | Solution |
|---|---|---|
| Needle breaking frequently | Needle not inserted correctly; Needle bar bent; Timing issue. | Ensure needle is fully inserted and oriented correctly. Inspect needle bar for damage. Consult machine service manual for timing adjustment. |
| Skipped stitches | Improper threading; Needle bar height incorrect; Damaged thread guide. | Re-thread the machine carefully, ensuring thread passes through the guide. Verify needle bar height according to machine specifications. Inspect thread guide for burrs or damage. |
| Thread shredding or fraying | Rough edges on thread guide; Incorrect thread tension. | Inspect the thread guide for any sharp edges or burrs. Adjust upper thread tension. |
| Machine making unusual noise from needle area | Loose needle bar; Lack of lubrication; Interference with other parts. | Check and tighten needle bar set screws. Lubricate moving parts as per machine manual. Ensure no foreign objects are obstructing movement. |
If problems persist, it is advisable to consult a professional sewing machine technician or refer to the comprehensive service manual for your JUKI LBH-1790.
8. Warranty and Support
For information regarding warranty coverage for your Blooy Needle Bar & Thread Guide Assembly, please refer to the terms and conditions provided at the time of purchase or contact your retailer. For technical support or further assistance, please reach out to the Blooy customer service department or the authorized distributor from whom you purchased the product.
Always ensure you have your product details, including the part codes (400-04215 and 137-06403), and proof of purchase readily available when seeking support.